Herunterladen Inhalt Inhalt Diese Seite drucken
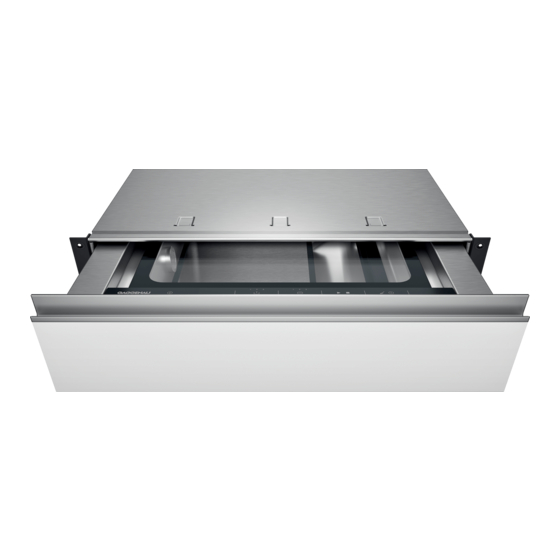
Gaggenau DV061100 Montageanleitung
Vorschau ausblenden Andere Handbücher für DV061100:
Inhaltsverzeichnis

Werbung

Verfügbare Sprachen
  • DE

Verfügbare Sprachen

  • DEUTSCH, seite 1
Gaggenau
de Montageanleitung
en Assembly instructions
es Instrucciones de montaje
fr
Instructions de montage
it
Istruzioni per il montaggio
nl
Montagehandleiding
DV061100
Vakuumierschublade
Vacuum-sealing drawer
Cajón de envasado al vacío
Tiroir de mise sous-vide
Cassetto per sottovuoto
Vacumeerlade
2
9
16
23
30
37

Werbung

Inhaltsverzeichnis
loading

Inhaltszusammenfassung für Gaggenau DV061100

  • Seite 1 Gaggenau de Montageanleitung en Assembly instructions es Instrucciones de montaje Instructions de montage Istruzioni per il montaggio Montagehandleiding DV061100 Vakuumierschublade Vacuum-sealing drawer Cajón de envasado al vacío Tiroir de mise sous-vide Cassetto per sottovuoto Vacumeerlade...
  • Seite 2: Inhaltsverzeichnis

    de Lieferumfang ¡ Klebepuffer Inhaltsverzeichnis ¡ Doppelseitiges Klebeband (3x) Lieferumfang ..............   2 Gerätemaße ..............   2 Gerätemaße Sicherheitsabstände ............    2 Hier finden Sie die Maße des Geräts. Sichere Montage ............   3 Hinweise zum elektrischen Anschluss.......    3 Werkzeuge ..............   3 Gerät vorbereiten ............
  • Seite 3: Sichere Montage

    Sichere Montage de der Anschlussleitung darf nur vom Elektrofachmann Einbau im Einbaumöbel Beachten Sie die Sicherheitsabstände für den Einbau unter Berücksichtigung der einschlägigen Vorschrif- im Einbaumöbel. ten ausgeführt werden. Das Gerät darf nur mit der mitgelieferten Anschluss- ¡ leitung angeschlossen werden. Die Anschlussleitung an der Geräterückseite einstecken.
  • Seite 4 de Gerät vorbereiten Das Gerät vorsichtig aus der Verpackung heben. Den Ölfilter montieren. Die Transportsicherung für die Pumpe auf der Gerä- Den Deckel in die Öffnung legen und nach links teoberseite entfernen. schieben. Die Transportsicherung zur weiteren Verwendung an WARNUNG ‒ Kippgefahr! Nach Entfernen der der Geräterückseite befestigen.
  • Seite 5: Möbel Vorbereiten

    Möbel vorbereiten de WARNUNG ‒ Verletzungsgefahr! Das hohe Möbel vorbereiten Gerätegewicht kann beim Anheben zu Verletzungen führen. Den Kippschutz montieren. Darauf achten, dass die Das Gerät nicht alleine anheben. ▶ Schrauben im oberen Teil der Langlöcher befestigt Das Gerät in das Möbel schieben. werden.
  • Seite 6: Möbelfront Vorbereiten

    de Möbelfront vorbereiten Um das Gerät zu fixieren, die Dekorbleche an die Die Breite des Einbaumöbels messen und die Mitte Befestigungswinkel schrauben. am Zwischenboden anzeichnen. Die Nut am Dekorblech gehört jeweils nach außen. Die Laschen des Frontblechs mit der Kombizange um 90° nach oben biegen. Möbelfront vorbereiten Voraussetzungen Die Dicke der Möbelfront beträgt mind.
  • Seite 7 Möbelfront montieren de Das doppelseitige Klebeband als Montagehilfe an Die Langlöcher anzeichnen. das Frontblech kleben. Das Frontblech von der Möbelfront lösen und das Die Möbelfront ausrichten und auf das Frontblech doppelseitige Klebeband entfernen. drücken. Mittig in den Langlöchern die Bohrungen bohren. Die Bohrungen ansenken.
  • Seite 8: Möbelfront Einstellen

    de Möbelfront einstellen Das Frontblech wieder an der Möbelfront ausrich- Möbelfront festschrauben ten. Die seitlichen Schrauben einschrauben und fest an- ziehen. Die Möbelfront mit den Seitenblechen verbinden. ▶ Die Möbelfront mit dem Frontblech am Gerät ein- hängen. Möbelfront einstellen Bei Bedarf die Möbelfront vertikal einstellen. Die Schublade öffnen.
  • Seite 9: Scope Of Delivery

    Scope of delivery en ¡ Adhesive buffers Table of contents ¡ Double-sided adhesive tape (3 pcs) Scope of delivery ............   9 Unit dimensions ............   9 Unit dimensions Safety clearances............   9 You will find the dimensions of the appliance here Safe installation ............
  • Seite 10: Safe Installation

    en Safe installation The appliance must only be connected with the Installation in the fitted unit ¡ Note the safety clearances for installing in the fitted power cable provided. Connect the power cable to unit. the back of the appliance. Connecting cables with various plug types are avail- ¡...
  • Seite 11 Preparing the appliance en Remove the transport lock for the pump from the Place the lid into the opening and move it to the left. top of the appliance. WARNING ‒ Risk of tipping! After removing Secure the transport lock to the rear of the appli- the transportation lock, the drawer may open and ance for further use.
  • Seite 12: Preparing The Units

    en Preparing the units WARNING ‒ Risk of injury! The high weight of Preparing the units the appliance may result in injury when lifted. Do not lift the appliance on your own. ▶ Install the tilt protection. Ensure that the screws are Slide the appliance into the unit. mounted in the upper part of the elongated holes.
  • Seite 13: Preparing The Furniture Panel

    Preparing the furniture panel en To secure the appliance, screw the decorative pan- Measure the width of the fitted unit and mark the els onto the mounting brackets. centre of the intermediate floor. The groove on the decorative panel should face out- Use the combination pliers to bend the hooks on wards in each case.
  • Seite 14 en Installing the furniture panel Stick the double-sided adhesive tape to the front Mark the elongated holes. panel as an installation aid. Loosen the front panel from the furniture panel and Align the furniture panel and push the front panel remove the double-sided adhesive tape. Drill the holes in the middle of elongated holes.
  • Seite 15: Adjusting The Furniture Panel

    Adjusting the furniture panel en Screw in the side screws and tighten them. Screwing the furniture panel in tightly Connect the furniture panel to the side panels. ▶ Mount the furniture panel with the front panel on the appliance. Adjusting the furniture panel If required, adjust the furniture panel vertically.
  • Seite 16: Volumen De Suministro

    es Volumen de suministro ¡ 2 arandelas curvadas Índice ¡ Tope adhesivo ¡ 3 cintas adhesivas de doble cara Volumen de suministro..........   16 Medidas del aparato...........    16 Medidas del aparato Distancias de seguridad ..........   16 Aquí se pueden consultar las dimensiones del aparato. Montaje seguro ............
  • Seite 17: Montaje Seguro

    Montaje seguro es El aparato solo podrá conectarse a una toma de co- Montaje en muebles empotrados ¡ Respetar las distancias de seguridad para el montaje rriente de instalación reglamentaria y provista de to- en muebles empotrados. ma de tierra. La instalación de un enchufe o el cam- bio del cable de alimentación debe realizarlos siem- pre un técnico electricista experto cumpliendo con las normas pertinentes.
  • Seite 18 es Preparar el aparato Sacar el aparato del embalaje tirando de él hacia Montar el filtro de aceite. arriba. Colocar la tapa en la abertura y desplazar hacia la Retirar el seguro de transporte para la bomba de la izquierda. parte superior del aparato. ADVERTENCIA ‒ Peligro de vuelco! Después Fijar el seguro de transporte a la parte posterior del de retirar el seguro de transporte, el cajón puede...
  • Seite 19: Preparar Los Muebles

    Preparar los muebles es ADVERTENCIA ‒ Peligro de lesiones! El ele- Preparar los muebles vado peso del aparato puede causar lesiones al le- vantarlo. Montar el seguro contra vuelco. Comprobar que los Una sola persona no puede levantar el aparato. ▶ tornillos estén fijados en la parte superior de los ori- Introducir el aparato en el mueble.
  • Seite 20: Preparar El Frontal Del Mueble

    es Preparar el frontal del mueble Para fijar el aparato, atornillar las chapas decorati- Medir el ancho del mueble empotrado y marcar el vas a los ángulos de fijación. centro del panel intermedio. La ranura de la chapa decorativa se encuentra ha- Doblar 90°...
  • Seite 21 Montar el frontal del mueble es Pegar la cinta adhesiva de doble cara a la chapa Marcar los orificios. frontal a modo de ayuda para la instalación. Aflojar la chapa frontal del frontal del mueble y reti- Nivelar el frontal del mueble y presionar la chapa rar la cinta adhesiva de doble cara .
  • Seite 22: Ajustar El Frontal Del Mueble

    es Ajustar el frontal del mueble Volver a colocar la chapa frontal sobre el frontal del Volver a atornillar los tornillos laterales. mueble. Enroscar y apretar los tornillos laterales. Atornillar el frontal del mueble Unir el frontal del mueble con las chapas laterales. ▶...
  • Seite 23: Contenu De La Livraison

    Contenu de la livraison fr ¡ Vis métrique (6 unités) Table des matières ¡ Rondelle bombée (2 unités) ¡ Butoir à coller Contenu de la livraison..........   23 ¡ Ruban adhésif double face (3 unités) Dimensions de l’appareil ...........    23 Distances de sécurité ..........   23 Dimensions de l’appareil Installation en toute sécurité........
  • Seite 24: Installation En Toute Sécurité

    fr Installation en toute sécurité L'appareil doit uniquement être raccordé à une prise Installation dans un meuble d'encastrement ¡ Respectez les distances de sécurité pour l'installation de courant de sécurité installée de manière régle- dans un meuble d'encastrement. mentaire. Seul un électricien agréé est habilité à ins- taller ou à...
  • Seite 25 Préparation de l'appareil fr Sortez l'appareil avec précaution de l'emballage. Montez le filtre à huile. Retirez la cale de transport pour la pompe sur la Placez le couvercle dans l'orifice et poussez-le vers face supérieure de l'appareil. la gauche. Fixez la cale de transport à l'arrière de l'appareil AVERTISSEMENT ‒ Risque de basculement! pour une utilisation ultérieure.
  • Seite 26: Préparation Du Meuble

    fr Préparation du meuble AVERTISSEMENT ‒ Risques de blessures! Le Préparation du meuble soulèvement du poids élevé de l’appareil peut en- traîner des blessures. Montez la sécurité anti-basculement. Veillez à ce Ne soulevez jamais seul l’appareil. ▶ que les vis soient fixées dans la partie supérieure Poussez l'appareil dans le meuble.
  • Seite 27: Préparation De L'habillage De Porte Meuble

    Préparation de l'habillage de porte meuble fr Pour fixer l'appareil, vissez les panneaux décoratifs Mesurez la largeur du meuble d'encastrement et sur l'équerre de fixation. marquez le milieu du plancher intermédiaire. La rainure sur panneau décoratif se trouve toujours Utilisez la pince multiple pour plier les pattes de la à...
  • Seite 28 fr Montage de l'habillage de porte meuble Collez le ruban adhésif double face sur la tôle fron- Marquez les trous oblongs. tale comme aide au montage. Retirez la tôle frontale de l'habillage de porte Ajustez l'habillage de porte meuble et appuyez sur meuble et retirez le ruban adhésif double face.
  • Seite 29: Réglage De L'habillage De Porte Meuble

    Réglage de l'habillage de porte meuble fr Alignez à nouveau le tôle frontale avec l'habillage Déplacez l'habillage de porte meuble vers le haut de porte meuble. ou vers le bas. Vissez et serrez les vis latérales. Revissez les vis latérales. Accrochez l'habillage de porte meuble avec la tôle frontale sur l'appareil.
  • Seite 30: Contenuto Della Confezione

    it Contenuto della confezione ¡ Paracolpi adesivi Sommario ¡ Nastro biadesivo (3) Contenuto della confezione ........   30 Dimensioni apparecchio..........   30 Dimensioni apparecchio Distanze di sicurezza ..........   30 Qui sono riportate le dimensioni dell'apparecchio Montaggio sicuro ............   31 Avvertenze sul collegamento elettrico .....
  • Seite 31: Montaggio Sicuro

    Montaggio sicuro it L'apparecchio può essere collegato solamente a Montaggio nel mobile da incasso ¡ Osservare le distanze di sicurezza dell'apparecchio per una presa con messa a terra installata secondo le il montaggio nel mobile da incasso. istruzioni. Lo spostamento di una presa o la sostitu- zione del cavo di allacciamento possono essere ef- fettuati unicamente da un elettricista qualificato te- nendo conto delle relative istruzioni.
  • Seite 32 it Preparazione dell'apparecchio Sollevare delicatamente l'apparecchio dall'imballag- Montare il filtro dell'olio. gio. Porre la copertura nell'apertura e spostarla verso si- Rimuovere il blocco per il trasporto per la pompa nistra. sul lato superiore dell'apparecchio. AVVERTENZA ‒ Pericolo di ribaltamento! Do- Fissare il blocco per il trasporto per altri impieghi po la rimozione del blocco per il trasporto si può...
  • Seite 33: Preparazione Dei Mobili

    Preparazione dei mobili it AVVERTENZA ‒ Pericolo di lesioni! Il peso Preparazione dei mobili elevato dell'apparecchio può causare lesione duran- te il sollevamento. Montare la protezione antiribaltamento. Assicurarsi Non sollevare l'apparecchio autonomamente. ▶ che le viti siano fissate nella parte superiore dei fori Spingere l'apparecchio nel mobile.
  • Seite 34: Preparazione Del Frontale Del Mobile

    it Preparazione del frontale del mobile Per fissare l'apparecchio, avvitare i pannelli decorati- Misurare la larghezza del mobile da incasso e con- vi all'angolare di fissaggio. trassegnare il centro sul ripiano intermedio. La scanalatura sul pannello decorativo è rivolta ver- Piegare verso l'alto di 90° i cappucci del pannello so l'esterno.
  • Seite 35 Montaggio del frontale del mobile it Incollare il nastro biadesivo come supporto di mon- Contrassegnare i fori allungati. taggio sul pannello frontale. Allentare il pannello frontale dal frontale del mobile Allineare il frontale del mobile e premere sul pannel- e rimuovere il nastro biadesivo. lo frontale.
  • Seite 36: Regolazione Del Frontale Del Mobile

    it Regolazione del frontale del mobile Allineare nuovamente il pannello frontale al frontale Spostare verso l'alto o verso il basso il frontale del del mobile. mobile. Avvitare le viti laterali e serrarle. Serrare nuovamente le viti laterali. Agganciare il frontale del mobile con il pannello frontale sull'apparecchio.
  • Seite 37: Inhoud Van De Verpakking

    Inhoud van de verpakking nl ¡ Kleefbuffer Inhoudsopgave ¡ Dubbelzijdige zelfklevende tape (3x) Inhoud van de verpakking .........    37 Afmetingen van het apparaat ........   37 Afmetingen van het apparaat Veiligheidsafstanden ..........   37 Hier vindt u de afmetingen van het apparaat. Veilige montage ............
  • Seite 38: Veilige Montage

    nl Veilige montage contact of het vervangen van de aansluitkabel mag Inbouw in het inbouwmeubel Neem de veiligheidsafstanden voor de inbouw in het in- uitsluitend worden uitgevoerd door een elektricien, bouwmeubel in acht. met inachtneming van de geldende voorschriften. Het apparaat mag alleen met de meegeleverde aan- ¡...
  • Seite 39 Apparaat voorbereiden nl Til het apparaat voorzichtig uit de verpakking. De oliefilter monteren. De transportbeveiliging voor de pomp aan de bo- Het deksel in de opening leggen en naar links venkant van het apparaat verwijderen. schuiven. De transportbeveiliging voor het verdere gebruik WAARSCHUWING ‒ Kantelgevaar! Na het ver- aan de achterkant van het apparaat bevestigen.
  • Seite 40: Meubel Voorbereiden

    nl Meubel voorbereiden WAARSCHUWING ‒ Gevaar voor letsel! Het Meubel voorbereiden hoge gewicht van het apparaat kan bij het optillen letsels veroorzaken. De kantelbeveiliging monteren. Erop letten dat de Het apparaat niet alleen optillen. ▶ schroeven in het bovenste deel van de langgaten Het apparaat in het meubel schuiven.
  • Seite 41: Meubelfront Voorbereiden

    Meubelfront voorbereiden nl Om het apparaat te bevestigen, de sierplaten aan De breedte van het inbouwmeubel meten en het de bevestigingshoeken schroeven. midden aan het tussenschot aftekenen. De groef aan de sierplaat hoort aan de buitenkant. De nokken van de frontplaat met de combitang 90° naar boven buigen.
  • Seite 42 nl Meubelfront monteren De dubbelzijdige zelfklevende tape als montagehulp De langgaten aftekenen. aan de frontplaat plakken. De frontplaat van het meubelfront losmaken en de Het meubelfront uitlijnen en op de frontplaat druk- dubbelzijdige zelfklevende tape verwijderen. ken. In het midden in de langgaten de boringen boren. De boringen verzinken.
  • Seite 43: Meubelfront Instellen

    Meubelfront instellen nl De zijdelingse schroeven inschroeven en stevig aan- Meubel trekken. Het meubelfront met de zijplaten verbinden. ▶ Het meubelfront met de frontplaat aan het apparaat inhangen. Meubelfront instellen Indien nodig het meubelfront verticaal instellen. De lade openen. De zijdelingse schroeven losdraaien. Het meubelfront naar boven of onderen verschui- ven.
  • Seite 44 Gaggenau Hausgeräte GmbH Carl-Wery-Straße 34 81739 München GERMANY www.gaggenau.com...
Inhaltsverzeichnis