
Verwandte Anleitungen für WERTHER INTERNATIONAL TITANIUM 200/22

Inhaltszusammenfassung für WERTHER INTERNATIONAL TITANIUM 200/22
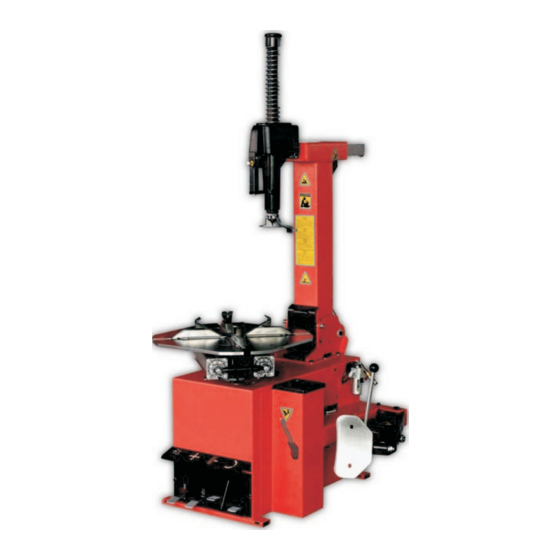
- Seite 1 TITANIUM 200/22 B/15 SMONTAGOMME AUTOMATICO AUTOMATIC TYRE CHANGER DÉMONTE-PNEUS AUTOMATIQUE AUTOMATISCHE REIFENMONTIER - MACHINE...
- Seite 3 CARS TYRE CHANGER DÉMONTE-PNEUS AUTOMOBILE SEMIAUTOMATISCHE REIFENMONTIER- MACHINE DESMONTADORA DE RUEDAS SEMI-AUTOMATICAS Modello -Model- Modèle -Model- Modelo: TITANIUM 200/22 COSTRUTTORE:-MANUFACTURER:-FABRICANT:-HERSTELLER:-FABRICANTE WERTHER INTERNATIONAL S.p.A. Via F.Brunelleschi, 12 42124 CADE’ (RE) - ITALY Telefono ++ / +522 / 9431 - Telefax ++ / +522 / 941997 E-MAIL sales@wertherint.com...
- Seite 4 Indice Index INTRODUCTION ...........Page 4 INTRODUZIONE ............Pag. 4 1. DESCRIPTION OF THE MACHINE ....Page 6 1. DESCRIZIONE DELLA MACCHINA....Pag. 6 2. GENERAL............Page 6 2. GENERALITA’ ............Pag. 6 3. TRANSPORT ...........Page 8 3. TRASPORTO ............Pag. 8 4. UNPACKING ............Page 8 4.
-
Seite 5: Inhaltsverzeichnis
INDEX GÉNÉRAL INHALT INTRODUCTION ...........Page 4 EINFÜHRUNG ............Seite 4 1. DESCRIPTION DE LA MACHINE .....Page 6 1.BESCHREIBUNG DER MASCHINE....Seite 6 2. GENERALITES ..........Page 6 2.ALLGEMEINES........... Seite 6 3. TRANSPORT ...........Page 8 3.TRANSPORT............ Seite 8 4.DEBALLAGE............Page 8 4.AUSPACKEN DER MASCHINE......Seite 8 5.INSTALLATION..........Page 10 5.INSTALLATION ..........Seite 10 6. - Seite 6 INTRODUZIONE INTRODUCTION Vi ringraziamo per aver acquistato un prodotto della Nostra linea di Thank you for purchasing a product from the line of Automatic tyre smontagomme automatici. La macchina è realizzata changers. The machine has been manufactured in attraverso l’applicazione dei migliori principi in rispetto al concetto di accordance with the very best quality principles.
-
Seite 7: Einführung
INTRODUCTION EINFÜHRUNG Nous vous remercions d’avoir choisi un produit de la ligne des démon- Wir danken Ihnen für Ihr Vertrauen, das Sie uns mit dem Kauf eines un- te-pneus Automatiques. La réalisation de ces machines a été soignée serer automatischen Reifenmontiergeräte bewiesen haben. dans les moindres détails pour vous offrir des produits de qualité. -
Seite 8: Descrizione Della Macchina
1. DESCRIZIONE DELLA MACCHINA 1. DESCRIPTION OF THE MACHINE G) Griffe di bloccaggio G) Clamps I) Torretta integrale I) Mounting head L) Pistoletta di gonfiaggio L) Airline gauge M) Braccio operante M) Mounting bar N) Palo orizzontale N) Horizontal arm P) Palo verticale P) Vertical arm Q) Alimentazione aria... -
Seite 9: Description De La Machine
1. DESCRIPTION DE LA MACHINE 1.BESCHREIBUNG DER MASCHINE G) Mors de blocage G) Spannklauen I) Tête de montage I) Montierfuß L) Pistolet de gonflage L) Reifenfülldruckgerät M) Barre de montage M) Werkzeugarm N) Bras horizontal N) Horizontalstab P) Bras vertical P) Kipparm Q) Raccord air comprimé... -
Seite 10: General Safety Precautions
2.2 NORME GENERALI DI SICUREZZA. 2.2 GENERAL SAFETY PRECAUTIONS L’uso dello smontagomme è consentito solo ed esclusivamente a per- The tyre changer may only be used by specially trained and authorized sonale esperto, appositamente addestrato ed autorizzato. expert personnel. • Ogni e qualsiasi manomissione o modifica dell’apparecchiatura non •... -
Seite 11: Normes Generales De Securite
2.2 NORMES GENERALES DE SECURITE 2.2 ALLGEMEINE SICHERHEITSNORMEN L’utilisation du démonte-pneus est permise exclusivement à du person- Die Verwendung des Reifenmontiergerätes ist nur Personen gestattet, nel spécialisé, expressément formé et autorisé. die entsprechende Erfahrung haben, eingewiesen worden und zum Ge- •... -
Seite 12: Installation
5. INSTALLAZIONE 5. INSTALLATION 5.1 SPAZIO NECESSARIO 5.1 SPACE REQUIRED Al momento della scelta del luogo di installazione, è necessario osser- When choosing the place of installation be sure that it complies with vare le normative vigenti per current safety at work regulations. la sicurezza sul lavoro •The tyre changer must be connected to the mains electric power •... -
Seite 13: Installation
5. INSTALLATION 5. INSTALLATION 5.1 EMPLACEMENT NECESSAIRE 5.1 PLATZBEDARF Au moment du choix du lieu d’installation, observer les normes en vi- Bei der Wahl des Aufstellungsortes müssen die gültigen Bestimmungen gueur pour la sécurité du travail. zur Sicherheit am Arbeitsplatz beachtet werden. •Le démonte-pneus devra être raccordé... -
Seite 14: Parts Assembly
5.2 MONTAGGIO COMPONENTI 5.2 PARTS ASSEMBLY 5.2.1 Montaggio pali 5.2.1 Arms assembly Inserire il palo verticale nel supporto della carcassa Set the vertical arm into its housing on the machine infilandolo come indicato in fig. 5 body, as shown in picture 5 Infilare le viti di fulcro posteriori (1), inserire le boccole (2), le Set the back screws (1), the bushes (2), the rondelle (3) e serrare i dadi (4). -
Seite 15: Montage Des Composants
5.2 MONTAGE DES COMPOSANTS 5.2 BESTANDTEILENEINBAU 5.2.1 Montage des bras 5.2.1 Armeinbau Insérer le bras vertical dans le logement sur le bâti, comme indiqué en Den senkrechten Arm in die dazu bestimmte Stütze auf der fig. 5 Maschinengehäuse einfügen (siehe Abb. 5) Insérer les vis arrière (1), les coquilles (2) ainsi que les rondelles (3) et Die hintere Schrauben (1), die Buchsen (2) sowie die serrer par les écrous (4). -
Seite 16: Messa In Servizio
5.5.2 Montaggio e collegamento serbatoio aria per GT 5.2.2 Mounting and connecting the GT-tank Fissare il serbatoio sul retro della carcassa con le apposite viti (1) Fix the tank on the back side of the machine body through the proper Smontare il pannello laterale screws (1). -
Seite 17: Montage Und Verbindung Von Gt-Luftbehälter
5.2.2 Montage et branchement du réservoir d'air pour GT 5.2.2 Montage und Verbindung von GT-Luftbehälter Fixer le réservoir sur la partie arrière du bâti moyennant les vis Behälter auf Hinterseite der Maschine durch die dazu bestimmten appropriées (1). Schrauben (1) befestigen. Démonter le panneau lateral. -
Seite 18: Test Di Funzionamento
5.4 TEST DI FUNZIONAMENTO 5.4 OPERATING TESTS • Premendo il pedale (Z) il piatto autocentrante (Y) deve ruotare in sen- •When pedal (Z) is pressed down the turntable (Y) should turn in a cloc- so orario. Spingendo verso l'alto il pedale il piatto autocentrante (Y) kwise direction.When pedal is pulled up the turntable deve ruotare in senso antiorario. -
Seite 19: Essais De Fonctionnement
5.4 ESSAIS DE FONCTIONNEMENT 5.4 FUNKTIONSTEST •En appuyant sur la pédale (Z) le plateau (Y) doit tourner dans le sens -Pedal (Z) drücken; der Zentriertisch (Y) dreht sich im Uhrzeigersinn. horaire. -Wird das Pedal (Z) nach oben gedrückt, sodreht sich der Zentriertisch •En poussant la pédale (Z) vers le haut le plateau (Y) doit tourner dans (Y) im Gegenuhrzeigersinn. - Seite 20 5.5 REGOLAZIONE MISURE DI BLOCCAGGIO PIATTO 5.5 TURNTABLE LOCKING VALUE ADJUSTING AUTOCENTRANTE Il piatto autocentrante dello smontagomme viene regolato dal costruttore su The tyre-changer turntable is preset by the manufacturer on a middle una misura di bloccaggio intermedia che va da 11" a 21" ext (rispetto all'e- range measure from 11"...
-
Seite 21: Utilisation
5.5 REGLAGE MESURE DE BLOCAGE PLATEAU 5.5 ZENTRIERTISCH-EINSPANNMAß-EINSTELLEN CENTREUR Der Montiermaschinezentriertisch wird vom Hersteller auf ein mittleres Maß von 11"-21" ext (Einspannen der Felge von außen) und 13"-23" int Le plateau centreur du démonte-pneus est reglé par le constructeur sur une (Einspannen der Felge von innen) voreingestellt. - Seite 22 6.1 STALLONATURA 6.1 BREAKING THE BEAD L'operazione di stallonatura deve essere effettuata con Bead breaking must be done with the utmost care and at- la massima attenzione. L'azionamento del pedale stallo- tention. When the bead breaker pedal is operated the bead natore causa una veloce chiusura del braccio e rappre- breaker arm moves quickly and powerfully.
- Seite 23 6.1 DECOLLAGE 6.1 ABDRÜCKEN L'opération de décollage doit être exécutée avec le plus Dieser Vorgang muß äußerst vorsichtig ausgeführt werden. grand soin. L'actionnement de la pédale de décollage Die Betätigung des Abdrückpedal veruusache eine schnelle provoque une fermeture rapide et violente du bras; elle und heftige Bewegung des Abdrücker-arms.
- Seite 24 6.2 SMONTAGGIO 6.2 REMOVING THE TYRE Prima di qualsiasi operazione togliere dal cerchio i vec- Before any operation remove the old wheel balancing chi contrappesi di equilibratura e assicurarsi che il pne- weights and check that the tyre is deflated. umatico sia sgonfio During arm tilting make sure that nobody stays behind Durante l'operazione di ribaltamento del palo accertarsi...
-
Seite 25: Demontage
6.2 DEMONTAGE 6.2 DEMONTAGE Vor jede Arbeit ist es nötig, die alten Auswuchtungsge- Avant toute opération, enlever les masses d’équilibrage gengewichte zu entfernen und auch sicherzustellen, daß de la jante et vérifier si le pneu est dégonflé der Reifen keine Luft enthält. Bei Armkippen soll niemand hinter der Maschine sich Lors du basculement du bras s’assûrer que personne ne befinden. - Seite 26 Non tenere le mani sulla ruota: il ritorno in posizione "di Never keep your hands onto the wheel: the arm recovery lavoro" del braccio potrebbe causarne lo schiacciamen- to “working position” could set the operator at risk of to tra cerchio e torretta. hand crushing between rim and mounting tool.
- Seite 27 Ne pas tenir les mains sur le pneu: le retour en position “de Die Hände auf den Reifen nicht halten: der Rücklauf des travail” du bras pourrait en causer l’écrasement entre jante Armes zu “Arbeitsstellung”könnte eine Quetschung zwi- et outil. schen Felge und Montierwerkzeug verursachen.
- Seite 28 6.3 MONTAGGIO 6.3 MOUNTING THE TYRE ATTENZIONE: questo controllo è importantissimo per evita- WARNING: This checking of tyre and rim is of th utmost re rischi di scoppio del pneumatico durante la fase di gon- importance to prevent tyre explosion during the inflating fiaggio.
- Seite 29 6.3 MONTAGE 6.3 MONTAGE ATTENTION: ce contrôle est très important pour éviter VORSICHT: Es ist sehr wichtig, diese Prüfung durchzuführen, tout risque d’éclatement du pneu lors du gonflage. um Reifenplatzen bei Aufpumpenphase zu vermeiden. Vor Avant de commencer l’opération de montage vérifier: der Montage ist es wichtig, festzustellen, daß: Que le pneu ne présente pas de défauts, soit visuellement soit au -den Reifen sowohl bei Ansicht als auch beim Antasten keinen Mangel...
-
Seite 30: Pericolo Di Esplosione
7 GONFIAGGIO INFLATING Il gonfiaggio dei pneumatici richiede la massima atten- The greatest attention is called for when inflating the zione. Pertanto occorre attenersi strettamente alle indica- tyres. Keep strictly to the following instructions sin- zioni di seguito riportate poichè lo smontagomme NON è ce the tyre changer is NOT designed and built to pro- stato progettato e costruito per riparare l'utente (o chi si tect the user (or anyone else in the vicinity of the ma-... -
Seite 31: Gonflage
7 GONFLAGE 7 AUFPUMPEN Faire très attention pour le gonflage des pneus. Beim Aufpumpen der Reifen ist sehr sorgfältig vorzuge- Suivre scrupuleusement les indications ci-dessous car le hen.Die nachfolgenden Angaben sind streng zu befolgen, démonte-pneus N’A PAS été projeté et construit pour répa- denn das Reifenmontiergerät bietet dem Benützer (oder Per- rer l’utilisateur (ou qui se trouve près de la machine) en cas sonen, die sich in der Nähe befinden) beim Platzen des Rei-... - Seite 32 7.2 Gonfiaggio pneumatici con sistema GT (optional) 7.2 Inflating tyres with GT system (optional) Il sistema di gonfiaggio GT facilita il gonfiaggio dei pneumatici tubeless The GT inflation system facilitates inflation of tubeless tyres thanks to a grazie ad un potente getto d'aria dagli ugelli posti sulle griffe. powerful jet of air from the nozzles positioned on the clamps.
-
Seite 33: Aufpumpen Der Reifen Mit Gt-System (Auf Befragen)
7.2 Aufpumpen der Reifen mit GT-System (Auf Befragen) 7.2 Gonflage avec système GT (sur demande): Das Reifenaufpumpsystem GT erleichtert das Aufpumpen Le système GT facilite le gonflage des pneus tubeless grâce von schlauchlosen Reifen durch starken Lufteinlaß aus den à un puissant jet d’air qui sort des gicleurs placés sur les Düsen auf den Spannklauen. -
Seite 34: Avvertenze Generali
8. MANUTENZIONE 8. MAINTENANCE 8.1 Avvertenze generali 8.1 General warnings La manutenzione è sempre vietata a perso- Unauthorized personnel may not carry out nale non autorizzato maintenance work. · La manutenzione regolare, come da istruzioni, è fondamentale per · Regular maintenance as described in the instructions is essential for un corretto funzionamento e una lunga durata dello smontagomme correct operation and long lifetime of the tyre changer. -
Seite 35: Entretien
8. ENTRETIEN 8. WARTUNG 8.1 Remarques générales 8.1 Allgemeine HInweise L’entretien ne doit jamais être effectué par Unbefugtes Personal darf keine Wartungsar- du personnel non autorisé beiten vornehmen. · L’entretien régulier, selon les instructions données, est fondamental · Eine regelmäßige Wartung, wie in diesem Handbuch beschrieben, ist pour un fonctionnement correct et une longue durée. -
Seite 36: Operazioni Di Manutenzione
OPERAZIONI DI MANUTENZIONE: MAINTENANCE OPERATIONS • Pulire settimanalmente il piatto autocentrante con nafta per evitare la •Clean the turntable once a week with diesel fuel so as to prevent the formazione di sporcizia e ingrassare le guide di scorrimento delle griffe. formation of dirt, and grease the clamp sliding guides. -
Seite 37: Wartungsarbeiten
ENTRETIEN: WARTUNGSARBEITEN: •Toutes les semaines nettoyer le plateau tournant avec du mazout pour -Einmal wöchentlich den Zentriertisch mit Dieselöl reinigen, damit sich éviter la formation de saleté et graisser les glissières des mors. kein Schmutz bildet, Gleitführungen der Spannklauen einfetten. •Tous les mois vérifier: -Mindestens einmal pro Monat folgende Operationen ausführen: •le niveau de l’huile dans le réservoir du graisseur. - Seite 38 9. TABELLA GUASTI E RIMEDI 9. TROUBLE-SHOOTING - MAUVAIS FONCTIONNEMENT: TROUBLES POSSIBLE REASON SOLUTION INCONVENIENTE CAUSA RIMEDIO Turntable rotates Reverser broken Replace reverser Autocentrante gira Invertitore giri rotto Sostituire invertitore only in one direc- in un solo senso tion Turntable does Belt broken Replace Autocentrante non...
-
Seite 39: Der Betriebsstörungen Und Ihre Behebung
9.CAUSES - REMEDES - TABELLE 9.DER BETRIEBSSTÖRUNGEN UND IHRE BEHEBUNG Fehler Mögliche Ursache Abhilfe ANOMALI CAUSE REMÈDE Der Zentriertisch Wendegetriebe de- Wendegetriebe auswechseln Le plateau à cen- Inverseur de tours Le remplacer dreht sich nur in ei- fekt trage tourne seule- cassé... - Seite 40 DATI TECNICI / DONNEES TECHNIQUE/ STANDARD FEATURES / TECHNISCHE DATEN 10” – 20” Dimens. jante blocage ex- Abmessungen der äußeren Bloc- Bloccaggio cerchio dall'esterno External locking rim dimensions 11” – 21” terne kierungsfelge 12” – 22” 12”- 22” Dimens. jante blocage in- Abmessungen der inneren Bloc- Bloccaggio cerchio dall'interno Internal locking rim dimensions...
- Seite 41 Diagramme électriques et pne- DIAGRAMMA ELETTRICO E ELECTRIC AND PNEUMATIC PNEUMATICO DIAGRAM umatiques 110V/220V/230V-1PH...
- Seite 42 220V/230V/380V/400V-3PH(SINGLE SPEED)
- Seite 43 220V/230V/380V/400V-3PH(DOUBLE SPEED)
- Seite 44 DIAGRAMMA SISTEMA STANDARD PNEUMATIC DIAGRAMME SYSTEME PNEUMATICO SYSTEM DIAGRAM PNEUMATIQUE STANDARD STANDARD Inflating gauge Indicateur de gonflage Silencer 1/4” Silentiateur 1/4 Silencer 1/8” Silentiateur 1/8 Quick relief valve Soupape de secours rapide Bead breaker cylinder Détalonneur cylindre Turntable cylinder Cylindre de platine Bead breaking valve Soupape de détalonnage Turntable valve...
-
Seite 45: System Diagram
DIAGRAMMA SISTEMA GT PNEUMATIC DIAGRAMME SYSTEME PNEUMATICO GT SYSTEM DIAGRAM PNEUMATIQUE GT Safety Valve Soupape de sécurité Tank Réservoir Setting solenoid Réglage de solénoïde GT pedal valve GT pédale de valve Safety Valve Soupape de sécurité inflating head gonfler la tête Divider Cloison Pressure gauge... - Seite 75 Dichiarazione di conformità - Déclaration de conformité Declaration of Conformity - Konformitätserklärung Declaración de conformidad - Overensstemmelseserklæring Överensstämmande intyg - EG-Conformiteitsverklaring WERTHER INTERNATIONAL S.p.A. Via F.Brunelleschi, 12 42124 CADE’ (Reggio Emilia) Italy Tel.++/+522/9431 (r.a.) Fax ++/+522/941997 dichiariamo che lo smontagomme modello declara, que la desmontadora de neumáticos modelo...