Inhaltsverzeichnis
Werbung
Quicklinks
Education
ROBOTICS
Building System
ROBOTIQUE
Système de Construction
S
SCIENCE
LA SCIENCE
T
TECHNOLOGY
TECHNOLOGIE
E
ENGINEERING
INGÉNIERIE
M
MATH
MATHÉMATIQUES
FREE
DOWNLOADABLE SOFTWARE
LOGICIEL TÉLÉCHARGEABLE
GRATUITEMENT
6
10
X
+
®
CONTROL BOX
CONTROL BOX
BOITE DE
BOITE DE
COMMANDE
COMMANDE
• Not included
• Pas inclus
• No se incluyen
• Nicht enthalten
• Non incluse
• Não estão incluídas
• Niet inberepen
79100/79484
DISTANCE
DISTANCE
SENSOR
SENSOR
CAPTEUR DE
CAPTEUR DE
DISTANCE
DISTANCE
COLOR/
COLOR/
LIGHT SENSOR
LIGHT SENSOR
COULEUR/
COULEUR/
CAPTEUR DE
CAPTEUR DE
COULEUR
COULEUR
LED
LED
‡
Modelos
Modelle
Modelli
Modelo
Modellen
BUILD,
PROGRAM,
&
CONTROL!
CONSTRUIRE,
PROGRAMMER,
ET CONTRÔLER !
MOTORS X4
MOTORS X4
MOTEUR
MOTEUR
PUSH BUTTON
PUSH BUTTON
SENSOR
SENSOR
CAPTEUR À
CAPTEUR À
BOUTON-POUSSOIR
BOUTON-POUSSOIR
Werbung
Inhaltsverzeichnis

Verwandte Anleitungen für k'nex Education 79100


Inhaltszusammenfassung für k'nex Education 79100
- Seite 1 BUILD, PROGRAM, DISTANCE DISTANCE & SENSOR SENSOR CONTROL! Education CAPTEUR DE CAPTEUR DE ® DISTANCE DISTANCE CONSTRUIRE, PROGRAMMER, ROBOTICS ET CONTRÔLER ! Building System ROBOTIQUE COLOR/ COLOR/ LIGHT SENSOR LIGHT SENSOR Système de Construction COULEUR/ COULEUR/ CAPTEUR DE CAPTEUR DE COULEUR COULEUR MOTORS X4...
-
Seite 2: Inhaltsverzeichnis
English Français ( EN ) ( FR ) CONTENTS CONTENUS K’NEX Building Basics ........3 K’NEX Bases de Construction ......3 Battery Information ........4 Informations sur les Piles ......4 Parts List ...........5 Liste des Pièces ..........5 Quick Start Guide ........6 Guide de démarrage rapide de la Robotique ..6 Stryder 6 ...........7 Stryder 6 ...........7 Bi-Ped Robot .......... -
Seite 3: K'nex Building Basics
Before you use your K’NEX Robotics models, Avant d’utiliser vos modèles K’NEX Robotics, read all instructions carefully lire attentivement toutes les instructions • Attention : Le non-respect ou d’observer tous les assemblages, la sécurité et les • Warning: Failure to comply with or observe all assembly, safety, and operation instructions de fonctionnement et les avertissements concernant l’utilisation de ce instructions and warnings regarding the use of this product may result in serious produit peut entraîner des blessures corporelles graves. -
Seite 4: Battery Information
Battery Informations sur les Piles Information Comment mettre et retirer des piles Utiliser un petit Phillips tournevis pour How to Insert and Remove Batteries desserrer la vis et pour enlever la couverture de batterie. Insérer 6 AA Use a small Phillips head screwdriver (LR6) batteries* fraîches dans le to loosen the screw. -
Seite 5: Parts List
Parts List Liste des Pièces Before you start building, be sure to compare the parts in your set with the Avant de commencer à construire, assure-toi de comparer les pièces dans ta parts list here. If anything is missing, call or write to us using the information boîte à... -
Seite 6: Quick Start Guide
Quick Start Guide/Guide de démarrage rapide de la Robotique Quick Start Guide/Guide de démarrage rapide de la Robotique Download K’NEX Robotics Software Click on the “Open” Icon and open the Build the Stryder 6 model. @ www.knex.com/robotics “Stryder 6 Program 1.KNEX” program Construire le modèle file from desktop. -
Seite 7: Stryder 6
STRYDER STRYDER When you see this icon, head to www.knex.com/instructions and enter code 79100 for helpful building tip videos. Lorsque vous voyez cette icône, aller sur www.knex.com/instructions et entrer le code 79100 pour voir de vidéos sur de conseil pratique de construction. Did you install 6 AA (or LR6) ( EN ) batteries in the control box? - Seite 8 gire modelo ( ES ) grehe das Modell rotate model ( DE ) gira il modello pivoter le ( IT ) modèle gire modelo ( PT ) draai model ( NL ) 1 - 2 STRYDER Education ® education.com Build...
- Seite 9 3 - 4 3 - 4 3 - 5 STRYDER Education ® Education ® education.com Building Programs...
- Seite 10 3 - 5 3 - 7 STRYDER Education ® education.com Build...
- Seite 11 1 - 2 3 - 7 1 - 8 STRYDER Education ® Education ® education.com Building Programs...
- Seite 12 1 - 8 1 - 9 STRYDER Education ® education.com Build...
- Seite 13 1 - 9 1 - 11 STRYDER Education ® Education ® education.com Building Programs...
- Seite 14 1 - 13 1 - 11 STRYDER Education ® education.com Build...
- Seite 15 gire modelo ( ES ) grehe das Modell ( DE ) rotate model gira il modello ( IT ) pivoter le gire modelo modèle ( PT ) draai model ( NL ) 1 - 13 1 - 15 STRYDER Education ®...
- Seite 16 1 - 15 1 - 17 STRYDER Education ® education.com Build...
- Seite 17 gire modelo ( ES ) grehe das Modell ( DE ) rotate model gira il modello ( IT ) pivoter le gire modelo modèle ( PT ) draai model ( NL ) 1 - 17 1 - 19 STRYDER Education ®...
- Seite 18 1 - 21 1 - 19 STRYDER Education ® education.com Build...
- Seite 19 STRYDER Education ® Education ® education.com Building Programs...
- Seite 20 gire modelo ( ES ) grehe das Modell ( DE ) rotate model gira il modello ( IT ) pivoter le gire modelo modèle ( PT ) draai model ( NL ) 1 - 26 1 - 21 STRYDER Education ®...
- Seite 21 1 - 26 1 - 28 STRYDER Education ® Education ® education.com Building Programs...
- Seite 22 gire modelo ( ES ) grehe das Modell ( DE ) rotate model gira il modello Connect Push Button Sensor to ( IT ) pivoter le gire modelo Sensor Input ( PT ) modèle draai model ( NL ) Connectez le bouton-poussoir Tastsensor a la sortie du capteur 1 - 28 1 - 30...
- Seite 23 Connect Motor to Motor Output Connectez moteur à la sortie du moteur 1 - 30 1 - 31 STRYDER Education ® Education ® education.com Building Programs...
- Seite 24 Connect Motor to Motor Output Connectez moteur à la sortie du moteur 1 - 31 1 - 32 STRYDER Education ® education.com Build...
- Seite 25 1 - 33 1 - 32 Connect Distance Sensor to Sensor Input Connectez le détecteur à distance à l’entrée du capteur STRYDER Education ® Education ® education.com Building Programs...
- Seite 26 rotate model pivoter le modèle Connect LED to LED Output Connectez the LED a la sortie de LED gire modelo ( ES ) grehe das Modell ( DE ) gira il modello ( IT ) gire modelo ( PT ) draai model ( NL ) Top View...
-
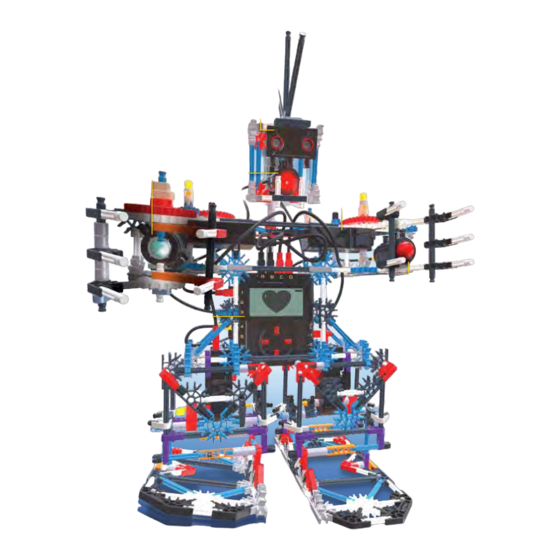
Seite 27: Bi-Ped Robot
ROBOT ROBOT BI-PED BI-PED ROBOT ROBOT BI-PED BI-PED When you see this icon, head to www.knex.com/instructions and enter code 79100 for helpful building tip videos. Lorsque vous voyez cette icône, aller sur www.knex.com/instructions et entrer le code 79100 pour voir de vidéos sur de conseil pratique de construction. - Seite 28 1 - 3 1 - 4 1 - 4 1 - 6 BI-PED ROBOT ROBOT de BI-PED Education ® education.com Build...
- Seite 29 1 - 6 1 - 8 BI-PED ROBOT ROBOT de BI-PED Education ® Education ® education.com Building Programs...
- Seite 30 1 - 8 1 - 10 BI-PED ROBOT ROBOT de BI-PED Education ® education.com Build...
- Seite 31 1 - 10 1 - 11 1 - 11 BI-PED ROBOT 1 - 12 ROBOT de BI-PED Education ® Education ® education.com Building Programs...
- Seite 32 1 - 13 1 - 12 BI-PED ROBOT ROBOT de BI-PED Education ® education.com Build...
- Seite 33 BI-PED ROBOT ROBOT de BI-PED Education ® Education ® education.com Building Programs...
- Seite 34 Adjust or remove the rubber pins based on the ( EN ) surface the model is walking on. Ajuster ou retirer les épingles de caoutchouc en ( FR ) basant sur la surface sur lequel le modèle marche. 14 - 16 BI-PED ROBOT ROBOT de BI-PED Education...
- Seite 35 1 - 13 14 - 16 1 - 17 1 - 17 1 - 18 BI-PED ROBOT ROBOT de BI-PED Education ® Education ® education.com Building Programs...
- Seite 36 19 - 21 BI-PED ROBOT ROBOT de BI-PED Education ® education.com Build...
- Seite 37 19 - 21 19 - 22 19 - 22 19 - 24 BI-PED ROBOT ROBOT de BI-PED Education ® Education ® education.com Building Programs...
- Seite 38 19 - 24 19 - 26 BI-PED ROBOT ROBOT de BI-PED Education ® education.com Build...
- Seite 39 19 - 26 19 - 28 BI-PED ROBOT ROBOT de BI-PED Education ® Education ® education.com Building Programs...
- Seite 40 19 - 28 19 - 29 19 - 29 BI-PED ROBOT 19 - 30 ROBOT de BI-PED Education ® education.com Build...
- Seite 41 19 - 30 19 - 31 BI-PED ROBOT ROBOT de BI-PED Education ® Education ® education.com Building Programs...
- Seite 42 BI-PED ROBOT ROBOT de BI-PED Education ® education.com Build...
- Seite 43 Adjust or remove the rubber pins based on the surface the ( EN ) model is walking on. Ajuster ou retirer les épingles de caoutchouc en basant ( FR ) sur la surface sur lequel le modèle marche. 32 - 34 BI-PED ROBOT ROBOT de BI-PED Education...
- Seite 44 19 - 31 19 - 35 32 - 34 19 - 35 19 - 36 BI-PED ROBOT ROBOT de BI-PED Education ® education.com Build...
- Seite 45 19 - 36 1 - 18 1 - 37 BI-PED ROBOT ROBOT de BI-PED Education ® Education ® education.com Building Programs...
- Seite 46 1 - 38 Did you install 6 AA (or LR6) batteries in the control box? ( EN ) Est-ce que tu as installé 6 piles AA (ou LR6) dans le boite de commande ? ( FR ) ¿Instalaste 6 pilas AA (o LR6) en el caja de control? ( ES ) Hast du 6 AA (oder LR6) Batterien in den Kontrollkasten eingelegt? ( DE )
- Seite 47 1 - 40 1 - 38 BI-PED ROBOT ROBOT de BI-PED Education ® Education ® education.com Building Programs...
- Seite 48 1 - 40 1 - 43 BI-PED ROBOT ROBOT de BI-PED Education ® education.com Build...
- Seite 49 1 - 43 1 - 45 BI-PED ROBOT ROBOT de BI-PED Education ® Education ® education.com Building Programs...
- Seite 50 1 - 47 1 - 45 BI-PED ROBOT ROBOT de BI-PED Education ® education.com Build...
- Seite 51 1 - 47 1 - 48 BI-PED ROBOT ROBOT de BI-PED Education ® Education ® education.com Building Programs...
- Seite 52 1 - 48 1 - 50 BI-PED ROBOT ROBOT de BI-PED Education ® education.com Build...
- Seite 53 1 - 52 1 - 50 BI-PED ROBOT ROBOT de BI-PED Education ® Education ® education.com Building Programs...
- Seite 54 1 - 52 1 - 53 BI-PED ROBOT ROBOT de BI-PED Education ® education.com Build...
- Seite 55 1 - 53 1 - 55 BI-PED ROBOT ROBOT de BI-PED Education ® Education ® education.com Building Programs...
- Seite 56 1 - 55 1 - 57 1 - 57 1 - 59 BI-PED ROBOT ROBOT de BI-PED Education ® education.com Build...
- Seite 57 Make sure the ( EN ) gears mesh. Surveille ( FR ) l’engrènement. 1 - 59 1 - 61 Make sure the ( EN ) gears mesh. Surveille ( FR ) l’engrènement. 1 - 61 1 - 63 BI-PED ROBOT ROBOT de BI-PED Education ®...
- Seite 58 1 - 63 1 - 64 1 - 64 1 - 65 BI-PED ROBOT ROBOT de BI-PED Education ® education.com Build...
- Seite 59 1 - 65 1 - 67 gire modelo ( ES ) grehe das Modell ( DE ) rotate model gira il modello ( IT ) pivoter le gire modelo modèle ( PT ) draai model ( NL ) 1 - 68 Connect Push Button Sensor to Sensor Input 1 - 67...
- Seite 60 1 - 68 Connect Distance Sensor to Sensor Input Connectez le détecteur à distance 1 - 69 à l’entrée du capteur 1 - 69 Connect Color/Light Sensor to Sensor Input 1 1 - 70 Connectez le Color/Light détecteur a l’entrée de capteur BI-PED ROBOT ROBOT de BI-PED Education...
- Seite 61 1 - 70 Connect LED to LED Output 1 - 71 Connectez the LED a la sortie de LED rotate model pivoter le modèle gire modelo ( ES ) grehe das Modell ( DE ) gira il modello ( IT ) gire modelo ( PT ) draai model...
- Seite 62 1 - 72 Connect Motor to Motor Output Connectez moteur à la sortie du moteur 1 - 73 1 - 73 Connect Motor to Motor Output Connectez moteur à la sortie du moteur 1 - 74 BI-PED ROBOT ROBOT de BI-PED Education ®...
- Seite 63 BI-PED ROBOT Connect Motor to Motor Output ROBOT Connectez moteur à la sortie du moteur BI-PED 1 - 75 1 - 74 BI-PED ROBOT ROBOT de BI-PED Education ® Education ® education.com Building Programs...
-
Seite 64: Line Tracker
LINE TRACKER LINE TRACKER When you see this icon, head to www.knex.com/instructions Did you install 6 AA (or LR6) batteries in the control box? ( EN ) and enter code 79100 for Est-ce que tu as installé 6 piles AA (ou LR6) dans le boite de commande ? ( FR ) helpful building tip videos. - Seite 65 1 - 3 1 - 5 LINE TRACKER Education ® Education ® education.com Building Programs...
- Seite 66 1 - 7 1 - 5 LINE TRACKER Education ® education.com Build...
- Seite 67 1 - 9 1 - 7 LINE TRACKER Education ® Education ® education.com Building Programs...
- Seite 68 1 - 10 1 - 9 LINE TRACKER Education ® education.com Build...
- Seite 69 1 - 12 1 - 10 LINE TRACKER Education ® Education ® education.com Building Programs...
- Seite 70 1 - 14 1 - 12 LINE TRACKER Education ® education.com Build...
- Seite 71 15 - 16 LINE TRACKER Education ® Education ® education.com Building Programs...
- Seite 72 15 - 16 1 - 17 1 - 14 LINE TRACKER Education ® education.com Build...
- Seite 73 1 - 18 1 - 17 LINE TRACKER Education ® Education ® education.com Building Programs...
- Seite 74 1 - 18 1 - 20 LINE TRACKER Education ® education.com Build...
- Seite 75 21 - 22 LINE TRACKER Education ® Education ® education.com Building Programs...
- Seite 76 21 - 22 1 - 23 1 - 20 LINE TRACKER Education ® education.com Build...
- Seite 77 1 - 23 1 - 24 LINE TRACKER Education ® Education ® education.com Building Programs...
- Seite 78 1 - 26 1 - 24 LINE TRACKER Education ® education.com Build...
- Seite 79 1 - 28 1 - 26 gire modelo ( ES ) grehe das Modell rotate model ( DE ) gira il modello pivoter le ( IT ) modèle gire modelo ( PT ) draai model ( NL ) LINE TRACKER Education ®...
- Seite 80 Connect Motor to Motor Output Connectez moteur à la sortie 1 - 28 du moteur 1 - 29 Connect Motor to Motor Output Connectez moteur à la sortie du moteur 1 - 30 1 - 29 LINE TRACKER Education ® education.com Build...
- Seite 81 Connect Color/Light Sensor to Sensor Input Connectez le Color/Light détecteur a l’entrée de capteur 1 - 31 1 - 30 LINE TRACKER Connect Push Button Sensor to Sensor Input Connectez le bouton-poussoir Tastsensor a la sortie du capteur 1 - 32 See page 82 to learn how to use the Line Tracker model.
- Seite 82 Place mat on hard flat surface and secure corners. Position Line Tracker model on the mat so that the sensor is over the line and activate Line Tracker program. Placez le mat sur une surface LINE TRACKER plat et dure en sécurisant les coins.
-
Seite 83: Informationen Für Später Aufbewahren
(DE) Deutsch • Keine alten und neuen Batterien mischen. Nur Batterien des gleichen Typs oder (Seite 62) Schließen Sie den Motor an den Motorausgang an B empfohlenen äquivalenten Typs verwenden. (Seite 1) Wissenschaft, Technologie, Ingenieurswesen, Mathematik • Leere oder verbrauchte Batterien aus dem Spielzeug entfernen; darauf achten, dass Schließen Sie den Motor an den Motorausgang an C die Pole der Batterie nicht kurzgeschlossen werden. -
Seite 84: Informazioni Sulle Batterie
Le spine sopra i cavi di collegamento sono direzionale e possono essere inserite solo in (Pagina 59) Conectores Colleghi il Sensore a pulsante al sensore di ingresso 4 un modo. FORZARE spine in connessioni nel modo sbagliato può danneggiare la spina É... - Seite 85 (Página 26) • De transformator is niet bedoeld voor kinderen jonger dan 3 jaar. De transformator Deze onderdelen altijd samengaan Conecte a saída do LED LED p1 is geen speelgoed. Het speelgoed mag alleen worden gebruikt met de aanbevolen Wegopnemer Bedieningskast Sensor drukknoppen vista de cima...
-
Seite 86: Basketball Game
For instructions of these models go to www.knex.com/instructions and enter code 79100. (EN) Pour les instructions de ces modèles vont à www.knex.com/instructions et entrez dans le code 79100. (FR) Para obtener instruccionnes de los estos modelos vaya a www.knex.com/instructions y entre en el código 79100. (ES) Für Anweisungen dieser Modelle gehen sie zu www.knex.com/instructions und geben sie Code 79100 ein. - Seite 87 SEARCH & RESCUE ROBOT SEARCH & RESCUE ROBOT RECHERCHE ET ROBOT DE RECHERCHE ET ROBOT DE SAUVETAGE SAUVETAGE AIRPLANE AIRPLANE CAR BOT CAR BOT AVION AVION VOITURE BOT VOITURE BOT...
- Seite 88 ® Education § Sold separately. Vendus séparément. Se venden por separado. Separat erhältlich. Venduti separatamente. Vendidos separadamente. education.com Afzonderlijk verkocht. § Building Programs § education.com (EN) K’NEX and K’NEX Education are registered trademarks of K’NEX Limited Partnership Group. facebook.com/KNEXeducation (FR) K’NEX et K’NEX Education sont des marques déposées de K’NEX Limited Partnership Group. ©2016 K’NEX Limited Partnership Group, P.O.