V-TAC VT-5555 Bedienungsanleitung
Robot vacuum cleaner
Inhaltsverzeichnis
INSTRUCTION MANUAL
ROBOT VACUUM CLEANER (VT-5555)
INTRODUCTION & WARRANTY
Thank you for selecting and buying V-TAC product. V-TAC
will serve you the best. Please read these instructions
carefully before starting the installing and keep this manual
handy for future reference. If you have any another query,
please contact our dealer or local vendor from whom you
have purchased the product. They are trained and ready to
serve you at the best.
MULTI-LANGUAGE MANUAL
QR CODE
Please scan the QR code to
access the manual in multiple
languages.
IN CASE OF ANY QUERY/ISSUE WITH THE PRODUCT PLEASE REACH
OUT TO US AT SUPPORT@V-TAC.EU
V-TAC EUROPE LTD, BULGARIA, PLOVDIV 4000, BUL.L.KARAVELOW 9B
works with
Inhaltsverzeichnis

Verwandte Anleitungen für V-TAC VT-5555


Inhaltszusammenfassung für V-TAC VT-5555
- Seite 1 INSTRUCTION MANUAL INTRODUCTION & WARRANTY ROBOT VACUUM CLEANER (VT-5555) Thank you for selecting and buying V-TAC product. V-TAC will serve you the best. Please read these instructions carefully before starting the installing and keep this manual handy for future reference. If you have any another query, please contact our dealer or local vendor from whom you have purchased the product.
- Seite 2 (HR) UVOD Hvala vam, što ste odabrali i kupili tvrtke Vi-Tek (V-TAC). Vi-Tek (V-TAC) će va poslužiti na najbolji mogući način. Molimo, pažljivo pročitajte ove upute prije instalacije i spremite upute za buduću uporabu. Ako imate dodatnih pitanja, molimo obratite se našem-...
- Seite 3 INTRODUCCIÓN Le agradecemos que ha elegido y adquirido la V-TAC. V-TAC le servirá del mejor modo posible. Pedimos que antes de comenzar la instalación lea atentamente las presentes instrucciones y las guarde en un lugar adecuado para consultas próximas. En caso de dudas o preguntas, póngase, por favor, en contacto con el representante o suministrador más cercano de quien ha comprado el...
- Seite 4 INTRODUCERE Vă mulţumim că aţi ales şi v-aţi cumpărat acest produs de V-TAC. V-TAC vă va fi de un mare folos, utilizându-l în modul cel mai potrivit posibil. Vă rugăm să citiţi .aceste instrucţiuni cu atenţie, înainte să începeţi instalarea, şi păstraţi-le pentru că s-ar putea să...
-
Seite 5: Safety Regulations
Safety Regulations Warning: Before using this product, please read the following safety instructions and follow Use only the original rechargeable battery and charging seat specially equipped by the all routine safety precautions. manufacturer. Non - rechargeable batteries are strictly prohibited, please refer to" product Please read the instructions carefully, please keep the instructions.Any operation parameters"... -
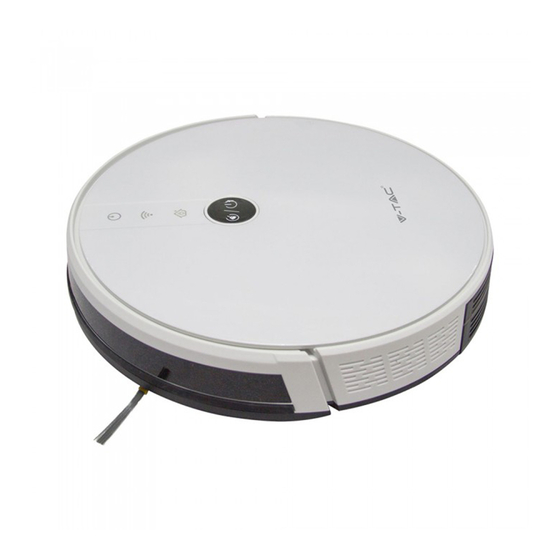
Seite 6: Package Contents
Package Contents Romote Control (with battery x2) Charging dock Water Tank Robot Dust Box Mopping Pad Cleaning Brush Side Brush x2 Instruction manual Adapter Hepa filter... - Seite 7 Product Composition / Part Name Front Robot Back Robot Down view Sensor Side Brush Start/Pause Key Drive Wheel Surface Dust Box Cover Charging Pole Piece Dust Box/ Water Tank Universal Wheel Button Omnidirectional Battery Lens Main Brush Assembly...
-
Seite 8: Remote Control
Product Composition / Part Name Charging Dock Dust box Signal Indicator High Efficiency Strainer High Efficiency Net Cover Primary Filter Strainer DC Plug Dust Box Dust Box Side Cover Metal Sheet Dust Box / Water Tank/ Conductive Sheet Charging Dock Pins Remote Control Water Tank and Mopping Pad Screen Display... - Seite 9 Product Usage - Preparation Remove Protection Before using the Robot, remove the protective strip on the Robot. Remove the protective strip FIG 1...
-
Seite 10: Charging The Product
Charging The Product Placing and charging: The charging seat is placed against the 4. Charging: Place the Robot on the charging seat to wall and is to beplaced on a flat ground. Do not place articles charge (during charging, the indicator light flashes and once within the range of 0.5m left and right and 1.5m ahead. -
Seite 11: Cleaning The Product
You can start various cleaning Applicable scenario: Cleaning single room mode through Robot, remote control or V-TAC Smart Light App. Setting method:Click the remote control mode switch button select the single room cleaning mode to start the single room cleaning. - Seite 12 Functions - Pause, Wakeup & shutdown Pause: During the operation of the Robot, press the pause key or the remote control pause key to pause the operation of the Robot. Awaken: If the Robot stops working for more than ten minutes, it will automatically enter sleep mode (The Robot lights will turn off).You can wake up the Robot by clicking the Start/Pause Key(Robot key) on the device, then click the Robot key or any key of the remote controller and app to restart Shutdown: After the Robot stops working, press the Start/Pause Key(Robot key) for a long time, and the indicator light of the Robot machine goes switches off to indicate that the machine has been shut down.
- Seite 13 Using The Water Tank *Do not use the floor mopping function on carpets. Note:After mopping the floor, please empty the water tank and remove the mopping pad. Add water Install the Water Tank FIG 6 FIG 7 Start Mopping the Floor Install Mopping Pad FIG 8 FIG 9...
- Seite 14 Maintenance - Dust Box A.Press the dust box button to take out the dust box C. Dumping garbage FIG 10 FIG 12 B.Open the dust box side cover Open the high efficiency filter FIG 13 FIG 11...
- Seite 15 Maintenance - Dust Box F.Rinse the primary filter screen E. Open the high-efficiency screen cover and take out the high-efficiency screen and the primary-efficiency screen. High-efficiency screen is not recommend for water washing. Tap gently to remove dust. FIG 15 G.The dust box is to be scrubbed clean with dishcloth.
- Seite 16 Maintenance - Dust Box H.Dry the dust box and assemble the filter, and keep it dry to ensure its service life. Note: It is recommended to wash the primary strainer with water 15 - 30 days after it is used. The maximum service life of the high efficiency filter screen is 3 months.
- Seite 17 Maintenance - Water Tank & Mopping Pad 1.Remove the water tank. 4.Clean the mopping pad. FIG 18 FIG 21 2.Remove the mopping pad. 5. Dry the mopping pad. FIG 19 FIG 22 3.Empty/Drain the Water Tank. 6. Dry or naturally dry the water tank FIG 20 FIG 23...
- Seite 18 Maintenance - Main Brush & Side Brush 1. Open the main brush cover assembly 3. Use the utility tool for cleaning tangled hair (Cleaning main brush) FIG 24 FIG 26 2. Remove the main brush shaft(as shown below) 4. FIG 25 FIG 27...
- Seite 19 Maintenance - Charging dock pins, Down view sensor, Drive & universal wheel Warm Tip: The interior of the charging pole piece, the down-view sensor and the striking plate all contain sensitive electronic components, please use dry dishcloth when cleaning, and do not use wet dishcloth to prevent damage caused by water inflow. Clean up charging dock pins Clean drive wheels and universal wheel FIG 28...
-
Seite 20: Troubleshooting
Troubleshooting Prompt Tone Cause of Failure Solution Please put the Robot back to the ground and press the Wheels off the ground Robot suspended cleaning button again. Install the dust box to the Robot and press the cleaning Dust box not installed Dust box removed and not installed key again. -
Seite 21: Technical Specifications
Technical Specifications Classification Projects Parameter Diameter 330 mm Height 76mm Structural class Net weight 2.7 kg Voltage 14.4 volts Battery Battery 2500 mah rechargeable lithium battery pack Dust box capacity 600 ml 350 ml Water tank capacity Charging type Automatic charging / manual charging parameter Cleaning mode Auto / single room / edge / mop floor... - Seite 22 Step 2: Scan the given QR code, or download “V-TAC Smart Light’ from the App Store (iOS) or the Google Play Store (Android). Step 3: Open the V-TAC Smart Light app and tap on register for creating a new account. If you already have an existing account, please proceed to please proceed to logging in.(Ref Fig 1)
- Seite 23 Step 5: Enter the verification code which will be sent to your mobile number/emai id, then assign a new password to your account and tap on “Confirm” to complete the registration process. (Ref Fig 3). Once done you will be redirected to V-TAC Smart Light Home page.
- Seite 24 Step 7: To select the device, tap on Home appliances, and then choose ‘Robot Vaccum’ to start Pairing process of the device to the app.(Ref Fig 5) Step 8: A) To start pairing the device make sure the light on the device is blinking rapidly. B) Power on , long press power button for 5 seconds till the indicator flashes rapidly.
- Seite 25 Step 9: Once you have successfully completed step 8, you will be redirected to “Connecting Now” page, where the App searches, registers and initializes the device (ref Fig 8). Once it is completed your device will be successfully paired. Step10: Once your device is successfully paired, rename the device to your preference. And then tap on completed. (Ref Fig 9) Step11: You can now start controlling your device with the App.
- Seite 26 Step 12: Modes And Features 1. Cleaning Modes: To start cleaning mode Tap on “Auto Mode” (OR) “Fix point mode” (OR) “Single room mode” (OR) “Edge mode” (OR) “Charging mode Choose ”Cleaning strength” to set the suction power setting (Ref Fig 11) 2.
- Seite 27 3. Standby/Sleeping/Pause Mode: to pause the device (OR) press Idle mode, the device will pause.(Ref Fig 15) Tap ON/OFF to make the device enter sleeping mode (or) Standy.(Ref Fig 15) Note: When in sleep mode the App page will turn into darker shade(Ref Fig 16). When the device is in sleeping mode, tap ON/OFF button in order to wake the device to standby mode.
- Seite 28 6. Device Sharing: To Share device please tap on the top right corner of the screen , then select Shared Devices on the page and add the registered phone number or email id of the person you want to share the device with. (Ref Fig19 and 20) Fig 19 Fig 20 7.
-
Seite 29: Commande Manuelle
Pause: Pendant le fonctionnement du robot, appuyez sur la touche pause ou la touche nettoyage à partir du robot, de la télécommande ou de V-TAC Smart Light App. pause de la télécommande pour mettre en pause le fonctionnement du robot. - Seite 30 2. N’exposez pas la crépine à haute efficacité et la crépine primaire au soleil. * Après que le robot a terminé son travail, il est recommandé de ne pas l’éteindre afin de le J. Couvrez le couvercle de la boîte à poussière et installez la boîte à poussière sur le robot maintenir en état de recharge pour qu’il puisse opérer mieux la prochaine fois.
- Seite 31 Appuyez sur le nom de l’appareil sur la page d’accueil pour entrer dans les Étape 2: Scannez le code QR donné ou téléchargez l’application «V-TAC Smart Light» de commandes et fonctionnalités de l’appareil. (veuillez vous référer à la fig. 40) App Store (iOS) ou de Google Play Store (Android)..
-
Seite 32: Manuelle Kontrolle
Reinigungsmodi gewählt werden. Sie können verschiedene Klicken Sie auf dem Gerät auf die Start/Pause-Taste (Robotertaste) und anschließend auf Reinigungsmodi über den Roboter, die Fernbedienung oder die V-TAC Smart Light App die Robotertaste oder eine beliebige Taste auf der Fernbedienung und der App, um den starten. -
Seite 33: Funktion - Zeitplanungseinstellung
FUNKTION - ZEITPLANUNGSEINSTELLUNG J. Den Staubbehälterdeckel abdecken und die Staubbox am Roboter installieren. Hinweis: Lassen Sie beim Reinigen kein Wasser in den Lüfteranschluß eindringen. Zeitplanung: Drücken Sie die Fernbedienungstaste, um die Zeitplanung für den Roboter einzustellen. Drücken Sie die Taste, um danach die Planungszeit einzustellen. Drücken Sie WARTUNG - WASSERTANK UND WISCHPAD anschließend die Taste erneut, um die Einstellungen abzuschließen. - Seite 34 Schritt 12: Modi und Funktionen 1. Reinigungsmodi: Um den Reinigungsmodus zu starten, tippen Sie auf „Auto-Modus“ Schritt 3: Öffnen Sie die V-TAC Smart Light App und tippen Sie auf „Registrieren“, um ein (ODER) „Fixpunktmodus“ (ODER) „Einzelraummodus“ (ODER) „Kantenmodus“ (ODER) neues Konto zu erstellen. Wenn Sie bereits über ein Konto verfügen, fahren Sie mit der „Lademodus“.
- Seite 35 Ако роботът спре да работи в продължение на повече от десет минути, почистване от робота, дистанционното управление или Приложение “Smart Light” на той автоматично ще влезе в режим на заспиване (Светлините на робота ще се V-TAC. Автоматично почистване: изключат). Вие можете да събудите робота като натиснете клавиша за старт/пауза...
- Seite 36 Изключване: След като роботът спре да работи, натиснете клавиша за старт/пауза Забележка: Препоръчително е да се измива основната цедка с вода 15 - 30 дни след (клавиш на робот) продължително и индикаторната светлина на робота се изключва, за като бъде използвана. Максималният обслужващ живот на екрана на филтъра с да...
- Seite 37 Стъпка 1: Включете бутона за захранване на устройството. Фигура 41) Стъпка 2: Сканирайте посочения QR код или изтеглете „V-TAC Smart Light” от Магазина 2. Определяне на времеви график: Натиснете върху „График” (моля позовете се на за приложения (за iOS) или от Магазина на Google Play (за Android).
- Seite 38 Možete aktivirati drugačiji način čišćenja od strane robota, putem daljinskog mirovanja (Svjetla robota će se isključiti). Možete probuditi robota pritiskom na start/pauzu upravljača ili V-TAC aplikacije „Smart Light“. na uređaju (gumb koji se nalazi na robotu), a zatim kliknite odgovarajući gumb na robotu ili bilo koji g] Automatsko čišćenje:...
- Seite 39 * Nakon što robot završi svoj rad, poželjno je da ga ne isključujete u cjelini, kako bi ga držali 1. Prije nego što postavite filtarski zaslon, provjerite jesu suhi zaslon filtra visoke učinkovitos- u stanju spremnosti, da bi bio u mogućnosti brzo da obavlja svoju funkciju prilikom ti i glavni zaslon filtra.
-
Seite 40: Upute Za Ugradnju
"Radni režim za čišćenje jedne sobe" (ili) "Radni režim za čišćenje kutova" (ili) „Punjenje". Korak 3: Otvorite aplikaciju "V-TAC Smart Light" i kliknite na prijavu, da biste registrirali novi Odaberite "Intenzitet čišćenja" da biste postavili postavku namijenjenu za određivanje snage profil. - Seite 41 Pode iniciar vários modos de limpeza através do robô, * Depois que o robô terminar seu trabalho, recomenda-se não desligá-lo, mas mantê-lo em controlo remoto ou V-TAC Smart Light App. estado de carga, a fim de melhor executar da próxima vez.
- Seite 42 MANUTENÇÃO - TANQUE DE ÁGUA E ESFREGÃO Etapa 3: Abra o aplicativo V-TAC Smart Light e toque em registar para criar uma nova conta. Se já tem uma conta existente, por favor, prossiga para fazer o login. (Ver figura 31) 1.
- Seite 43 (Ver figura 33). Uma vez feito isso, será redirecionado para a página inicial quarta, etc.) e horário. (Ver figura 42, figura 43 e figura 44) do V-TAC Smart Light. 3. Modo de repouso / dormir / pausa: Etapa 6: Toque em "Adicionar dispositivo"...
-
Seite 44: Manual Control
Puede iniciar varios modos de limpieza a través de Robot, control remoto o de robot) durante un tiempo prolongado y la luz indicadora del robot se apagará para indicar V-TAC Smart Light App. que la máquina se ha apagado. - Seite 45 Antes de la configuración de la programación de la hora, primero debe usar el botón Nota: para configurar el reloj del robot. Presione el botón y luego presione la tecla para establecer 1. Antes de instalar la pantalla del filtro, asegúrese de que la pantalla del filtro de alta la hora del Robot, cuando haya seleccionado la hora presione la tecla para completar la eficiencia y la pantalla del filtro primario estén secos.
- Seite 46 Paso 11: Ahora puedes comenzar a controlar tu dispositivo con la aplicación. Toque el nombre del dispositivo en la página de inicio para ingresar los controles y las funciones del Paso 2: Escanee el código QR dado o descargue “V-TAC Smart Light” de la App Store (iOS) dispositivo. (Ver imagen 40) o Google Play Store (Android).
- Seite 47 A Robot-ot felébresztheti a rajta található Start / Szünet gomb (Robot key) megnyomásával, választhat. Ön különböző tisztitási módot indithat el a Robot-on, a távvezérlő-n vagy a majd kattintson a Robot key-re vagy a távvezérlőn és az alkalmazáson lévő bármelyik V-TAC Smart Light Applikáción keresztül. gombra, hogy újraindítsa a Robotot. Kikapcsolás: Miután a robot leállt, hosszan nyomja meg a Roboton a Start / Szünet gombot...
- Seite 48 FUNKCIÓ – ÜTEMEZÉS (A ROBOT INDITÁSA AZ ELŐRE J. Zárja le a porkonténer fedelét, és szerelje fel a porkonténert a Robot-ra Megjegyzés: Amikor a készüléket tisztítja ne engedje, hogy víz kerüljön bele a ventilator BEPROGRAMOZOTT IDŐPONTBAN - AZ U.N. KÉSLELTETETT térségébe.
- Seite 49 UTASITÁSOK AZ APPLIKÁCIÓ LETELEPITÉSÉHEZ 12. lépés: Módok és Funkciók 1. Tisztítási módok: A tisztítási mód elindításáhóz érintse meg az „Automatikus üzemmód” (vagy) „Rögzítési pont üzemmód” (vagy) „Egyágyas szoba üzemmód” (vagy) „Él üzemmód” 1. lépés: Kapcsolja az ON (BE) gombot a készüléken (vagy) „Töltési üzemmód”...
- Seite 50 È possibile avviare varie modalità di pulizia tramite il robot, il telecomando o robot premendo il tasto di avvio/pausa (tasto robot) sul dispositivo, quindi fare clic sul tasto l’applicazione della V-TAC “Smart Light”. del robot o sul qualsiasi tasto del telecomando e sull’applicazione per riavviare.
- Seite 51 FUNZIONE – IMPOSTAZIONE DELLA PROGRAMMAZIONE I. Sostituire la schermata del filtro principale e la schermata del filtro ad alta efficienza nella scatola della polvere. TEMPORALE/ORARIO Nota: Definire una programmazione temporale/orario Premere il pulsante del telecomando per 1. Prima di installare la schermata del filtro, assicurarsi che la schermata del filtro ad alta impostare la programmazione temporale/orario del robot.
- Seite 52 (ad esempio: lunedì, martedì, Passaggio 3: Aprire l’applicazione Smart Light della V-TAC e fare clic su registrati per creare mercoledì, ecc.) e determinate ore (Si prega di fare riferimento alla Figura 42, Figura 43 e un nuovo profilo.
- Seite 53 διαφορετική λειτουργία καθαρισμού από το ρομπότ, από το τηλεχειρισμό ή από την μπορείτε να ξυπνήσετε το ρομπότ, πατώντας το πλήκτρο ξεκινήματος/παύσης (πλήκτρο Εφαρεμογή “Smart Light” του V-TAC. ρομπότ) στη συσκευή, μετά πατήστε στο πλήκτρο του ρομπότ ή στο οποιοδήποτε πλήκτρο...
- Seite 54 *Αφού το ρομπότ σταματήσει να λειτουργήσει, συνιστάται να μην το σβήσετε, έτσι που να το Παρατήρηση: διατηρείτε φορτισμένο, για να είναι σε θέση να πραγματοποιεί τη λειτουργία του καλύτερα. 1. Πριν να εγκαταστήσετε την οθόνη φίλτρου, βεβαιωθείτε ότι η οθόνη του φίλτρου υψηλής ΛΕΙΤΟΥΡΓΙΑ...
- Seite 55 Βήμα 1: Ενεργοποιήστε το κουμπί φόρτισης της συσκευής. συνδεθείτε στη διεπαφή των ρυθμίσεων, που σας επιτρέπει να ορίσετε καθαρισμό σε Βήμα 2: Κάντε σάρωση του QR κώδικα ή κατεβάστε το „V-TAC Smart Light” από το συγκεκριμένες ημέρες (για παράδειγμα: τη Δευτέρα, την Τρίτη, την Τετάρτη κλπ.) και...
- Seite 56 Można uruchomić inny tryb sprzątania na samym pauza (klawisz na robocie) na samym urządzeniu, a następnie naciśnij przycisk na robocie robocie, na pilocie zdalnego sterowania lub za pomocą aplikacji „Smart Light” V-TAC. lub dowolny klawisz na pilocie zdalnego sterowania albo w aplikacji w celu ponownego uruchomienia robota.
- Seite 57 FUNKCJA - USTAWIANIE HARMONOGRAMU PRACY 2. Nie narażaj filtr o wysokiej wydajności i podstawowe sitko na promienie słońca. Postaw pokrywę pojemnika na kurz i zamontuj pojemnik na kurz na robocie Uwaga: Nie dopuść do spłynięcia wody do portu wentylatora podczas sprzątania. Zdefiniowanie harmonogramu pracy Naciśnij przycisk na pilocie zdalnego sterowania, aby ustawić...
- Seite 58 Krok 1: Włącz przycisk zasilania urządzenia. (lub) „Tryb ładowania”. Wybierz „Intensywność sprzątania”, aby ustawić poziom siły ssącej Krok 2: Zeskanuj wskazany kod QR lub możesz pobrać aplikację "V-TAC Smart Light" ze (patrz Rysunek 41). sklepu aplikacji App Store (iOS) lub Google Play (Android).
- Seite 59 – prin Aplicaţia “Smart Light” a automat va intra în regim de adormire (Se vor deconecta luminile robotului). Puteţi deştepta V-TAC. robotul dacă apăsaţi tasta start/pauză (tastă a robotului) de pe dispozitiv, iar apoi faceţi un click pe tasta robotului sau pe oricare tastă...
- Seite 60 Deconectarea: Când robotul este oprit, apăsaţi tasta start/pauză (tastă a robotului), şi Observaţie: ţineţi-o apăsată mai mult timp, până la conectarea indicatorului luminos al robotului care 1. Înainte să instalaţi ecranul filtrului, asiguraţi-vă că ecranul filtrului de mare eficienţă şi indică...
-
Seite 61: Instrucţiuni De Instalare
2. Determinarea graficului de lucru: Apăsaţi pe funcţia „Graficul” (vezi Figura 41) ca să Pasul 3: Deschideţi aplicaţia Smart Light a V-TAC şi apăsaţi pe butonul de înregistrare ca să accesaţi interfaţa setărilor, ceea ce vă va permite să programaţi orele de lucru pentru vă... - Seite 62 V závislosti na různých potřebách čištění má tento výrobek různé režimy čištění, ze kterých v nabytém stavu, aby mohl příště plnit svou funkci lépe. si můžete vybrat. Můžete začít jiný řežím čištění od robota, dálkového ovládání anebo aplikaci „Smart Light“ V-TAC. URČENÍ ČASOVÉHO HARMONOGRAMU AUTOMATICKÉ ČIŠTĚNÍ: Stiskněte tlačítko...
- Seite 63 1. Před instalací filtru se ujistěte, že jsou obrazovka vysoce výkonného filtru a sítka hlavního filtru suché. Krok 2: Skenujte zadaný QR kód anebo si stáhněte "V-TAC Smart Light" z App Store (pro 2. Nevystavujte filtr s vysokou účinností a hlavní filtr slunečnímu záření.
- Seite 64 (viz obr. 42, obr. 43 a obr. 44). registrace. (viz Obrázek 33). Jakmile budete mluvit, budete přesměrováni na domovskou stránku "V-TAC Smart Light". 3. Režim pozastavení/zaspání/pauzy: Krok 6: Klikněte na "Přidat zařízení" anebo na symbol+. Ujistěte se, že zařízení je zapnuto.