Inhaltsverzeichnis
Werbung
Verfügbare Sprachen
Verfügbare Sprachen
Quicklinks
Declaration of conformity to the R&TTE directives 99/5/EC
Manufacturer: ATRAL S.A., rue du Pré de l'Orme, F-38926 Crolles Cedex, France
Atral radio equipments are in conformity with the following european directives:
- R and TTE Directive 99/5/EC,
- Electromagnetic Compatibility Directive 89/336/EEC,
- Low Voltage Directive 73/23/EEC,
and the harmonised European Standards notified under these directives:
- EN 300 220-3 (Spectrum Respect),
- EN 301489-1 (EMC Conformity),
- EN 55022 and EN 55024,
- EN 60950 (Electrical Security).
These products can be used in all the EU and EEA countries and Switzerland.
Crolles, January the 14th 2003
DETECTEUR POUR VOLET ROULANT
RIVELATORE PER AVVOLGIBILI
MELDER FÜR ROLLADENSICHERUNG
DETECTOR VOOR ROLLUIKEN
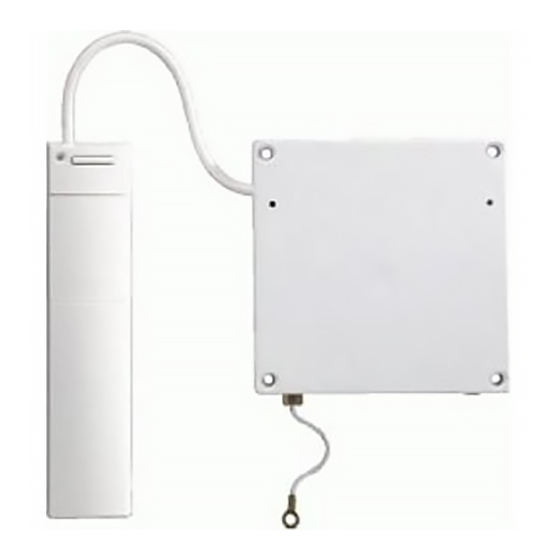
SLIDING SHUTTER DETECTOR
VR200
F
2
I
7
D
13
NL
19
GB
25
Werbung
Inhaltsverzeichnis

Inhaltszusammenfassung für diagral VR200
- Seite 1 - EN 300 220-3 (Spectrum Respect), - EN 301489-1 (EMC Conformity), - EN 55022 and EN 55024, - EN 60950 (Electrical Security). These products can be used in all the EU and EEA countries and Switzerland. Crolles, January the 14th 2003 VR200...
-
Seite 2: Caractéristiques
(risque de section- ● dio, l'information à votre centrale. nement du cordon). Ce détecteur n'est compatible qu'avec les centrales DIAGRAL TwinPass ® MATÉRIEL NÉCESSAIRE CARACTÉRISTIQUES Un petit tournevis plat fourni. - Seite 3 Vous allez programmer par appuis successifs (sur les touches 0 et 1) votre code Appuyez brièvement sur la touche test de votre détecteur et vérifiez que votre cen- radio personnalisé, puis la zone affectée à votre détecteur. trale émet un message sonore en allumant le voyant intrusion, zone 1 ou énonce le message vocal “INTRUSION GROUPE X IMMÉDIAT /TEMPORISÉ”.
-
Seite 4: Funzionamento
Appuyez longuement (durée approximative : 7 s) sur la touche test du détecteur jus- ■ Il rivelatore VR200 sorveglia in permanenza gli avvolgibili che protegge. Rileva il qu’à extinction du voyant. Il va alors clignoter 1 à 4 fois selon la zone programmée. -
Seite 5: Precauzioni Per L'installazione
PRECAUZIONI PER L’INSTALLAZIONE FIG. C Apertura trasmettitore Aprite il contenitore del rivelatore premendo verso l’interno, con un dito o una mone- FIG. L Questo rivelatore è studiato sia per tapparelle tradizionali (con il cas- ta, i perno d’incastro. sonetto all’interno dei locali) che per tapparelle con il cassonetto posizionato all’e- FIG. - Seite 6 Programmazione del canale (Fig. Programmate il codice impianto tramite i due pulsanti “0” e “1” utilizzando la ● Il canale programmato di fabbrica sul rivelatore d’apertura è “Canale 1”. Potrete seguente procedura: mantenere questa programmazione o programmare il rivelatore su di un canale dif- Fine della programmazione Inizio della programmazione Programmazione...
- Seite 7 Esempio: La spia luminosa lampeggia 3 volte se il rivelatore è unverzüglich die Information per Funk an Ihre Alarmzentrale. stato programmato sul canale 3. Se il rivelatore non risponde come previsto, ripetete le operazioni di programmazione. Dieser Melder ist nur mit den DIAGRAL-Alarmzentralen TwinPass ® kompatibel. FIG. I Fissaggio del sensore Il sensore dispone di 4 fori di fissaggio al cassonetto.
-
Seite 8: Erforderliche Geräte
■ Platzieren Sie den Melder nicht wie folgt: Durch die aufeinander folgende Betätigung der Tasten „0” und „1” programmieren Sie außerhalb des Hauses, Ihren personalisierten Funkcode und anschließend die Ihrem Melder zugewiesene Zone. ● in einem Metallkasten, Programmierung des personalisierten Funkcodes (Abb. - Seite 9 Drücken Sie kurz die Testtaste Ihres Melders und stellen Sie sicher, dass Ihre und dann auf 0 und beenden Sie die Programmierung durch gleichzeitige Alarmzentrale beim Einschalten der Einbruchanzeige für Zone 1 eine Tonmeldung Betätigung des Programmierendes. sendet oder sogar eine Sprachmitteilung „EINBRUCH ZONE 1”...
- Seite 10 5 cm van het rolluik en zendt met het touwtje door één van de glijsporen van het rolluik (risico dat het touwtje ● deze informatie onmiddellijk via een radiosignaal naar uw centrale. doorslijt). Deze detector is enkel compatibel met DIAGRAL TwinPass centrales. ® BENODIGD MATERIAAL KENMERKEN De kleine, meegeleverde platte schroevendraaier.
- Seite 11 Het programmeren gebeurt door eerst de persoonlijke radiocode en vervolgens de Druk even op de testtoets van de detector en controleer of uw centrale een geluidssi- bij uw detector horende zone (met behulp van de 0 en 1 toetsen) in te tikken. gnaal uitzendt waarbij het lampje gaat branden voor indringers zone 1 of de bood- Programmeren van de persoonlijke radiocode (Fig.
-
Seite 12: How It Works
Voorbeeld: het lampje knippert 3 maal indien u zone 3 gepro- radio, to the base unit. grammeerd hebt. Indien uw detector niet reageert zoals voorzien, herhaal dan de This detector is only compatible with DIAGRAL TwinPass base units. ®... -
Seite 13: You Will Need
■ Do not install: You will now program your personalised radio code by entering a sequence of key presses on the keypad (using the 0 and 1 keys) then the zone assigned to the detector. outside the house, ● • Programming the personalised radio code (Fig. - Seite 14 Briefly press the detector test button and check that the base unit gives an audible Testing the selected zone (Fig. message and that the zone 1 intruder indicator light comes on, or that it speaks the Hold down (for about 7 seconds) the detector test button until the indicator light goes message “INTRUDER, ZONE 1”.
- Seite 15 € 50744540001 07/95...
- Seite 16 gris grigio vert grau verde grijs grün grey groen green rouge/rosso rot/rood/red...
