Herunterladen Inhalt Inhalt Diese Seite drucken
Inhaltsverzeichnis

Werbung

Verfügbare Sprachen

Verfügbare Sprachen

GND
LM.125 / .250
G
N
D
MANUAL
HANDLEIDING
ANLEITUNG

Werbung

Inhaltsverzeichnis
loading

Inhaltszusammenfassung für Fancom LM.125

  • Seite 1 LM.125 / .250 MANUAL HANDLEIDING ANLEITUNG...
  • Seite 2 N.B.: The original, authentic version of this manual is the English version produced by Fancom B.V. or one of its daughter companies (referred to further as Fancom). Any modifications introduced to this manual by third parties have neither been checked nor approved by Fancom. Modifications are taken by Fancom to include translations into languages other than English and the insertion and/or deletion of text and/or illustrations to/from the original contents.
  • Seite 3: Inhaltsverzeichnis

    Table of contents General introduction ..........................1 How to use this manual ........................1 Fancom helpdesk ........................... 1 Safety warnings ............................2 Installing the LM ............................3 Mounting the actuator ........................3 Mounting the cable reel ........................4 Mounting the steel wire on the cable reel ..................4 Mounting the CE protection cover for the cable reel ...............
  • Seite 4: General Introduction

    The control computer and this manual use a decimal point in values. For example: a weight is shown as 1.5 kg (not as 1,5 kg). Fancom helpdesk For any questions and support, please contact the local Fancom Sales & Service Center.
  • Seite 5: Safety Warnings

    Safety warnings Do not touch any moving parts of the actuator! Fancom takes no responsibility for any possible damage as a result of incorrect mounting and a non- or partially functioning installation. If a product is modified in any way, the right of guarantee and support from Fancom is forfeited.
  • Seite 6: Installing The Lm

    Installing the LM Install the LM and associated components as follows: Mount the actuator (see 3.1). Mount the cable reel (see 3.2). Mount the steel wire on the cable reel (see 3.3). Mount the CE protection cover for the cable reel (see 3.4). Mount the pipe/chain coupling (see 3.5).
  • Seite 7: Mounting The Cable Reel

    Mounting the cable reel Mounting the steel wire on the cable reel Ø 50 mm Feed the cable through the opening. Place the retainer clamp at the end of the steel cable. Wind at least 2 strokes before loading the cable.
  • Seite 8: Mounting The Ce Protection Cover For The Cable Reel

    Ø 80/106 mm Feed the cable through the opening Insert the cable into the blind hole and fix using the hexagonal socket screw. Wind at least 2 strokes before loading the cable. Mounting the CE protection cover for the cable reel If the actuator is hung within reach of people or animals (less than 2.7m above the floor), a CE protection cover should be mounted.
  • Seite 9: Mounting The Pipe/Chain Coupling

    Mounting the pipe/chain coupling Mounting the belt drum Mounting the belt on the belt drum...
  • Seite 10: Mounting The Ce Protection Cover On The Belt Drum

    Mounting the CE protection cover on the belt drum Connecting the LM Disconnect power before connecting the cables. Ensure the actuator is grounded correctly. Observe the regulations of the electricity company Limit the length of signal cables as much as possible. Avoid crossing low/high voltage cables. For electrical connection of the LM refer to the following diagrams in the appendix.
  • Seite 11: Setting The Stroke Length

    LM three phase Open the lid of the reduction gear unit (reductor). Change over the OPEN and CLOSE connection (terminals 3 and 4) of the limit switches. Change over the connections of the inlet position feedback (terminals 2 and 4). Close the lid of the reduction gear unit.
  • Seite 12: Testing The Lm

    Mounting pignon on motor axle The limit switch set must be moved so the worm wheel can be mounted. Unscrew the M4 screw at the rear (~5mm). The screw at the front does not need to be unscrewed. The limit switch set slides under the front screw head. Screw at the rear Screw at the front The limit switch set has alignment locks (see figure below).
  • Seite 13: Using The Lm

    (Figure below). Manual operation with battry drilling machine Maintaining the LM Always disconnect power before cleaning the actuator. Fancom advises cleaning the LM actuator regularly, preferably using an air compressor. This prevents imbalance and overheating.
  • Seite 14: Adjusting The Lm

    Adjusting the LM Before starting to adjust the limit switches, ensure that all electrical connections have been carried out correctly. Open the housing. Ensure that the cam discs (1 and 4) are loose on the, so that the discs can be turned. Place the manual switch in position ().
  • Seite 15 Limit switch set Nbr. Description Cam disc CLOSED position Screw to tighten cam disc CLOSED position Worm wheel for fine adjustment CLOSED position Cam disc OPEN position Screw to tighten cam disc OPEN position Worm wheel for fine adjustment OPEN position Potentiometer setting Roller on switch arm CLOSED position Limit switch for CLOSED position...
  • Seite 16 Display Status/action Signal too high, turn potentiometer to the left. Signal too low, turn potentiometer to the right. Signal is correct, proceed with next step.
  • Seite 17: Connection Diagrams

    Connection diagrams Damper position feedback Connection LM 1 Phase...
  • Seite 18: Control Connection Lm 3 Phase Y

    Control connection LM 3 Phase Y Motor connection LM 3 Phase Y Control connection LM 3 Phase Δ...
  • Seite 19: Motor Connection Lm 3 Phase Δ

    Motor connection LM 3 Phase Δ Dimensions (mm)
  • Seite 20: Mounting The Lm-Mounting Kit

    Mounting the LM-mounting kit...
  • Seite 21: Technical Specifications

    Running speed at 60 Hz 2.4 RPM Torque LM.125 125 Nm Torque LM.250 250 Nm Tensile force LM.125, cable reel Ø50 mm. 450 kg Tensile force LM.125, belt drum Ø55 mm. 450 kg Tensile force LM.125, cable reel Ø80 mm. 300 kg Tensile force LM.125, belt drum Ø80 mm.
  • Seite 22 Oil (synthetic) Type Shell Tivela WB 320 Amount LM.125 0.4 l Amount LM.250 1.2 l Accessoires Cable reel (only for LM.125) Ø50mm Cable reel Ø80mm Cable reel Ø160 mm Belt drum (only for LM.125) Ø 55mm Belt drum Ø 80mm Belt drum Ø...
  • Seite 23: Appendix: Eg Declaration Of Conformity

    Appendix: EG declaration of conformity Manufacturer: Fancom B.V. Address: Industrieterrein 34 City: Panningen (the Netherlands) LM.125/LM.250 Hereby declares that the: Complies with the provisions of the: Low voltage directive 2006/95/EC according to NEN-EN-IEC 60335-01: 2012 Machine directive 2006/42/EC EMC directive 2004/108/EC...
  • Seite 24 N.B.: De originele, authentieke versie van deze handleiding is de door Fancom B.V. of door een van haar dochterondernemingen (verder aangeduid als Fancom) geproduceerde Engelstalige versie. Achteraf door derden aangebrachte wijzigingen in deze handleiding zijn door Fancom noch gecontroleerd, noch goedgekeurd. Onder wijzigingen verstaat Fancom o.a.
  • Seite 25 Inhoudsopgave Algemene inleiding ............................. 1 Hoe gebruikt u deze handleiding ....................1 Fancom-helpdesk ........................... 1 Veiligheidsinstructies ..........................2 De LM installeren ............................3 De motor monteren ......................... 3 De dwingrol monteren........................4 De kabel op de dwingrol monteren ....................4 De CE-kap op de dwingrol monteren ....................
  • Seite 26: Algemene Inleiding

    Op de regelcomputer en in deze handleiding wordt de punt gebruikt als decimaal scheidingsteken. Gewichten worden bijvoorbeeld weergegeven als 1.5 kg (niet als 1,5 kg). Fancom-helpdesk Voor ondersteuning en antwoord op eventuele vragen kunt u het lokale Fancom Sales & Service Centre raadplegen.
  • Seite 27: Veiligheidsinstructies

    Veiligheidsinstructies Raak geen bewegende delen van de aandrijfmotor aan! U kunt Fancom niet aansprakelijk stellen voor eventuele schade als gevolg van verkeerde montage en/of het niet of gedeeltelijk functioneren van de gehele installatie. Wanneer het product in welke vorm of uitvoering dan ook wordt gewijzigd en/of bewerkt, vervalt ieder recht op garantie en ondersteuning van Fancom.
  • Seite 28: De Lm Installeren

    De LM installeren Installeer de LM en bijbehorende onderdelen als volgt: Monteer de motor (zie 3.1) Monteer de dwingrol (zie 3.2) Monteer de kabel op de dwingrol (zie 3.3) Monteer de CE-kap op de dwingrol (zie 3.4) Monteer de buis/kettingkoppeling (zie 3.5) Monteer de bandtrommel (zie 3.6) Monteer de band op de bandtrommel (zie 3.7) Monteer de CE-kap op de bandtrommel (zie 3.8)
  • Seite 29: De Dwingrol Monteren

    De dwingrol monteren De kabel op de dwingrol monteren Ø 50 mm Staalkabel door gat in de flens halen. Plaats de borgklem op het uitende van de staalkabel. Kabel minimaal 2 slagen wikkelen voordat deze belast mag worden.
  • Seite 30: De Ce-Kap Op De Dwingrol Monteren

    Ø 80/106 mm Kabel door doorgaande gat halen. Kabel in blind gat steken en met binnenzeskantschroef vastzetten. Kabel minimaal 2 slagen wikkelen voordat deze belast mag worden. De CE-kap op de dwingrol monteren Monteer een CE-kap bij montage op een hoogte lager dan 2.7 m boven de vloer (binnen bereik van mens of dier).
  • Seite 31: De Buis/Kettingkoppeling Monteren

    De buis/kettingkoppeling monteren De bandtrommel monteren De band op de bandtrommel monteren...
  • Seite 32: De Ce-Kap Op De Bandtrommel Monteren

    Houdt u zich verder aan de regels van het energiebedrijf. Beperk de lengte van signaalkabels zoveel mogelijk. Vermijd, indien mogelijk, kruisingen met zwak-/sterkstroomkabels. Voor de elektrische aansluiting van de LM.125 en LM.250 aandrijfmotor, zie de schema’s uit de bijlage: • Aansluiting LM.125 / LM.250, eenfase •...
  • Seite 33: De Slaglengten Instellen

    De slaglengte is afhankelijk van het wel/niet plaatsen van het bijgeleverde wormwiel. Op de LM aandrijfmotor kunt u twee verschillende slaglengten (zie technische gegevens) instellen (Figuur onder). De standaard fabrieksinstelling van de LM.125-250 is zonder wormwiel. Zonder wormwiel 3.0-12.0 rev...
  • Seite 34: De Lm Testen

    Wormwiel op motoras plaatsen Om het bijgeleverde wormwiel te plaatsen dient de eindschakelaarset verplaatst te worden. Draai hiervoor de M4 schroef aan de achterzijde los (~5mm). De schroef aan de voorzijde behoeft niet losgedraaid te worden. De eindschakelaarset schuift onder de voorste schroefkop door. Schroef achterzijde Schroef voorzijde De eindschakelaarset is voorzien van positioneernokken (zie onderstaand figuur).
  • Seite 35: De Lm Gebruiken

    Handbediening met accuboormachine De LM onderhouden Schakel altijd de spanning uit, voordat u de aandrijfmotor gaat schoonblazen. Fancom raadt u aan om de LM-aandrijfmotor regelmatig schoon te blazen, bij voorkeur met behulp van een luchtcompressor. Dit voorkomt onbalans en oververhitting.
  • Seite 36: De Lm Eindschakelaars Afstellen

    De LM eindschakelaars afstellen Controleer of de elektrische aansluitingen correct zijn, voordat u de eindschakelaars gaat afstellen. Open de behuizing. Zorg ervoor dat de nokkenschijven (1 en 4) los op de as zitten, zodat u de schijven kunt verdraaien. Zet de handschakelaar op stand (). Laat de inlaatklep volledig sluiten t.b.v. het afregelen van de “DICHT” stand.
  • Seite 37 Eindschakelaarset Omschrijving Nokschijf dischtstand Schroef tbv fixatie nokschijf dichtstand Wormwiel tbv fijnafstelling dichtstand Nokschijf openstand Schroef tbv fixatie nokschijf openstand Wormwiel tbv fijnafstelling openstand Potmeter instelling Rol op schakelaararm dichtstand Eindschakelaar tbv dichtstand Eindschakelaar tbv openstand Rol op schakelaararm openstand...
  • Seite 38 Display Status/actie Signaal te hoog, draai potmeter verder naar links. Signaal te laag, draai potmeter verder naar rechts. Signaal O.K., ga verder met de volgende stap.
  • Seite 39: Aansluitschema's

    Aansluitschema’s Klepstandterugmelding Aansluiting 1 fase...
  • Seite 40: Aansluiting Sturing Lm 3 Fase Y

    Aansluiting sturing LM 3 fase Y Aansluiting motor LM 3 fase Y Aansluiting sturing LM 3 fase Δ...
  • Seite 41: Aansluiting Motor Lm 3 Fase Δ

    Aansluiting motor LM 3 fase Δ Afmetingen (mm)
  • Seite 42: Montage Lm-Bevestigingsset

    Montage LM-bevestigingsset...
  • Seite 43: Technische Specificaties

    Loopsnelheid bij 60 Hz 2.4 omw./min. Koppel LM.125 125 Nm Koppel LM.250 250 Nm Trekkracht LM.125, dwingrol Ø50 mm. 450 kg Trekkracht LM.125, bandtrommel Ø55 mm. 450 kg Trekkracht LM.125, dwingrol Ø80 mm. 300 kg Trekkracht LM.125, bandtrommel Ø80 mm.
  • Seite 44 Olie (synthetisch) Type Shell Tivela WB 320 Hoeveelheid LM.125 0.4 l Hoeveelheid LM.250 1.2 l Accessoires Dwingrol (alleen tbv LM.125) Ø50mm Dwingrol Ø80mm Dwingrol Ø160 mm Bandtrommel (alleen tbv LM.125) Ø 55mm Bandtrommel Ø 80mm Bandtrommel Ø 100mm Buis/kettingkoppeling Ø1 inch...
  • Seite 45: Bijlage: Eg-Verklaring Van Overeenstemming

    Bijlage: EG-verklaring van overeenstemming Fabrikant: Fancom B.V. Adres: Industrieterrein 34 Plaats: Panningen (the Netherlands) LM.125 / LM.250 Verklaart hiermee dat de: Voldoet aan de bepalingen van de: De Laagspanningsrichtlijn 2006/95/EC conform NEN-EN-IEC 61010-1: 2010 Machinerichtlijn 2006/42/EC EMC-richtlijn 2004/108/EG Emissienorm conform NEN-EN-IEC 61000-6-3: 2007...
  • Seite 46 Änderungen in dieser Anleitung wurden von Fancom weder geprüft noch genehmigt. Unter Änderungen versteht Fancom u. a. das Übersetzen in eine andere Sprache als das Englische sowie das Ergänzen und/oder Entfernen von Texten und/oder Abbildungen aus dem Original. Fancom übernimmt keinerlei Haftung für Schäden jeglicher Art, Verletzungen und Garantieforderungen sowie andere Forderungen im Zusammenhang mit derartigen Änderungen, soweit diese Änderungen dazu führen, dass der Inhalt von der von Fancom erstellten englischen...
  • Seite 47 Inhalt Allgemeine Einleitung ..........................1 Zur Verwendung dieses Handbuchs ....................1 Fancom Helpdesk ........................... 1 Sicherheitsvorschriften ..........................2 Installation des LM ............................. 3 Den Motor montieren ........................3 Die Winderolle montieren ....................... 4 Den Stahlkabel montieren ......................4 Die CE-Schutzkappe auf die Winderolle montieren ................ 5 Die Rohr-/Kettenkupplung montieren....................
  • Seite 48: Allgemeine Einleitung

    Im Steuercomputer und in dieser Bedienungsanleitung werden Dezimalzeichen in Werten angezeigt. Beispiel: ein Gewicht wird als 1.5 kg angezeigt (nicht als 1,5 kg). Fancom Helpdesk Wenden Sie sich bei Fragen und für Hilfe an das Fancom Sales & Service Centre in Ihrer Nähe.
  • Seite 49: Sicherheitsvorschriften

    Sicherheitsvorschriften Keine drehenden Teile des Antriebsmotors berühren! Fancom kann nicht verantwortlich gemacht werden für eventuelle Schäden als Folge von falscher Montage und/oder das nicht oder zeitweise Funktionieren der gesamten Anlage. Werden am Produkt Veränderungen jeglicher Art vorgenommen, verfällt jedes Recht auf Garantie und Unterstützung durch Fancom.
  • Seite 50: Installation Des Lm

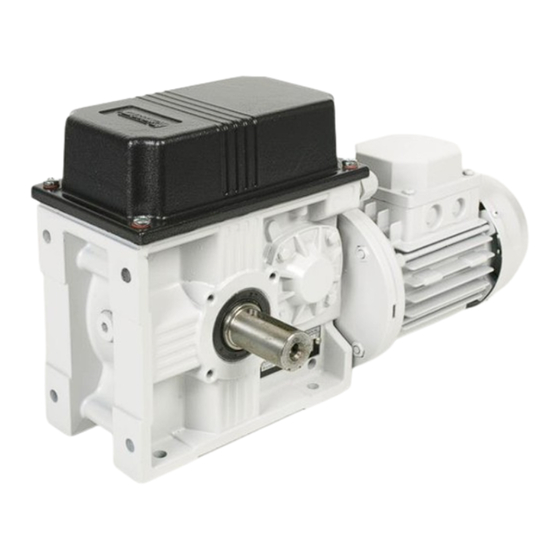
    Installation des LM Installieren Sie die LM und zugehörige Komponenten wie folgt: Montieren Sie den Motor (siehe 3.1). Montieren Sie die Winderolle (siehe 3.2). Montieren Sie den Stahlkabel (siehe 3.3). Montieren Sie die CE-Schutzkappe auf die Winderolle (siehe 3.4). Montieren Sie die Rohr-/Kettenkupplung (siehe 3.5). Montieren Sie die Bandtrommel (siehe 3.6).
  • Seite 51: Die Winderolle Montieren

    Die Winderolle montieren Den Stahlkabel montieren Ø 50 mm Holen Sie das Kabel durch das Durchführungsloch. Bringen Sie die Sicherungsklemme am Ende des Stahlkabels an. Wickeln Sie mindestens 2 Schläge, bevor das Kabel belastet werden darf.
  • Seite 52: Die Ce-Schutzkappe Auf Die Winderolle Montieren

    Ø 80/106 mm Holen Sie das Kabel durch das Durchführungsloch. Bringen Sie die Sicherungsklemme am Ende des Stahlkabels an. Wickeln Sie mindestens 2 Schläge, bevor das Kabel belastet werden darf. Die CE-Schutzkappe auf die Winderolle montieren Befindet sich der Antriebsmotor in Reichweite von Mensch oder Tier (niedriger als 2.7m über dem Fußboden), dann müssen Sie eine CE-Schutzkappe montieren.
  • Seite 53: Die Rohr-/Kettenkupplung Montieren

    Die Rohr-/Kettenkupplung montieren Die Bandtrommel montieren Das Band auf die Bandtrommel montieren...
  • Seite 54: Die Ce-Schutzkappe Auf Die Bandtrommel Montieren

    Im Weiteren die Vorschriften des Energiebetriebes beachten. Die Länge von Signalkabeln so weit wie möglich beschränken. Kreuzungen von Schwach- und Starkstromkabeln vermeiden. Für den elektrischen Anschluss des LM.125 und LM.250 Antriebsmotors verweist Fancom auf die folgenden Schemas im Anhang: •...
  • Seite 55: Einstellen Der Hublänge

    Schließen Sie den Deckel des Getriebekastens (Reduktors). LM Dreiphasen Öffnen Sie den Deckel des Getriebekastens (Reduktors). Vertauschen Sie die OFFEN und ZU Anschlüsse (Klemmen 3 und 4) des Endschalters. Vertauschen Sie die Anschlüsse der Klappenstandrückmeldung (Klemmen 2 und 4). Schließen Sie den Deckel des Getriebekastens (Reduktors). Vertauschen Sie die zwei Phasen, z.B.
  • Seite 56: Den Lm Testen

    Anbringung des Schneckenrads auf der Motorachse Zur Anbringung des mitgelieferten Schneckenrads muss der Endschaltersatz verschoben werden. Dazu die Schraube M4 an der Rückseite lösen (~5 mm). Die Schraube vorn braucht nicht gelöst zu werden. Der Endschaltersatz gleitet unter dem vorderen Schraubenkopf hindurch. Schraube hinten Schraube vorn Der Endschaltersatz ist mit Positioniernocken versehen (siehe Abbildung unten).
  • Seite 57: Verwendung Des Lm

    6 mm Sechskantstift. Den Stift in den Bohrkopf der Akkubohrmaschine bringen und danach in die Rückseite des Motors (Abb. unten). Handbedienung mit Akkubohrmaschine Wartung des LM Vor dem Reinigen des Antriebsmotors immer die Spannung ausschalten. Fancom empfiehlt Ihnen, den LM-Antriebsmotor regelmäßig zu reinigen, vorzugsweise mit Hilfe von Pressluft. Das verhindert Unwucht und Überhitzung.
  • Seite 58: Einregeln Der Lm Endschalter

    Einregeln der LM Endschalter Überprüfen Sie vor dem Einregeln der Enschalter, ob die elektrischen Anschlüsse korrekt sind. Öffnen Sie das Gehäuse. Die Nockenscheiben (1 und 4) müssen lose auf der Achse sitzen, sodass sie verdreht werden können. Stellen Sie der Handschalter auf Position (). Einlassventil zum Einregeln der Position „GESCHLOSSEN“ vollständig schließen lassen.
  • Seite 59 Endschaltersatz Beschreibung Geschlossen-Position der Nockenscheibe Schraube zur Fixierung der Geschlossen-Position der Nockenscheibe Schneckenrad für Feineinstellung der Geschlossen-Position Offen-Position der Nockenscheibe Schraube zur Fixierung der Offen-Position der Nockenscheibe Schneckenrad für Feineinstellung der Offen-Position Einstellung Potentiometer Geschlossen-Position der Schaltarmrolle Endschalter für Geschlossen-Position Endschalter für Offen-Position Offen-Position der Schaltarmrolle...
  • Seite 60 Display Status/aktion Signal zu hoch, Potentiometer weiter nach links drehen. Signal zu niedrig, Potentiometer weiter nach rechts drehen. Signal O.K., weiter mit dem nächsten Schritt.
  • Seite 61: Anschlussschaltbild

    Anschlussschaltbild Klappenstandrückmeldung Anschluss LM 1~...
  • Seite 62: Anschluss Steuerung Lm 3~Y

    Anschluss Steuerung LM 3~Y Anschluss Motor LM 3~Y Anschluss Steuerung LM 3~ Δ...
  • Seite 63: Anschluss Motor Lm 3~ Δ

    Anschluss Motor LM 3~ Δ Abmessungen (mm)
  • Seite 64: Montage Lm-Befestigungs-Set

    Montage LM-Befestigungs-Set...
  • Seite 65: Technische Daten

    Laufgeschwindigkeit bei 60 Hz 2.4 Umdr./Min. Drehmoment LM.125 125 Nm Drehmoment LM.250 250 Nm Zugkraft LM.125, Windrolle Ø50 mm. 450 kg Zugkraft LM.125, Bandtrommel Ø55 mm. 450 kg Zugkraft LM.125, Windrolle Ø80 mm. 300 kg Zugkraft LM.125, Bandtrommel Ø80 mm.
  • Seite 66 Öl (synthetisch) Type Shell Tivela WB 320 Menge LM.125 0.4 l Menge LM.250 1.2 l Zubehör Winderolle (nur für LM.125) Ø50mm Winderolle Ø80mm Winderolle Ø160 mm Bandtrommel (nur für LM.125) Ø 55mm Bandtrommel Ø 80mm Bandtrommel Ø 100mm Rohrkettenkopplung Ø1 inch Gehäuse...
  • Seite 67: Anhang: Eg-Konformitätserklärung

    Anhang: EG-Konformitätserklärung Hersteller Fancom B.V. Anschrift: Industrieterrein 34 Ort: Panningen (The Netherlands) erklärt hiermit, dass der LM.125/LM.250 Die Bestimmungen erfüllt von: Niederspannungsrichtlinie 2006/95/EG gemäß NEN-EN-IEC 61010-1: 2010 Maschinenrichtlinie 2006/42/EG EMV-Richtlinie 2004/108/EG Emissionen gemäß NEN-EN-IEC 61000-6-3: 2007 Immunität gemäß NEN-EN-IEC 61000-6-2: 2005...

Diese Anleitung auch für:

Lm.250

Inhaltsverzeichnis