Herunterladen Diese Seite drucken
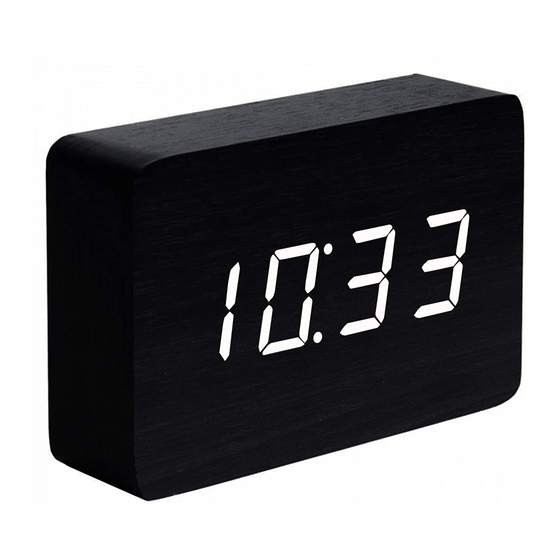
Gingko CLICK CLOCK Bedienungsanleitung

Gingko CLICK CLOCK Bedienungsanleitung

For the collections of brick,slab & wall
Vorschau ausblenden Andere Handbücher für CLICK CLOCK:

Werbung

Verfügbare Sprachen
  • DE

Verfügbare Sprachen

  • DEUTSCH, seite 5
TM
c li c k
clock
time at the click of your fingers
For the Collections of BRICK,SLAB
& WALL CLICK CLOCKS
G
Gingko
DESIGN -
QUALITY
- TIME

Werbung

loading

Inhaltszusammenfassung für Gingko CLICK CLOCK

  • Seite 1 For the Collections of BRICK,SLAB & WALL CLICK CLOCKS Gingko DESIGN - QUALITY - TIME...
  • Seite 2 1. Take out the product from the box and connect the DC charging adapter to the DC charging point on the back of the clock 2. Press and Hold Down the button to turn on the clock and the screen display should light up on the front.
  • Seite 3 : make sure you start setting the clock within 20 seconds after accessing to the setting mode or it will revert to the non setting mode; Each setting of the below can’t be skipped over, so if you would like to go back to the previous setting page if you made a mistke, you will have to restart again from the beginning by following the same instruction as below 1.
  • Seite 4 1. Press the button to access the alarm setting menu and the display screen will show which means the alarm is currently off. 2. To set your alarm time, press and hold down the button and the display screen will change to 8:00. Then press SET button and the alarm hour section will be flashing. 3.
  • Seite 5 1. Nehmen Sie das Produkt aus der Box und verbinden Sie den DC-Ladeadapter mit dem DC-Ladepunkt auf der Rückseite der Uhr 2. Halten Sie die -Taste gedrückt, um die Uhr einzuschalten, und die Bildschirmanzeige sollte auf der Vorderseite aufleuchten. 3. Wenn die Uhr aufgeladen wird, leuchtet die Ladeanzeige rot und wenn sie vollständig geladen ist, wird sie grün.
  • Seite 6 Wichtiger Hinweis : make sauer Sie starten die Uhr innerhalb von 20 Sekunden nach - Zugriff auf die Modus-Einstellung Einstellung oder es wird auf den nicht -Modus Einstellung zurück 1. Drücken Sie die Taste und halten Sie sie für 3 -5 Sekunden gedrückt, um den Einstellungsmodus zu öffnen;...
  • Seite 7 1. Drücken Sie auf die Taste , um das Menü für die Einstellung des Alarms öffnen; in der Anzeige erscheint , das heißt, dass der Alarm momentan ausgeschaltet ist (Standardeinstellung). 2. Um Ihre gewünschte Alarmzeit einzustellen, halten Sie die Taste gedrückt die Anzeige ändert sich in 8:00.
  • Seite 8 1. Sortez le produit de la boîte et connectez l'adaptateur de charge CC au point de charge CC situé au dos de l'horloge. 2. Appuyez sur le bouton et maintenez-le enfoncé pour allumer l'horloge et l'écran devrait s'allumer à l'avant. 3.
  • Seite 9 ( Avis important : assurez-vous que vous commencez à régler l'horloge dans les 20 secondes après avoir accédé au mode de réglage ou il reviendra au mode de réglage non) 1. Appuyer sur le bouton et le maintenir enfoncé pendant 3 à 5 secondes pour accéder au mode réglage, et l’affichage du chiffre de l’ANNÉE se met à...
  • Seite 10 1. Appuyer sur le bouton pour accéder au menu de réglage de l’alarme et l’écran indique , ce qui signifie que l’alarme est actuellement désactivée par défaut. 2. Pour régler l’heure de l’alarme, appuyer et maintenir enfoncé le bouton et l’écran passe à 8:00. Ensuite, appuyer sur le bouton SET et la section heure de l’alarme se met à...
  • Seite 11 1. Haal het product uit de doos en sluit de DC-laderadapter aan op het DC-oplaadpunt aan de achterkant van de klok 2. Houd de -knop ingedrukt om de klok in te schakelen en de schermweergave moet aan de voorzijde oplichten. 3.
  • Seite 12 ( Belangrijke opmerking : zorg ervoor dat u begint met het instellen van de klok binnen 20 seconden na het openen om de instelling modus of het zal terugkeren naar de non instelmodus) 1. Houd de SET knop 3-5 seconden ingedrukt om naar de instelmodus te gaan, het displaynummer JAAR zal knipperen.
  • Seite 13 1. Druk op de knop om naar het menu instellen alarm te gaan en het scherm zal weergeven, wat betekent dat het alarm momenteel uitgeschakeld is als standaard instelling. 2. Om uw wektijd in te stellen houdt u de knop ingedrukt en op het scherm zal 8:00 verschijnen.
  • Seite 14 1. Estrarre il prodotto dalla confezione e collegare l'adattatore di ricarica CC al punto di ricarica CC sul retro dell'orologio 2. Premere e tenere premuto il tasto POWER per accendere l'orologio e il display dello schermo dovrebbe illuminarsi sul davanti. 3.
  • Seite 15 (Avviso importante : assicurarsi che si avvia l'impostazione dell'orologio entro 20 secondi dopo l'accesso alla modalità di regolazione o l'apparecchio ritorna alla modalità di impostazione non) 1. Tenere premuto il tasto per 3 -5 secondi per accedere alla modalità di impostazione e quindi verrà...
  • Seite 16 1. Premere il tasto per accedere al menu di impostazione dell'allarme e sullo schermo verrà visualizzata la dicitura il che significa che attualmente l'allarme non è attivo per impostazione predefinita. 2. Per impostare l'ora della sveglia, tenere premuto il tasto e sullo schermo verrà...
  • Seite 17 1. Eliminar producto de la caja y conecte el adaptador de carga de CC al punto de carga de CC en la parte posterior del reloj. 2. Presione y mantenga presionado el botón de para encender el reloj y la pantalla se iluminará...
  • Seite 18 (Aviso Importante : asegúrese de comenzar a configurar el reloj antes de 20 segundos después de acceder al modo de ajuste o se revertirá al modo de ajuste no) 1. Presione el botón y manténgalo presionado de 3 a 5 segundos para acceder al modo de configuración, y el número de AÑO estará...
  • Seite 19 1. Presione el botón para acceder al menú de configuración de la alarma, y la visualización en pantalla mostrará que significa que la alarma actualmente está apagada como configuración predeterminada. 2. Para configurar la hora de la alarma, presione y mantenga presionado el botón , la visualización en pantalla cambiará...
  • Seite 20 Copyright © Gingko Electronics Ltd All rights are registered and protected Alle Rechte sind eingetragen und geschützt Todos los derechos están registrados y protegidos support@ging-ko.co.uk Printed in China...