Herunterladen Inhalt Inhalt Diese Seite drucken
Inhaltsverzeichnis

Werbung

Verfügbare Sprachen

Verfügbare Sprachen

Staubsauger Roboter
Model:X-503

Werbung

Inhaltsverzeichnis
loading

Inhaltszusammenfassung für ORFELD X-503

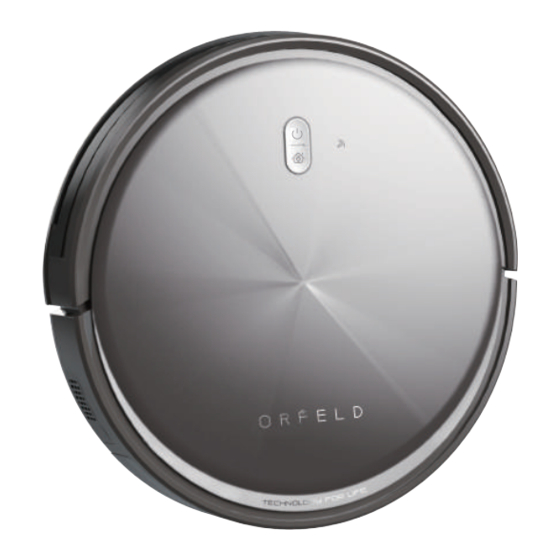
  • Seite 1 Staubsauger Roboter Model:X-503...
  • Seite 3 1-18 19-36 37-54 55-72...
  • Seite 4: Inhaltsverzeichnis

    CONTENTS 1. Safety Instructions 2. What’s in the Box 3. Using Your X-503 Important Tips before Use Preparation LED Indication Charging Modes Switching Modes Cleaning Modes Set Time and Scheduled Cleaning 4.Cleaning and Maintenance X-503 Anatomy Clean the Rolling Brush...
  • Seite 5: Safety Instructions

    To reduce the risk of injury or damage, read these safety instructions carefully and keep them at hand when setting up, using, and maintaining this device. Safety Instructions for X-503 and Accessories Warning 1. Do not disassemble, repair or refit the product without authorization;...
  • Seite 6 Please recycle the battery safely for environmental protection. Safety Instructions for X-503 and Accessories 1. Always use a dedicated battery adapter to avoid leakage, heating or rupture.
  • Seite 7 11. The power supply must be removed from the socket-outlet before cleaning or maintaining the device. 12. The battery must be removed from the device before it is scrapped. 13. The device must be disconnected from the mains supply when removing the battery.
  • Seite 8: What's In The Box

    2. What’s in the Box Main Body Remote Control Charging Base Power Adapter (2 * AAA Batteries required but NOT included) High-effective Cleaning Tool Side Brushes(4) Filter/Sponge While the accessories provided for some models are slightly dif ferent, they are subject to the actual product.
  • Seite 9: Using Your X-503

    Remove power cords and small objects from the floor that may be come entangled with the X-503. The X-503 may climb on top of objects less than 0.63 in/16 mm in height. Remove these objects if possible. Do NOT stand around narrow places, such as thresholds and aisle s, to reduce the uncovered rate.
  • Seite 10: Preparation

    Install the side brushes before use. Please note L and R should correspond to each other when installing the side brushes. Turn on the main power switch on the side of X-503. Remove before use Place the Charging Base on a hard, level surface and against a wall.
  • Seite 11 Install 2 AAA batteries (Not included in the package) into the remote control. Power On/Off Display Screen Return for Auto Plan Cleaning Charging Confirm Direction Clock Settings Suction Settings Edge Cleaning Schedule Note: For App users, please refer to our User Guide for App&Alexa. When the device is in the vicinity of the charging base and the virtual protection wall, it may not be able to receive the instructions issued by the remote control.
  • Seite 12: Led Indication

    Method 2: When cleaning is completed, or the battery is too low, the X-503 will automatically start finding the charging base to charge itself. Please keep the charging base energized, or the X-503 will not be able to find t he charging base.
  • Seite 13: Switching Modes

    The pause function switches the X-503 from the operating mode to the selected mode, and it can be paused by the following operations: Press on the remote control to pause it. Note : If the X-503 is out of service for a long time, please turn the power switch off.
  • Seite 14: Cleaning Modes

    Smart Cleaning mode. 2. Spot Cleaning Orfel X-503 intensively cleans a specific area in a spiral pattern, useful if there is a concentrated area of dust or debris. When in the Spot Cleaning mode, the X-503 will stop cleaning after 2 minutes.
  • Seite 15: Set Time And Scheduled Cleaning

    You can schedule the X-503 to start cleaning at a specified time. To cancel a previously scheduled cleaning session, press and hold for 3 seconds. Note: 1. Make sure the main power switch on the bottom of the X-503 is turned on. 2. Press on the remote control. will blink on the d isplay.
  • Seite 16: Cleaning And Maintenance

    4.Cleaning and Maintenance For optimal performance, follow the instructions below to clean and maintain the X-503 regularly. The cleaning/replacement frequency will depend on the way you use the X-503. X-503 Anatomy Top & Side Bumper Control button DC power jack...
  • Seite 17: Charging Base

    Charging Base Charging indicator light DC power jack Charging terminal Dust box Pre-filter High-performance filter Filter sponge Dust box Dust box cover Clean the Rolling Brush 1.Open the rolling brush components. 2.Remove the rolling brush shaft and clean off any debris and hair. Clean the Side Brushes Foreign substances, such as hair, can easily get tangled in the side brushes, and dirt may adhere to them.
  • Seite 18: Clean The Box And Filters

    2) Carefully unwind and pull off any hair or string that is wrapped between the main unit and the side brushes. 3) Use a cloth dampened with warm water to remove dust from the brushes or to gently reshape them. Only use the side brushes when they are completely dry.
  • Seite 19: Replace The Side Brushes

    Replace the Side Brushes The side brushes may become bent or damaged after being used for a period of time. Follow the instructions below to replace them. Pull off the old side brushes and snap the new ones into place. Clean the Sensors and Charging Terminals To maintain the best performance, clean the drop sensors and charging terminal regularly.
  • Seite 20: Troubleshooting

    Clean the sensors carefully with movements or the X-503’s software. a dry cloth. travel path are Restart the X-503 by turning abnormal. the power switch off and back The side The side brushes are mounted Please install the side brushes brushes deform in reverse.
  • Seite 21: Specification

    6. Specification Product Model X-503 Input 19 V/ 0.6 A Battery Voltage DC 14.4 V Power Consumption Battery Capacity 2500mAh Dust Box Capacity 600ml Cleaning Time Max. 100 mins Charging Time 240 - 360 mins 330mm Diameter of main unit...
  • Seite 22 INHALT 1. Sicherheitsanweisung 2. Was ist in der Box 3. Gebrauch des X-503 Wichtige Tipps vor dem Gebrauch Vorbereitung LED-Anzeige Lademodi Schaltmodi Reinigungsmodi Zeit und planmäßige Reinigung einstellen 4. Reinigung und Wartung X-503 Aufbau Reinigen der Rollbürste Reinigen der Seitenbürsten Reinigen des Behälters und Filter...
  • Seite 23: Sicherheitsanweisung

    1. Sicherheitsanweisung...
  • Seite 26: Was Ist In Der Box

    2. Was ist in der Box...
  • Seite 27: Gebrauch Des X-503

    Entfernen Sie Netzkabel und kleine Gegenstände vom Boden, die sich am X-503 verfangen können. Der X-503 kann auf Objekte mit einer Höhe von weniger als 0,63 Zoll/16 mm aufsteigen. Entfernen Sie diese Objekte, wenn möglich. Stellen Sie sich NICHT an engen Stellen wie Schwellen und Gängen auf, um die ungedeckte Fläche zu reduzieren.
  • Seite 28: Vorbereitung

    Installieren Sie die Seitenbürsten vor Gebrauch. Bitte beachten Sie, dass L und R bei der Montage der Seitenbürsten einander entsprechen sollten. Schalten Sie den Hauptschalter auf der Seite des X-503 ein. Remove before use Stellen Sie die Ladestation auf eine harte, ebene Fläche und an eine Wand.
  • Seite 29 Legen Sie 2 AAA-Batterien (nicht im Lieferumfang enthalten) in die Fernbedienung ein. Ein/Ausschalten Anzeigebildschirm Zurück zum Reinigungsplanung Auto-Afuladen Einstellungen bestätigen Richtung Uhr Einstellung Absaug-Einstellungen Kantenreinigung Zeitplan Hinweis: Wenn sich das Gerät in der Nähe der Ladestation und der virtuellen Schutzwand befindet, kann es möglicherweise nicht in der Lage sein, die Anweisungen der Fernbedienung zu empfangen.
  • Seite 30: Led-Anzeige

    Ladestation zurückzubewegen. Methode 2: Wenn die Reinigung abgeschlossen ist oder der Akku zu schwach ist, beginnt der X-503 automatisch, die Ladestation zu suchen, um sich aufzuladen. Bitte halten Sie die Ladestation eingeschaltet, da der X-503 sonst die Ladestation nicht finden kann.
  • Seite 31: Schaltmodi

    Sie ihn verwenden. Wake Up Der Schlafmodus bedeutet, dass der X-503 angehalten wird und die Kontrollleuchte erlischt. Wenn der X-503 für 10 Minuten nicht aktiv ist, wechselt er automatisch in den Schlafmodus. Drücken Sie auf der Fernbedienung, um ihn aufzuwecken.
  • Seite 32: Reinigungsmodi

    App, um die Reinigung im Fleckenreinigungsmodus zu starten. 3. Kantenreinigung Der Orfel X-503 reduziert seine Geschwindigkeit, wenn er eine Wand erkennt und folgt dann der Wand, um sicherzustellen, dass die Kante gründlich gereinigt wird. Klicken Sie auf das Symbol für die Kantenreinigung in der App oder drücken Sie...
  • Seite 33: Zeit Und Planmäßige Reinigung Einstellen

    4. Drücken Sie , um die Einstellung zu speichern. Stellen Sie eine planmäßige Reinigung ein Sie können den X-503 so einplanen, dass er mit der Reinigung zu einem bestim- mten Zeitpunkt beginnt. Um eine zuvor geplante Reinigungsaktion abzubrechen, halten Sie 3 Sekunden lang gedrückt.
  • Seite 34: Reinigung Und Wartung

    4.Reinigung und Wartung X-503 Aufbau...
  • Seite 35: Reinigen Der Seitenbürsten

    Reinigen der Walzenbürste 1. Öffnen Sie die Komponenten der Walzenbürste. 2. Entfernen Sie die Welle der Walzenbürste und entfernen Sie alle Ablagerungen und Haare. Reinigen der Seitenbürsten Fremdkörper, wie z.B. Haare, können sich in den Seitenbürsten leicht verheddern und Schmutz kann an ihnen haften. Achten Sie darauf, sie regelmäßig zu reinigen. 1) Entfernen Sie die Seitenbürsten.
  • Seite 36 2) Wickeln Sie die Haare oder Schnüre, die zwischen dem Hauptgerät und den Seitenbürsten eingewickelt sind, vorsichtig ab und ziehen Sie sie ab. 3) Verwenden Sie ein mit warmem Wasser befeuchtetes Tuch, um Staub von den Bürsten zu entfernen oder sie sanft umzuformen. Hinweis: Verwenden Sie die Seitenbürsten nur, wenn sie vollständig trocken sind.
  • Seite 37: Ersetzen Der Seitenbürsten

    Ersetzen der Seitenbürsten Die Seitenbürsten können nach längerem Gebrauch verbogen oder beschädigt werden. Befolgen Sie die folgenden Anweisungen, um sie zu ersetzen. Ziehen Sie die alten Seitenbürsten ab und rasten Sie die neuen ein. Reinigen der Sensoren und Ladeklemmen Um die beste Leistung zu erhalten, reinigen Sie die Fallensensoren und die Ladesta- tion regelmäßig.
  • Seite 38: Fehlerbehebung

    Mit der Software des X-503 vorsichtig mit einem trockenen oder der stimmt etwas nicht. Tuch. Verfahrweg des X-503 sind nicht Starten Sie das X-503 neu, indem normal. Sie den Netzschalter aus- und wieder einschalten. Die Seitenbürsten Die Seitenbürsten sind in Bitte installieren Sie die...
  • Seite 39: Technische Daten

    6. Technische Daten Produktmodell X-503 Eingang 19 V/ 0.6 A Batteriespannung DC 14.4 V Energieverbrauch Batteriekapazität 2500mAh Staubbehälter Kapazität 600ml Reinigungszeit Max. 100 mins Ladezeit 240 - 360 mins 330mm Durchmesser der Haupteinheit 81mm Dicke der Haupteinheit Nettogewicht der Haupteinheit 2.8kg...
  • Seite 40 TABLE DES MATIERES 1. Consignes de sécurité 2. Qu'y a-t-il dans la boite 3. En utilisant votre X-503 Conseils Importants avant Utilisation Mise en Marche Voyants DEL Modes de Charge Modes de Commutation Modes de Nettoyage Régalage de l’heure et de Nettoyage Planifié...
  • Seite 41: Consignes De Sécurité

    1. Consignes de sécurité...
  • Seite 44: Qu'y A-T-Il Dans La Boite

    2. Qu'y a-t-il dans la boite...
  • Seite 45: Conseils Importants Avant Utilisation

    Retirez du sol les cordons d’alimentations et les petits objets susceptibles de s’emmêler avec le X-503. Le X-503 peut grimper sur des objets d’une hauteur inférieure à 16 mm Ramassez ces objets, si possible. NE vous placez pas dans des endroits étroits, tels que les entrées et les allées, afin de réduire le nombre des zones non-couvertes.
  • Seite 46: Mise En Marche

    Installez les brosses latérales avant toute utilisation. Veuillez noter que les signes L et R doivent correspondre l’une à l’autre lors de l’installation des brosses latérales. Mettez l’interrupteur d’alimentation principal - situé sur le côté du X-503 - en position de marche. Remove before use Placez la base de chargement sur une surface stable et contre le mur.
  • Seite 47 Installez 2 piles de type AAA (non fournis) dans la télécommande. Bouton de mise en marche / arrêt Écran d’affichage Retourner pour le Programmation du chargement Nettoyage automatique Confirmer Direction Réglages de l’horloge Réglages d’aspiration Nettoyage Latéral Planification Remarque: Lorsque l'appareil se trouve à proximité de la base de chargement et du mur virtuel de protection, il se peut qu’il ne soit pas en mesure de recevoir les instructions émises par la télécommande.
  • Seite 48: Voyants Del

    Lorsque le nettoyage est terminé ou que la batterie est trop faible, le X-503 bascule automatiquement à la base de chargement pour se charger. Veuillez garder la base de chargement sous tension, sinon le X-503 ne pourra pas détecter la base de chargement.
  • Seite 49: Modes De Commutation

    Assurez-vous que l’interrupteur d’alimentation situé sur le côté du X-503 est allumé avant d’utiliser l’appareil. Le mode veille signifie que le X-503 est arrêté et que le voyant lumineux est éteint. Si le X-503 n'est pas actif pendant 10 minutes, il passera automatiquement en mode veille.
  • Seite 50: Modes De Nettoyage

    Cliquez sur l'icône Nettoyage de Taches dans l'application pour lancer le nettoyage en mode Nettoyage de Taches. Le Orfel X-503 réduit sa vitesse lorsqu'il détecte un mur, puis le suit pour s'assurer que le bord est nettoyé en profondeur. Cliquez sur l’icône Nettoyage Latéral dans l’application ou appuyez sur le bouton...
  • Seite 51: Réglage De L'heure

    Remarque : Assurez-vous que AM / PM est réglée correctement. 4. Appuyez sur le bouton pour sauvegarder le réglage. Vous pouvez programmer le X-503 afin de commencer le nettoyage à une heure précise. Pour annuler une session de nettoyage précédemment planifiée, maintenez le bouton enfoncée pendant 3 secondes.
  • Seite 52: Nettoyage Et Entretien

    4. Nettoyage et entretien Composants du X-503...
  • Seite 53: Nettoyage De La Brosse Roulante

    Nettoyage de la Brosse Roulante 1. Ouvrez les composants de la brosse roulante. 2. Retirez l'axe de la brosse roulante et nettoyez tous les débris, les cheveux et les poils emmêlés. Nettoyage des Brosses Latérales Des substances étrangères, telles que les cheveux, peuvent facilement s’emmêler dans les brosses latérales.
  • Seite 54: Nettoyage Du Bac Et Des Filtres

    2) Déroulez et retirez soigneusement les cheveux ou les ficelles enroulés entre l’appareil principal et les brosses latérales. 3) Utilisez un chiffon imbibé d'eau tiède pour éliminer la poussière des brosses ou pour les rétablir doucement. Remarque: Nettoyage du Banc et des Filtres 1.
  • Seite 55: Remplacement Des Brosses Latérales

    Remplacement des Brosses Latérales Les brosses latérales peuvent devenir tordues ou endommagées après une utilisation prolongée. Suivez les instructions ci-dessous pour les remplacer. Retirez les anciennes brosses latérales et encliquetez les nouvelles. Nettoyage des Capteurs et des Bornes de Charge Afin de maintenir une efficacité...
  • Seite 56: Dépannage

    Solutions Nettoyez soigneusement les Les mouvements Il y a un problème avec le capteurs avec un chiffon sec. ou trajectoires du logiciel du X-503. Redémarrez le X-503 en X-503 sont éteignant puis rallumant anormaux. l’interrupteur d’alimentation. Les brosses latérales se Les brosses latérales sont...
  • Seite 57: Caractéristiques

    6. Caractéristiques modèle du produit X-503 Contribution 19 V/ 0.6 A Voltage de batterie DC 14.4 V Consommation d'énergie Capacité de la batterie 2500mAh Capacité de la boîte à poussière 600ml Temps de nettoyage Max. 100 mins 240 - 360 mins...
  • Seite 58 INDICE 1. Istruzioni di Sicurezza 2. Contenuto della confezione 3. Utilizzo di X-503 Suggerimenti importanti prima dell’uso Preparazione Spie luminose LED Modalità di ricarica Modalità di funzionamento Modalità di pulizia Impostazione ora e pulizia programmata 4. Pulizia e Manutenzione Anatomia di X-503...
  • Seite 59: Istruzioni Di Sicurezza

    1. Istruzioni di Sicurezza Avvertenze autorizzazione in caso contrario potrebbero verificarsi danni o incendi. ne sedersi seriamente il dispositivo. asciutto di stoffa. alimentato da presenti in si prega di non toccare la ruota ed il lato delle spazzole metalli o materiali conduttivi vengano a contatto con la batteria; dove chiuse da troppo tempo con presenza di acqua o liquidi.
  • Seite 60 accumulati da lavori in casa. varia da 0 a 40 gradi centigradi, non usare il robot in ambienti ad alte temperature. potrebbe causare cortocircuito con perdite di liquidi, riscaldamento o rottura. se il robot non viene utilizzato per un lungo periodo di tempo, rimuovere la batteria e immergere in acqua ne entrare in contatto 4.
  • Seite 61 competenti. eseguire manutenzione all'apparecchio. diventi inutilizzabile.
  • Seite 62: Contenuto Della Confezione

    2. Contenuto della confezione Corpo Principale Base di Ricarica Telecomando Alimentazione Strumento di Pulizia Spazzole laterali Filtro / spugna ad alta e...
  • Seite 63 Rimuovere dal pavimento i cavi di alimentazione e gli oggetti di piccole dimensioni che potrebbero impigliarsi nell'X-503. L'X-503 può arrampicarsi sopra oggetti di altezza inferiore a 0.63 in / 16 mm. Rimuo- vere questi oggetti se possibile. NON stare in piedi intorno a luoghi stretti, come soglie e corridoi, per ridurre la percentuale di superficie scoperta.
  • Seite 64 Installare le spazzole laterali prima dell’uso. Prestare attenzione alla corrispon- denza tra Sinistra (L) e Destra (R) durante l’installazione. Accendere l’interruttore di alimentazione laterale di X-503. Rimuovere prima dell’uso Collocare la Base di Ricarica su una superficie dura, livellata e contro una parete.
  • Seite 65: Impostazione Orologio

    Installare 2 batterie AAA (non incluse nella confezione) nel telecomando. Alimentazione on/off Display di visualizzazione Ritorno per Pulizia programmata auto-ricarica Conferma Direzione Impostazione orologio Impostazione aspirazione Pulizia bordi Programma Nota: Quando il dispositivo è in prossimità della base di ricarica o della parete di protezione virtuale, potrebbe non essere in grado di ricevere comandi dal telecomando.
  • Seite 66: Modalità Di Ricarica

    Base di Ricarica. Metodo 2: A pulizia completata, o se la batteria è scarica, l’X-503 comincerà automati- camente a dirigersi verso la base di ricarica. Tenere la base di ricarica alimentata, altrimenti l’X-503 non riuscirà a trovare la base di ricarica.
  • Seite 67: Modalità Di Funzionamento

    Modalità di funzionamento Nota: Risveglio Modalità di sospensione significa che X-503 è fermo e la spia luminosa è spenta. Se l’X-503 non è attivo da 10 minuti, entra automaticamente in modalità Sospensione. Premere sul telecomando per riattivarlo. Avvio In modalità di Standby, premere...
  • Seite 68: Modalità Di Pulizia

    Cliccare l’icona Pulizia a Zona sull’app per avviare la pulizia in modalità Pulizia a Zona. Orfel l’X-503 riduce la velocità quando rileva una parete e quindi segue la parete per assicurarsi che il bordo venga pulito a fondo. Cliccare l’icona Pulizia Bordo sull’app o premere...
  • Seite 69: Impostazione Ora

    “ore” e i “minuti”. 4. Premere per salvare le impostazioni. Impostazione del programma di pulizia È possibile impostare X-503 perché cominci a pulire ad un orario determinato. Per annullare la sessione di pulizia programmata in precedenza, premere e tenere premuto per 3 secondi Nota: 1.
  • Seite 70: Pulizia E Manutenzione

    4. Pulizia e Manutenzione Anatomia di X-503 Paraurti Pulsante di rilascio della scatola Striscia Ruote Contenitore della polvere...
  • Seite 71: Pulizia Della Spazzola Rotante

    Contenitore polvere Contenitore polvere Coperchio del contenitore della polvere Pulizia della Spazzola rotante 1. Aprire le componenti della spazzola rotante. 2. Estrarre l’asse della spazzola rotante e togliere sporcizia e capelli. Pulizia delle Spazzole laterali Sostanze estranee, come capelli, possono facilmente restare impigliati nelle spazzole laterali e la sporcizia può...
  • Seite 72 2) Districare e rimuovere con cura ogni capello o filo che si è impigliato attorno all’unità principale e alle spazzole laterali. 3) Usare un panno inumidito con acqua calda per togliere la polvere dalle spazzole e rimodellarle con delicatezza. Nota: Pulizia di Contenitore e Filtri 1.
  • Seite 73: Sostituzione Delle Spazzole Laterali

    Sostituzione delle Spazzole laterali Le spazzole laterali possono piegarsi o danneggiarsi dopo un uso prolungato nel tempo. Seguire le istruzioni riportate di seguito per sostituirle. Estrarre le vecchie spazzole laterali e inserire quelle nuove. Pulizia dei Sensori e dei Terminali di Ricarica Per una prestazione ottimale, pulire i sensori anti-caduta e i terminali di ricarica regolarmente.
  • Seite 74: Risoluzione Dei Problemi

    I movimenti o il C’è qualche problema con il panno asciutto. percorso di lavoro software dell’X-503. dell’X-503 sono Riavviare l’X-503 spegnendo e anomali. riaccendendo l’interruttore di alimentazione. Le spazzole laterali Le spazzole laterali sono state Installare le spazzole sul lato si deformano montate a rovescio.
  • Seite 75: Servizio Clienti

    6. Specifiche Modello di prodotto X-503 Ingresso 19 V/ 0.6 A Voltaggio batteria CC 14.4 V Consumo di energia Capacità della batteria 2500mAh Capacità del contenitore della polvere 600ml Tempo di pulizia Max. 100 min 240 - 360 min Tempo di carica 330mm Diametro dell'unità...
  • Seite 76 Address: No. 123, Building P09, Huanan International Printing Paper Packaging and Logistics Zone (1st), No. 1 Huanan Avenue, Hehua Community, Pinghu Street, Longgang District, Shenzhen, China Website: www.orfeldtech.com E-Mail: support@orfeldtech.com Made in China ORFELD Facebook ORFELD Inst ORFELD Twitter ORFELD Official...

Inhaltsverzeichnis