Herunterladen Inhalt Inhalt Diese Seite drucken
Oregon Scientific RMR182 Bedienungsanleitung

Oregon Scientific RMR182 Bedienungsanleitung

Kabelloses mehrkanalinnen-aussen-thermometer mit externem sensor und funkuhr
Vorschau ausblenden Andere Handbücher für RMR182:

Werbung

Verfügbare Sprachen
  • DE

Verfügbare Sprachen

  • DEUTSCH, seite 14
Multi-Channel In-Out Thermometer
with Cable Free Sensor and RF Clock
MODEL: RMR182
USER'S MANUAL
INTRODUCTION
Congratulations on your purchase of the RMR182 Multi-
Channel In-Out Thermometer with 433MHz cable free sensor and
radio-controlled calendar clock.
The basic package comes with a main unit, which is the tempera-
ture and calendar clock station, and a remote unit, the thermo
sensor.
The main unit has a large display for indoor temperature,
calendar clock and temperatures collected and transmitted by the
remote unit. The main unit can support up to three remote units.
The main unit is capable of keeping track of the maximum and
minimum temperature of different sites. No wire installation is
required as the RMR182 operates at 433MHz.
As for the calendar clock, it is radio-controlled. It automatically
synchronizes its current time and date when it is brought within
an approximate 1500km radius of the radio signal generated from
Frankfurt, Germany (DCF77).
You can also set the calendar clock manually when it is off range.
Other features include four-language display, four-step crescendo
dual alarms and interchangeable display modes.
MAIN FEATURES: MAIN UNIT
1

Werbung

Inhaltsverzeichnis
loading

Inhaltszusammenfassung für Oregon Scientific RMR182

  • Seite 1 Cable Free Sensor and RF Clock MODEL: RMR182 USER'S MANUAL INTRODUCTION Congratulations on your purchase of the RMR182 Multi- Channel In-Out Thermometer with 433MHz cable free sensor and radio-controlled calendar clock. The basic package comes with a main unit, which is the tempera- ture and calendar clock station, and a remote unit, the thermo sensor.
  • Seite 2 A FOUR-LINE LCD DISPLAY ] BUTTON Facilitates easy reading of remote and indoor temperatures and Advances the value of a setting calendar clock ] BUTTON ] RADIO-RECEPTION SIGNAL Decreases the value of a setting Indicates the condition of radio reception N [AL ON/OFF] BUTTON C TEMPERATURE TREND INDICATOR Enables or disables the alarms...
  • Seite 3: Before You Begin

    A LCD DISPLAY MAIN FEATURES: REMOTE UNIT Displays the current temperature monitored by the remote unit B LED INDICATOR Flashes when the remote unit transmits a reading ° ° F SLIDE SWITCH Selects between Centigrade (°C) and Fahrenheit (°F) D CHANNEL SLIDE SWITCH Designates the remote unit Channel 1, Channel 2 or Channel 3 E RESET BUTTON...
  • Seite 4: Low Battery Warning

    and reset the main unit after installing batteries. This will ensure 5. Replace the battery compartment door and secure its screws. easier synchronization between the transmission and reception Note that once a channel is assigned to a remote unit, you can only of signals.
  • Seite 5: The Reset Button

    When it is time to replace batteries, the low-battery indicator will Remote unit show up when the corresponding channel is selected. The battery Wall-mount Table Stand level of the main unit will be shown on the indoor temperature when it is running low. HOW TO USE THE TABLE STAND OR WALL MOUNTING The main unit has a removable table stand, which when installed,...
  • Seite 6: Temperature Trend

    If no signals are received, blanks "----" will be displayed and the TEMPERATURE TREND kinetic wave icon will show " ". Press [CHANNEL] and [MEMORY] simultaneously to enforce another search for about The temperature trend indicator on the screen shows the trend of 30 seconds.
  • Seite 7 ° ° NOTE ON C AND DISCONNECTED SIGNALS The unit of temperature display is selected with the °C/°F slide If without obvious reasons the display for a particular channel goes switch. Select °C for Centigrade or °F for Fahrenheit. blank, press [CHANNEL] and [MEMORY] to enforce an imme- diate search.
  • Seite 8 CALENDAR CLOCK DISPLAY MODES ABOUT RADIO RECEPTION The RMR182 supports four display modes in the sequence of: The RMR182 is designed to automatically synchronize its calendar clock once it is brought within range of the Frankfurt DCF77 radio signal. MODE 1.
  • Seite 9 The radio reception signal will disappear. The unit will not respond to radio signals. The RMR182 has two alarms, ALARM 1 and ALARM 2. They can To enable the feature again, press the button for three seconds.
  • Seite 10 When the alarm goes off the sound which will gradually increase in TIME ZONE AND OFFSET TABLE volume and repeating speed will be turned on for about 2 minutes unless the [( )] or [AL ON/OFF] button is pressed to mute the ( •...
  • Seite 11: Specifications

    RF Transmission Range : Maximum 30 meters SPECIFICATIONS Temperature sensing cycle : around 30 seconds Temperature Measurement Main unit Radio Controlled Clock Indoor Temperature measurement Maintime set and synchronized by Radio Signal DCF77 for Continental Central Europe Displayed IN temperature range : -9.9°C to +70.0°C 24 h display with hh : mm ss 14.2°F to 158.0°F Date Format : Day.
  • Seite 12: About Oregon Scientific

    - The contents of this manual may not be reproduced without We hope you will find all the information you need on our website, the permission of the manufacturer. however if you'd like to contact the Oregon Scientific Customer Care department directly, please visit www2.oregonscientific.com/ service/support Call 949-608-2848 in the US.
  • Seite 13: Ec Declaration Of Conformity

    Additional information: EC-DECLARATION OF CONFORMITY The product herewith complies with the requirements of the Low Voltage Directive 73 / 23 / EC, the EMC Directive 89 / 336 / EC and This product contains the approved transmitter module that com- carries the CE marking accordingly.
  • Seite 14 Sie können die Uhr auch manuell einstellen, falls sich das Gerät außerhalb der Reichweite des Senders befindet. Wir gratulieren Ihnen zum Kauf des RMR182 Mehrkanal-Innen- Zusätzlich verfügt das Gerät über vier Anzeigesprachen, einen 4- Thermometers mit kabelloser 433 MHz-Sendeeinheit sowie stufigen, dualen Crescendo-Alarm und umschaltbare Funkuhr mit Kalenderfunktion.
  • Seite 15: Merkmale Der Empfangseinheit

    A ANZEIGE MERKMALE DER EMPFANGSEINHEIT für Innen- und Aussentemperatur sowie Uhrzeit, Datum, Zeitzone und Alarmzeiten. Zusätzlich erscheint bei verbrauchten Batterien ein durchgestrichenes Batteriesymbol sowohl für die Empfangseinheit wie auch im zugeordneten Kanal für jede externe Sendeeinheit. B ZEITSIGNAL-EMPFANGSINDIKATOR [ Zeigt den Empfang eines Zeitsignals über Funk an. C TEMPERATUR-TENDENZ-INDIKATOR Zeigt die Tendenz der Temperaturänderungen an.
  • Seite 16: Merkmale Der Sendeeinheit

    K [CHANNEL]-TASTE MERKMALE DER SENDEEINHEIT Wählt Kanal für externen Sensor. ] TASTE Anzeige aufwärts einstellen. ] TASTE Anzeige abwärts einstellen. N ALARM EIN/AUS [AL ON/OFF] Aktivieren oder deaktivieren der Alarme. O RÜCKSETZ-TASTE [RESET] Rücksetzung aller Einstellungen auf die Vorgabewerte. ° °...
  • Seite 17 ° ° UMSCHALTER [ 4. Stellen Sie die Empfangseinheit und die externen Sendeeinheiten innerhalb der möglichen Reichweite der Geräte Einstellen der Temperaturanzeige für Celsius- (°C) oder auf, d.h. in einem Umkreis von bis zu 20 bis 30 Metern. Fahrenheit-Grade (°F). Beachten Sie, daß...
  • Seite 18 4. Setzen Sie 2 Alkalibatterien (1,5V, UM-4 oder Größe “AAA”) VORBEREITUNG DER den jeweiligen Polaritäten entsprechend ein. EMPFANGSEINHEIT 5. Schrauben Sie die Batteriefachabdeckung wieder auf. Hinweise zu den Sendeeinheiten: Bitte achten Sie darauf, daß nach jeder Änderung der Einstellungen an der Sendeeinheit unbedingt die Rücksetz- Taste [RESET] mittels eines dünnen Drahtes (Büroklammer o.ä.) betätigt wird.
  • Seite 19: Betrieb

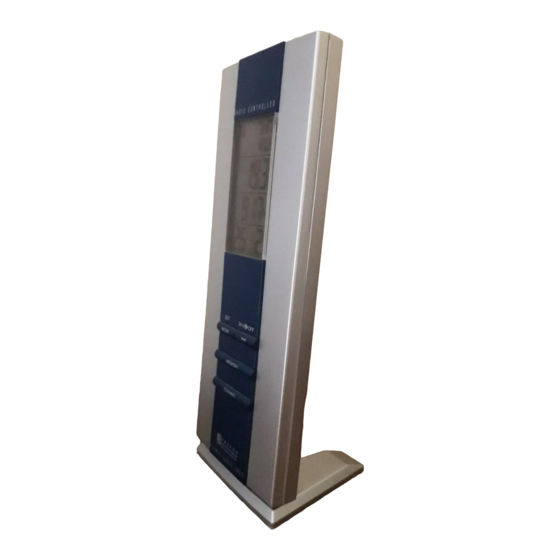
    Sendeeinheit WANDAUFHÄNGUNG ODER Wandaufhängung Tischaufstellung TISCHAUFSTELLUNG Die Empfangseinheit ist mit einem herausziehbaren Standfuss ausgerüstet, der zur Aufstellung an der Unterseite eingerastet und das Gerät damit auf einer ebenen Fläche aufgestellt werden kann. Die Öse auf der Rückseite der Empfangseinheit dient zur Wandaufhängung.
  • Seite 20: Minimal- Und Maximal- Temperaturen

    Drücken Sie nun gleichzeitig die Tasten [CHANNEL] und [MEMORY], um einen erneuten Suchvorgang zu starten. Dadurch “Pfeil”- werden die Sende- und Empfangsintervalle erneut synchronisiert. Indikator Starten Sie diesen Suchvorgang auch immer dann, wenn Temperatur- Abweichungen zwischen der Anzeige der Empfangseinheit und Steigend Konstant Fallend...
  • Seite 21: Kein Signal Von Den Externen Sendeneinheiten

    ° ANZEIGE IN CELSIUS KEIN SIGNAL VON DEN EXTERNEN ° ODER FAHRENHEIT SENDENEINHEITEN Die Maßeinheit der Temperaturanzeige kann wahlweise mittels des Falls die Übertragung der extern gemessenen Temperaturen ohne °C/°F-Schalters auf der Rückseite der Empfangseinheit eingestellt ersichtlichen Grund einmal ausfallen sollte (in der Anzeige des werden.
  • Seite 22: Anzeige-Modi Der Funkuhr Mit Datum

    Reichweite des Frankfurter DCF77-Funksignals befindet. MODUS 2. Normalzeit Für einen guten Empfang des Zeitsignals sollten Sie das RMR182 Stunde, Minute, Wochentag nicht in der Nähe von metallischen Gegenständen oder elektrischen ---------------------------------- Geräten aufstellen, um Störungen möglichst gering zu halten.
  • Seite 23: Manuelle Einstellung

    MANUELLE EINSTELLUNG DER ALARMFUNKTIONEN Drücken Sie die Taste [SET/MODE] drei Sekunden lang, um die Ihr RMR182 ist mit zwei Alarmfunktionen ausgestattet. Sie Uhr manuell einzustellen. Die Anzeige schaltet in den Anzeige- können wahlweise beide Alarmzeiten einstellen oder unabhängig Modus 1 zurück, wobei die Stundenanzeige blinkt.
  • Seite 24: Abschalten Eines Alarms

    die zuletzt eingestellte Alarmzeit oder bei der erstmaligen Wenn der Alarm startet, baut er sich stufenweise in der Lautstärke Einstellung erscheint "0:00". und Geschwindigkeit für 2 Minuten auf, wenn er nicht durch drücken der Tasten [( )] oder [AL ON/OFF] abgebrochen wird.\ ( •...
  • Seite 25: Zeitzone Und Tabelle

    Externe Sendeeinheit Bitte denken Sie auch daran, daß verbrauchte Batterien nicht in den Hausmüll gehören, sondern an den dafür vorgesehenen Messbereich außen : -50.0°C to +70.0°C Sammelstellen abgegeben werden. -58.0°F to 158.0°F Komfortbereich : -20°C bis +60°C ZEITZONE UND TABELLE -4.0°F to 140.0°F Messschritte : 0.1°C...
  • Seite 26: Über Oregon Scientific

    UM-4 bzw. AAA (1,5V) Über OREGON SCIENTIFIC (Micro) Besuchen Sie unsere Website (www.oregonscientific.de) und erfahren Sie mehr über unsere Oregon Scientific-Produkte wie zum Gewicht Beispiel Digitalkameras, MP3-Player, Kinderlerncomputer und Empfangseinheit : 172 g (ohne Batterie) Spiele, Projektionsfunkuhren, Produkte für Gesundheit und Fit-...
  • Seite 27: Eg-Konformitätserklärung

    Zusätzliche Information: EG-KONFORMITÄTSERKLÄRUNG Damit ist das Produkt konform mit der Niederspannungsrichtlinie 73 / 23 / EG, Dieses Produkt enthält das genehmigte Sendemodul, welches bei der Richtlinie für elektromagnetische Verträglichkeit 89 / 336 / bestimmungsgemäßer Verwendung den grundlegenden EG und entspricht den Anforderungen des Artikels 3 der Anforderungen des Artikels 3 der R &...
  • Seite 28 La unidad principal es capaz de registrar la temperatura máxima y mínima de diferentes lugares. Y no se necesita ninguna instalación de cable. Dado que el RMR182 funciona a 433MHz, puede utilizarse en los Estados Unidos y en la mayoría de los países del continente europeo.
  • Seite 29 A PANTALLA DE CUATRO LINEAS K BOTON [CHANNEL] Facilita la lectura de las previsiones meteorológicas, las Seleccioa los canales del detector remoto temperaturas remotos, las temperaturas medidas por los L BOTON [ sensores y del calendario. Para incremental el valor de un ajuste B SEÑAL DE RECEPCION DE RADIO [ M BOTON [ Indica el estado de recepción de radio...
  • Seite 30: Antes De Empezar

    E BOTON RESET FUNCIONES PRINCIPALES: Vuelve todos los ajustes a los valores por defecto UNIDAD REMOTA F COMPARTIMENTO DE PILAS Acomoda dos pilas tamaño AAA G TAPA DEL COMPARTIMENTO DE PILAS H SUJETADOR PARA MONTURA EN LA PARED Sujeta toda la unidad remota en la pared SOPORTE DE MESA MOVIBLE Para colocar la unidad remota en una superficie plana.
  • Seite 31 3. Vuelva a colocar la tapa del compartimento de pilas. INSTALACION DE PILAS Y CANALES: Reemplace las pilas cuando el indicador de pilas de la temperatura UNIDAD REMOTA interior se ilumine. (Repita los pasos descritos en la sección "ANTES DE EMPEZAR"). 1.
  • Seite 32 En cuanto a la unidad remota, viene junto con un sujetador para sujetar el botón. Todos los ajustes volverán a los valores por defecto montar en la pared y un soporte movible. Use cualquiera de ellos para colocar la unidad en su sitio. EMPEZANDO Unidad principal Montura de la pared...
  • Seite 33 Si no se reciben lecturas de un canal específico se muestran los grabadas en memoria. Para mostrarlas, espacios en blanco "---" hasta que se localicen lecturas 1. Seleccione el canal a comprobar. adicionales. Compruebe que la unidad remota esta en buen estado 2.
  • Seite 34 °C/°F de la unidad principal. Cualquiera que sean las unidades de RELOJ ALMANAQUE muestra de los sensores remotos, se convertirán automáticamente RMR182 soporta cuatro modos de visualización en la en los elegidos de la unidad principal. secuencia de: SEÑALES DESCONECTADAS MODO 1.
  • Seite 35: Ajuste Manual Del Reloj

    Para el segundo huso horario, el cual se indica por el ICONO ZONE, introduzca la variación de hora por medio de los botones y el RMR182 calcula el segundo huso horario de la debida forma. - Recibiendo Para más detalles, por favor refiérase a la sección “Tabla De Husos...
  • Seite 36 DE LAS ALARMAS Cuando la alarma haya terminado, el sonido que gradualmente se RMR182 tiene dos alarmas: ALARMA 1 Y ALARMA 2, las cuales incrementa en volumen y en velocidad, volverá a sonar a menos se pueden seleccionar juntas o separadas.
  • Seite 37: Especificaciones

    5. Use solo pilas nuevas como se especifica en el manual del ESPECIFICACIONES usuario. No mezcle pilas nuevas y viejas, ya que las viejas se pueden derramer. Medida de la temperatura 6. Lea siempre el manual del usuario por completo antes de usar Unidad principal la unidad.
  • Seite 38 Número de canales : Máximo de 3 PRECAUCION RF Límites de transmisión : Máximo 30 metros - El contenido de este manual está sujeto a cambio sin Ciclo de sensor de temperatura : unos 30 segundos aviso previo. - Debido a las limitaciones de impresión, las pantallas Reloj de control por radio mostradas en este manual podrían diferir de la pantalla real.
  • Seite 39: Sobre Oregon Scientific

    Visite nuestra página web (www.oregonscientific.com) para Este producto contiene el módulo de transmisor aprobado que conocer más sobre los productos de Oregon Scientific tales como: cumple con las normas esenciales que marca el Artículo 3 de la Reproductores MP3, juegos y productos de aprendizaje electrónico Directiva Europea R&TTE 1999 / 5 / EC siempre que cumpla los...
  • Seite 40 Información adicional: El producto está conforme por consiguiente con la Directiva de Bajo Voltaje 73 / 23 / EC, la Directiva EMC 89 / 336 / EC y Directiva R&TTE 1999 / 5 / EC (apéndice II) y lleva la señal de CE respectiva. Carmelo Cubito Agrate Brianza (MI) / Italia January 2004 Representante de R&TTE de fabricante...
  • Seite 41 L’appareil principal peut garder la trace des températures maximum et minimum dans différents sites. Aucune pose de c‚ble n’est requise. Comme le RMR182 fonctionne sur 433MHz, il peut Ítre utilisé aux Etats-Unis et dans la plupart des pays d’Europe Continentale.
  • Seite 42 A AFFICHAGE QUATRE LIGNES L COMMANDE HAUT [ Facilite la lecture des prévisions météo, températures distance Pour augmenter la valeur d’un réglage. et intérieure et pendule calendrier. M COMMANDE BAS [ B SIGNAL DE RECEPTION RADIO [ Pour diminuer la valeur d’un réglage. Indique l’état de la réception radio.
  • Seite 43 ° ° C COMMUTATEUR CARACTERISTIQUES PRINCIPALES: Permet de basculer entre les températures en degrés SONDE Centigrade (°C) ou degrés Fahrenheit (°F) D COMMUTATEUR DE CANAUX Désigne le canal utilisé par la sonde: 1, 2 ou 3. E TOUCHE DE REMISE A ZERO Remet tous les éléments programmés aux valeurs par défaut.
  • Seite 44 Notez toutefois que le rayon de communication est fortement Lorsque le témoin d'usure des piles situé sur l'unité principale influencé par les matériaux de construction et par l'emplacement s'allume, remplacez les piles de l'unité du canal concerné. ( Répétez de l'unité principale et de la sonde. Essayez plusieurs installa- les étapes de la rubrique "AVANT DE COMMENCER"...
  • Seite 45 Sonde TEMOIN D'USURE DES PILES Fixation murale Socle Lorsque les piles sont usées, le témoin d'usure des piles sera affiché pour le canal concerné. Le témoin d'usure des piles de l'unité principale sera affiché à l'emplacement de la température intérieure. UTILISATION DU SOCLE ET DU SUPPORT MURAL L'unité...
  • Seite 46 seront affichées à la ligne supérieure et la température intérieure à Indication de la ligne inférieure. Les indications affichées seront mises à jour environ toutes les 30 secondes. la flèche Si aucun signal n'est détecté, l'écran affichera "---" et l'icône Temp.
  • Seite 47 ° ° REMARQUES SUR LES DEGRES C ET LECTURE DU TEMOIN D'ONDE CINETIQUE L'unité d'affichage est sélectionnée à l'aide du commutateur °C/°F. Le témoin d'onde cinétique affiche l'état du signal reçu par l'unité Sélectionnez °C pour un affichage en degrés Centigrade ou °F pour principale.
  • Seite 48 Jour, Mois PENDULE CALENDRIER EachChaque pression sur la commande de [SET/MODE] permet Le RMR182 supporte quatre modes d’affichage dans la séquence de circuler à travers l’affichage dans l’ordre ci-dessus. suivante : Notez que la ligne du bas de l’afficheur sera remplacée par l’heure de l’alarme si la commande [(...
  • Seite 49 3 secondes. Le signal de furt DCF77. réception radio disparaîtra. L’appareil ne répondra pas aux signaux Quand le RMR182 se trouve dans le rayon d’émission, son radio. mécanisme radio-piloté surpasse tous les réglages manuels. L’heure Pour réactiver cette caractéristique, appuyez sur pendant trois se mettra en marche à...
  • Seite 50 2 minutes environ sauf si on appuie sur la commande [( ARMER LES ALARMES ou [AL ON/OFF] pour l’interrompre. Le RMR182 possède deux alarmes, l’ALARME 1 et l’ALARME PRECAUTIONS 2. Elles peuvent être appelées ensemble ou indépendamment. Pour régler une alarme, Ce produit a été...
  • Seite 51 5. Utiliser uniquement des piles neuves du type préconisé dans SPECIFICATIONS le manuel d'utilisation. Ne pas mélanger piles neuves et piles usées afin d'éviter les fuites. Mesure de la Température 6. Lire soigneusement le manuel d'instructions avant de faire Unité principale fonctionner l'appareil.
  • Seite 52: A Propos D'oregon Scientific

    Sonde : 92 x 60 x 21 mm le service client Oregon Scientific directement, allez sur le site www2.oregonscientific.com/service/support ou appelez le 949-608- 2848 aux US. Pour des demandes internationales, rendez vous sur le site:...
  • Seite 53 Information supplémentaire: DÉCLARATION DE CONFORMITE Par conséquent ce produit est conforme à la Directive Basse ten- EUROPÉENNE sion 73 / 23 / EC, à la Directive EMC 89 / 336 / EC et à la Directive R&TTE 1999 / 5 / EC (annexe II) et porte la mention CE Cet instrument est muni du module transmetteur.
  • Seite 54 L'unità principale è in grado di monitorare la temperatura massima e minima di differenti postazioni. L'unità non richiede installazione di cavi. Poiché funziona a 433 MHz, RMR182 può essere utilizzato negli Stati Uniti e nella maggior parte dei paesi d'Europa.
  • Seite 55 A DISPLAY A QUATTRO SEZIONI L PULSANTE UP [ Mostra la temperatura int/est, l’ora e la data. Permette di selezionare il valore successivo di un'impostazione. B SEGNALE DI RICEZIONE RADIO [ M PULSANTE DOWN [ Indica la condizione della ricezione radio. Permette di selezionare il valore precedente di C INDICATORE DI TENDENZA DELLA TEMPERATURA un'impostazione.
  • Seite 56: Prima Di Cominciare

    A LCD CARATTERISTICHE PRINCIPALI: Visualizza la temperatura attuale monitorata dall’unità remota. UNITÀ REMOTA B INDICATORE LED Lampeggia quando ‘íunità remota trasmette un rilevamento. ° ° C SELETTORE Permette di selezionare i gradi centigradi (°C) o Fahrenheit (°F). D SELETTORE DEI CANALI Permette di associare il Canale 1, il Canale 2 o il Canale 3 all’unità...
  • Seite 57 3. Posizionare l’unità principale il più vicino possibile all’unità remota e azzerare l’unità principale dopo aver installato le batterie. Ciò assicurerà una sincronizzazione più facile fra la trasmissione e la ricezione dei segnali. 4. Posizionare l’unità remota e l’unità principale entro un campo di trasmissione efficace, che in circostanze normali varia da 20 a 30 metri.
  • Seite 58 COME USARE IL SUPPORTO DA TAVOLO O IL FORO DI MONTAGGIO A PARETE L’unità principale dispone di un supporto di appoggio retrattile il quale, quando è aperto, permette di appoggiare l’unità su una superficie piana. Alternativamente si può chiudere questo supporto ed appendere l’unità...
  • Seite 59: Operazioni Preliminari

    Unità remota In caso di mancata comunicazione tra l’unità centrale e quella re- mota nella prima sezione del display comparirà il simbolo “---” e Montaggio a parete Supporto da tavolo verrà visualizzata l’onda cinetica “ ”. Premere simultaneamente [CHANNEL] e [MEMORY] per avviare uníaltra ricerca per circa 30 secondi.
  • Seite 60 ° ° TENDENZA DI TEMPERATURA NOTE SUI GRADI L'indicatore di tendenza della temperatura sul display mostra L’unità di misura della temperatura viene scelta con il selettore °C/ °F. Selezionare °C per i gradi centigradi o °F per i gradi l’andamento della temperatura relativa ad ogni unità remota. Fahrenheit.
  • Seite 61 MODALITÀ DI VISUALIZZAZIONE DELL'OROLOGIO/CALENDARIO Se, senza motivi apparenti, la temperatura di un particolare canale scompare, premere [CHANNEL] e [MEMORY] per avviare una RMR182 supporta quattro modalità di visualizzazione che sono, ricerca immediata. nell'ordine: Se ciò non sortisce l’effetto desiderato: MODALITÀ 1.
  • Seite 62 ] per tre secondi. Il segnale di ricezione radio scompare e l'unità non risponderà ai segnali radio. RMR182 è stato progettato per sincronizzare automaticamente il suo orologio e calendario una volta che viene portato entro il raggio Per attivare nuovamente la funzione, premere il pulsante [ ] per del segnale radio DCF 77 di Francoforte.
  • Seite 63 ] : RMR182 calcolerà l'ora sulla base del valore immesso. Può essere attivato o disattivato anche premendo il pulsante Per maggiori dettagli fare riferimento all’apposito paragrafo sul [AL ON/OFF]. manuale del prodotto. Se si desidera lasciare invariata una particolare voce, basta premere COME INTERROMPERE LA SUONERIA [SET/MODE] per saltarla.
  • Seite 64: Dati Tecnici

    4. Non manomettere i componenti interni dell’unità. Così facendo DATI TECNICI si rende nulla la garanzia e si possono causare danni superflui. L’unità non contiene componenti che possono essere riparati Misurazione delle temperature dallíutente. Unità principale 5. Usare solo batterie nuove, come specificato nelle istruzioni del produttore.
  • Seite 65: Informazioni Su Oregon Scientific

    Unità remote : 2 batterie UM-4 o “AAA” alcaline da 1,5 V INFORMAZIONI SU OREGON SCIENTIFIC Per avere maggiori informazioni sui nuovi prodotti Oregon Scientific, Peso come le fotocamere digitali, il lettori MP3, i computer didattici per Unità principale : 172 g (senza batteria) ragazzi, gli orologi con proiezione dell’ora, le stazioni barometriche,...
  • Seite 66: Dichiarazione Di Conformitá

    Informazioni aggiuntive: DICHIARAZIONE DI CONFORMITÁ L’apparecchio è inoltre conforme alla Direttiva sulla Bassa Tensione 73 / 23 / EC, alla Direttiva sulla Compatibilità Elettromagnetica Questo prodotto contiene il modulo di trasmissione approvato ed è 89 / 336 / EC, alla Direttiva R&TTE 1999 / 5 / EC (appendice II) e conforme ai requisiti essenziali dell’articolo 3 della Direttiva 1999 recante i rispettivi marchi CE.
  • Seite 67 MANUAL DO UTILIZADOR INTRODUÇÃO Parabéns pela sua compra do Termómetro de Interior e Exterior Multi-Canal RMR182 com sonda livre por cabo de 433MHz e relógio-calendário radiossincronizado. Este aparelho inclui um unidade principal com estação de medição de temperaturas e relógio-calendário e uma unidade remota, a sonda térmica.
  • Seite 68 A ECRÃ DE CRISTAIS LÍQUIDOS DE QUATRO L BOTÃO [ SEGMENTOS Avança o valor de um ajuste Facilita a leitura da previsão meteorológica, temperaturas M BOTÃO [ remota e interior e do relógio - calendário Diminui o valor do ajuste B SINAL DE RECEPÇÃO RÁDIO [ N BOTÃO DO [AL ON/OFF] Indica as condições de recepção do rádio...
  • Seite 69: Antes Da Primeira Utilização

    A ECRÃ DE CRISTAIS LÍQUIDOS PRINCIPAIS CARACTERÍSTICAS: Indica as temperaturas correntes através da unidade remota UNIDADE REMOTA B INDICADOR LED Começa a piscar quando a unidade remota transmite uma leitura ° ° C COMUTADOR DESLIZÁVEL Selecciona entre graus Centígrados (°C) e Fahrenheit(° F) D COMUTADOR DE CANAIS DESLIZÁVEL Designa o canal 1, 2 ou 3 da unidade remota E BOTÃO DE [RESET]...
  • Seite 70 3. Coloque a unidade principal o mais perto possível da unidade 4. Coloque 2 pilhas alcalinas (UM-4 ou “AAA” de 1.5V) respeitando, remota, reajuste a unidade principal após a inserção das pilhas. rigorosamente, a polaridade indicada. Este procedimento assegura uma melhor sincronização entre os 5.
  • Seite 71 Unidade AVISO DE PILHA FRACA Instalação de parede Suporte de mesa Quando for necessário substituir as pilhas, o sinal de pilha fraca aparecerá quando o canal for seleccionado. O nível da pilha da unidade principal aparecerá na temperatura interior, quando estiver fraca.
  • Seite 72: Controlo Das Temperaturas Remotas E Interiores

    Se não for recebido nenhum sinal, aparecem um espaço em branco TENDÊNCIA DA TEMPERATURA "----" e o ícone da onda cinética " ". Prima o botão de [CHANNEL] e de [MEMORY], simultaneamente, durante 30 O indicador de tendências das temperaturas, no ecrã, indica a segundos, para fazer outra busca.
  • Seite 73 ° ° NOTA RELATIVA AOS GRAUS SINAIS DESLIGADOS A unidade de medição de temperatura deste aparelho é seleccionada Se, sem razão óbvia, na visualização de um determinado canal no comutador deslizável °C/°F. Seleccione °C para graus Centígrados aparecer um espaço em branco, prima o botão de [CHANNEL] e ou °F para graus Fahrenheit.
  • Seite 74 O RMR182 foi concebido para sincronizar automaticamente o relógio-calendário, quando entra no raio de acção do sinal de O RMR182 incluiu quarto modos de visualização com esta sequência: frequência rádio de Frankfurt, DCF77. Quando o aparelho está dentro destes limites, os mecanismos MODO 1.
  • Seite 75: Ajuste Manual Do Relógio

    Para activar a função de novo, prima o botão [ ] durante três O RMR182 tem dois alarmes, o ALARME 1 e o ALARME 2. segundos. O sinal de recepção de rádio começa a piscar para iniciar Podem ser activados juntos ou independentes.
  • Seite 76 Quando o alarme dispara o som aumenta gradualmente de volume FUSOS HORÁRIOS E QUADRO e a velocidade de repetição será ligada durante cerca de 2 minutos DE COMPENSAÇÃO a menos que o botão [(( • ))] ou [ AL ON/OFF] seja pressionado para calar o alarme.
  • Seite 77 Relógio radiossincronizado ESPECIFICAÇÕES Hora principal ajustada e sincronizada por sinal de rádio DCF 77 para a Europa continental Central Leitura da Temperatura Visualização 24 h com hh: mm: ss Unidade Principal Formato da data: Dia, Mês Leitura da temperatura interior Dia da semana seleccionável em 4 idiomas (E, D, F, Italiano I) Variação da Temperatura interior (IN) : -9.9°C até...
  • Seite 78: Declaração De Conformidade - Ec

    Padrões Aplicados EN 60950: 2000 Compatibilidade Eletromagnética (Artigo 3.1.b da diretriz R&TTE) SOBRE A OREGON SCIENTIFIC: Padrões Aplicados ETSI EN 301 489-1-3 (Ver.1.4.1) : 2002-08 Visite nosso site (www.oregonscientific.com.br) para aprender mais sobre nossos outros produtos, tais como Câmeras Digitais;...
  • Seite 79 Informações Adicionais: O produtos está em conformidade com as diretrizes de Baixa Voltagem 73 / 23 / EC, a diretriz EMC 89 / 336 / EC e diretriz R&TTE 1999 / 5 / EC (apêndice II) e leva a marca CE respectiva. Carmelo Cubito Agrate Brianza (MI) / Itália January 2004 Representante do Fabricante na Comunidade Européia...
  • Seite 80 L'unità principale è in grado di monitorare la temperatura massima e minima di differenti postazioni. L'unità non richiede installazione di cavi. Poiché funziona a 433 MHz, RMR182 può essere utilizzato negli Stati Uniti e nella maggior parte dei paesi d'Europa.
  • Seite 81 A DISPLAY A QUATTRO SEZIONI L PULSANTE UP [ Mostra la temperatura int/est, l’ora e la data. Permette di selezionare il valore successivo di un'impostazione. B SEGNALE DI RICEZIONE RADIO [ M PULSANTE DOWN [ Indica la condizione della ricezione radio. Permette di selezionare il valore precedente di C INDICATORE DI TENDENZA DELLA TEMPERATURA un'impostazione.
  • Seite 82 A LCD CARATTERISTICHE PRINCIPALI: Visualizza la temperatura attuale monitorata dall’unità remota. UNITÀ REMOTA B INDICATORE LED Lampeggia quando ‘íunità remota trasmette un rilevamento. ° ° C SELETTORE Permette di selezionare i gradi centigradi (°C) o Fahrenheit (°F). D SELETTORE DEI CANALI Permette di associare il Canale 1, il Canale 2 o il Canale 3 all’unità...
  • Seite 83 3. Posizionare l’unità principale il più vicino possibile all’unità remota e azzerare l’unità principale dopo aver installato le batterie. Ciò assicurerà una sincronizzazione più facile fra la trasmissione e la ricezione dei segnali. 4. Posizionare l’unità remota e l’unità principale entro un campo di trasmissione efficace, che in circostanze normali varia da 20 a 30 metri.
  • Seite 84 COME USARE IL SUPPORTO DA TAVOLO O IL FORO DI MONTAGGIO A PARETE L’unità principale dispone di un supporto di appoggio retrattile il quale, quando è aperto, permette di appoggiare l’unità su una superficie piana. Alternativamente si può chiudere questo supporto ed appendere l’unità...
  • Seite 85 Unità remota In caso di mancata comunicazione tra l’unità centrale e quella re- mota nella prima sezione del display comparirà il simbolo “---” e Montaggio a parete Supporto da tavolo verrà visualizzata l’onda cinetica “ ”. Premere simultaneamente [CHANNEL] e [MEMORY] per avviare uníaltra ricerca per circa 30 secondi.
  • Seite 86 ° ° TENDENZA DI TEMPERATURA NOTE SUI GRADI L'indicatore di tendenza della temperatura sul display mostra L’unità di misura della temperatura viene scelta con il selettore °C/ °F. Selezionare °C per i gradi centigradi o °F per i gradi l’andamento della temperatura relativa ad ogni unità remota. Fahrenheit.
  • Seite 87 MODALITÀ DI VISUALIZZAZIONE DELL'OROLOGIO/CALENDARIO Se, senza motivi apparenti, la temperatura di un particolare canale scompare, premere [CHANNEL] e [MEMORY] per avviare una RMR182 supporta quattro modalità di visualizzazione che sono, ricerca immediata. nell'ordine: Se ciò non sortisce l’effetto desiderato: MODALITÀ 1.
  • Seite 88 ] per tre secondi. Il segnale di ricezione radio scompare e l'unità non risponderà ai segnali radio. RMR182 è stato progettato per sincronizzare automaticamente il suo orologio e calendario una volta che viene portato entro il raggio Per attivare nuovamente la funzione, premere il pulsante [ ] per del segnale radio DCF 77 di Francoforte.
  • Seite 89 ] : RMR182 calcolerà l'ora sulla base del valore immesso. Può essere attivato o disattivato anche premendo il pulsante Per maggiori dettagli fare riferimento all’apposito paragrafo sul [AL ON/OFF]. manuale del prodotto. Se si desidera lasciare invariata una particolare voce, basta premere COME INTERROMPERE LA SUONERIA [SET/MODE] per saltarla.
  • Seite 90 4. Non manomettere i componenti interni dell’unità. Così facendo DATI TECNICI si rende nulla la garanzia e si possono causare danni superflui. L’unità non contiene componenti che possono essere riparati Misurazione delle temperature dallíutente. Unità principale 5. Usare solo batterie nuove, come specificato nelle istruzioni del produttore.
  • Seite 91 Unità remote : 2 batterie UM-4 o “AAA” alcaline da 1,5 V INFORMAZIONI SU OREGON SCIENTIFIC Per avere maggiori informazioni sui nuovi prodotti Oregon Scientific, Peso come le fotocamere digitali, il lettori MP3, i computer didattici per Unità principale : 172 g (senza batteria) ragazzi, gli orologi con proiezione dell’ora, le stazioni barometriche,...
  • Seite 92 Informazioni aggiuntive: DICHIARAZIONE DI CONFORMITÁ L’apparecchio è inoltre conforme alla Direttiva sulla Bassa Tensione 73 / 23 / EC, alla Direttiva sulla Compatibilità Elettromagnetica Questo prodotto contiene il modulo di trasmissione approvato ed è 89 / 336 / EC, alla Direttiva R&TTE 1999 / 5 / EC (appendice II) e conforme ai requisiti essenziali dell’articolo 3 della Direttiva 1999 recante i rispettivi marchi CE.
  • Seite 93 Het hoofdtoestel is in staat om de maximum en minimum temperatuur bij te houden van verschillende plaatsen. Een installatie van kabels is niet vereist aangezien de RMR182 werkt op 433MHz. Wat de kalenderklok betreft, die is radiogestuurd. Ze synchroniseert automatisch de huidige tijd en datum wanneer het in een bereik van ongeveer 1500km wordt gebracht van het radiosignaal gegenereerd vanuit Frankfurt, Duitsland (DCF77).
  • Seite 94 A VIER-REGEL LCD SCHERM ] TOETS Zorg voor gemakkelijk af te lezen buiten en binnen temperaturen Verhoogt de waarde van een instelling en kalenderklok. ] TOETS ] RADIO-ONTVANGST SIGNAAL Verlaagt de waarde van een instelling Duidt de status van de radio-ontvangst aan. N [AL AAN/UIT] TOETS C TEMPERATUUR TENDENS AANDUIDING Schakelt de weksignalen in of uit.
  • Seite 95: Voor U Begint

    A LCD SCHERM HOOFDKENMERKEN: DRAADLOOS TOESTEL Geeft de huidige temperatuur weer opgenomen door het draadloze toestel B LED AANDUIDING Knippert wanneer het draadloze toestel een peiling doorstuurt C ˚C/ ˚F SCHUIFSCHAKELAAR Selecteert tussen Centigraden (˚C ) en Fahrenheit (˚F ) D KANAAL SCHUIFSCHAKELAAR Stelt het draadloze toestel in op Kanaal 1, Kanaal 2 of Kanaal 3...
  • Seite 96 3. Plaats het hoofdtoestel zo dicht mogelijk bij het draadloze 5. Plaats de batterijvakdeur terug en maak de schroeven vast. toestel en reset het hoofdtoestel na de installatie van de batterijen. Merk op dat eenmaal een kanaal toegekend is aan een draadloos Dit zal een gemakkelijkere synchronisatie verzekeren tussen de toestel, de enige manier om dit te veranderen is door de batterijen transmissie en de ontvangst van de signalen.
  • Seite 97: De Reset Toets

    Wanneer het tijd is om de batterijen te vervangen zal de lage batterij Draadloos Toestel aanduiding verschijnen wanneer het overeenkomstige kanaal Muurbevestiging Tafelstandaard geselecteerd is. Het batterijniveau van het hoofdtoestel zal verschijnen op de binnentemperatuur wanneer deze bijna leeg is. HOE DE TAFELSTANDAARD OF MUURBEVESTIGING GEBRUIKEN Het hoofdtoestel heeft een verwijderbare tafelstandaard, die, wanneer...
  • Seite 98 Wanneer geen signalen ontvangen worden zullen spaties “ --- ” TEMPERATUUR TENDENS weergegeven worden en zal het kinetische golficoon verschijnen “ “ ” Druk gelijktijdig op [KANAAL] en [GEHEUGEN] om De temperatuur tendens aanduiding op het scherm geeft de tendens nogmaals te zoeken gedurende 30 seconden.
  • Seite 99 OPMERKING OVER ˚C EN ˚F ONDERBOKEN SIGNALEN De eenheid van de temperatuurweergaven wordt gekozen met de Ña Indien de weergave van een bepaald kanaal zonder enige reden ˚C/˚F schuifschakelaar. Kies ˚C voor Celsius of ˚F voor Fahrenheit. uitvalt, druk op [KANAAL] en [GEHEUGEN] om een onmiddellijk zoeken te forceren.
  • Seite 100 KALENDERKLOK WEERGAVEMODI OVER RADIO-ONTVANGST De RMR182 ondersteunt vier weergavemodi in de volgende volgorde: De RMR182 is ontworpen om de kalenderklok automatisch te synchroniseren eenmaal het binnen bereik wordt gebracht van het Frankfurt DCF77 radiosignaal. MODUS 1. Locale Tijd Wanneer de RMR182 binnen bereik is, zal de radiobesturing Uur, Minuten, Seconden mechanisme alle manuele instellingen overnemen.
  • Seite 101 Het radio-ontvangst signaal zal verdwijnen. Het toestel zal niet reageren op radiosignalen. De RMR182 heeft twee weksignalen, ALARM 1 en ALARM 2. Wanneer U deze functie opnieuw wil inschakelen, druk op de toets Deze kunnen tegelijk opgeroepen worden of apart.
  • Seite 102: Voorzorgsmaatregelen

    HOE EEN WEKSIGNAAL STOPPEN TIJDZONE EN OFFSET TABEL Om een weksignaal niet te laten afgaan op dezelfde dag, druk eenmaal [( )] of [AL AAN/UIT]. Merk op dat het weksignaal nog ( • ) steeds ingeschakeld is en zal afgaan op de ingestelde tijd de volgende dag.
  • Seite 103 Radiogestuurde Klok SPECIFICATIES Hoofdtijd ingesteld en gesynchroniseerd door Radiosignaal DCF77 voor Temperatuur Meting Hoofdtoestel Centraal Continentaal Europa Binnentemperatuur Meting 24 u weergave met uu: mm: ss Weergegeven BINNEN temperatuurbereik : -9.9˚C tot +70.0˚C Datum Formaat: Dag, Maand. 14.2˚F tot 158.0˚F Weekdag te kiezen in 4 talen (E, D, F, I) Voorgesteld werkbereik : -5.0˚C tot +50.0˚C...
  • Seite 104: Over Oregon Scientific

    Efficiënt gebruik van het radiofrequentiespectrum (Artikel 3.2 van de R&TTE-richtlijnen) Bezoek onze website (www.oregonscientific.com) om meer te weten over uw nieuwe product en andere Oregon Scientific producten Toegepasten normen: zoals digitale fototoestellen, gezondheids- en fitnessuitrusting en ETSI EN 300 220-3 (Ver1.1.1) : 2000-09 weerstations.
  • Seite 105 Bijkomende informatie: Dit product is bijgevolg conform de Richtlijn voor Laagspanning 73/23/EC, de EMC-richtlijn 89/336/EC en de R&TTE-richtlijn 1999/5/EC (appendix II) en is voorzien van de overeenkomstige CE-markering. Carmelo Cubito Agrate Brianza (MI) / Italië January 2004 R&TTE-vertegenwoordiger van de fabrikant LANDEN DIE ZIJN ONDERWORPEN AAN RTT&E Alle EEG-landen, Zwitserland en Noorwegen...
  • Seite 106 © 2004 Oregon Scientific. All rights reserved. 086-002217-169...
  • Seite 107 !"#$%&' !" # ojoNUO !"#$%QPPjew !"# $%&'() !"#"$%&'()*+,-./ o j o N U O !"#$%&'()*+,-./01&2304 !"#$%&'!() !"#$%&'()*&'+,-./012345 !"#$%&'()*+,-./0123456 !"#$%&'()*(+,-.o j o N U O !"#$%&'()*+ QPPjew ! " # $ % & ' ( ) * + , - . / 0 1 2 3 !"NRMMâã...
  • Seite 108 !"#$%& !"# x=`e^kkbi=z !"#$%&'()*+,-. !"#$ x= =z= !"#$ x= =z= !" !"#$%&' x= =z= !"#$ !" !"#$%& !"#$%& x=^i=lkLlcc=z !"#$ !"#$%& !" !"#"$%&'() !" x=obpbq=z !"#$%&'(# !"#$ !"#$%& ! "#$%&' !"# =(°C)= =(°F) !"#$% x= =z x= =z= !"#$%&' !=EOF=rjJP= !"# F=z x=E F=z=...
  • Seite 109 !" !"#$%& !"#$%&'()*+ !"#$%&'() ! "#$%&' !"# =(°C)= =(°F) !"# !"#$%&=N !"#$%&'$ !=rjJQ= !"# !"# !"#$"%&'( !"# !"#$%&'())*+ !"#$%&! !"#$% !"#$%&' !()* !"#$%&'()*+,-.-/012...
  • Seite 110 !"#$%&'()*+,(-./01 !"#$%&'()*+,-./01234567 !"#$%&'()*+,-./01234! !"#$%&'() !"#$%&'()*+,-./012345 !"#$ OM PM !"#$%&'()* !"#$%&'()*+,-./01234567 !"#$%&'()*+,-+./* 012 , !"#$%&'()*+&,-.rjJP !"#$%&'()*+,-./0123456 !"#$ !"#$%&'$( !"#$%& !"#$%&'( `e^kkbi !" #$%&'()*+#$,-./01 !"# !"#$%&'()*+&,-.rjJQ !"#$%&'()*+,-.&#$/#0123 !"#$%&'()* +,-./01%&! !"#$%&'()*...
  • Seite 111 !"#$%&'() !"#$%&'()*+,)$- .*/0"12 !"#$%&'()*+,-./01234567 !"#$%&'()*+,'-.)/01 !"#$%&'()*+,-./01234501 !"#$%&'()*+,-./01234-5 ! "#$%&'()*+P M !"#$%&'( !"#$%&'()*+,-./012 !"#$%&'#()*+,-./012&34* !"#$%&'()*PM !"#$% !"#$%&'()*+,-JJJJ !"#$%& !"#= x`e^kkbiz !"= xjbjlovz !"#$%&'()P M !"#$%&'()*+ !"#$%&'...
  • Seite 112 !"#$%&'()*+,'-./0123456 !" # ! !" #$%&'("')*+ !,-./01 !"#$%&'( !"#$%&'() !" !"#$%&'()*+,=x`e^kkbiz !" !"#$ !"#$%&'()*!"+,-.%!"/012 !"#$%&'()*+, = xjbjlovz !" !"#$%&'()* +,=j^u= =jfk !"#$%&'()*+,-./$0123JJJ !"#$%&=xjbjlovz !"#$%&'( !"# $%&'()*+,-./0123456 !"#$%&'=xjbjlovz !"#$%&# !"#$ %&'(=x`e^kkbiz= =xjbjlovz !"#$ %&'()*+!,-./ !"#$%&'()*+,-./01234567 !"#$ !"#$%&'!"($%&) !"#$%&'()*+,-./01234561 !"#$%=°C °F !"#$%&'(%&=°C !"#$%!"&eee !"#$=°F !"#$...
  • Seite 113 !"# !"#$% !"#$%&'()*+,- ojoNUO !"#$%&' !" # !"#$%&'()*+,$-.= x`e^kkbiz= !" #$ !"#$%&'()*+,- xjbjlovz= !"#$%&'()* !"#$ % ! !"#$%&'()*'+,-./ !"#$!%&'%() !"#$%&'()*+,-./0123)4 !"!#$!%&' !"#$%&'() ! "#$%&'()*+, !-./0 !"#$%&'() !" #$ !"#$%&'()*+,- !"#$%&'()*+,-./012,-345 = xpbqLjlabz !"#$%&'()*+,-./0"12345 !"#$%&'()*+,-./01 2345' !"=x ( !"#$%&'()*+,-./ ) z= !"#$%&' ( •...
  • Seite 114 !"#$%&'()*+,- = = !"#$ !"#$ !"#$%&'()*#+,-. /012& !"#$%&'(a`cTT !"#$% ojoNUO !"#$%&'()*= = !"#$%&'() !"#$%&'( !"# $%&'( !"#$%&'()*+,-./012 ojoNUO !"#$ !"#$% !"#$%&'("#$ %&)*+,-. !"#$#%&'(=xpbqL=jlabz= !"#$ !"#$%OúNM !"#$%&'()*+,- !"#$%&'()*+, !"#$%&'()*+,-./0 !"#$%&'()*+,-./!0 = = = = !"#$%&'()*+,- !"#$%&'()*+,-. = xpbqLjlabz !"#$%&'()*+,-./0()12324 !"#$%&'()*+',- !"#$%&'()O Q !"# $ !"#$%&'!(b !"a...
  • Seite 115 !"#$%&'()*+,#-./01(2345 !"#$%& !"#$ )z= =x^i=lkLlccz= ( • ) !"#$%&'#$()#$*+,-./ ojoNUO !"#$ % !"#$ !"#$%&'()*+,-./01 !"#$%!&'( !"#$%&' ^i^oj=N ( • ) !" !"#$%&'()*+, ^i^oj=O !"#$%&'()*+=MWMM !"#$%& !"#$%&'() !"#$%#&'()*+,-./01'23 ( • ) !"# !"#$% = = = = !"#$%&'()*+,-.,/01234 !"#$%&' ( • ) !"#$%&'()*+,-./'01*23 !"#$% = = = =...
  • Seite 116 !"# !" #$ !"#$% -50.0°C H70.0°C -58.0°F H158.0°F -50.0°C H70.0°C -58.0°F H158.0°F !"# -20.0°C H60.0°C -40.0°F H140.0°F !" 0.1°C 0.2°F ! " 433MHz !" !"# !"# !"#$ !"#$%&'()*+,a`cTT !"#$ÜÜ ãã ëë !" #$ !"#$%&'()*+,-).+,/)0+, !"# !"#!$%&'( !"#$% -9.9°C H70.0°C !"#$%& 14.2°F 158.0°F !"# -5.0°C H50.0°C...
  • Seite 117 = lêÉÖçå= pÅáÉåíáÑáÅ= E !"rjJP !" ^^ NKR !"#=lêÉÖçå=pÅáÉåíáÑáÅ=E !"= !"rjJQ !" ^^^ NKR !"#$%&'()*+,!-./0!12* !"#$%&'()*+,-./012345-6 =EïïïKçêÉÖçåëÅáÉåíáÑáÅKÅçãF lêÉÖçå=pÅáÉåíáÑáÅ=E !"#$ !"#$%&'()*+,-./012345&' !"#$ !" !"#$=lêÉÖçå=pÅáÉåíáÑáÅ=E !"#$ !"#$%&'()*+,-.!/0123 45 !"#$ % ïïïKçêÉÖçåëÅáÉåíáÑáÅKÅçãLëÉêîáÅÉLëìééçêí= NVMEiF=ñ=TREtF=ñ=ONEqF=ãã !"#$%&'()*+,-./ VQVJSMUJOUQU VOEiF=ñ=SMEtF=ñ=ONEqF=ãã EïïïOKçêÉÖçåëÅáÉåíáÑáÅKÅçãL~ÄçìíLáåíÉêå~íáçå~äLÇÉÑ~ìäíK~ëéF !"#$%&'()*+,-./012 !"#$%&'()*+",*-./0 !"#$%&' !"#$ %&'"()*+, -./ !"#$%&'%( !"#$%&'()*+,-.
  • Seite 118 © 2005 Oregon Scientific. All rights reserved. 086-002217-155...
  • Seite 119 !"#$%&' !" # ojoNUO !"#$%QPPjew !"# $%&'() !"#"$%&'()*+,-./ o j o N U O !"#$%&'()*+,-./01&2304 !"#$%&'!() !"#$%&'()*&'+,-./012345 !"#$%&'()*+,-./0123456 !"#$%&'()*(+,-.o j o N U O !"#$%&'()*+ QPPjew ! " # $ % & ' ( ) * + , - . / 0 1 2 3 !"NRMMâã...
  • Seite 120 !"#$%& !"# x=`e^kkbi=z !"#$%&'()*+,-. !"#$ x= =z= !"#$ x= =z= !" !"#$%&' x= =z= !"#$ !" !"#$%& !"#$%& x=^i=lkLlcc=z !"#$ !"#$%& !" !"#"$%&'() !" x=obpbq=z !"#$%&'(# !"#$ !"#$%& ! "#$%&' !"# =(°C)= =(°F)= !"#$% x= =z x= =z= !"#$%&' !=EOF=rjJP= !"# )=z x=( )=z=...
  • Seite 121 !" !"#$%& !"#$%&'()*+ !"#$%&'() ! "#$%&' !"# =(°C)= =(°F) !"# !"#$%&=N !"#$%&'$ !=rjJQ= !"# !"# !"#$"%&'( !"# !"#$%&'())*+ !"#$%&! !"#$% !"#$%&' !()* !"#$%&'()*+,-.-/012...
  • Seite 122 !"#$%&'()*+,(-./01 !"#$%&'()*+,-./01234567 !"#$%&'()*+,-./01234! !"#$%&'() !"#$%&'()*+,-./012345 !"#$ OM PM !"#$%&'()* !"#$%&'()*+,-./01234567 !"#$%&'()*+,-+./* 012 , !"#$%&'()*+&,-.rjJP !"#$%&'()*+,-./0123456 !"#$ !"#$%&'$( !"#$%& !"#$%&'( =`e^kkbi !" #$%&'()*+#$,-./01 !"# !"#$%&'()*+&,-.rjJQ !"#$%&'()*+,-.&#$/#0123 !"#$%&'()* +,-./01%&! !"#$%&'()*...
  • Seite 123 !"#$%&'() !"#$%&'()*+,)$- .*/0"12 !"#$%&'()*+,-./01234567 !"#$%&'()*+,'-.)/01 !"#$%&'()*+,-./01234501 !"#$%&'()*+,-./01234-5 ! "#$%&'()*+P M !"#$%&'( !"#$%&'()*+,-./012 !"#$%&'#()*+,-./012&34* !"#$%&'()*PM !"#$% !"#$%&'()*+,-JJJJ !"#$%& !"#= x`e^kkbiz !"= xjbjlovz !"#$%&'()P M !"#$%&'()*+ !"#$%&'...
  • Seite 124 !"#$%&'()*+,'-./0123456 !" # ! !" #$%&'("')*+ !,-./01 !"#$%&'( !"#$%&'() !" !"#$%&'()*+,=x`e^kkbiz !" !"#$ !"#$%&'()*!"+,-.%!"/012 !"#$%&'()*+, = xjbjlovz !" !"#$%&'()* +,=j^u= =jfk !"#$%&'()*+,-./$0123JJJ !"#$%&=xjbjlovz !"#$%&'( !"# $%&'()*+,-./0123456 !"#$%&'=xjbjlovz !"#$%&# !"#$ %&'(=x`e^kkbiz= =xjbjlovz !"#$ %&'()*+!,-./ !"#$%&'()*+,-./01234567 !"#$ !"#$%&'!"($%&) !"#$%&'()*+,-./01234561 !"#$%=°C °F !"#$%&'(%&=°C !"#$%!"&eee !"#$=°F !"#$...
  • Seite 125 !"# !"#$% !"#$%&'()*+,- ojoNUO !"#$%&' !" # !"#$%&'()*+,$-.= x`e^kkbiz= !" #$ !"#$%&'()*+,- xjbjlovz= !"#$%&'()* !"#$ % ! !"#$%&'()*'+,-./ !"#$!%&'%() !"#$%&'()*+,-./0123)4 !"!#$!%&' !"#$%&'() ! "#$%&'()*+, !-./0 !"#$%&'() !" #$ !"#$%&'()*+,- !"#$%&'()*+,-./012,-345 = xpbqLjlabz !"#$%&'()*+,-./0"12345 !"#$%&'()*+,-./01 2345' !"=x ( !"#$%&'()*+,-./ ) z= !"#$%&' ( •...
  • Seite 126 !"#$%&'()*+,- = = !"#$ !"#$ !"#$%&'()*#+,-. /012& !"#$%&'(a`cTT !"#$% ojoNUO !"#$%&'()*= = !"#$%&'() !"#$%&'( !"# $%&'( !"#$%&'()*+,-./012 ojoNUO !"#$ !"#$% !"#$%&'("#$ %&)*+,-. !"#$#%&'(=xpbqL=jlabz= !"#$ !"#$%OúNM !"#$%&'()*+,- !"#$%&'()*+, !"#$%&'()*+,-./0 !"#$%&'()*+,-./!0 = = = = !"#$%&'()*+,- !"#$%&'()*+,-. = xpbqLjlabz !"#$%&'()*+,-./0()12324 !"#$%&'()*+',- !"#$%&'()O Q !"# $ !"#$%&'!(b !"a...
  • Seite 127 !"#$%&'()*+,#-./01(2345 !"#$%& !"#$ )z= =x^i=lkLlccz= ( • ) !"#$%&'#$()#$*+,-./ ojoNUO !"#$ % !"#$ !"#$%&'()*+,-./01 !"#$%!&'( !"#$%&' ^i^oj=N ( • ) !" !"#$%&'()*+, ^i^oj=O !"#$%&'()*+=MWMM !"#$%& !"#$%&'() !"#$%#&'()*+,-./01'23 ( • ) !"# !"#$% = = = = !"#$%&'()*+,-.,/01234 !"#$%&' ( • ) !"#$%&'()*+,-./'01*23 !"#$% = = = =...
  • Seite 128 !"# !" #$ !"#$% -50.0°C H70.0°C -58.0°F H158.0°F -50.0°C H70.0°C -58.0°F H158.0°F !"# -20.0°C H60.0°C -40.0°F H140.0°F !" 0.1°C 0.2°F ! " 433MHz !" !"# !"# !"#$ !"#$%&'()*+,a`cTT !"#$ÜÜ ãã ëë !" #$ !"#$%&'()*+,-).+,/)0+, !"# !"#!$%&'( !"#$% -9.9°C H70.0°C !"#$%& 14.2°F 158.0°F !"# -5.0°C H50.0°C...
  • Seite 129 = lêÉÖçå= pÅáÉåíáÑáÅ !"rjJP !" ^^ NKR !"#=lêÉÖçå=pÅáÉåíáÑáÅ= !"= !"rjJQ !" ^^^ NKR !"#$%&'()* +,-. /0(/12 !"#$%&'()*+,-./012*34 !"#$ EïïïKçêÉÖçåëÅáÉåíáÑáÅKÅçãF lêÉÖçå=pÅáÉåíáÑáÅ= !"#$ !"#$%&'()*+,-./ !01234 !"#$ !"#$=lêÉÖçå=pÅáÉåíáÑáÅ= !"#$ %&' ! " # $ % & ' ( ) * + , - . / 0 1 2 3 !"#$ % ïïïKçêÉÖçåëÅáÉåíáÑáÅKÅçãLëÉêîáÅÉLëìééçêí= !"#$%&'()*+,-./...

Inhaltsverzeichnis