
Verwandte Anleitungen für ZyXEL NBG-415N


Inhaltszusammenfassung für ZyXEL NBG-415N
-
Seite 1: Inhaltsverzeichnis
ZyXEL NBG-415N Draft 802.11n Wireless Broadband Router Quick Start Guide Version 1.00 10/2006 Edition 1 Table of Contents ENGLISH DEUTSCH ESPAÑOL FRANÇAIS ITALIANO РУССКИЙ SVENSKA 繁體中文 Copyright © 2006 ZyXEL Communications Corporation. All rights reserved... -
Seite 2: Hardware Connections
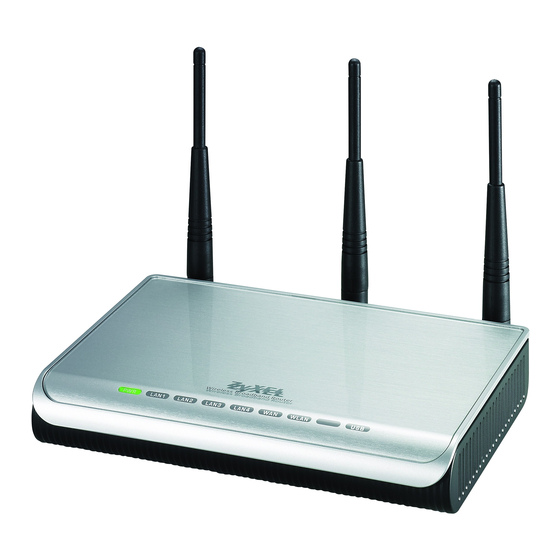
ENGLISH ENGLISH Introduction The NBG-415N allows more than one computer on your network to share an Internet connection. You can also use the NBG-415N to set up a wireless network. 1 Hardware Connections 1 LAN: Use an Ethernet cable to connect a computer to a LAN port for Internet access. - Seite 3 • The WAN and/or LAN LEDs turn on and sometimes blink if the corresponding ports are properly connected. If none of the LEDs are on, unplug the device and check your hardware connections again. 2 Access the NBG-415N 1 Start your web browser. Enter 192.168.10.1 (the default management LAN IP address) in the Location or Address field.
- Seite 4 Setup 1 Click START > WIZARD > Launch Internet Connection Setup Wizard to display the first wizard screen. Click Next in each screen to continue. The NBG-415N may have already detected your Internet connection. 2 Change the login password in the second wizard screen.
- Seite 5 6 In the last wizard screen, click Connect to save the settings to the NBG-415N. 7 Click Reboot the Device to restart the NBG-415N and make the changes take effect. Wait a couple of minutes for the NBG-415N to finish rebooting before accessing it again.
- Seite 6 WEP key or password. 5 Check your wireless LAN settings in this screen and click Save to save the settings to the NBG-415N. 6 Click Reboot the Device to restart the NBG-415N and make the changes take effect.
- Seite 7 Windows® Connect Now With Windows® Connect Now, you can transfer wireless settings on your NBG-415N to a USB memory stick and then save the settings to the wireless client computer(s). This allows you to easily set up a wireless LAN. To take advantage of this feature, you need: •...
- Seite 8 ENGLISH 3 Select Set up a new wireless network to configure a new wireless network. 4 In the Network name (SSID) field, specify a unique name to identify your wireless LAN. 5 Select Automatically assign a network key to have Windows create a security key.
- Seite 9 LAN connection to the NBG-415N. Troubleshooting 1 None of the LEDs turn on when the NBG-415N is on. • Make sure that you use the included power adaptor to connect to the NBG-415N and that it is plugged into an appropriate power source.
- Seite 10 • If the LAN LEDs are off, check the cable connections between the NBG-415N and your LAN computers. • Verify that the IP address and subnet mask of the NBG-415N and the LAN computers are in the same IP address range. 4 I cannot access the Internet.
- Seite 11 • Check that you have entered your Internet account information correctly in the wizard screens. 5 I cannot connect to the wireless LAN via the NBG-415N. • Make sure the ON OFF switch is in the ON position to enable the wireless LAN on the NBG-415N.
- Seite 12 9 Close the Network Connections screen. View Your Product’s Certifications 1 Go to www.zyxel.com. 2 Select your product from the drop-down list box on the ZyXEL home page to go to that product's page. 3 Select the certification you wish to view from this page.
- Seite 13 ENGLISH...
-
Seite 14: Einführung
DEUTSCH DEUTSCH Einführung Der NBG-415 ermoglicht den gleichzeitigen Internetzugang mehrerer Computer in Ihrem Netzwerk.Sie konnen den NBG- 415N auch verwenden, um ein Drahtlosnetzwerk aufzubauen. 1 Anschließen der Hardware 1 LAN: Schließen Sie für den Internetzugang einen Computer mit einem Ethernet-Kabel an einen LAN- Anschluss an. -
Seite 15: Bedeutung Der Leds
Kabel richtig gesteckt wurden. Wenn keine der LEDs leuchtet, trennen Sie das Gerät vom Stromnetz, und prüfen Sie die Kabelverbindungen. 2 Zugreifen auf den NBG-415N 1 Starten Sie Ihren Internetbrowser. Geben Sie in das Feld Address (Adresse) oder Location (Position) 192.168.10.1 ein (das ist die... - Seite 16 Launch Internet Connection Setup Wizard (Assistent zum Einrichten der Internetverbindung starten), um den Assistenten zu starten. Klicken Sie im folgenden Fenster zum Fortfahren auf Next (Weiter). Möglicherweise hat der NBG-415N bereits Ihre Internetverbindung erkannt. 2 Ändern Sie im zweiten Fenster des Assistenten das Anmeldekennwort.
- Seite 17 Connect (Verbinden), um die Einstellungen im NBG- 415N zu speichern. 7 Klicken Sie auf Reboot the Device (Gerät neu starten), um den NBG-415N mit den geänderten Einstellungen neu zu starten. Greifen Sie auf den NBG- 415N erst zu, wenn der Neustart abgeschlossen ist.
-
Seite 18: Wireless Lan Wizard Setup (Assistent Zum Einrichten Des Wireless-Lan)
DEUTSCH Wenn Sie keine Verbindung zum Internet herstellen können, prüfen Sie, ob die Internetdaten in den entsprechenden Fenstern des Assistenten richtig eingegeben wurden. 4 Wireless LAN Wizard Setup (Assistent zum Einrichten des Wireless-LAN) 1 Klicken Sie auf START (Start) > WIZARD (Assistent) > Launch Wireless Security Setup Wizard (Assistent zum Einrichten des Wireless-LAN), um den Assistenten zu starten. - Seite 19 Drahtlossicherheit aus. 4 Das nächste Fenster erscheint, wenn Sie einen Sicherheitsmodus aktiviert haben. Geben Sie ein Kennwort ein, mit dem der NBG-415N einen geheimen Schlüssel für die Drahtlosverbindung erzeugt. 5 Prüfen Sie in diesem Fenster die Wireless-LAN- Einstellungen, und klicken...
-
Seite 20: Einrichten Der Drahtlosverbindung Mit Windows® Connect Now
5 Einrichten der Drahtlosverbindung mit Windows® Connect Now Mit Windows® Connect Now können Sie Drahtlos- Einstellungen des NBG-415N auf einen USB-Memory-Stick übertragen, und dann die Einstellungen in den Wireless- Client-Computern speichern. Auf diese Weise können Sie ein Wireless-LAN problemlos einrichten. Um diese Funktion nutzen zu können, benötigen Sie:... - Seite 21 DEUTSCH 2 Das erste Fenster des Assistenten erscheint. Klicken Sie im folgenden Fenster zum Fortfahren auf Next (Weiter). 3 Um ein neues Drahtlosnetzwerk zu konfigurieren, wählen Sie Set up a new wireless network (Ein neues Drahtlosnetzwerk einrichten). 4 Geben Sie in das Feld Netzwerkname (SSID) einen eindeutigen Namen ein, um das Wireless-LAN zu identifizieren.
- Seite 22 Feld Flash-Laufwerk ein. 9 Führen Sie die Anweisungen auf dem Bildschirm aus. 10In diesem Fenster wird angezeigt, ob das sichere Drahtlosnetzwerk erfolgreich eingerichtet wurde. Klicken Sie auf Fertig stellen. 11Prüfen Sie von einem Computer mit Drahtlosverbindung aus die Wireless-LAN-Verbindung zum NBG-415N.
-
Seite 23: Problembeseitigung
DEUTSCH Problembeseitigung 1 Der NBG-415N ist eingeschaltet, aber die LEDs leuchten nicht. • Prüfen Sie, ob Sie den NBG-415N mit dem mitgeliefer- ten Netzadapter an eine geeignete Stromquelle ange- schlossen haben. • Prüfen Sie alle Kabelverbindungen. • Wenn die LED-Anzeigen auch dann nicht leuchten, besteht möglicherweise ein Problem mit der Hardware. - Seite 24 NBG-415N und der LAN-Computer im gleichen IP-Adressbereich befinden. 4 Es ist kein Zugriff auf das Internet möglich. • Prüfen Sie die Verbindung des NBG-415N zum Breit- bandmodem. • Schalten Sie das Breitbandmodem und den NBG- 415N aus und wieder ein. Wenn Sie ein Kabelmodem verwenden, müssen Sie zuerst das Kabelmodem...
-
Seite 25: Einrichten Der Ip-Adresse Des Computers
Wireless-LAN- und Sicherheitseinstellungen hat wie der NBG-415N. • Stellen Sie sicher, dass sich der Wireless-Client inner- halb der Reichweite des NBG-415N befindet. • Stellen Sie sicher, dass es keine Störungen durch Überlagerungen gibt (z. B. von anderen Wireless- LANs oder Funktelefonen). -
Seite 26: Produktzertifizierungen Ansehen
7 Klicken Sie auf OK, um das Fenster Internetprotokolleigenschaften (TCP/IP) zu schließen. 8 Klicken Sie auf Schließen (bei Windows 2000/NT auf OK), um das Fenster Eigenschaften von LAN- Verbindung zu schließen. 9 Schließen Sie das Fenster Netzwerkverbindungen. Produktzertifizierungen ansehen 1 Zu www.zyxel.com. - Seite 27 DEUTSCH 2 Wählen Sie auf der ZyXEL-Startseite aus der Drop-down- Liste Ihr Produkt aus, um die Seite des Produkts aufzurufen. 3 Wählen Sie auf dieser die Zertifizierung aus, die angezeigt werden soll.
-
Seite 28: Español
ESPAÑOL ESPAÑOL Introducción El NBG-415N permite más de un ordenador en su red para compartir una conexión a Internet. También puede usar el NBG-415N para configurar una red inalámbrica. 1 Conexiones del hardware 1 LAN: Utilice un cable Ethernet para conectar un ordenador a un puerto LAN y acceder a Internet. - Seite 29 Si ninguno de los LEDs están encendidos, desenchufe el dispositivo y compruebe de nuevo sus conexiones de hardware. 2 Acceso al NBG-415N 1 Inicie su explorador de web. Escriba 192.168.10.1 (la dirección IP predeterminada de la LAN) en el campo Ubicación o Dirección. Presione [ENTRAR] 2 Aparecerá...
-
Seite 30: Configuración De Internet
Asistente para la configuración de la conexión a Internet) para mostrar la primera pantalla del asistente. Haga clic en Next (Siguiente) en cada pantalla para continuar. El NBG-415N puede haber detectado ya su conexión a Internet. 2 Cambie la contraseña de acceso en la segunda pantalla del asistente. - Seite 31 Connect (Conectar) para guardar la configuración en el NBG-415N. 7 Haga clic en Reboot the Device (Reiniciar el dispositivo) para reiniciar el NBG-415N y hacer que los cambios tengan efecto. Espere un par de minutos para que el NBG-415N finalice el reinicio antes de volver a acceder.
- Seite 32 ESPAÑOL Si no puede acceder a Internet, compruebe si ha introducido la información de la cuenta de Internet correctamente en las pantallas del asistente. 4 Asistente para la configuración de la LAN inalámbrica 1 Haga clic en START (INICIAR) > WIZARD (ASISTENTE) >...
- Seite 33 LAN inalámbrica en esta pantalla y haga clic en Save (Guardar) para guardar la configuración en el NBG-415N. 6 Haga clic en Reboot the Device (Reiniciar el dispositivo) para reiniciar el NBG-415N y hacer que los cambios tengan efecto.
- Seite 34 ESPAÑOL 7 Espere un par de minutos para que el NBG-415N finalice el reinicio antes de volver a acceder. 5 Configuración de la conexión inalámbrica utilizando Windows® Connect Now Con Windows® Connect Now, puede transferir la configuración inalámbrica de su NBG-415N a un lápiz de memoria USB y luego guardar la configuración en los...
- Seite 35 ESPAÑOL 2 Aparecerá la primera pantalla del asistente. Haga clic en Next (Siguiente) en cada pantalla para continuar. 3 Seleccione Configurar una nueva red inalámbrica para configurar una nueva red inalámbrica. 4 En el campo Nombre de la red (SSID), especifique un único nombre para identificar su LAN inalámbrica.
- Seite 36 ESPAÑOL 7 Seleccione Usar una unidad USB Flash para configurar una red inalámbrica. 8 Conecte la unidad USB en su ordenador y especifique la letra de la unidad en el campo Unidad flash. 9 Siga las instrucciones en pantalla. 10Esta pantalla aparece cuando ha configurado con éxito una red inalámbrica segura.
-
Seite 37: Solución De Problemas
ESPAÑOL Solución de problemas 1 Ninguno de los LEDs se enciende con el NBG-415N encendido. • Asegúrese de utilizar el adaptador de alimentación incluido para conectar al NBG-415N y que esté enchufado en una fuente de alimentación apropiada. • Compruebe todas las conexiones de los cables. - Seite 38 ESPAÑOL • Verifique que la dirección IP y máscara de subred del NBG-415N y los ordenadores de la LAN estén en el mismo rango de dirección IP. 4 No puedo acceder a Internet. • Compruebe la conexión del NBG-415N al módem de banda ancha.
- Seite 39 ESPAÑOL • Asegúrese de que no haya interferencias de radio (por ejemplo, desde otras LANs inalámbricas o telé- fonos inalámbricos). Configurar la dirección IP de su ordenador Esta sección le muestra cómo configurar el ordenador con Windows NT/2000/XP para obtener automáticamente una dirección IP.
- Seite 40 área local. 9 Cierre la pantalla Conexiones de red. Ver los certificados de su producto 1 Vaya a www.zyxel.com. 2 Seleccione su producto de la lista desplegable en la página inicial de ZyXEL para ir a la página de ese producto.
- Seite 41 ESPAÑOL 3 Seleccione el certificado que desee visualizar en esta página.
-
Seite 42: Français
FRANÇAIS FRANÇAIS Introduction Le NBG-415N permet a plusieurs ordinateurs de votre reseau de partager une connexion Internet. Vous pouvez aussi utiliser le NBG-415N pour etablir un reseau sans fil. 1 Connexions matérielles 1 LAN : Utilisez un câble Ethernet pour connecter un ordinateur à... - Seite 43 Si aucune LED n'est allumée, débranchez l'appareil et revérifiez les connexions de votre matériel. 2 Accéder au NBG-415N 1 Démarrez votre navigateur web. Entrez 192.168.10.1 (l'adresse IP LAN de gestion par défaut) dans le champ Emplacement ou Adresse.
- Seite 44 1 Cliquez sur DÉMARRER > ASSISTANT > Lancer l'Assistant d'installation Internet pour afficher le premier écran de l'assistant. Cliquez sur Suivant dans chaque écran pour continuer. Le NBG-415N a peut-être déjà détecté votre connexion Internet. 2 Changez le mot de passe de connexion dans le second écran de l'assistant.
- Seite 45 Connecter pour enregistrer les paramètres sur le NBG- 415N. 7 Cliquez sur Redémarrer l'appareil pour redémarrer le NBG-415N et pour que les modifications prennent effet. Patientez quelques minutes afin que leNBG-415N finisse de redémarrer avant d'accéder à nouveau à celui- 8 Tester votre connexion Internet.
- Seite 46 FRANÇAIS Si vous n'arrivez pas à accéder à Internet, vérifiez que vous avez correctement entré les informations de votre compte Internet dans les écrans de l'assistant. 4 Assistant d'installation du LAN sans 1 Cliquez sur DÉMARRER > ASSISTANT > Lancer l'assistant d'installation de sécurité...
- Seite 47 Enregistrer pour enregistrer les paramètres sur le NBG- 415N. 6 Cliquez sur Redémarrer l'appareil pour redémarrer le NBG-415N et pour que les modifications prennent effet. 7 Patientez quelques minutes afin que le NBG-415N finisse de redémarrer avant d'accéder à nouveau à celui-ci.
- Seite 48 à l'aide de Windows® Connect Now Avec Windows® Connect Now, vous pouvez transférer les paramètres sans fil de votre NBG-415N sur une clé USB Memory Stick et enregistrer ensuite les paramètres sur le(s) ordinateur(s) client sans fil. Cela vous permet d'établir facilement un LAN sans fil.
- Seite 49 FRANÇAIS 2 Le premier écran de l'assistant apparaît. Cliquez sur Suivant dans chaque écran pour continuer. 3 Sélectionnez Installer un nouveau réseau sans fil pour configurer un nouveau réseau sans fil. 4 Dans le champ Nom du réseau (SSID), spécifiez un nom unique pour identifier votre LAN sans fil.
- Seite 50 11A l'aide d'un ordinateur sans fil, testez votre connexion LAN sans fil au NBG-415N. Dépannage 1 Aucune des LED ne s'allume quand le NBG-415N est allumé. • Vérifiez que vous utilisez l'adaptateur d'alimentation fourni pour vous connecter au NBG-415N et qu'il est branché...
- Seite 51 être un problème matériel. Dans ce cas, vous devez contacter votre vendeur local. 2 Impossible d'accéder au NBG-415N à partir du LAN. • Vérifiez la connexion des câbles entre le NBG-415N et votre ordinateur ou hub. Reportez-vous à Connexions matérielles pour les détails.
- Seite 52 FRANÇAIS • Eteignez et allumez pour redémarrer à la fois le modem large bande et le NBG-415N. Si vous utilisez un modem câble, vous devez d'abord éteindre votre modem câble et attendre environ deux à trois minutes avant de connecter le modem câble au NBG-415N.
- Seite 53 FRANÇAIS Paramétrez l'adresse IP de votre ordinateur Cette section vous indique comment paramétrer votre ordinateur Windows NT/2000/XP afin d'obtenir automatiquement une adresse IP. Reportez-vous à votre guide de l'utilisateur pour la configuration de l'adresse IP pour les autres systèmes d'exploitation Windows et Macintosh. 1 Dans Windows XP, cliquez sur Démarrer, Panneau de configuration.
- Seite 54 Visualisez les certifications de votre produit 1 Allez à www.zyxel.com. 2 Sélectionnez votre produit dans la liste déroulante dans la page d'accueil de ZyXEL pour aller à la page de ce produit. 3 Sélectionnez la certification que vous désirez consulter dans cette page.
- Seite 55 FRANÇAIS...
-
Seite 56: Italiano
ITALIANO ITALIANO Introduzione NBG-415N consente di condividere la connessione a Internet con più computer della rete. È possibile utilizzare NBG-415N per installare una rete wireless. 1 Collegamenti hardware 1 LAN: Utilizzare un cavo Ethernet per collegare un computer a una porta LAN per abilitarne l'accesso a Internet. - Seite 57 Se nessuno dei LED è acceso, scollegare il dispositivo e ricontrollare i collegamenti hardware. 2 Accedere a NBG-415N 1 Avviare il browser. Immettere 192.168.10.1 (l'indirizzo IP di gestione della LAN predefinito) nel campo Indirizzo. Premere [INVIO] 2 Appare la schermata di login.
- Seite 58 1 Fare clic su START > PROCEDURA GUIDATA > Avvia Configurazione guidata connessione a Internet per visualizzare la prima schermata della procedura guidata. Fare clic su Avanti in ogni schermata per continuare. NBG-415N potrebbe aver già rilevato la connessione a Internet. 2 Cambiare la password di login nella seconda schermata della procedura guidata.
- Seite 59 NBG-415N. 7 Fare clic su Riavvia il dispositivo per riavviare NBG- 415N e rendere effettive le modifiche apportate. Attendere un paio di minuti affinché NBG-415N termini il riavvio prima di accedere nuovamente ad esso. 8 Testare la connessione a Internet.
- Seite 60 ITALIANO Se l'accesso a Internet non funziona, verificare di aver inserito correttamente le informazioni dell'account Internet nelle schermate della procedura guidata. 4 Configurazione guidata LAN wireless 1 Fare clic su START > PROCEDURA GUIDATA > Avvia Configurazione guidata sicurezza wireless per visualizzare la prima schermata della procedura guidata.
- Seite 61 Salva per salvare le impostazioni in NBG-415N. 6 Fare clic su Riavvia il dispositivo per riavviare NBG-415N e rendere effettive le modifiche apportate. 7 Attendere un paio di minuti affinché NBG-415N termini il riavvio prima di accedere nuovamente ad esso.
- Seite 62 5 Connessione guidata wireless utilizzando Windows® Connect Now Con Windows® Connect Now è possibile trasferire le impostazioni wireless di NBG-415N in un pen drive di memoria USB e quindi salvare le impostazioni nei computer client wireless. Ciò consente di configurare facilmente una LAN wireless.
- Seite 63 ITALIANO 2 Viene visualizzata la prima schermata della procedura guidata. Fare clic su Avanti in ogni schermata per continuare. 3 Selezionare Installa una nuova rete wireless per configurare una nuova rete senza fili. 4 Nel campo Nome rete (SSID), specificare un nome univoco per identificare la LAN wireless.
-
Seite 64: Risoluzione Dei Problemi
1 Nessuno dei LED si accende quando NBG-415N è acceso. • Utilizzare solo l'alimentatore incluso per collegare NBG-415N e che lo stesso sia collegato a una sor- gente di alimentazione valida. • Controllare i collegamenti di tutti i cavi. - Seite 65 • Se i LED continuano a non accendersi, potrebbe esserci un guasto hardware. In questo caso, è oppor- tuno rivolgersi al rivenditore locale. 2 Impossibile accedere a NBG-415N dalla LAN. • Controllare il collegamento dei cavi tra NBG-415N e il computer o l'hub. Vedere Collegamenti hardware per i dettagli.
- Seite 66 5 Impossibile connettersi alla LAN wireless tramite NBG- 415N. • Verificare che l'interruttore ON OFF sia nella posizione ON per abilitare la LAN wireless di NBG-415N. • Verificare che il client wireless sia impostato per utiliz- zare la stessa LAN wireless e impostazioni di sicurezza di NBG-415N.
- Seite 67 ITALIANO Impostare l'indirizzo IP del computer In questa sezione viene spiegato come configurare Windows NT/2000/XP per ottenere l'indirizzo IP automaticamente. Vedere la Guida dell'utente per le istruzioni su come configurare l'indirizzo IP nei sistemi operativi Windows e Macintosh. 1 In Windows XP, fare clic su Start, Pannello di controllo. In Windows 2000/NT, fare clic su Start, Impostazioni, Pannello di controllo.
- Seite 68 Visualizzazione delle certificazioni del prodotto 1 Aprire la pagina www.zyxel.com. 2 Selezionare il prodotto dall'elenco di riepilogo a discesa nella Home Page di ZyXEL per passare alla pagina del prodotto in questione. 3 Selezionare da questa pagina la certificazione che si desidera visualizzare.
- Seite 69 ITALIANO...
-
Seite 70: Русский
РУССКИЙ РУССКИЙ Вступление NBG-415N позволяет устанавливать совместный доступ к сети Интернет нескольким компьютерам. Вы также можете использовать NBG-415N для создания беспроводной сети. 1 Подключение оборудования 1 LAN: При помощи кабеля Ethernet подключите компьютер к порту ЛВС для доступа в Интернет. - Seite 71 Если ни один из индикаторов не включился, то отключите устройство от сети и снова проверьте подключение оборудования. 2 Войдите в Доступ к веб- конфигуратору NBG-415N 1 Запустите веб-браузер. Введите 192.168.1.1 (IP адрес управления ЛВС по умолчанию) в поле Адрес или Расположение. Нажмите...
- Seite 72 Launch Internet Connection Setup Wizard[Запустить мастер подключения к Интернет], для запуска мастера. На каждой следующей странице щелкайте на Next[Далее] для продолжения настройки. Может быть NBG-415N уже обнаружил ваше подключение к сети Интернет. 2 Измените пароль во втором окне мастера. Пароль чувствителен к...
- Seite 73 6 В последнем окне мастера установки нажмите Connect[Подключить], чтобы сохранить настройки в NBG-415N. 7 Нажмите Reboot the Device[Перезагрузить устройство] для перезапуска NBG-415N и вступления в силу внесенных изменений. Подождите пару минут перед повторным входом, пока NBG-415N закончит перезагрузку. 8 Протестируйте...
- Seite 74 РУССКИЙ Если вы не можете войти в Интернет, то проверьте правильность введения информации вашей учетной записи Интернет в полях мастера. 4 Мастер настройки беспроводной ЛВС 1 Щелкните на START[ПУСК] > WIZARD[МАСТЕР] > Launch Wireless Security Setup Wizard[Запустить мастер настройки беспроводной безопасности], для...
- Seite 75 окно. Введите пароль, который будет использоваться NBG-415N для создания уникального ключа беспроводной безопасности. 5 Проверьте настройки вашей беспроводной ЛВС и нажмите Save[Сохранить], чтобы сохранить изменения в NBG-415N. 6 Нажмите Reboot the Device[Перезагрузить устройство] для перезапуска NBG-415N и вступления в силу внесенных изменений.
- Seite 76 5 Настройка беспроводной сети с использованием функции Windows® Connect Now При помощи Windows® Connect Now вы можете перенести настройки беспроводной сети с NBG-415N на карту памяти USB, а затем сохранить их на компьютере(компьютерах) с беспроводными клиентами. Это позволяет легко создавать беспроводные сети. Чтобы...
- Seite 77 РУССКИЙ 2 Появиться первое окно мастера. На каждой следующей странице щелкайте на Next[Далее] для продолжения настройки. 3 Выберите Set up a new wireless network to configure a new wireless network[Создать новую беспроводную сеть]. 4 В поле Network name (SSID)[Сетевое имя] укажите уникальное...
- Seite 78 8 Подключите USB флэш-память к компьютеру и укажите букву диска в поле Флэш-память . 9 Следуйте инструкциям, появляющимся на дисплее. 10Когда вы успешно установите безопасную беспроводную сети на мониторе появится это окно. Нажмите Finish[Завершить]. 11Проверьте беспроводное ЛВС соединение к NBG-415N с беспроводного компьютера.
-
Seite 79: Устранение Неисправностей
РУССКИЙ Устранение неисправностей 1 При включении NBG-415N индикаторы не загораются. • Убедитесь, что NBG-415N подключен с использованием сетевого адаптера необходимого типа и этот адаптер присоединен к сети питания указанного типа. • Проверьте подключение всех кабелей. • Если индикаторы все еще не горят, то, возможно, у... - Seite 80 РУССКИЙ • Если индикатор LAN не светиться, то проверьте подключение кабеля между NBG-415N и компьютерами вашей ЛВС. • Проверьте IP-адрес/маску подсети NBG-415N и компьютеров ЛВС. Они должны находиться в одной подсети одинаковом диапазоне IP адреса 4 Не могу войти в Интернет.
- Seite 81 РУССКИЙ • Убедитесь, что беспроводной клиент настроен на использование той же ЛВС и настроек безопасности, что и NBG-415N. • Убедитесь, что беспроводной клиент находится в пределах радиуса действия NBG-415N. • Убедитесь в отсутствии радиопомех (например, от других беспроводных ЛВС или радиотелефонов).
- Seite 82 РУССКИЙ 3 Щелкните правой клавишей мышки на иконке Local Area Connection [Подключения по локальной сети] и нажмите Properties [Свойства]. 4 Выберите Internet Protocol (TCP/IP) [Протокол Интернет(TCP/ IP)] (на вкладке General [Общие]) и нажмите Properties [Свойства]. 5 Откроется окно Internet Protocol TCP/IP Properties [Свойства...
- Seite 83 РУССКИЙ Просматривание Сертификатов вашего изделия 1 Посетите сайт www.zyxel.com. 2 Выберите ваш продукт из выпадающего списка на домашней странице ZyXEL и перейдите на его страницу. 3 Выберите на этой странице сертификат, который вы хотите просмотреть.
-
Seite 84: Svenska
SVENSKA SVENSKA Introduktion NBG-415N låter mer än en dator i ditt nätverk dela en Internet-anslutning. Du kan även använda NBG-415N för att installera ett trådlöst nätverk. 1 Maskinvaruanslutningar 1 LAN: Använd en Ethernet-sladd för att ansluta en dator till en LAN-port för Internet-åtkomst. - Seite 85 är rätt anslutna. Om ingen indikatorlampa tänds, koppla bort enheten och kontrollera dina maskinvaruanslutningar på nytt. 2 Öppna NBG-415N 1 Starta din webbläsare. Ange 192.168.10.1 (standard LAN IP-hanteringsadress) i fältet Location (plats) eller Address (adress). Tryck på...
- Seite 86 1 Klicka på START > WIZARD > Launch Internet Connection Setup Wizard (START-GUIDE-starta installationsguide för Internet-anslutning) för att visa den första guideskärmen. Klicka på Next (nästa) på varje skärm för att fortsätta. NBG-415N har eventuellt redan detekterat din Internet-anslutning. 2 Ändra inloggningslösenordet på...
- Seite 87 (anslut) för att spara inställningarna till NBG- 415N. 7 Klicka på Reboot the Device (starta om enheten) för att starta om NBG-415N och låta ändringarna börja gälla. Vänta några minuter tills NBG-415N slutfört omstarten innan du får åtkomst till den igen.
- Seite 88 SVENSKA Om du inte kan koppla upp dig på Internet, kontrollera att du har angett din Internet- kontoinformation rätt på guideskärmarna. 4 Installationsguide för trådlöst LAN 1 Klicka på START > WIZARD > Launch Wireless Security Setup Wizard (START-GUIDE-starta installationsguide för trådlös säkerhet) för att visa den första guideskärmen.
- Seite 89 (spara) för att spara inställningarna till NBG- 415N. 6 Klicka på Reboot the Device (starta om enheten) för att starta om NBG-415N och låta ändringarna börja gälla. 7 Vänta några minuter tills NBG-415N slutfört omstarten innan du får åtkomst till den igen.
- Seite 90 5 Inställning av trådlös anslutning med Windows® Connect Now Med Windows® Connect Now kan du överföra trådlösa inställningar på din NBG-415N till ett USB.minne och därefter spara inställningarna till den trådlösa klientdatorn(datorerna). På detta vis kan du enkelt installera ett trådlöst LAN. För att kunna dra fördel av denna funktion behöver du:...
- Seite 91 SVENSKA 2 Den första guideskärmen visas. Klicka på Next (nästa) på varje skärm för att fortsätta. 3 Välj Set up a new wireless network (installera ett nytt trådlöst nätverk) för att konfigurera ett nytt trådlöst nätverk. 4 I fälttet Network name (SSID) (nätverksnamn (SSID)), ange ett unikt namn som identifierar ditt trådlösa LAN.
- Seite 92 Flash drive (flashenhet). 9 Följ instruktionerna på skärmen. 10Denna skärm visas när du har slutfört inställningen av ett säkert trådlöst nätverk. Klicka på Finish (slutför). 11Från en trådlös dator, testa din trådlösa LAN-anslutning till NBG-415N.
- Seite 93 • Om indikatorlamporna fortfarande inte tänds, kan du stå inför ett maskinvaruproblem. I sådant fall bör du kontakta din lokala återförsäljare. 2 Det går inte att få åtkomst till NBG-415N från LAN. • Kontrollera sladdanslutningen mellan NBG-415N och din dator eller hubb. Se Maskinvaruanslutningar för...
- Seite 94 • Kontrollera NBG-415N:s anslutning till bredbands- modemet. • Stäng och och starta om både bredbandsmodemet och NBG-415N. Om du använder ett kabelmodem måste du först stänga av ditt kabelmodem och sedan vänta 2-3 minuter innan du ansluter kabelmodemet till NBG-415N.
-
Seite 95: Ställa In Datorns Ip-Adress
SVENSKA • Kontrollera att det inte förekommer någon radiointer- ferens (t ex från andra trådlösa LAN eller sladdlösa telefoner). Ställa in datorns IP-adress I detta avsnitt beskrivs hur du ställer in din dator med Windows NT/2000/XP så att den hämtar en IP-adress automatiskt. - Seite 96 SVENSKA 3 Högerklicka på Local Area Connection (LAN- anslutningar) och klicka sedan på Properties (egenskaper). 4 Välj Internet Protocol (TCP/IP) (Internetprotokoll) (under fliken General (allmänt) i Win XP) och klicka på Properties (egenskaper). 5 Skärmen Internet Protocol TCP/IP Properties (Internetprotokoll TCP/IP Egenskaper) öppnar fliken General (allmänt) i Windows XP).
- Seite 97 SVENSKA Visa din produkts certifikat 1 Gå till www.zyxel.com. 2 Välj din produkt från rullgardinslistrutan på ZyXEL:s hemsida för att gå till denna produkts sida. 3 Välj det certifikat du vill titta på från denna sida.
-
Seite 98: 繁體中文
繁體中文 繁體中文 簡介 NBG-415N 可讓網路上的多台電腦共用同一網際網路連線。您也 可以使用 NBG-415N 設定無線網路。 1 硬體連接 1 LAN: 使用乙太網路線將電腦連接至區域網路埠以接取網際 網路。 2 WAN: 使用 DSL/ 纜線數據機隨附的乙太網路線連接至 DSL/ 纜線數據機的乙太網路埠。 3 POWER:使用隨附的電源轉接器將 POWER 插槽連接至合適的 電源。 1.1 檢查 LED ( 指示燈 ) • PWR LED 指示燈亮起。 • WLAN LED 指示燈穩定亮著。... - Seite 99 繁體中文 • 如果對應的連接埠連接正確,則 WAN 及 / 或 LAN LED 指示燈 會亮起並間歇閃爍。 如果 LED 指示燈都沒有亮,請拔除裝置的插頭, 再檢查一次硬體連接。 2 存取 NBG-415N 1 啟動網頁瀏覽器,在 Location ( 位置 ) 或 Address ( 位址 ) 欄位輸入 192.168.10.1 ( 預 設的管理區域網路 IP 位址 ),然後按 [ENTER]。. 2 出現登入畫面。選取 User Name ( 使用者名稱...
- Seite 100 面。在各畫面按一下 Next ( 下一步 ) 以繼續進行下個步 驟。NBG-415N 可能已經偵測到您的網際網路連線。 2 在第二個精靈畫面中變更登 入密碼。密碼區分大小寫。 3 選取您所在地區的時區。 4 選擇網際網路連線類型。 5 下一個精靈畫面會隨您選取 的連線類型而有所不同。利 用 ISP 提供您的資訊設定畫 面中的欄位,然後按一下 Next ( 下一步 )。 6 在最後一個精靈畫面中,按 一下 Connect ( 連線 ),將設 定儲存至 NBG-415N。 7 按一下 Reboot the Device ( 重新啟動裝置 ),重新啟動 NBG-415N 並使變更生效。...
- Seite 101 繁體中文 稍待數分鐘,等 NBG-415N 完 成重新啟動作業後再存取一 次。 8 測試網際網路連線。啟動網 頁瀏覽器,輸入任何網站位 址,例如 http:// www.zyxel.com。 如果無法接取網際網路,請檢查您在精靈畫面中 輸入的網際網路帳戶資訊是否正確。 4 無線區域網路精靈設定 1 按一下 START ( 開始 ) > WIZARD ( 精靈 ) > Launch Internet Connection Setup Wizard ( 啟動無線安全措施 設定精靈 ),顯示第一個精靈畫面。在各畫面按一下 Next ( 下一步 ) 以繼續進行下個步驟。...
- Seite 102 繁體中文 3 依照畫面指示,選取無線安 全模式。 4 如果啟動無線安全模式,就 會出現下個畫面。輸入 NBG- 415N 用以產生唯一無線網路 密鑰的密碼 5 在此畫面檢查您的無線區域 網路設定,再按一下 Save ( 儲存 ) 將設定儲存至 NBG- 415N。 6 按一下 Reboot the Device ( 重新啟動裝置 ),重新啟動 NBG-415N 並使變更生效。 7 稍待數分鐘,等 NBG-415N 完成重新啟動作業後再存取 一次。...
- Seite 103 繁體中文 5 使用 Windows® Connect Now 設定無線 網路連線 利用 Windows® Connect Now,您可以將 NBG-415N 的無線網路 設定傳輸至 USB 記憶卡,然後再將該設定儲存至用戶端的電 腦。這可讓您輕鬆建立無線區域網路。若要利用此功能,您需 要: • 可用記憶體至少有 300K 的 USB 記憶卡。 • 裝有 Service Pack 2 (SP2) 的 Windows XP 系統。 依照下列步驟使用 Windows® Connect Now 設定無線區域網路。...
- Seite 104 繁體中文 3 選取 Set up a new wireless network to configure a new wireless network ( 設定新無線網 路以進行配置 )。 4 在 Network name (SSID) ( 網路名 稱 (SSID)) 欄位中,指定一個唯一 名稱以辨識您的無線區域網路。 5 選取 Automatically assign a network key to have Windows create a security key ( 自動配置...
- Seite 105 Flash drive (Flash 磁碟機 ) 欄位 中指定磁碟機代號。 9 依照畫面上的指示進行作業。 10一旦成功建立安全的無線網路,就 會顯示此畫面。按一下 Finish ( 完成 )。 11利用無線電腦測試連接至 NBG- 415N 的無線區域網路連線。 疑難排解 1 當 NBG-415N 開啟時沒有任何 LED 指示燈亮起。 • 確認您使用隨附的電源轉接器連接至 NBG-415N,而且電 源轉接器已插入適當的電源。 • 檢查所有纜線的連接。 • 如果 LED 仍然不能點亮,您可能有硬體問題。若此情況 發生,請聯絡本地的供應商。 2 無法從區域網路存取 NBG-415N。...
- Seite 106 • 請檢查 NBG-415N 與電腦或集線器之間的纜線連接。請 參閱 硬體連接 取得詳細資訊。 • 利用區域網路電腦偵測 NBG-415N。 • 確認電腦的乙太網路卡安裝正確且運作正常。 3 無法在區域網路偵測到任何電腦。 • 如果區域網路 LED 指示燈熄滅,請檢查 NBG-415N 和區 域網路電腦之間的纜線連接。 • 確認 NBG-415N 的 IP 位址與子網路遮罩,和區域網路 電腦位於相同的 IP 位址範圍。 4 無法接取網際網路。 • 檢查 NBG-415N 連至寬頻數據機的連線。 • 關閉再開啟寬頻數據機和 NBG-415N,重新啟動兩裝置。 如果您使用的是纜線數據機,必須先關閉纜線數據機,...
- Seite 107 繁體中文 • 確認無線用戶端使用的無線區域網路和安全設定與 NBG- 415N 相同。 • 確認無線用戶端位在 NBG-415N 的傳輸範圍之內。 • 確認沒有任何無線電干擾 ( 例如,其他無線區域網路或 無線電話的干擾 )。 設定電腦的 IP 位址 本節說明如何設定 Windows NT/2000/XP 電腦以自動取得 IP 位址。請參閱 《使用手冊》 ,取得其他 Windows 及 Macintosh 作業系統的 IP 位址設定資訊。 1 在 Windows XP 中,按一下開始,然後按一下控制台。在 Windows 2000/NT 中,按一下開始、設定、控制台。...
- Seite 108 繁體中文 7 按一下確定,關閉網際網路通訊協定 (TCP/IP) 內容視窗。 8 按一下關閉 ( 在 Windows 2000/NT 中是確定 ),關閉區域 連線內容視窗。 9 關閉網路連線視窗。 檢視產品認證 1 前往 www.zyxel.com。 2 在 ZyXEL 首頁的下拉式清單方塊選取您的產品,進入該產 品的網頁。 3 在此頁選取您想查看的認證資料。...
- Seite 109 繁體中文...