Herunterladen Inhalt Inhalt Diese Seite drucken
KeySonic KSK-3201 RF Bedienungsanleitung
Vorschau ausblenden Andere Handbücher für KSK-3201 RF:

Werbung

Verfügbare Sprachen

Verfügbare Sprachen

Werbung

Inhaltsverzeichnis
loading

Inhaltszusammenfassung für KeySonic KSK-3201 RF

  • Seite 2: Besondere Eigenschaften Ksk-3201 Rf

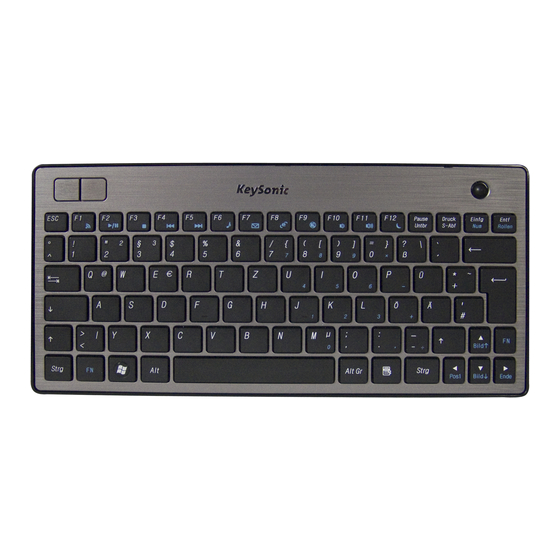
    ...touch the difference 1. Besondere Eigenschaften KSK-3201 RF • Extrem fl ache, kabellose Super-Mini-Tastatur mit integriertem Trackball • Weitreichende und zuverlässige 2,4 GHz Funkübertragung bis ca. 7 m Entfernung zum PC • Integrierter 8 mm großer Laser-Trackball mit Mausfunktion und zwei Maustasten •...
  • Seite 3: Besondere Eigenschaften Ksk-3201 Bt

    Bedienungsanleitung KSK-3201 RF/BT 3. Besondere Eigenschaften KSK-3201 BT • Extrem fl ache, kabellose Super-Mini-Tastatur mit integriertem Trackball • Weitreichende und zuverlässige Bluetooth Funkübertragung bis ca. 10 m Entfernung zum PC • Integrierter 8 mm großer Laser-Trackball mit Mausfunktion und zwei Maustasten •...
  • Seite 4: Systemvoraussetzungen

    Windows XP / Vista / Windows7 Für die Installation der Tastatur unter den o. g. Betriebssystemen benötigen Sie KEINEN speziellen Treiber! 5.2 Installation des USB-Receivers für KSK-3201 RF Um Ihre Tastatur zu installieren, führen Sie bitte folgende Schritte aus: •...
  • Seite 5: Installation Der Tastatur Ksk-3201 Rf

    Hinweis: Sollte die Funktionsweise durch andere Benutzer, die ebenfalls eine Funktastatur in näherer Umgebung verwenden, beeinfl usst werden, führen Sie bitte eine Neu-Synchronisation, wie unter 5.4 beschrieben, durch. 5.4 Neu-Synchronisierung des Funkkanals der Tastatur KSK-3201 RF • Wenn Sie die Tastatur zum ersten Mal in Betrieb nehmen und keine...
  • Seite 6: Installation Des Mitgelieferten Bluetooth-Adapters Für Ksk-3201 Bt

    ...touch the difference 6. Installation KSK-3201 BT 6.1 System-Voraussetzungen Voraussetzung zur Nutzung der Tastatur ist, dass Ihr Endgerät (PC, Notebook, Tablet, „Handheld“ o.ä.) • hardwareseitig Bluetooth-fähig ist (z.B. durch integriertes Bluetooth-Modul bzw. externen -Adapter) • softwareseitig (Bluetooth) das HID-Profi l einwandfrei unterstützt •...
  • Seite 7: Installation Der Tastatur Ksk-3201 Bt

    Bedienungsanleitung KSK-3201 RF/BT 6.3 Installation der Tastatur KSK-3201 BT Für die weitere Vorgehensweise wird vorausgesetzt, dass die entsprechende Bluetooth Treiber-Software bereits einwandfrei auf Ihrem PC installiert wurde. • Falls noch nicht geschehen, entfernen Sie die Abdeckung des Batteriefaches auf der Unterseite der Tas- tatur und installieren Sie die mitgelieferten Batterien des Typs AAA 1,5 V unter Beachtung der richtigen Polarität in das Batteriefach (wie im Bild dargestellt).
  • Seite 8 ...touch the difference • Setzen Sie einen Haken bei „Gerät ist eingerichtet und kann erkannt werden“ • und klicken Sie auf „Weiter>“. • Wählen Sie die erkannte Tastatur aus, die im nächsten Fester angezeigt wird (hier „BTKB-66EB – Neues Gerät“) und bestätigen Sie mit „Weiter>“.
  • Seite 9 Adapter nur im HID–Modus (Human Interface Device) funktioniert. Hierzu wäre ein dualer Bluetooth USB-Adap- ter erforderlich, der sowohl den HID– als auch den HCI–Modus (Host Controller Interface) unterstützt. 7. Bedienung der Tastaturen KSK-3201 RF und KSK-3201 BT Nach erfolgreicher Inbetriebnahme genießen Sie nun bei der Bedienung eine freie und unabhängige Stand- ortwahl bis ca.
  • Seite 10: Status-Leds Der Tastaturen (Oberhalb Des Trackballs)

    [gelbe LED (KSK-3201 RF) bzw. rote LED (KSK-3201 BT) - blinkend] Sie zeigt an, dass der Ladezustand der Batterie unter 2,2 Volt (KSK-3201 RF) bzw. 2,3 V (KSK-3201 BT) liegt. Sie blinkt, bis neue Batterien eingesetzt werden oder die Batterie völlig aufgebraucht ist. Auch leuchtet sie nur, wenn sich die Tastatur nicht im Sleep-Modus (Ruhezustand) befi ndet.
  • Seite 11 Lauter Erhöht die Lautstärke Sleep Versetzt die Tastatur in den Sleep-Modus (nur bei KSK-3201 RF!) 8. Reinigung der Tastaturen KSK-3201 RF und KSK-3201 BT • Staub entfernen Sie mit einem Pinsel, mit sanfter Druckluft oder mit einem Staubsauger mit Bürstenkopf- düse.
  • Seite 12 ...touch the difference 1. Special features KSK-3201 RF • Extremely slim, wireless super-mini keyboard with built-in trackball • Far-ranging and reliable radio-frequency transmission at 2.4 GHz up to approx. 7 m away from the PC • Built-in 8 mm laser trackball with mouse function and two mouse buttons •...
  • Seite 13 User Manual KSK-3201 RF/ BT 1. Special features KSK-3201 BT • Extremely slim, wireless super-mini keyboard with built-in trackball • Far-ranging and reliable Bluetooth transmission up to approx. 10 m away from the PC • Built-in 8 mm laser trackball with mouse function and two mouse buttons •...
  • Seite 14: System Requirements

    Windows XP / Vista / Windows7 For the installation of the keyboard under the mentioned above operating systems you need NO special driver! 5.2 Installation of the USB receiver for KSK-3201 RF In order to install your keyboard, please perform the following steps: •...
  • Seite 15 Advise: Should the functionality be infl uenced by other users applying their wireless keyboard close-by, make a newsynchronisation as described under point 5.4. 5.4 New-synchronisation of the radio channel KSK-3201 RF • When you install your keyboard for the fi rst time and no connection can...
  • Seite 16 ...touch the difference 6. Installation KSK-3201 BT 6.1 System requirements Precondition for the use of the keyboard is that your device (PC, notebook, tablet, handheld, etc.) • is hardware-sided Bluetooth-enabled (e.g. by an integrated Bluetooth module or external adapter) • software-sided (Bluetooth) supports faultlessly the HID profi le •...
  • Seite 17 User Manual KSK-3201 RF/ BT 6.3 Keyboard installation KSK-3201 BT Ensure for the further procedure that the used Bluetooth driver software was installed correctly on your PC. If you haven’t done yet, remove the covering of the battery case on the bottom of your keyboard. Insert the included batteries of type AAA 1.5 V considering the right polarity in the battery case (see picture).
  • Seite 18 ...touch the difference • Place a tick for „Device is set and can be identifi ed“ • and click „Continue>“. • Select the identifi ed keyboard, which is shown in the next window (here „BTKB-66EB – New device“) and confi rm with „Continue>“. (Attention: here can be listed of course also more Bluetooth devices as shown in our picture) •...
  • Seite 19 HID mode (Human Interface Device). For this a dual Bluetooth USB adapter would be necessary, which supports both HID and HCI mode (Host Controller Interface. 7. How to use the keyboards KSK-3201 RF and KSK-3201 BT •...
  • Seite 20 Low Battery It indicates that the battery is below 2.2 Volt (KSK-3201 RF) respectively 2.3 V (KSK-3201 BT). It is blinking, until new battery is installed or the battery is total used up. It is fl ashing only while the keyboard is not in sleep mode.
  • Seite 21 Sleep Puts the keyboard into sleep mode (only for KSK-3201 RF!) 8. How to clean the keyboards KSK-3201 RF and KSK-3201 BT • Remove dust with a brush, with soft compressed air, or with a vacuum cleaner with brush head nozzle.
  • Seite 22 Y compris le récepteur USB mini dans le logement des batteries • Application idéale pour : home cinéma, usage mobile, salles de formation, de conférence, de présentation 2. Technical data KSK-3201 RF Nombre des touches : 84 (83-87 selon le pays) Construction : Technologie à...
  • Seite 23 Manuel d’Utilisation KSK-3201 RF/ BT 1. Caractéristiques KSK-3201 BT • Super-mini-clavier sans fi l extrêmement plat à Trackball intégré • Transmission Bluetooth puissante et fi able jusqu’à env. 10 m éloigné de l’ordinateur • Trackball Laser intégré de 8 mm avec 2 touches de fonction simulant les boutons d’une souris •...
  • Seite 24 Windows XP / Vista / Windows7 Pour l‘installation du clavier sous les systèmes d‘exploitation mentionné au-dessus vous n‘avez besoin d‘AUCUN pilote spécial! 5.2 Installation de récepteur USB KSK-3201 RF Pour installer votre clavier, exécutez les opérations suivantes : • Ouvrez le logement et sortez le récepteur USB. [Quand vous n’utilisez pas le clavier vous pouvez accrocher le récepteur sur le dos du clavier.]...
  • Seite 25 Conseil: Si la fonctionnalité est infl uencée par d‘autres utilisateurs appliquant leur clavier sans fi l fermer- par, faire une nouveau-synchronisation comme décrit sous le point 5.4 5.4 Refaire la synchronisation du canal radio KSK-3201 RF • Quand vous démarrez votre clavier pour la première fois et aucune connexion ne pouvait être établie, il faut donc synchroniser le canal...
  • Seite 26: Système Requis

    ...touch the difference 6. Installation KSK-3201 BT 6.1 Système requis Les conditions requises pour l’utilisation du clavier à vos périphériques (PC, ordinateur portable, tablette, mobile, etc.) sont les suivantes : • Le matériel est compatible Bluetooth (par adaptateur Bluetooth intégré ou externe) •...
  • Seite 27 Manuel d’Utilisation KSK-3201 RF/ BT 6.3 Installation de clavier KSK-3201 BT Vérifi ez, pour les procédures ultérieures, que le pilote Bluetooth a été correctement installé sur votre ordi- nateur. • Si vous ne l’avez pas encore fait, retirez le cache situé dans le logement pour les piles, en bas de votre clavier derrière.
  • Seite 28 ...touch the difference • Veuillez cocher la case « Matériel à installer et à identifi er » • et cliquez sur « Suivant ». • Sélectionnez le clavier concerné, qui s’affi chera sur la prochaine fenêtre (par exemple, BTKB-66EB – nouveau périphérique) et confi rmez avec la touche «...
  • Seite 29 USB Bluetooth supportant HID et HCI sera nécessaire (HCI = Host Controller Interface). 7. Utilisation des claviers KSK-3201 RF et KSK-3201 BT Après la réussite de la synchronisation, la distance de transmission du radio entre le clavier et le récepteur est approximativement de 7-10 m.
  • Seite 30 [LED jaune (KSK-3201 RF) ou LED rouge (KSK-3201 BT) - clignotante] Elle est utilisée afi n d’indiquer que la batterie est en dessous des 2,2 Volts (KSK-3201 RF) ou 2,3 V (KSK- 3201 BT). Elle reste allumée jusqu’au changement de la batterie ou lorsque celle-ci est épuisée. Elle clig- note uniquement lorsque le clavier n’est pas mis en veille.
  • Seite 31 Volume + Augmenter le volume Mode veille Placez le clavier en mode veille (seulement KSK-3201 RF!) 8. Nettoyage des claviers KSK-3201 RF et KSK-3201 BT • Ôtez la poussière en utilisant un pinceau, de l’air comprimé doux, ou un aspirateur à buse-brosse.

Diese Anleitung auch für:

Ksk-3201 bt

Inhaltsverzeichnis