Herunterladen Inhalt Inhalt Diese Seite drucken
Sangean DPR-39 Bedienungsanleitung
Vorschau ausblenden Andere Handbücher für DPR-39:

Werbung

Verfügbare Sprachen
  • DE

Verfügbare Sprachen

3A81X51000000
DPR-39
DAB+ / FM-RDS Draagbare ontvanger
Operating instruction
GB
Mode d'emploi
F
Instruccions de manejo
E
Gebruiksaanwijzing
NL
Bedienungsanleitung
D
DAB+ / FM-RDS Hand-held Receiver
DAB+ / FM-RDS Récepteur portable
DAB+ / FM-RDS Receptor de mano
DAB+ / UKW-RDS Handempfänger

Werbung

Inhaltsverzeichnis
loading

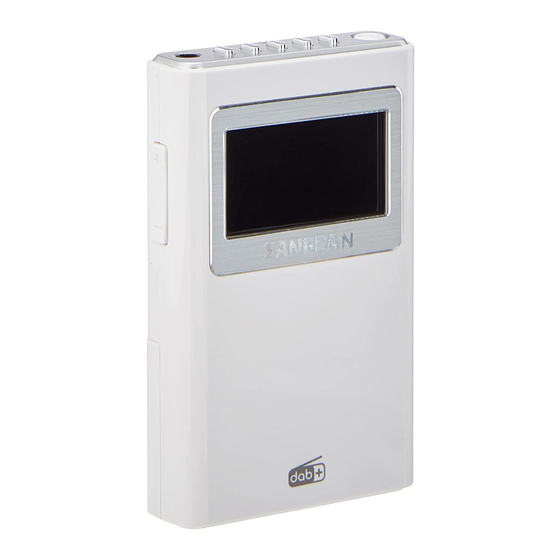
Inhaltszusammenfassung für Sangean DPR-39

  • Seite 1 Operating instruction Mode d’emploi Instruccions de manejo Gebruiksaanwijzing Bedienungsanleitung DPR-39 DAB+ / FM-RDS Hand-held Receiver DAB+ / FM-RDS Récepteur portable DAB+ / FM-RDS Receptor de mano DAB+ / FM-RDS Draagbare ontvanger DAB+ / UKW-RDS Handempfänger 3A81X51000000...
  • Seite 3: Important Safety Instructions

    Important Safety Instructions 1. Read these instructions. 2. Keep these instructions. 3. Heed all warnings. 4. Follow all instructions. 5. Do not use this apparatus near water. 6. Clean only with dry cloth. 7. Do not block any ventilation openings. Install in accordance with the manufacturer’...
  • Seite 4 9. Do not defeat the safety purpose of the polarized or grounding-type plug. A polarized plug has two blades with one wider than the other. A grounding type plug has two blades and a third grounding prong. The wide blade or the third prong are provided for your safety.
  • Seite 5 12. Use only with the cart, stand, tripod, bracket, or table sp ecified by the manufacturer, or sold with the apparatus. When a cart is used, use caution when moving the cart/apparatus combination to avoid injury from tip-over. 13. Unplug this apparatus during lightning storms or when unused for long periods of time.
  • Seite 6 15. To Reduce the Risk of Fire or Electric Shock, Do not Expose This Appliance To Rain or Moisture. 16. T h e S h o c k H a z a r d M a r k i n g a n d Associated Graphical Symbol is provided on the bottom panel of unit.
  • Seite 8 Controls Headphone socket Preset buttons (1-5) Power button LCD display Volume control Tuning/Menu jog wheel Lock switch (Note: If this is activated radio will not operate) USB socket for software upgrade Battery compartment Strap holder...
  • Seite 9: Battery Installation

    Battery Installation Battery cover is located on the back of the unit. Slide the cover downwards to gain access to the battery compartment. Insert two AA (UM-3/R6/LR6) batteries into the compartment. Make sure that the battery is positioned in accordance with the indicated diagram.
  • Seite 10: Setting The Clock

    Important: Excessive volume levels from earphones and headphones may cause damage to your hearing. Setting the clock The clock will automatically update each time you turn on the radio and tune to a DAB radio station or to an FM station which is broadcasting the time via RDS.
  • Seite 11 3. The display will show “Welcome to Digital Radio” and start to scan the entire DAB+ channel range and stop at the first found station. If the radio has been used before, the last used station will be selected. Press in the tuning/menu jog wheel to play the station.
  • Seite 12 While listening to DAB+, continually press in the jog wheel to cycle through information on: a. Program type (PTY) b. Multiplex Name c. Time d. Date e. Channel and Frequency f . Bit Rate and Codec g. Signal Strength Menu Functions-DAB Press in and hold the jog wheel for 2 seconds to enter the menu list.
  • Seite 13 ● Full scan press in the jog wheel to scan the whole DAB network in your area. Radio will tune to first station found after the scanning is completed. ● Back press in the jog wheel to go back to the previous menu display.
  • Seite 14 USB upgrade port. You should not attempt to update your radio unless it is recommended to you by Sangean Customer Services. Updating the software may remove all network settings and radio station presets from your radio. Software updates for your radio may be...
  • Seite 15 As software updates become available software and information on how to update your radio can be found at: http://sg.sangean.com.tw/first/first.asp http://www.sangean.eu/first/first.asp www.sangean.com.au. For more information, please contact our Head Office by sending an email to: info@ sangean.com ● SW version Press in the jog wheel to view software version installed in the radio.
  • Seite 16 ● Set backlight Press in the jog wheel to select Backlight Auto. Select YES and display backlight will auto shut off 12 seconds after last operation. Select NO and the display backlight will remain on. ● DRC Dynamic Range Control (DRC) feature can make quieter sounds easier to hear, especially when your radio is used in a noisy environment.
  • Seite 17 ● Language Your radio functions can be configured to a different language. Press in and turn the log wheel to select your desired language. current language setting is marked with an asterisk. ● Sleep Use the Sleep menu to set auto shut off timer.
  • Seite 18: Operating Your Radio - Fm

    Stations which cannot be found, or which have not been received for a very long time are shown in the station list with a question mark. The Prune stations function will delete the marked DAB stations from your station list. Press in the jog wheel to enter prune station function.
  • Seite 19 Search tuning - FM 1. Turn the jog wheel either down or down until display shows “scanning”. 2. The radio will search in an upwards or downwards direction until it finds a station of sufficient signal strength. Menu-FM Press in the jog wheel for 2 seconds to enter FM Menu.
  • Seite 20 B) Back press in jog wheel to return to FM listening. C) DAB Mode press in jog wheel to switch to DAB mode. D) Settings press in jog wheel to select from the following settings: ● Audio setting Turn the jog wheel to select Stereo allowed or Forced mono.
  • Seite 21 You should not attempt to update your radio unless it is recommended to you by Sangean Customer Services. Updating the software may remove all network settings and radio station presets from your radio. Software updates for your radio may be available in the future.
  • Seite 22 ● Factory reset Press in and turn the jog wheel to select YES or NO. Select YES to erase all saved settings, station lists and favorites. All settings will revert to factory default. ● Set contrast Turn and press in the jog wheel to select required LCD display contrast.
  • Seite 23 ● Sleep Use the Sleep menu to set auto shut off timer. Press in and turn the jog wheel to cycle through: Sleep off (auto shut off disabled), 90-60-45-30-15 Auto shut off timer. Radio will turn off after selected sleep time has elapsed. Presetting stations- FM &...
  • Seite 24 3. Stations which are already stored in the presets may be over written by following the above procedure. Note: The radio station presets are retained in memory when the radio is switched off. Recalling a preset- FM & DAB 1. Select the required operating mode as previously described.
  • Seite 25: Specification

    1. Key lock switch is located on the back of the radio. When the key lock switch is set to LOCK, the power button, volume control, preset buttons and jog wheel will be disabled. If any buttons are pressed when the key lock function is set to lock, display will show “Button Locked”...
  • Seite 26 Frequency Coverage: FM 87.50 – 108 MHz DAB+ Band III 5A – 13 F Circuit Features Headphones: 32 ohm, in-ear style The company reserves the right to amend the specification without notice If at any time in the future you should need to dispose of this product please note that: Waste electrical products should not be disposed of with household waste.
  • Seite 27: Instructions Importantes Sur La Sécurité

    Instructions importantes sur la sécurité 1. Lisez ces instructions. 2. Conservez ces instructions. 3. Tenez compte de toutes les mises en garde. 4. Suivez toutes les instructions. 5. N’utilisez pas cet appareil à proximité de l’eau. 6. Ne nettoyez qu’à l’aide d’un linge sec. 7.
  • Seite 28 9. Ne sous-estimez pas l’objectif de sécurité des prise polarisées ou de type terre. Une prise polarisée a deux fiches dont l’ une est plus large que l’autre. Une prise de type terre à deux fiches plus une fiche supplémentaire de raccord à la terre. La fiche large ou le raccord à...
  • Seite 29 12. N’utilisez qu’avec un chariot, support, trépied, crochet ou table spécifié par le fabricant, ou vendu avec l’appareil. Lorsque vous utilisez un chariot, soyez att entif l orsque vous d é pl ac e z l a combinaison chariot/appareil pour éviter les blessures dues au renversement.
  • Seite 30 15. Pour réduire le risque d'incendie ou de choc électrique, n'exposez pas cet appareil à la pluie ou l'humidité. 16. Le symbole de risque d’étouffement et les symboles graphiques associés sont présents sur la face inférieure de l’unité. 17. L’appareil ne doit pas être exposé aux égouttements ou aux éclaboussures et aucun objet rempli de liquide ne doit être placé...
  • Seite 32 Commandes Prise écouteurs Touches présélection (1-5) Touche d’alimentation Écran LCD Contrôle du volume Roue de défilement Fréquence/Menu Interrupteur de verrouillage (Note: Si activé, la radio ne fonctionnera pas) Fente USB pour la mise à jour de logiciel Compartiment des piles Œillet pour la courroie...
  • Seite 33: Installation De La Batterie

    Installation de la batterie Le compartiment de piles est situé à l’arrière de l'unité. Faites coulisser le couvercle vers le bas pour accéder au compartiment de piles. Insérez deux piles AA (UM-3 / R6 / LR6) dans le compartiment. Assurez-vous que les piles sont positionnées conformément au schéma d'indication.
  • Seite 34: Régler L'horloge

    Important: Des volumes sonores excessifs des écouteurs et casques peuvent engendrer des troubles de l’audition. Régler l’horloge L’horloge se mettra à jour automatiquement à chaque fois que vous allumerez la radio et la réglerez sur une station radio DAB+ ou sur une station de radio qui diffuse l’heure via RDS.
  • Seite 35 3. L’écran affichera “Welcome to Digital Radio” et commencera à scanner toute l’ étendue des canaux DAB et s’arrêtera à la première station trouvée. Si la radio a été utilisée avant, la dernière station utilisée sera sélectionnée à la place. Appuyez sur la roue de défilement fréquence/menu pour diffuser la station.
  • Seite 36 Lorsque vous écoutez du DAB+, maintenez la roue de défilement appuyée pour circuler entre les informations: a. Type de programme (PTY) b. Nom du multiplexe c. Heure d. Date e. Canal et fréquence f . Débit binaire et codec g. Force du signal Fonctions du menu - DAB Maintenez la roue de défilement appuyée pendant 2 secondes pour entrer dans la liste...
  • Seite 37 ● Scan total Appuyez sur la roue de défilement pour scanner l’ensemble du réseau DAB+ dans votre secteur. La radio réglera la première station trouvée une fois la recherche terminée ● Arrière Appuyez sur la roue de défilement pour revenir à l'affichage du menu précédent. ●...
  • Seite 38 Vous ne devez pas essayer de mettre votre radio à jour à moins que cela ne vous soit recommandé par le service clients de Sangean. La mise à jour du logiciel peut peut-être effacer tous les paramètres réseau et les stations présélectionnées...
  • Seite 39 Au fur et à mesure que des mises à jour de logiciel apparaissent, des informations sur la manière de mettre à jour le logiciel de votre radio sont disponibles sur : http://sg.sangean.com.tw/first/first.asp http://www.sangean.eu/first/first.asp www.sangean.com.au. Pour plus d’informations, veuillez contacter notre siège social en envoyant un email à: info@sangean.com...
  • Seite 40 ● Régler le contraste Tournez et appuyez sur la roue de défilement pour sélectionner le contraste de l’écran LCD que vous souhaitez. Le contraste de l’écran changera en conséquence. ● Régler le rétro éclairage Appuyez sur la roue de défilement pour sélectionner le rétro éclairage automatique.
  • Seite 41 DRC Off - le DRC est désactivé, la diffusion en DRC sera ignorée. DRC bas – le niveau de DRC est réglé à ½ du niveau émis par le diffuseur. DRC haut – le DRC est réglé tel qu’émis par le diffuseur. ●...
  • Seite 42 E) Rafraichir la liste Si vous déménagez dans une zone différente du pays, certaines stations qui étaient répertoriées ne seront plus disponibles. Aussi, de temps en temps, certains services DAB peuvent arrêter de diffuser, ou peuvent changer d’emplacement ou de fréquence. Les stations qui ne peuvent être trouvées, ou qui n’ont pas été...
  • Seite 43 Utiliser votre radio -- FM 1. Allumez la radio en appuyant sur la touche Alimentation. Appuyez sur la roue de défilement pendant 2 secondes pour entrer dans le menu. Tournez la roue de défilement et faites défiler versle mode FM et appuyez pour choisir la bande FM.
  • Seite 44 A) Zone de recherche FM Lorsque vous utilisez le mode FM, votre radio peut être réglée soit sur scanner des stations locales soit sur scanner toutes les stations, y compris les stations de radio éloignées. Appuyez et tournez la roue de défilement pour saisir le paramètre de zone de recherche FM.
  • Seite 45 ● Paramètres audio Tournez la roue de défilement pour choisir stéréo autorisé ou mono forcé. Choisissez 'Stéréo autorisé': la radio recevra les programmes de stéréo FM. Choisissez 'Mono forcé': améliore la réception d'un signal FM faible. ● Arrière Appuyez sur la roue de défilement pour revenir au menu de paramètre.
  • Seite 46 Vous ne devez pas essayer de mettre votre radio à jour à moins que cela ne vous soit recommandé par le service clients de Sangean. La mise à jour du logiciel peut peut-être effacer tous les paramètres réseau et les stations présélectionnées réglées sur votre radio.
  • Seite 47 ● Réinitialisation de la configuration d’usine Appuyez et tournez la roue de défilement pour choisir OUI ou NON. Choisissez OUI pour effacer tous les paramètres, listes de stations et stations favorites sauvegardés. Tous les paramètres reviendront à la configuration par défaut. ●...
  • Seite 48 ● Langue Votre radio peut être configurée sur différentes langues. Appuyez et tournez la roue de défilement pour choisir la langue de votre choix. Le paramètre de langue actuel sera indiqué avec un astérisque. ● Mise en veille programmée U t i l i s é l e m e n u d e m i s e e n v e i l l e programmée pour régler le minuteur d'extinction automatique.
  • Seite 49 1. Réglez la station de radio souhaitée comme décrit précédemment. 2. Pour enregistrer une station, tenez la touche Preset requise (1-5) appuyée jusqu'à ce que l'écran affiche 'Preset Stored' La station sera enregistrée à l’ aide de la touche de présélection utilisée. Répétez cette procédure autant de fois pour les présélections restantes.
  • Seite 50 Rappeler une station présélectionnée – DAB et FM 1. Choisissez le mode de fonctionnement qui vous convient comme décrit précédemment. 2. Appuyez un moment sur la touche de présélection de votre choix. Votre radio réglera alors la station sauvegardée dans la mémoire de présélection.
  • Seite 51: Spécification

    2. Pour désactiver la fonction de verrouillage des t ouch es, passez le bouton de verrouillage sur la position opposée. La fonction de verrouillage des touches sera désactivée. Spécification Mode d’alimentation: Batteries: 2 x LR6 (taille AA) Alcaline Durée de vie de la batterie: Environ 12 heures d’...
  • Seite 52 L’entreprise se réserve le droit de modifier les spécifications sans notification. Si à l'avenir vous devez vous débarrasser de ce produit, veuillez noter que: Les produits électriques ne peuvent pas être jetés avec le reste des déchets ménagers. Si possible, amenez l'appareil à un centre de recyclage. Vérifiez auprès de votre municipalité...
  • Seite 53: Importantes Instrucciones De Seguridad

    Importantes instrucciones de seguridad 1. Lea estas instrucciones. 2. Conserve estas instrucciones. 3. Observe todas las advertencias. 4. Siga todas las instrucciones. 5. No use este aparato cerca del agua. 6. Límpielo solo con un paño seco. 7. No bloquee ninguna de las aberturas de ventilación.
  • Seite 54 9. No eluda el propósito de seguridad del enchufe polarizado o del tipo de toma de tierra. Un enchufe polarizado tiene dos hojas, siendo una más ancha que la otra. Un enchufe del tipo de toma de tierra tiene dos hojas y una clavija de toma de tierra.
  • Seite 55 12. Coloque el aparato sobre un carrito, soporte, pie de apoyo o mesa que haya sido especificado por el fabricante o vendido con el televisor. Cuando use el televisor en combinación con un carrito, tenga cuidado al desplazarlos juntos, para evitar las lesiones que podría producir un vuelco de ambos.
  • Seite 56 15. Para reducir el riesgo de incendio o descarga eléctrica, no exponga este aparato a la lluvia o la humedad. 16. La marca de peligro de descarga eléctrica y los símbolos gráficos asociados están presentes en la parte posterior de la unidad.
  • Seite 58 Controles Toma para auriculares Botones de presintonías (1-5) Botón de encendido Display LCD Control de volumen Dial de Sintonización / Menú Interruptor Lock (Nota: si está activado, la radio no funcionará) Toma USB para la actualización del software Compartimento para pilas Pasador de la correa...
  • Seite 59: Instalación De Las Pilas

    Instalación de las pilas La tapa del compartimento para pilas está situada en la parte posterior de la unidad. Deslícela hacia abajo para lograr tener acceso al compartimento. Introduzca dos pilas AA (UM-3/R6/LR6) en su interior. Asegúrese de que las pilas han sido instaladas siguiendo el diagrama indicado.
  • Seite 60: Ajuste De La Hora

    Importante: Un volumen excesivo procedente de los auriculares podía dañar sus oídos. Ajuste de la hora El reloj se actualizará automáticamente cada vez que encienda su radio y sintonice una emisora DAB o FM que esté retransmitiendo la hora mediante RDS. La visualización de la hora parpadeará...
  • Seite 61 3. El display mostrará “Welcome to Digital Radio” y comenzará la búsqueda por toda la cobertura de canales DAB+, deteniéndose en la primera emisora encontrada. Si la radio se ha usado con anterioridad, se seleccionará la última emisora reproducida. Pulse el Dial de Sintonización/Menú...
  • Seite 62 Cuando esté escuchando DAB+, mantenga pulsado el Dial para pasar por la información del modo siguiente: a. Tipo de programa (PTY) b. Nombre Multiplex c. Hora d. Fecha e. Canal y frecuencia f . Velocidad de transferencia de bits y códec g.
  • Seite 63 ● Búsqueda completa Pulse el Dial para buscar por toda la red DAB de su área. La radio sintonizará la primera emisora encontrada, una vez la búsqueda se haya completado. ● Atrás Pulse el Dial para volver a la visualización del menú...
  • Seite 64 USB de actualización. No intente actualizar su radio, a menos que le sea recomendado por el Servicio de Atención al Cliente de Sangean. La actualización del software podría eliminar todos los ajustes de la red y emisoras de radio presintonizadas.
  • Seite 65 Para más información, por favor, póngase en contacto con nuestra Oficina Central, enviando un email a: info@sangean.com ● Versión de software Pulse el Dial para consultar la versión de software instalada en su radio. Pulse de nuevo el Dial para regresar al menú de ajustes.
  • Seite 66 ● Ajuste de la retroiluminación P u l s e e l D i a l p a r a s e l e c c i o n a r l a retroiluminación automática (Backlight Auto). Seleccione YES y la retroiluminación del display se apagará...
  • Seite 67 ● Idioma Las funciones de su radio podrán ser configuradas con diferentes idiomas. Pulse y gire el Dial para seleccionar el idioma que desee. El ajuste de idioma actual será indicado con un asterisco. ● Apagado automático (Sleep) Utilice el menú de apagado automático (Sleep) para ajustar el temporizador de apagado automático.
  • Seite 68 A q u e l l a s e m i s o r a s q u e n o p u e d a n encontrarse o que no se reciban desde hace mucho tiempo se mostrarán en la lista de emisoras con un símbolo de interrogación.
  • Seite 69 Sintonización de emisoras - FM 1. Gire el Dial hacia arriba o hacia abajo hasta que el display muestre “scanning”. 2. La radio buscará en dirección ascendente o descendente hasta que encuentre una emisora con la señal lo bastante potente. Menú-FM Pulse el Dial durante 2 segundos para entrar en el menú...
  • Seite 70 Si selecciona ‘Local’: solo se encontrarán las emisoras con las señales más potentes durante la búsqueda. Si selecciona ‘Distant’: se buscarán todas las emisoras disponibles. B) Atrás Pulse el Dial para volver a la escucha de FM. C) Modo DAB Pulse el Dial para pasar al modo DAB.
  • Seite 71 USB de actualización. No intente actualizar su radio, a menos que le sea recomendado por el Servicio de Atención al Cliente de Sangean. La actualización del software podría eliminar todos los ajustes de la red y emisoras de radio presintonizadas.
  • Seite 72 Para más información, por favor, póngase en contacto con nuestra Oficina Central, enviando un email a: info@sangean.com ● Versión de software Pulse el Dial para consultar la versión de software instalada en su radio. Pulse de nuevo el Dial para regresar al menú de ajustes.
  • Seite 73 ● Idioma Las funciones de su radio podrán ser configuradas con diferentes idiomas. Pulse y gire el Dial para seleccionar el idioma que desee. El ajuste de idioma actual será indicado con un asterisco. ● Apagado automático (Sleep) Utilice el menú de apagado automático (Sleep) para ajustar el temporizador de apagado automático.
  • Seite 74 ● Ajuste de la retroiluminación P u l s e e l D i a l p a r a s e l e c c i o n a r l a retroiluminación automática (Backlight Auto). Seleccione YES y la retroiluminación del display se apagará...
  • Seite 75: Presintonización De Emisoras

    Presintonización de emisoras- FM y DAB Hay cinco memorias de presintonías disponibles para DAB y cinco más para FM. Se usarán de la misma manera para cada modo de uso. 1. Sintonice la emisora de radio que desee del modo descrito anteriormente. 2.
  • Seite 76 Selección de una emisora presintonizada - FM y DAB 1. Seleccione el modo de uso que desee del modo descrito anteriormente. 2. Pulse el botón de Presintonía que desee. Su radio sintonizará entonces la emisora guardada en la memoria de presintonía seleccionada.
  • Seite 77: Especificaciones

    2. Para desactivar la función de bloqueo de botones, cambie de posición el interruptor de bloqueo. Entonces, los botones recuperarán su funcionalidad. Especificaciones Requisitos de alimentación: Pilas: 2 x LR6 (tamaño AA) alcalinas Duración de la pila: Aproximadamente 12 horas de escucha con los auriculares durante 4 horas al día a un volumen normal.
  • Seite 78 La empresa se reserva el derecho de realizar las modificaciones de las especificaciones que considere pertinentes sin notificarlo previamente. Si en un futuro deseara deshacerse de este aparato, recuerde que los productos eléctricos no deben tirarse junto a los desechos domésticos. Deposítelo en centros de reciclaje adecuados.
  • Seite 79: Belangrijke Veiligheidsinstructies

    Belangrijke veiligheidsinstructies 1. Lees deze instructies. 2. Bewaar deze instructies. 3. Neem alle waarschuwingen in acht. 4. Volg alle instructies. 5. Gebruik het apparaat niet in de buurt van water. 6. Alleen schoonmaken met een droge doek. 7. Blokkeer de ventilatieopeningen niet. Installeer in overeenstemming met de instructies van de fabrikant.
  • Seite 80 9. Omzeil de veiligheidsdoeleinden van de gepolariseerde stekker niet. Een gepolariseerde stekker heeft twee pinnen, één is breder dan de ander. Een geaarde stekker heeft twee pinnen en een derde aardepin. De brede pin of derde pin is voor uw veiligheid. Als de geleverde stekker niet in uw stopcontact past moet u een elektricien raadplegen voor vervanging van het verouderde...
  • Seite 81 12. Alleen gebruiken met het wagentje, standaard, driepoot, haak of tafel die gespecificeerd is door de fabrikant of verkocht met het apparaat. Beweeg, als er een wagentje wordt gebruikt, het wagentje voorzichtig om verwonding door omvallen te voorkomen. 13. Haal de stekker van het apparaat uit het stopcontact tijdens onweer of als het apparaat voor lange tijd niet wordt gebruikt.
  • Seite 82 15. Stel het apparaat niet bloot aan regen of vocht om het risico van brand of elektrische schok te voorkomen. 16. De sc h o k g e va a r - m ark eri ng en de bijbehorende afbeelding staan op de achterkant van het apparaat.
  • Seite 84 Bedieningselementen Hoofdtelefoonaansluiting Knoppen voorkeurszenders (1-5) Power LCD-display Volumeregeling Afstem/Menu-draaiwiel Vergrendelschakelaar (Opmerking: Als deze geactiveerd is, dan kan de radio niet worden bediend) USB-poort voor bijwerken software Batterijvak Houder voor draagriem...
  • Seite 85 Installatie batterij Het batterijdeksel zit op de achterkant van het apparaat. Schuif het deksel omlaag om het batterijvak te openen. Plaats twee AA (UM-3/ R6/ LR6) batterijen in het batterijvak. Zorg ervoor dat de batterijen juist worden geplaatst in overeenstemming met het diagram. Plaats het deksel terug.
  • Seite 86: De Klok Instellen

    Belangrijk: Overmatige geluidsdruk van oortelefoons en hoofdtelefoons kan leiden tot gehoorverlies. De klok instellen De klok zal elke keer wanneer u uw radio inschakelt en afstemt op een DAB-zender of een FM-zender die de tijd uitzendt met behulp van RDS automatisch worden ingesteld. De tijdsweergave 0:00 knippert voor een paar seconden en daarna zal de tijd worden weergegeven als deze wordt ontvangen via...
  • Seite 87 3. Het display toont de melding “Welcome to Digital Radio” en start met het scannen van het gehele DAB+ kanaalbereik. De radio stopt met scannen wanneer de eerste zender wordt gevonden. Als de radio al eerder is gebruikt, dat zal de laatst gebruikte zender worden geselecteerd.
  • Seite 88 Dienstinformatie – DAB De weergave van dienstinformatie – Technische informatie over de huidige status van de zender die wordt ontvangen. Druk tijdens het luisteren DAB+ herhaaldelijk op het draaiwiel om door de informatie te bladeren: a. Programmatype (PTY) b. Multiplexnaam c.
  • Seite 89 A) Diensten zoeken (Find Services) Druk op het afstem/menu-draaiwiel en draai omhoog og omlaag om te selecteren. ● Volledige scan (Full scan) Druk op het draaiwiel om te scannen op het gehele DAB-netwerk in uw gebied. De radio zal afstemmen op de eerst gevonden zender nadat het scannen is voltooid.
  • Seite 90 USB-poort. U moet niet proberen uw radio up te daten, tenzij het wordt aangeraden door de klantenservice van Sangean. Het updaten software alle netwerkinstellingen en voorkeurszenders verwijderen van uw radio...
  • Seite 91 Voor meer informatie, neem contact op met ons hoofdkantoor door een email te sturen naar: info@sangean.com ● SW-versie (SW version) Druk op het draaiwiel om de softwareversie van de software op uw radio te bekijken. Druk nogmaals op het draaiwiel om terug te gaan naar het instellingenmenu.
  • Seite 92 ● Instellen contrast (Set contrast) Draai en druk op het draaiwiel om het gewenste contrast van het LCD-display te selecteren. Het contrast van het display verandert dienovereenkomstig. ● Instellen achtergrondverlichting (Set backlight) Druk op het draaiwiel om Backlight Auto te selecteren.
  • Seite 93 D R C o f f – D R C i s u i t g e s c h a k e l d , uitgezonden DRC zal worden genegeerd. DRC low – DRC-niveau wordt ingesteld op 1/2 van datgene wat de zender verzendt.. DRC high –...
  • Seite 94 E) Niet-beschikbare zenders verwijderen (Prune) Als u bent verhuisd naar een ander deel van het land, dan is het mogelijk bepaalde zenders in de zenderlijst niet meer beschikbaar zijn. Ook kunnen bepaalde DAB- diensten van tijd tot tijd stoppen met uitzenden, of veranderen van locatie of frequentie.
  • Seite 95: Uw Radio Bedienen - Fm

    Uw radio bedienen – FM 1. Schakel de radio in door op Power te drukken. Houd het draaiwiel 2 seconden ingedrukt om het Menu te openen. Draai aan het draaiwiel, ga naar de FM Mode en druk op de knop om de FM-band te selecteren.
  • Seite 96 A) FM-scanzone (FM Scan Zone) Uw radio kan in de FM-modus worden ingesteld om alleen naar lokale zenders te scannen of om naar alle zenders, inclusief verre zenders, te scannen. Druk op en draai aan het draaiwiel om de instellingen voor de FM-zone te openen. Selecteer ‘Local’: alleen zenders met de sterkste signalen worden gevonden tijdens het scannen.
  • Seite 97 USB-poort. U moet niet proberen uw radio up te daten, tenzij het wordt aangeraden door de klantenservice van Sangean. Het updaten software alle netwerkinstellingen en voorkeurszenders verwijderen van uw radio Er zullen wellicht in de toekomst software- updates voor uw radio beschikbaar zijn.
  • Seite 98 Voor meer informatie, neem contact op met ons hoofdkantoor door een email te sturen naar: info@sangean.com ● SW-versie (SW version) Druk op het draaiwiel om de softwareversie van de software op uw radio te bekijken. Druk nogmaals op het draaiwiel om terug te gaan naar het instellingenmenu.
  • Seite 99 ● Instellen contrast (Set contrast) Draai en druk op het draaiwiel om het gewenste contrast van het LCD-display te selecteren. Het contrast van het display verandert dienovereenkomstig. ● Instellen achtergrondverlichting (Set backlight) Druk op het draaiwiel om Backlight Auto te selecteren.
  • Seite 100 Sleep off ( automatisch uitschakelen i s u i t g e s c h a k e l d ) , 9 0 - 6 0 - 4 5 - 3 0 - 1 5 automatische uitschakeltimer. De radio schakelt uit nadat de geselecteerde slaaptijd is verstreken.
  • Seite 101 3. Zenders die al zijn opgeslagen in het geheugen kunnen worden overschreven door de bovenstaande procedure te volgen. Opmerking: De voorkeurszenders blijven opgeslagen i n h e t g e h e u g e n a l s d e r a d i o w o r d t uitgeschakeld.
  • Seite 102 Toetsvergrendelfunctie De toetsvergrendelfunctie wordt gebruikt om het per ongeluk bedienen van de radio te voorkomen. 1. De toetsvergrendelschakelaar zit op de achterkant van de radio. Als de toetsvergr endelschakelaar in de stand LOCK staat, dan zullen de power-knop, volumeregeling, knoppen van voorkeurszenders en het draaiwiel worden uitgeschakeld.
  • Seite 103 Specificaties Voeding: Batterijen: 2 x LR6 (maat AA) Alkaline Levensduur batterij: Ongeveer 12 uur luisteren met hoofdtelefoon voor 4 uur per dag op een normaal volume. Frequentiebereik: FM 87,50 – 108 MHz DAB+ Band III 5A – 13 F Circuitfuncties Hoofdtelefoon: 32 ohm, in-oor stijl Het bedrijf behoudt zich het recht voor om de specificaties te wijzigen zonder voorafgaande kennisgeving...
  • Seite 104 Important Safety Instructions 1. Read these instructions. 2. Keep these instructions. 3. Heed all warnings. 4. Follow all instructions. 5. Do not use this apparatus near water. 6. Clean only with dry cloth. 7. Do not block any ventilation openings. Install in accordance with the manufacturer’...
  • Seite 105 9. Do not defeat the safety purpose of the polarized or grounding-type plug. A polarized plug has two blades with one wider than the other. A grounding type plug has two blades and a third grounding prong. The wide blade or the third prong are provided for your safety.
  • Seite 106 12. Use only with the cart, stand, tripod, bracket, or table specified by the manufacturer, or sold with the apparatus. When a cart is used, use caution when moving the cart/apparatus combination to avoid injury from tip-over. 13. Unplug this apparatus during lightning storms or when unused for long periods of time.
  • Seite 107 15. To Reduce the Risk of Fire or Electric Shock, Do not Expose This Appliance To Rain or Moisture. 16. T h e S h o c k H a z a r d M a r k i n g a n d Associated Graphical Symbol is provided on the bottom panel of unit.
  • Seite 109 Controls Kopfhörerausgang Speichertasten (1 - 5) Ein/Aus-Schalter LCD-Anzeige Lautstärkeregelung Frequenzauswahl / Menürad Tastensperre (Hinweis: Wenn dieser Schalter eingeschaltet ist, kann das Radio nicht eingeschaltet werden) USB-Anschluss für Software-Upgrades Batteriefach Trageriemenöse...
  • Seite 110: Einlegen Der Batterien

    Einlegen der Batterien Das Batteriefach befindet sich auf der Rückseite des Geräts. Schieben Sie die Abdeckung nach unten, um den Zugang zum Batteriefach zu erhalten. Legen Sie zwei Batterien der Größe AA (UM-3 / R6 / LR6) in das Fach ein. Vergewissern Sie sich, dass die Batterien entsprechend der vorliegenden Zeichnung eingelegt werden.
  • Seite 111 Kopfhörer Der 3,5mm-Stereo-Kopfhöreranschluss befindet sich auf der Oberseite des Geräts und steht für die Verwendung mit Stereo- Kopfhörern oder Headsets zur Verfügung. Wenn Sie Kopfhörer am Gerät anschließen, w i r d d e r e i n g e b a u t e L a u t s p r e c h e r automatisch ausgeschaltet.
  • Seite 112 Inbetriebnahme - DAB Dieser Vorgang ist nur bei der ersten Inbetriebnahme des Geräts notwendig – 1. Vergewissern Sie sich, dass Ihre Kopfhörer /Ohrhörer angeschlossen sind. 2. Betätigen Sie den EIN/AUS-Schalterauf der Oberseite des Radios. 3. In der Anzeige erscheint die Meldung "Welcome to Digital Radio"...
  • Seite 113: Informationsanzeige - Dab

    5. St ell en Sie d i e L a u t st ä rk e auf e i n angenehmes Maß. Informationsanzeige - DAB I n f o r m a t i o n s a n z e i g e - t e c h n i s c h e Informationen über den aktuellen Status der vom Sender übertragenen Dienste.
  • Seite 114: Menüfunktionen - Dab

    Menüfunktionen - DAB Halten Sie das Menürad für 2 Sekunden gedrückt, um die Menüliste aufzurufen. Das Display zeigt zunächst "DAB" und dann <Find Services>. Drehen Sie am Menürad und wählen Sie eine der folgenden Optionen: "Dienst finden", "Zurück", "UKW-Modus", "Einstellungen" und "Nicht-aktive Sender entfernen".
  • Seite 115 B) Zurück Betätigen Sie das Menürad, um zurück zur Wiedergabeanzeige zu gelangen. C) UKW-Modus Betätigen Sie das Menürad zur Auswahl des UKW-Bands. D) Einstellungen Betätigen Sie das Menürad, um eine der folgenden Einstellungsoptionen zu wählen: ● Automatische Auswahl Betätigen und drehen Sie am Menürad zur Auswahl von JA oder NEIN.
  • Seite 116 Software-Upgrades für Ihr Radio stehen möglicherweise Zukunft Verfügung. Wenn Software-Upgrades verfügbar sind, finden Sie die Upgrades und Informationen zum Upgrade unter: http://sg.sangean.com.tw/first/first.asp http://www.sangean.eu/first/first.asp www.sangean.com.au Für weitere Informationen wenden Sie sich bitte an unseren Kundenservice, indem Sie eine Email an info@sangean.com senden.
  • Seite 117 ● SW-Version Betätigen Sie das Menürad, um die Software-Version, die auf dem Radio installiert ist, anzuzeigen. Betätigen S i e d a s M e n ü r a d , u m z u r ü c k z u m Einstellungsmenü...
  • Seite 118 ● Hintergrundbeleuchtung einstellen B e t ä t i g e n S i e d a s M e n ü r a d , u m d i e a u t o m a t i s c h e E i n s t e l l u n g d e r Hintergrundbeleuchtung zu aktivieren.
  • Seite 119 DRC low – Der DRC-Pegel wird auf die Hälfte der Senderangaben gestellt. DRC high – Der DRC-Wert wird auf den vom Sender vorgegebenen Wert gestellt. ● Sprache Das Radio kann auf andere Sprachen eingestellt werden werden. Betätigen und drehen Sie das Menürad, um die gewünschte Sprache auszuwählen.
  • Seite 120 E) Entfernen nicht-aktiver Sender Wenn Sie in einen anderen Teil Ihres Landes ziehen, kann es passieren, dass einige der Sender in der Senderliste nicht mehr verfügbar sind. Unter Umständen können DAB-Sender auch geschlossen werden oder Standort bzw. Frequenz ändern. Sender, die nicht gefunden oder die nicht für lange Zeit nicht empfangen werden können, werden Senderliste...
  • Seite 121: Benutzung Des Radios - Ukw

    Benutzung des Radios – UKW 1. Betätigen Sie den Ein/Aus--Schalter zum Einschalten des Radios. Betätigen Sie das Menürad für 2 Sekunden, um das Menü aufzurufen. Drehen Sie am Menürad und wählen Sie den UKW-Modus zur Auswahl des UKW-Wellenbereichs. Automatische Sendersuche-UKW 1.
  • Seite 122 A) UKW-Suchbereich Sie können den UKW-Modus des Radios entweder so einstellen, dass bei einer Sendersuche lokale Sender gefunden werden oder alle Sendern gefunden werden, einschließlich entfernterer Sender. Betätigen und drehen Sie das Menürad, um in die UKW-Suchbereichseinstellung zu gelangen. "Local": nur die Sender mit den stärksten Signalen werden während des Suchvorgangs berücksichtigt.
  • Seite 123 Verfügung. Ihr Radio wurde daher so konzipiert, dass die interne Software über Ihrem USB-Upgrade-Port aktualisiert werden kann. Sie sollten allerdings nicht versuchen das Radio zu aktualisieren, es sei denn es wird vom Sangean-Kundendienst empfohlen. Durch eine Software- Aktualisierung werden alle Netzwerkeinstellungen und...
  • Seite 124 Für weitere Informationen wenden Sie sich bitte an unseren Kundenservice, indem Sie eine Email an info@sangean.com senden. ● SW-Version Betätigen Sie das Menürad, um die Software- Version, die auf dem Radio installiert ist, anzuzeigen. Betätigen Sie das Menürad, um zurück zum Einstellungsmenü...
  • Seite 125 ● Kontrast einstellen Drehen und betätigen in das Menürad, um gewünschten LCD- Kontrast einzustellen. Der Kontrast der Anzeige ändert sich entsprechend. ● Hintergrundbeleuchtung einstellen B e t ä t i g e n S i e d a s M e n ü r a d , u m d i e a u t o m a t i s c h e E i n s t e l l u n g d e r Hintergrundbeleuchtung zu aktivieren.
  • Seite 126: Sender Speichern-Dab Und Ukw

    ● Einschlaf-Timer Verwenden Sie das Einschlaf-Menü zum Einstellen der automatischen Abschaltung. Betätigen und drehen Sie das Menürad, um eine der folgenden Einstellungen zu wählen: Einschlaf-Timer aus (automatische Abschaltung ist deaktiviert), 90 - 60 - - 30 - 15 automatischer Abschaltung. Ihr Radio schaltet automatisch ab, nachdem die voreingestellte Abschaltzeit abgelaufen ist.
  • Seite 127: Abrufen Gespeicherter Sender

    2. Zum Spe ich e rn eines Se n de rs auf einem Speicherplatz, halten Sie die entspreche nde Se nde rtaste ( 1 - 5 ) gedrückt, bis in der Anzeige "Preset stored" erscheint. Der Sender wird dann unter der gewählten Sendertaste gespeichert.
  • Seite 128 2. Betätigen Sie die gewünschte Sendertaste. Das Radio stellt s ich dann auf die Frequenz des gespeicherten Senders. Die gewählte Speichernummer erscheint dann in der Anzeige des Radios, z. B. "P2 ". Tastensperre Die Tastensperre wird verwendet, um unbeabsichtigte Tastenbetätigung zu verhindern. 1.
  • Seite 129: Technische Daten

    Technische Daten Stromversorgungsanforderungen Batterien: 2 x LR6 (AA) alkalisch Batterielebensdauer: Ca. 12 Stunden bei 4 Stunden Benutzung über Kopfhörer am Tag bei normaler Lautstärke. Frequenzbereich: UKW 87,50 bis 108 MHz DAB+ Band III 5A - 13F Schaltkreismerkmale Kopfhörer: 32 Ohm, Innenohr Veränderungen der Spezifikationen ohne vorherige Ankündigung vorbehalten.

Inhaltsverzeichnis