Perel E305DIN1 Kurzanleitung
Quicklinks
E3
305DIN
N1
* Not
t incl. – non incl. – niet
incl. – nicht mitgeliefe
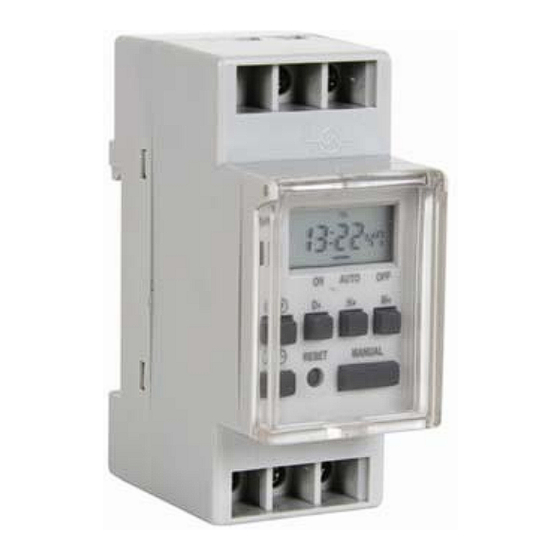
E305DIN1
1 – DIGITAL W
WEEK TIMER
1. Introducti
ion
To all residents
s of the European Un
nion
Important envi
ironmental informat
tion about this produ
This sy
ymbol on the device
or the package indica
could
harm the environme
ent. Do not dispose o
waste
; it should be taken t
to a specialized comp
to you
ur distributor or to a l
local recycling service
If in doubt, con
ntact your local wast
te disposal authoritie
Thank you for c
choosing Velleman! P
Please read the manu
service. If the d
device was damaged
in transit, do not inst
can be used to
control the lighting,
heating and other ap
2.
Wirin
g
• This timer is
to be used in DIN rai
il enclosures with pro
should be en
ntrusted to a qualifie
d technician only. Do
electrical ins
stallation.
• Place the tim
mer on the DIN rail or
r mount the timer us
and 2. The liv
ve connector must b
e protected with an
circuit betwe
een terminals 3 and 4
4 for a closing functio
Tighten the s
screws properly to m
make good contact pr
the connecti
ion terminal.
3. Programm
ming
• Time and Da
ate Setting
Hold
pres
ssed, and set the day
y with D+, set the hou
to confirm
m.
• Program Set
tting
This timer fe
eatures 8 on / off pro
grams. Press
days the pro
ogram must be active
e with D+ (15 modes,
the display [A
A]. Now, set the time
e with H+ and M+. Pr
program acc
cordingly. Repeat the
operation for the re
Finally, press
s
to show the cur
rent time.
• Verifying an
d modifying a Settin
ng
Press
sev
veral times to display
y each setting. To mod
and M+, and
d press
to confirm
m.
• Resetting th
e Timer
Press RESET
with a pointy object
. The clock and all the
• Manual Ove
erride
Press MANU
UAL and choose betw
ween permanent pow
(AUTO) mod
e. The status is indic
ated on the display [
mode.
• LED Indicato
or
The LED light
ts up when the NO co
ontact (5‐4) is closed
4. Technical
Specifications
Power Supply
Output
Resistive Loa
ad
Inductive Loa
ad
Timer Interval
Power Consum
ption
Operating Tem
perature
Deviation
Use this device
e with original access
sories only. Velleman
damage or inju
ury resulted from (inc
correct) use of this d
the warranty, p
please visit our webs
site www.perel.eu. T
change withou
t prior notice.
V.02 – 28‐1‐2013
3
mo
ode – modus – mode –
Modus – modo
MO
TH WE TH FR
MO
TU
WE
MO
TU WE TH FR
MO
TU WE TH FR
MO
WE
TU
MO
TU WE
t meegelev. – no
ert ‐ no incl.
uct
ates that disposal of
the device after its li
f the unit (or batterie
es) as unsorted muni
pany for recycling. Th
his device should be r
e. Respect the local e
environmental rules.
es.
ual thoroughly before
e bringing this device
tall or use it and cont
tact your dealer. This
ppliances.
otection grade IP30 m
minimum. The install
o not install the timer
r if you lack knowledg
ing the support. Con
nect the power to te
MCB or fuse of max.
16A. Connect the co
on, or between 4 and
d 5 for an opening fun
essure. Make sure th
here is no cable insula
urs with H+ and set t
he minutes with M+.
to se
et the first power‐on
n program [B]. Select
see table); the selec
ted days are highligh
ress
to confirm. N
Next, set the power‐o
maining 7 power‐on
and power‐off progr
dify, simply set a new
w date and time with
e settings will be era
sed.
wer‐on (ON), permane
ent power‐off (OFF) a
C]. The selected prog
gram will only work i
d.
220‐250 VAC
C, 50 Hz
16 A @ 230 V
VAC, 3680 W max.
8 A @ 230 VA
AC (cos φ = 0.4)
1 min
4.4 W
‐10 °C ~ 40 °C
C
± 1 min/mon
th
n nv cannot be held
responsible in the ev
device. For more info
o concerning this pro
The information in th
his manual is subject
E305
DIN1 – PROG
1. Intro
oduction
Aux rési
idents de l'Union eur
Des info
ormations environne
Ce symbole sur l'ap
peut polluer l'enviro
éventuelles) parmi
l'appareil en questi
recyclag
ge local. Il convient de
l'environ
nnement. En cas de q
remerci
ons de votre achat !
l'appare
eil a été endommagé
program
mmateur convient à a
2.
Câblage
• Ce pr
rogrammateur est de
ou pl
us). Confier l'installat
dispo
osez pas des connaiss
• Place
er le programmateur
modu
ules d'alimentation d
coupe
e‐circuit ou un fusible
ou au
ux bornes 4 et 5 pour
Veille
er à retirer le revêtem
– modo –
3. Prog
grammation
SA
SU
• Régla
age de l'heure et de l
Main
tenir enfoncé
pour
confirmer.
• Progr
TH
rammation
FR
Ce pr
rogrammateur intègr
SA
prem
mier programme d'allu
SU
les jo
urs sélectionnés sont
et M+
+. Confirmer avec
SA
SU
Répét
ter cette opération p
SA
pour
afficher l'heure actu
FR
• Vérifi
ication et modificatio
TH
SA
Enfon
ncer
pour afficher
avec
.
TH FR
SA
• Réini
tialisation du progra
Enfon
ncer RESET avec un o
• Comm
mande manuelle
Enfon
ncer MANUAL et séle
perm
manente (OFF) ou le m
sélect
tionné ne fonctionne
• L'indi
ication LED
La LE
D s'allume lorsque le
4. Spéc
cifications techni
ifecycle
Aliment
ation
icipal
Sortie
returned
Charg
ge résistive
Charg
ge inductive
Interval
le
e into
Consom
mmation
s timer
Tempér
ature de service
Décalag
e
N'emplo
oyer cet appareil qu'
ation
conform
me au droit applicabl
ge of
pouvant
t résulter de l'utilisat
garantie
e, visitez notre site w
rminals 1
peuvent
t être modifiées sans
ontrolled
E305
DIN1 – DIGITA
nction.
ation in
1. Inlei
iding
Aan alle
e ingezetenen van de
Belangr
ijke milieu‐informat
Dit symbool op het
. Release
weggeworpen, dit t
batterijen) niet bij h
terechtkomen voor
recyclag
gepunt brengen. Resp
which
plaatsel
lijke autoriteiten bet
hted on
Dank u v
voor uw aankoop! Le
off
toestel b
beschadigd tijdens he
rams.
worden
gebruikt voor het aa
2.
Aansluiting
• Deze
timer is ontworpen v
h D+, H+
Vertr
ouw de installatie aa
de no
odige kennis beschikt
• Plaats
s de timer op de DIN
voedi
ing aan op klemmen
minia
atuurstroomonderbre
and auto
voor
een sluitende functie
n auto
voldo
oende aan voor een g
3. Prog
grammering
• De tij
jd en de datum inste
Houd
d
ingedrukt. Stel d
beves
stigen.
• Een p
programma instellen
Deze
timer heeft 8 in‐ en
stelle
en [B]. Selecteer de d
tabel
); de geselecteerde d
om
m te bevestigen. Stel
stapp
pen voor de overige 7
de uu
uraanduiding.
• Een in
nstelling controleren
vent of
Druk
telkens op
oduct and
en M
+, en bevestig met
t to
• Het t
imergeheugen wisse
Druk
op RESET met een p
RAMMATEUR
R HEBDOMAD
ropéenne
ementales important
tes concernant ce pro
pareil ou l'emballage
e indique que l'élimin
onnement. Ne pas je
eter un appareil élect
les déchets municipa
aux non sujets au tri s
on. Renvoyer les équ
uipements usagés à v
e respecter la réglem
mentation locale relat
questions, contacter
r les autorités locales
Lire la présente notic
ce attentivement ava
pendant le transport
t, ne pas l'installer et
allumer et éteindre l'é
éclairage, le chauffag
estiné à un montage d
dans une armoire à r
tion à un technicien q
qualifié. Ne pas racco
sances requises.
sur le rail DIN ou le m
monter à l'aide du su
es bornes 1 et 2 au r
réseau. Protéger le co
e de max. 16 A. Racc
order le circuit aux b
r un circuit ouvert. Se
errer les vis de maniè
ment du câble dans la
a borne de connexion
la date
, et
régler la date avec D
D+, l'heure avec H+ et
e 8 programmes d'al
llumage et d'extinctio
umage [B]. Sélection
ner les jours applicab
t mis en surbrillance
sur l'afficheur [A]. Ré
. Paramétrer ensuite
e le programme d'ext
pour les 7 programme
es d'allumage et d'ex
elle.
on d'un programme
r un programme. Mo
difier la date et l'heu
ammateur
objet pointu. L'horlog
ge et les programmes
ectionner le mode d'a
allumage permanent
mode automatique (A
AUTO). L'état apparaî
e qu'en mode automa
atique.
e contact NO (5‐4) est
t fermé.
iques
220‐2
250 VCA / 50 Hz
16 A @
@ 230 VCA, 3680 W m
8 A @
@ 230 VCA (cos φ = 0,
1 min
4,4 W
W
‐10 °C
C ~ 40 °C
± 1 m
in/mois
'avec des accessoires
s d'origine. La SA Ve
e être tenue respons
sable des dommages
tion de cet appareil.
Pour plus d'informa
web www.perel.eu. T
Toutes les informatio
s notification préalab
ble.
ALE WEEKTIM
MER
e Europese Unie
ie betreffende dit pr
roduct
toestel of de verpak
king geeft aan dat, a
toestel schade kan to
oebrengen aan het m
het gewone huishoud
delijke afval; het moe
r recyclage. U moet d
dit toestel naar uw ve
pecteer de plaatselijk
ke milieuwetgeving. H
treffende de verwijd
ering.
ees deze handleiding
grondig voor u het to
et transport, installee
er het dan niet en raa
ansturen van verlicht
ing, verwarmingsinst
voor montage in een
n DIN‐railkast met bes
an toe een geschoold
technicus. Installeer
t.
‐rail of monteer de t
imer met behulp van
1 en 2. Bescherm de
e aansluiting onder sp
eker of een zekering
van max. 16 A. Sluit
e, of op klemmen 4 e
en 5 voor een openen
goed contact. Verwijd
der de kabelmantels
ellen
de dag in met D+, de
uren met H+ en de m
uitschakelprogramm
ma's. Druk op
agen waarop u het p
programma wenst in
dagen verschijnen op
p de display [A]. Stel n
vervolgens op dezel
fde manier het uitsc
7 in‐ en uitschakelpro
ogramma's. Druk ten
n en wijzigen
om he
et programma weer t
te geven. Wijzig de da
.
en
untig object. De klok
k en alle ingestelde pr
DAIRE NUMÉR
RIQUE
oduit
nation d'un appareil e
en fin de vie
rique ou électroniqu
e (et des piles
sélectif ; une déchète
erie traitera
votre fournisseur ou à
à un service de
tive à la protection de
e
s pour élimination. N
Nous vous
ant la mise en service
e de l'appareil. Si
t consulter votre reve
endeur. Ce
ge central et d'autres
s appareils.
ails DIN (indice de pr
rotection IP30
order ce programmat
teur si vous ne
pport de montage. R
Raccorder les
onnecteur sous tensi
on par un
bornes 3 et 4 pour un
circuit fermé,
ère à ce que le contac
ct soit solide.
n.
t les minutes avec M
+. Relâcher
on. Enfoncer
pou
r paramétrer le
bles avec D+ (15 mod
des, voir table) ;
égler l'heure et les m
minutes avec H+
tinction de la même m
manière.
xtinction restants. En
nfin, enfoncer
ure avec D+, H+ et M+
+, et confirmer
s seront effacés.
t (ON), le mode d'ext
inction
ît sur l'afficheur [C]. L
Le programme
max.
4)
lleman ne peut, dan
s la mesure
s ou lésions (directs
ou indirects)
ation concernant cet
article et la
ons présentées dans
cette notice
ls het na zijn levenscy
yclus wordt
milieu. Gooi dit toeste
l (en eventuele
et bij een gespecialise
eerd bedrijf
erdeler of naar een lo
okaal
Hebt u vragen, conta
acteer dan de
oestel in gebruik nee
emt. Werd het
adpleeg uw dealer. D
Deze timer kan
tallaties en andere to
oestellen.
schermingsgraad IP3
0 of hoger.
r de timer niet zelf in
dien niet over
n het montageplaatje
e. Sluit de
panning met een
het circuit aan op kle
emmen 3 en 4
nde functie. Span de
schroeven
uit de klemmen.
minuten met M+. Laat
t
los om te
om h
het eerste inschakelp
programma in te
te schakelen met D+
(15 modes, zie
nu de tijd in met H+ e
en M+. Druk op
hakelprogramma in.
Herhaal deze
slotte op
om teru
ug te keren naar
atum en tijd gewoon
nweg met D+, H+
rogramma's worden
gewist.
©Velleman nv

Verwandte Anleitungen für Perel E305DIN1


Inhaltszusammenfassung für Perel E305DIN1
- Seite 1 Enfon ncer RESET avec un o objet pointu. L’horlog ge et les programmes s seront effacés. • Comm mande manuelle Enfon ncer MANUAL et séle ectionner le mode d’a allumage permanent t (ON), le mode d’ext inction perm manente (OFF) ou le m mode automatique (A AUTO). L'état apparaî ît sur l'afficheur [C]. L Le programme E305DIN1 1 – DIGITAL W WEEK TIMER sélect tionné ne fonctionne e qu'en mode automa atique. • L'indi ication LED 1. Introducti ion La LE D s'allume lorsque le e contact NO (5‐4) est t fermé. To all residents s of the European Un nion 4. Spéc cifications techni...
- Seite 2 +, und bestätigen Sie e mit . voorafgaande k kennisgeving. • De Sc chaltuhr rücksetzen Drück ken Sie RESET mit ein nem spitzen Gegenst and. Die Uhr und alle e eingestellten Progra amme werden E305DIN1 1 – TEMPORIZ ZADOR SEMAN NAL DIGITAL gelös cht. • Manu 1. Introducci ión uelle Steuerung Drück ken Sie MANUAL und d wählen Sie die perm manente Einschaltun g (ON), die permane nte Abschaltung A los ciudadano os de la Unión Europ pea ...
- Seite 3 gebruik of gebruik van het toestel strijdig met de voorschriften van de fabrikant. Velleman® Service and Quality Warranty - schade ten gevolge van een commercieel, professioneel of collectief Since its foundation in 1972, Velleman® acquired extensive gebruik van het apparaat (bij professioneel gebruik wordt de experience in the electronics world and currently distributes its garantieperiode herleid tot 6 maand).
- Seite 4 - Schäden verursacht durch Brandschaden, Wasserschaden, Blitz, Unfälle, Naturkatastrophen, usw. Made in Hong Kong - Schäden verursacht durch absichtliche, nachlässige oder Imported for PEREL by Velleman nv unsachgemäße Anwendung, schlechte Wartung, zweckentfremdete Legen Heirweg 33, 9890 Gavere, Belgium Anwendung oder Nichtbeachtung von Benutzerhinweisen in der www.perel.eu...