
Verwandte Anleitungen für Yealink W53P


Inhaltszusammenfassung für Yealink W53P
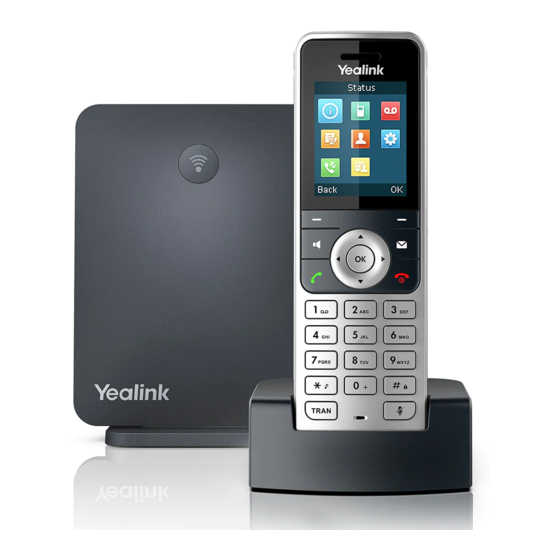
- Seite 1 DECT IP Phone W53P & W53H English | Deutsch | Español | Français Quick Start Guide(V83.11) www.yealink.com For W60B firmware: 77.83.0.10 or later For W53H firmware: 88.83.0.10 or later...
- Seite 2 Table of Contents English ..........1 Deutsch ........15 Español ........30 Français ........44...
- Seite 3 Ethernet Cable Belt Clip Rechargeable Battery Quick Start Guide Battery Cover Handset Protective Case (Optional) Note: Yealink W53P DECT IP phone consists of one W60B base station and one W53H handset. W53H Package Contents W53H Handset Charger Cradle Belt Clip...
- Seite 4 PoE Hub/Switch Note • If you choose Method a, use Yealink supplied power adapter (5V/600mA). A third-party power adapter may damage the base station. • If you choose Method b, you do not need to connect the power adapter. Make sure the hub/switch is PoE-compliant.
- Seite 5 2b. (Wall-Mount Installation) Attach the base station. 3. Insert the battery into the handset. 4. Attach the belt clip to the handset. 5. (Optional) Put the handset in the protective case and attach the belt clip. 6. (Optional) Mount the charger cradle to the wall. 40mm...
-
Seite 6: Getting Started
7. Connect the charger cradle and charge the handset. Note • Use Yealink supplied power adapter (5V/600mA). A third-party power adapter may damage the handset. • Check the charging status on the top-right corner of the LCD screen. Getting Started Shortcuts Shortcut keys help you quickly access the frequently used phone features. -
Seite 7: Handset Registration
Handset Registration You can register up to 8 handsets to one W60B base station. Each handset can be registered to 4 different base stations. When the handset LCD screen prompts “Unregistered!”, long press on the base station till the registration LED indicator flashes. There are two methods to register a new handset: Easy Registration: Press the Reg soft key on the handset to register quickly. -
Seite 8: Basic Operations
DNS address for the base station manually. To configure the network parameters for the base station manually: 1. Press the OK key to enter the main menu, and then select Settings->System Settings ->Network (default PIN: 0000)->Basic. 2. Select the desired IP address mode from the IP Mode field. 3. -
Seite 9: Handset Settings
Handset Settings Handset Name To rename the handset: 1. Press the OK key to enter the main menu, and then select Settings->Handset Name. 2. Edit the value in the Rename field. 3. Press the Save soft key to accept the change. Volume Adjustment •... - Seite 10 To delete a contact: 1. Press the OK key to enter the main menu, and then select Directory. 2. Press to highlight the desired entry. 3. Press the Options soft key, and then select Delete to delete the selected entry. To assign a speed dial number: 1.
-
Seite 11: Answering Calls
To place a call from the redial list: 1. Press when the handset is idle. 2. Press to highlight the desired entry, and then press To place a call using the speed dial key: Long press the speed dial key to call the preset number directly. Answering Calls To answer a call, do one of the following: •... -
Seite 12: Call Transfer
Call Transfer You can transfer a call in one of the following ways: Blind Transfer 1. Press the Options soft key during a call, and then select Transfer. 2. Enter the number you want to transfer the call to. 3. Press the Transfer soft key. Semi-Attended Transfer 1. -
Seite 13: Regulatory Notices
We are not liable for problems with Yealink device arising from the use of this product; we are not liable for financial damages, lost profits, claims from third parties, etc., arising from the use of this product. - Seite 14 • Use only the rechargeable battery pack delivered with the handset or those rechargeable battery packs expressly recommended by Yealink. • Defective or exhausted battery should never be disposed of as municipal waste. Return old battery to the battery supplier, a licensed battery dealer or a designated collection facility.
- Seite 15 2. Connect it to another wall outlet. The usage environment is out of operating temperature range. 1. Use in the operating temperature range. The cable between the unit and the Yealink device is connected incorrectly. 1. Connect the cable correctly. You cannot connect the cable properly.
-
Seite 16: Declaration Of Conformity
Huli District, Xiamen City, Fujian, P.R. China CE DATE: 10th/September/2018 declare that the product Type: DECT IP Phone Yealink W53P (W53H & W60B) meets the essential requirements and other relevant provisions according to the following EC directive Directive: 2014/30/EU, 2014/35/EU, RED 2014/53/EU;... - Seite 17 Base Stand Ladeschale Zwei Netzteile Ethernet-Kabel Gürtelclip Wiederaufladbare Batterie Kurzanleitung Batterie-Cover Schutzetui für das Handset (Optionales) Hinweis: Das Yealink DECT IP phone W53P besteht aus einer W60B Basisstation und einem W53H-Mobilteil. W53H Verpackungsinhalt W53H-Mobilteil Ladeschale Gürtelclip Netzteil Batterie-Cover Wiederaufladbare Batterie Schutzetui für das Handset (Optionales)
-
Seite 18: Das Dect-Telefon Zusammensetzen
W60B Verpackungsinhalt W60B Basisstation Standfuß Netzteil Ethernet-Kabel Kurzanleitung Das DECT-Telefon zusammensetzen 1. Verbinden Sie die Basisstation mit dem Netzwerk und der Stromver sorgung auf eine der nachfolgend beschriebenen Weisen: a. AC-Stromversorgung b. PoE (Power over Ethernet) PoE Netzwerk-Switch Hinweis: Bei Inline-Stromversorgung (PoE) muss das Netzteil nicht angeschlossen werden. Vergewissern Sie sich, dass der Netzwerk-Switch PoE-kompatibel ist. - Seite 19 2b. (Wandmontage) Anbringen der Basisstation 3. Legen Sie die Batterie wie unten dargestellt in das Mobilteil ein: 4. Befestigen Sie den Gürtelclip am Mobilteil: 5. (Optional) Stecken Sie das Mobilteil in die Schutzhülle und befestigen Sie den Gürtelclip. 6. (Optional) Befestigen Sie die Ladestation wie unten dargestellt an der Wand: 40mm...
-
Seite 20: Erste Schritte
7. Schließen Sie die Ladestation an und laden Sie das Mobilteil wie unten dargestellt auf: Hinweis: Das Mobilteil darf nur mit dem originalen Netzteil (5 V/600 mA) betrieben werden. Bei Verwendung eines Drittanbieter-Netzteils kann das Mobilteil beschädigt werden. Der Ladestatus des Mobilteils wird oben rechts im Display angezeigt Erste Schritte Schnellzugriffstasten Sie können Funktionen schnell aufrufen, indem Sie auf die Schnellzugriffstasten drücken,... -
Seite 21: Das Mobilteil Anmelden
• Drücken Sie die Save-Taste, um die Änderung zu übernehmen, oder , um sie zu verwerfen. Das Mobilteil anmelden Sie können bis zu acht Mobilteile an der Basisstation anmelden. Jedes Mobilteil kann an vier verschiedenen Basisstation angemeldet werden. 1. Gehen Sie wie folgt vor, um das Mobilteil manuell anzumelden: •... -
Seite 22: Grundlegende Funktionen
Manuelle Konfiguration der Netzwerkeinstellungen für die Basisstation: 1. Drücken Sie die OK-Taste, um das Hauptmenü aufzurufen, und wählen Sie Einstellung->System->Netzwerk. 2. Geben Sie die System-PIN (Standard: 0000) ein und drücken Sie dann den Fertig-Softkey. 3. Wählen Sie den gewünschten IP-Adress-Modus im IP-Modus-Feld aus. 4. -
Seite 23: Mobilteileinstellungen
Mobilteileinstellungen Mobilteilname Mobilteil umbenennen: 1. Drücken Sie die OK-Taste, um das Hauptmenü aufzurufen, und gehen Sie zu Einstellung->Mobilteilname. 2. Bearbeiten Sie die Angabe im Feld Umben. 3. Drücken Sie den Softkey Speichern, um die Änderungen zu übernehmen. Lautstärke einstellen • Drücken Sie im Ruhemodus des Mobilteils die Taste oder , um die Lautstärke des Klingeltons einzustellen. -
Seite 24: Kurzwahlnummer Einrichten
Kontakt löschen: 1. Drücken Sie die Taste OK zum Öffnen des Hauptmenüs und wählen Sie dann Telefonb. 2. Wählen Sie mit oder den gewünschten Eintrag.. 3. Drücken Sie den Softkey Optionen und wählen Sie dann Löschen, um den ausgewählten Eintrag zu löschen. Kurzwahlnummer einrichten: 1. -
Seite 25: Anrufe Entgegennehmen
Anruf anhand des Anrufprotokolls tätigen: 1. Drücken Sie am im Bereitschaftszustand befindlichen Mobilteil den Softkey Anrufl und wählen Sie dann das gewünschte Anrufprotokoll. 2. Drücken Sie oder , um den gewünschten Eintrag zu markieren, und drücken Sie dann oder , um einen Anruf über die Standardleitung zu tätigen. Einen Anruf über die Wiederwahl-Liste tätigen: 1. -
Seite 26: Anrufweiterleitung
• Falls nur ein Anruf gehalten wird, drücken Sie den Softkey Weiter. Wenn zwei Anrufe gehalten werden, drücken Sie den Softkey Weiter, um den • aktuellen Anruf fortzusetzen. Drücken Sie den Softkey Wechseln, um zwischen Anrufen umzuschalten. Anrufweiterleitung Sie können Anrufe wie folgt weiterleiten: Direkte Weiterleitung 1. - Seite 27 • Besetzt----Eingehende Anrufe werden umgeleitet, wenn die Leitung besetzt ist. • Verzögert----Eingehende Anrufe werden umgeleitet, wenn sie innerhalb einer bestimmten Zeit nicht entgegengenommen werden. 4. Wählen Sie im Feld Status die Option Aktiviert. 5. Geben Sie im Feld Ziel die Nummer ein, an die eingehende Anrufe umgeleitet werden sollen.
-
Seite 28: Ausführungshinweise Für Die Produkte Von Yealink Mit Akku
Betriebsanweisungen und der Systemumgebung verwendet wird. Wir sind weder für Schäden oder Verluste haftbar, die aus der Verwendung dieses Produkts entstehen, noch für Ansprüche eines Dritten. Wir sind nicht haftbar für Probleme mit dem Yealink Gerät, die aus der Verwendung dieses Produkts entstehen. Wir sind nicht haftbar für finanzielle Schäden, Gewinnverluste, Ansprüche Dritter etc., die aufgrund der Verwendung dieses... - Seite 29 • Öffnen oder beschädigen Sie den Akku nicht, da austretendes Elektrolyt ätzend wirkt und Ihre Augen oder Ihre Haut schädigen kann. • Verwenden Sie nur mit dem Mobilteil ausgelieferte oder ausdrücklich von Yealink empfohlene Akkus. • Defekte oder leere Akkus und Batterien dürfen nicht mit dem Hausmüll entsorgt werden.
- Seite 30 Die Umgebungstemperatur liegt oberhalb des Betriebstemperaturbereichs. 1. Verwenden Sie die Einheit innerhalb des Betriebstemperaturbereichs. Das Kabel zwischen der Einheit und dem Yealink Gerät ist nicht richtig angeschlossen. 1. Schließen Sie das Kabel richtig an. Das Kabel lässt sich nicht richtig anschließen.
-
Seite 31: Konformitätserklärung
Huli District, Xiamen City, Fujian, P.R. China CE DATE: 2018.09.10 erklären hiermit, dass das Produkt Type: DECT IP Telefon Yealink W53P (W53H & W60B) die grundlegenden Anforderungen und andere relevante Bestimmungen der folgenden EG-Richtlinie erfüllt. Richtlinie: 2014/30/EU, 2014/35/EU, RED 2014/53/EU;... - Seite 32 Cable Ethernet Pinza para el Batería recargable Guía de inicio rápido Tapa de batería cinturón Funda protectora (opcional) Nota: W53P Teléfono Inalámbrico DECT IP de Yealink consiste en una W60 base y un Handset W53H. W53H Contenido de la caja Ñ Teléfono W53H Base de carga Pinza para el cinturón...
- Seite 33 W60B Contenido de la caja W60B Base Soporte Alimentador Cable Ethernet Guía de inicio rápido Instalación del teléfono DECT 1. Conecte la estación base a la red y la alimentación de una de las dos formas posibles: a. Opción Alimentador b.
- Seite 34 2b. (Montaje en la pared) Conectar la estación base. 3. Introduzca las baterías en el teléfono como se muestra a continuación: 4. Coloque el clip de cinturón en el terminal : 5. (Opcional) Coloque el terminal en la funda protectora y coloque el clip del cinturón.
-
Seite 35: Primeros Pasos
7. Conecte la base de carga y cargue el teléfono como se muestra a continuación: Nota: El teléfono debe usarse únicamente con el alimentador original (5V/600 mA). El uso de un adaptador de terceros podría dañar el teléfono. El estado de carga del teléfono se indica en la esquina superior derecha de la pantalla LCD. -
Seite 36: Configuración De Red
Registro del teléfono en la estación base Es posible registrar hasta 8 teléfonos en una estación base. Se puede registrar cada teléfono en 4 estaciones base diferentes. 1. Siga uno de estos procedimientos para registrar manualmente el teléfono: • Mantenga pulsado en la estación base hasta que el LED de registro parpadee len tamente. -
Seite 37: Operaciones Básicas
Para configurar los parámetros de red de la estación base manualmente desde el teléfono: 1. Pulse la tecla OK para acceder al menú principal y, a continuación, seleccione Ajustes->Ajustes de sistema-> Red. 2. Introduzca el PIN del sistema (predeterminado: 0000) y, a continuación, pulse la tecla Hecho. -
Seite 38: Ajustes Del Teléfono
Ajustes del teléfono Nombre del teléfono Cambiar el nombre del teléfono: 1. Pulse la tecla OK para acceder al menú principal y, a continuación, seleccione Ajustes->Nombre de inalámbrico. 2. Edite el valor del campo Renombrar. 3. Pulse la tecla de función Guardar para aceptar el cambio. . Control de volumen •... -
Seite 39: Hacer Llamadas
Eliminar un contacto: 1. Pulse la tecla OK para entrar en el menú principal y seleccione Directorio. 2. Pulse para seleccionar la entrada deseada. 3. Pulse la tecla de función Opciones y seleccione Eliminar para eliminar el contacto selec cionado. Asignar un número de marcación rápida: 1. -
Seite 40: Responder Llamadas
Hacer una llamada desde la lista de números de rellamada: 1. Pulse cuando el teléfono esté inactivo. 2. Pulse para seleccionar la entrada deseada y, a continuación, pulse Hacer una llamada usando la tecla de marcación rápida: Mantenga pulsada la tecla de marcación rápida para hacer directamente una llamada a un número predefinido. - Seite 41 Transferencia semi atendida Puede transferir una llamada de las formas siguientes: Transferencia ciega 1. Pulse la tecla de función Opciones durante una llamada y seleccione Transferir. 2. Marque el número al que quiere transferir la llamada. 3. Pulse la tecla de función Transferir. Transferencia semi atendida 1.
- Seite 42 No nos hacemos responsables de los problemas con el dispositivo Yealink que surjan del uso de este producto; No nos hacemos responsables de los daños financieros, pérdidas de beneficios, reclamaciones de terceros, etc., que surjan del uso de este produc-...
- Seite 43 • Utilice únicamente el paquete de baterías recargables suministrado con el teléfono o los paquetes de baterías recargables recomendados explícitamente por Yealink. • Nunca elimine las baterías defectuosas o agotadas con los residuos urbanos.
- Seite 44 La temperatura del entorno está fuera del rango de temperatura de funcionamiento. 1. Asegúrese de que la temperatura del entorno está dentro de los límites permitidos. El cable entre la unidad y el dispositivo de Yealink no está conectado correctamente. 1. Conecte el cable correctamente.
-
Seite 45: Declaración De Conformidad
Huli District, Xiamen City, Fujian, P.R. China Fecha de CE: 2018.09.10 Declara que el producto Tipo: Teléfono DECT IP Yealink W53P (W53H & W60B) cumple con los requisitos esenciales y cualesquiera otras disposiciones aplicables o exigibles de la directivas CE Directiva: 2014/30/EU, 2014/35/EU, RED 2014/53/EU;... - Seite 46 Batterie couvrir ceinture rechargeable démarrage rapide Etui de protection du combiné (optionnel) Remarque: Le Yealink W53P inclut une W60 base et un combiné DECT W56H. W53H Contenu de la boîte Combiné W53H Socle chargeur Clip de ceinture Adaptateur secteur Batterie couvrir Batterie rechargeable Etui de protection du combiné...
- Seite 47 W60B Contenu de la boîte W60B Base Socle de Base Adaptateur secteur Câble Ethernet Guide de démarrage rapide Montage du téléphone DECT 1. Procédez à la connexion au réseau et à l’alimentation électrique de la station de base d’une des façons suivantes, comme illustré ci-dessous : a.
- Seite 48 2b. (Installation murale) Attacher la base. 3. Insérez les piles dans le combiné, comme illustré ci-dessous : 4. Fixez l’attache pour ceinture sur le combiné : 5. (Facultatif) Placez le combiné dans l’étui de protection et fixez l’attache pour ceinture. 6.
- Seite 49 7. Raccordez le socle chargeur et chargez le combiné, comme illustré ci-dessous : Remarque: • Le combiné doit uniquement être utilisé avec l’adaptateur d’alimentation d’origine (5 V/600 mA). L’utilisation d’un adaptateur tiers est susceptible d’endommager le combiné. • Le niveau de charge du combiné est indiqué dans le coin supérieur droit de l’écran LCD. Démarrer Raccourcis En vous servant des touches de raccourci, vous pourrez accéder rapidement aux...
-
Seite 50: Enregistrement Du Combiné
Enregistrement du combiné Vous pouvez enregistrer jusqu’à huit combinés sur une station de base. Chaque combiné peut être enregistré sur 4 stations de base différentes. 1. Pour enregistrer votre combiné manuellement, suivez la procédure suivante : • Maintenez le bouton de la station de base enfoncé... -
Seite 51: Fonctions Élémentaires
6. Appuyez sur la touche de fonction Sauver pour accepter la modification. Remarque : • La solution DECT Yealink supporte IPV4 et IPV6. IPV6 est désactivé par défaut. • Des paramètres réseau incorrects sont susceptibles de rendre votre téléphone DECT inaccessible et d’avoir un impact sur les performances du réseau. -
Seite 52: Réglages Du Combiné
Réglages du combiné Nom du combiné Pour renommer le combiné : 1. Appuyez sur la touche OK pour ouvrir le menu principal, puis sélectionnez Configuration->Nom combiné. 2. Modifiez la valeur dans le champ Renommer. 3. Appuyez sur la touche de fonction Sauver pour accepter la modification. Réglage du volume •... -
Seite 53: Fonctions D'appel De Base
Pour supprimer un contact : 1. Appuyez sur la touche Valider pour entrer dans le menu principal et sélectionnez Répert. 2. Appuyez sur ou sur pour sélectionner l’entrée désirée. 3. Appuyez sur la touche Options et sélectionnez l’option Effacer pour effacer l’entrée sélectionnée. -
Seite 54: Répondre Aux Appels
d’historique des appels souhaitée. 2. Appuyez sur pour sélectionner l’entrée souhaitée, puis appuyez sur pour appeler le numéro en utilisant la ligne par défaut. Pour passer un appel depuis la liste de rappel: 1. Appuyez sur la touche lorsque le combiné est inactif. 2. -
Seite 55: Transfert D'appel
Transfert d’appel Vous pouvez transférer un appel d’une des façons suivantes : Transfert sans préavis 1. Appuyez sur la touche Options au cours d’un appel, puis sélectionnez Transfert. 2. Saisissez le numéro vers lequel vous voulez transférer l’appel. 3. Appuyez sur la touche Transfert. Transfert semi-privé... - Seite 56 Nous ne sommes pas responsables des problèmes avec les appareils Yealink découlant de l’utilisation de ce produit. Nous ne sommes pas responsables pour les dommages financiers, pertes de profits, réclamations de tiers, etc. découlant de l’utili- sation de ce produit.
- Seite 57 • Utilisez uniquement l’accumulateur rechargeable fourni avec le combiné ou un accu mulateur expressément recommandé par Yealink. • Les batteries défectueuses ou épuisées ne doivent jamais être traitées comme des déchets ménagers.
- Seite 58 L’environnement d’utilisation est hors de la plage de températures de fonctionnement. 1. Utilisez l’appareil dans sa plage de températures de fonctionnement. Le câble entre l’appareil et le dispositif Yealink est mal branché. 1. Branchez le câble correctement. Vous ne pouvez pas brancher le câble correctement.
-
Seite 59: Déclaration De Conformité
Huli District, Xiamen City, Fujian, P.R. China DATE CE: 2018. 09.10 déclarons que le produit Type: Téléphone DECT IP Yealink W53P (W53H & W60B) répond aux exigences essentielles et autres dispositions pertinentes conformément à la directive CE suivante Directive: 2014/30/EU, 2014/35/EU, RED 2014/53/EU;... - Seite 60 As one of the best providers in more than 140 countries and regions including the US, the UK and Australia, Yealink ranks No.1 in the global market share of SIP phones shipments.