Inhaltsverzeichnis
Werbung
Verfügbare Sprachen
Verfügbare Sprachen
Quicklinks
MANUALE D'USO
OPERATION MANUAL
MANUEL D'INSTRUCTIONS
操作マニュアル
BEDIENUNGSANLEITUNG
MANUAL DE USO
Per l'installazione dell'ErgoBrain sulla bicicletta fate riferimento
al manuale d'installazione.
Please refer to the Installation Manual for how to assemble the
system on the bicycle.
Pour l'installation d'ErgoBrain sur votre vélo, consulter le Manuel
d'Installation
自転車への取付けは取付マニュアルをご覧く ださい
Für die Installation des ErgoBrain am Fahrrad verweisen wir auf die Installations-
anleitung.
Para instalar el Ergobrain en la bicicleta, tomar como referencia el Manual
de Instalación
Rev. 1.3-07/2000
Werbung
Kapitel
Inhaltsverzeichnis

Inhaltszusammenfassung für CAMPAGNOLO ErgoBrain
- Seite 1 Pour l'installation d'ErgoBrain sur votre vélo, consulter le Manuel d'Installation 自転車への取付けは取付マニュアルをご覧く ださい Für die Installation des ErgoBrain am Fahrrad verweisen wir auf die Installations- anleitung. Para instalar el Ergobrain en la bicicleta, tomar como referencia el Manual de Instalación...
-
Seite 3: Inhaltsverzeichnis
INDICE Introduzione ---------------------------------------------------------- Pag. 2 Attenzione ------------------------------------------------------------ Pag. 2 Importante ------------------------------------------------------------ Pag. 2 Caratteristiche ------------------------------------------------------- Pag. 3 Nomi delle parti ----------------------------------------------------- Pag. 3 Formattazione/Inizializzazione ---------------------------------- Pag.4 Selezione dell’unità di misura della velocità ------------ Pag. 4 Inserimento della circonferenza della ruota anteriore Pag. 5 Selezione cadenza on/off ----------------------------------- Pag. -
Seite 4: Introduzione
Introduzione La ringraziamo per aver acquistato l’ErgoBrain Campagnolo, il più sofisti- cato computer per biciclette da corsa mai realizzato. L’integrazione tra il computer e i comandi Ergopower fornisce delle funzioni assolutamente nuove. L’ErgoBrain è un vero computer da competizione, progettato per essere usato nelle gare e durante gli allenamenti, pur rimanendo molto facile ed intuitivo nell’utilizzo. -
Seite 5: Caratteristiche
Caratteristiche L’ErgoBrain è il primo computer auto-apprendente: • Facile da configurare e da programmare • Permette cambi ruota in gara senza perdere i dati programmati • Indica la combinazione pignone/ingranaggio oltre a mostrare la posi- zione della catena • Sensori di velocità e cadenza staccabili •... -
Seite 6: Formattazione/Inizializzazione
Formattazione / Inizializzazione Se usate l’ErgoBrain per la prima volta, o dopo aver sostituito la batteria, dovrete formattare l’unità. Prima di fare ciò, trovate la circonferenza della vostra ruota anteriore. Nota: Le formattazioni successive saranno semplificate. Premendo il pul- sante AC rimarranno in memoria i dati precedenti di circonferenza della ruota anteriore e le informazioni sugli ingranaggi e pignoni, basterà... -
Seite 7: Selezione Cadenza On/Off
3. Inserite la circonferenza della ruota anteriore. Iniziate con la ruota A. Premete il pulsante MODE per aumentare il valore, e il pulsante S/S per diminuirlo. Per inserire la circonferenza della seconda ruota anteriore (ruota B), tenete premuto il pulsante SET. Premete il pulsante SET per confermare. - Seite 8 6. Inserite il numero di denti degli ingranaggi iniziando da quello più piccolo. Premete il pulsante MODE per aumentare il valore, e il pulsante S/S per diminuirlo. Premete il pulsante SET per confermare, lo schermo passa all’ingranaggio successivo. Per tornare all’ingranaggio precedente, premete i pulsanti S/S e MODE contemporaneamente.
-
Seite 9: Sincronizzazione Della Deragliata
8. Sincronizzazione della deragliata Pericolo! Questa operazione deve essere effettuata mentre si guida la bicicletta. Quindi per ridurre il rischio di incidenti, effettuate tale operazione in un luogo ampio, senza ostacoli e non trafficato. Nota: Se questa non è la prima regolazione e non avete cambiato gli ingranaggi o regolato la tensione del cavo del deragliatore dal- l’ultima volta, potete saltare questa procedura. -
Seite 10: Funzioni Principali
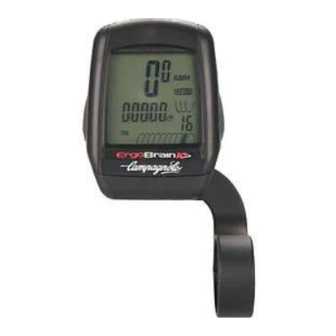
5. Numero denti del ingranaggio/pignone 6. Indicatore sopra/sotto media Utilizzo dei pulsanti L’ErgoBrain è dotato di due pulsanti grandi e due piccoli. I pulsanti presen- ti sui comandi Ergopower funzionano esattamente come i due pulsanti grandi sui lati dell’unità principale. -
Seite 11: Visualizzazione Auto Timer
Per avviare il cronometro, premete il pulsante S/S e per arrestarlo preme- te S/S nuovamente. Per azzerare premete i pulsanti S/S e MODE contemporaneamente. L’azzeramento ha effetto su AT e STW in modo indipendente. Per azzerare i dati delle schermate AT, effettuate l’azzeramento durante le funzioni contras- segnate col simbolo "Reset"... - Seite 12 Visualizzazione Auto Timer In questa modalità l’ErgoBrain rileva il movimento e avvia/arresta automa- ticamente la misurazione. Funzioni Principali Premete il pulsante MODE per spostarvi tra le funzioni principali. *La funzione CDC/SPD è disponibile solo col sensore di cadenza installato. Funzioni Secondarie Tenete premuto il pulsante MODE per due secondi per spostarvi tra una funzio- ne principale e la sua funzione secondaria.
- Seite 13 Visualizzazione Cronometro (STW) Tenete premuto il pulsante MODE per due secondi nella funzione TM di Auto Timer per passare alla visualizzazione cronometro (STW). Per ritornare alla visualizzazione Auto Timer, tenete premuto il pulsante MODE per due secondi in qualsiasi delle funzioni della visualizzazione cronometro (tornerete alla funzione TM della visualizzazione Auto Timer).
-
Seite 14: Regolazione Dell'orologio
Regolazione dell’orologio Premete il pulsante SET nella funzione CLK in visualizzazione Auto Timer. Se avete scelto la misurazione della velocità in KMH l’orologio funzionerà in modalità 24 ore. Se avete scelto MPH l’orologio funzionerà in modalità 12 ore. MODE MODE –... -
Seite 15: Funzione Di Auto Apprendimento
Funzione di Auto-apprendimento Se il sensore di cadenza (CDC) è installato sulla vostra bicicletta, l’ErgoBrain calcola automaticamente il numero di denti dei vostri pignoni (Per questo motivo non è necessario inserire il numero di denti dei pignoni a Pagina 6). Questa funzione è chiamata Auto-apprendimento. -
Seite 16: Manutenzione
Manutenzione Verificate periodicamente la posizione e lo stato dei sensori di velocità e cadenza e dei magneti. Se l’unità principale o la basetta sono sporche, pulitele con un detergente neutro diluito usando un panno morbido e asciugatele immediatamente. Non utilizzate benzene, alcool o altri solventi organici per non danneggiar- ne la superficie. -
Seite 17: Specifiche Tecniche
Avete cambiato i pignoni? Se il sensore di cadenza è attivo, effettuate la procedura di aggiornamento illu- strata a pagina 13. Se il sensore di cadenza non è attivo, premete il pulsante SET e inserite nuova- mente la combinazione dei pignoni o il numero dei denti (pagina 6). Il tempo di cambiata del deragliatore non corrisponde alle indicazioni visualizzate. - Seite 19 INDEX Introduction ---------------------------------------------------------- Pag. 2 Warnings ------------------------------------------------------------- Pag. 2 Important ------------------------------------------------------------- Pag. 2 Features -------------------------------------------------------------- Pag. 3 Name of parts ------------------------------------------------------- Pag. 3 Format/Initialization Select speed scale -------------------------------------------- Pag. 4 Input wheel circumference ---------------------------------- Pag. 4 Select cadence on/off ---------------------------------------- Pag. 5 Select chainring ----------------------------------------------- Pag.
-
Seite 20: Introduction
Introduction Thank you very much for purchasing the Campagnolo ErgoBrain, the most sophisticated road-racing bicycle computer ever made. The ErgoBrain of- fers some absolutely new functions thanks to the integration with the Ergopower levers. The ErgoBrain is a real competition computer designed for athletes' racing and training needs, but very easy and intuitive to use. -
Seite 21: Features
Features The ErgoBrain is the first self-learning computer: • Very easy set-up and programming • Allows wheel changes during a race without loss of any data • Displays sprocket/chainring teeth combination beside showing the chain position • With detachable speed and cadence sensors •... -
Seite 22: Format/Initialization
Format/Initialization When you use the ErgoBrain for the first time, or af- ter you have replaced the battery, you need to format the unit. Before doing this, find out your front wheel's circumference. Note: From the second time, formatting can be sim- plified. -
Seite 23: Input Wheel Circumference
3. Input wheel circumference. Start with wheel A. Push MODE button to increase the digits, and S/S button to decrease. To input your second bicycle's wheel circumference (wheel B), hold down SET button. Push SET button to fix. Increases digits MODE Decreases digits 2sec. -
Seite 24: Input Chainring's Number Of Teeth
6. Input chainring's number of teeth. Start with inner chainring. Push MODE button to increase the digits, and S/S button to decrease. Push SET button to fix, then the screen moves to the next chainring. To return to the former chainring, push S/S and MODE button simulta- neously. -
Seite 25: Set Chainring's Shift Timing
8. Set chainring's shift timing. Danger! This operation must be performed as you are riding the bicycle. Therefore, in order to minimize the potential of an accident, this operation must be performed in a wide, open space which is free from traffic or other obstacles. Note: If this is not a “first time”... -
Seite 26: Basic Operation
AT screen and STW screen is independently counted. When either is on the screen, the other is simultaneously continuing in the hidden screen. Thus the ErgoBrain C1 offers two types of measuring modes, Auto Timer with 1-second increment and Stopwatch with 0.1-second increment. -
Seite 27: Auto Timer Screen
To start the stopwatch, push S/S button. To stop it, push the button again. To reset the data, push S/S button and MODE button simultaneously. Re- set operation affects AT and STW independently. To reset the data of AT screen, do the reset operation while in the function that is marked with "Reset"... - Seite 28 Auto Timer Screen In this screen, the ErgoBrain detects pedaling and automatically starts/ stops measurement. Main Function Push MODE button to switch between the main functions. *CDC/SPD is available only when cadence sensor is attached to your bi- cycle. Sub Function Hold down MODE button for two seconds to switch from a main function to its sub function.
-
Seite 29: Reset Operation
Stopwatch Screen Hold down MODE button for two seconds in TM of Auto Timer screen, and the display moves to Stopwatch screen. To return to Auto Timer screen, hold down MODE button for two seconds in any of the Stopwatch screen, and it returns to TM of Auto Timer screen. In STW screen, the measurement starts/stops by the press of S/S button. -
Seite 30: Setting Clock Time
Setting Clock Time Push SET button in CLK of Auto Timer screen. If KMH has been chosen for speed scale, the clock time is in 24-hour. If MPH has been chosen, the clock time is in12-hour. MODE MODE – – Setting To clock time setting Moves from hour... -
Seite 31: Self Learning Feature
Self Learning Feature When CDC sensor is attached to your bike, the ErgoBrain automatically calculates the number of teeth of your sprockets. (This is why you did not have to input the sprockets' teeth in Page 6.) This is called Self Learning feature. -
Seite 32: Maintenance
Maintenance Periodically check the position and condition of the speed sensor, cadence sensor and the magnets. When the main unit or the bracket is soiled, clean it with diluted neutral detergent using a soft cloth, and then wipe it dry immediately. Do not use benzene, alcohol or other organic solvent. -
Seite 33: Specifications
Have you changed the cog set? If CDC sensor is on, do the updating operation according to the instructions in page 13. If CDC sensor is off, push SET button and input the sprocket’s combination or number of teeth again (page 6). The screen does not match with the shift timing of the front derailleur. - Seite 35 INDEX Introduction --------------------------------------------------------- Page 2 Attention ------------------------------------------------------------- Page 2 Important ------------------------------------------------------------ Page 2 Caractéristiques --------------------------------------------------- Page 3 Désignation des composants ----------------------------------- Page 3 Formatage/Initialisation Sélection de l’unité de mesure de vitesse ------------- Page 4 Introduction de la circonférence de la roue avant ---- Page 5 Sélection de la cadence on/off ---------------------------- Page 5 Sélection du nombre de plateaux ------------------------ Page 5 Introduction du nombre de dents des plateaux ------- Page 6...
-
Seite 36: Introduction
Introduction Nous vous remercions pour avoir porté votre choix sur l’ErgoBrain Cam- pagnolo, le compteur de vélo de route le plus sophistiqué qui ait jamais été réalisé. L’intégration entre le compteur et les poignées Ergopower per- met d’obtenir des fonctions tout à fait innovatrices. -
Seite 37: Caractéristiques
Caractéristiques L’ErgoBrain est le premier compteur capable d’auto-apprrentissage: • Il est facile à configurer et à programmer • Il permet de changer de roue pendant la compétition sans perdre des données • Il indique la combinaison entre pignon/plateauainsi que la position de la chaîne. -
Seite 38: Formatage/Initialisation
Formatage / Iniatialisation Si vous utilisez l’ErgoBrain pour la première fois, ou si vous venez de remplacer la pile, il sera nécessaire de formater l’unité. Commencez tout d’abord par mesurer la circonférence de la roue avant. Note: Les formatages suivants seront plus simples. En appuyant sur le bouton AC, les données précédentes concernant la... -
Seite 39: Introduction De La Circonférence De La Roue Avant
3. Introduction de la circonférence de la roue avant. Commencez par la roue A. Appuyez sur la touche MODE pour aug- menter la valeur, et sur la touche S/S pour la diminuer. Pour insérer la circonférence de la deuxième roue avant (roue B), te- nez le bouton SET appuyé. -
Seite 40: Introduction Du Nombre De Dents Des Plateaux
6. Introduction du nombre de dents des plateaux en com- mençant par le plus petit. Appuyez sur la touche MODE pour augmenter la valeur, et sur la tou- che S/S per la diminuer. Appuyez sur le bouton SET pour confirmer: l’écran passe au plateau suivant. -
Seite 41: Réglage Du Temps De Déraillage Des Plateaux
8. Réglage du temps de déraillage des plateaux. Danger! Cette opération doit être effectuée en roulant. Par conséquent, effectuez cette opération dans un endroit sans obstacle et isolé afin de réduire au maximum les risque d’accident. Note: S’il ne s’agit pas du premier réglage et si vous n’avez pas rem- placé... -
Seite 42: Utilisation
Les fonctions AT e STW sont indépendantes. Le calcul qui se fait lorsque l’une d’elles est affichée, se fait également pour l’autre qui reste cachée. L’ErgoBrain offre deux types de calcul:par augmentations de 1 seconde avec l’Auto Timer et par augmentations de 0.1 seconde avec le Chronomètre (STW). -
Seite 43: Visualisation Auto Timer
condes ” comme il est montré sur le dessin. Pour mettre le chronomètre en marche, appuyez sur la touche S/S. Pour l’arrêter,appuyez de nouveau sur S/S. Pour remettre à zéro, appuyer sur les touches S/S et MODE en même temps. Le mise à... - Seite 44 Visualisation Auto Timer Dans cette modalité, l’ErgoBrain relève les coups de pédale et active/ar- rête automatiquement le calcul. Fonctions principales Appuyez sur la touche MODE pour vous déplacer parmi les principales fonctions. * La fonction CDC/SPD n’est disponible que si le senseur de cadence est installé.
- Seite 45 Visualisation Chronomètre (STW) Tenez la touche MODE enfoncée pendant deux secondes dans la fonc- tion TM d’ Auto Timer pour passer à la visualisation du chronomètre (STW). Pour revenir à la visualisation d’Auto Timer, tenez le bouton MODE ap- puyé pendant deux secondes environ, dans n’importe quelle fonction de la visualisation Chronomètre (vous reviendrez à...
-
Seite 46: Réglage De L'heure
Réglage de l’heure Appuyez sur le bouton SET dans la fonction CLK, en visualisation Auto Timer. Si vous avez choisi le calcul de la vitesse en Km/h, l’heure sera en modalité 24 heures. Si vous avez choisi Mph, l’heure sera en modalité 12 heures. MODE MODE –... -
Seite 47: Fonction D'auto-Apprentissage
Fonction d’auto-apprentissage Si le senseur de cadence (CDC) est installé sur votre vélo, l’ErgoBrain calcule automatiquement le nombre de dents de vos pignons (voilà pour- quoi il n’est pas nécessaire d’introduire le nombre de dents à la page 6) Cette fonction est appellée «Auto-apprentissage». -
Seite 48: Entretien
Entretien Vérifiez périodiquement la position et l’état des senseurs de vitesse, de cadence et des aimants. Si l’unité principale ou la base sont sales, nettoyez-les avec un linge doux et un détergent neutre dilué et essuyez-les immédiatement. N’ utilisez jamais de dissolvant, d’alcool ou d’essence afin de ne pas en- dommager la surface de l’appareil. -
Seite 49: Caractéristiques Techniques
Avez-vous remplacez les pignons? Si le senseur de cadence est en marche, effectuez la procédure de mise à jour comme il est expliqué à la page 13. Si le senseur de cadence n’est pas en marche, appuyez sur le bouton SET et introduisez à... - Seite 51 目 次 はじめに --------------------------------------------------------------- Pag. 2 ご使用上の注意 ---------------------------------------------------- Pag. 2 エルゴブレイ ンの特徴 --------------------------------------------- Pag. 3 各部の名称 ---------------------------------------------------------- Pag. 3 初期設定 スピー ド単位の選択 ---------------------------------------- Pag. 4 タイヤ外周長の設定と周長A/Bの選択 ------------------ Pag. 4 ケイデンスセンサー有無の選択 -------------------------- Pag. 5 チェーンリ ング段数の選択 -------------------------------- Pag. 5 チェーンリ ングの設定 -------------------------------------- Pag. 6 スプロケッ...
-
Seite 52: はじめに
はじめに このたびはCampagnoloエルゴブレイ ンをお買上いただき誠にありがと う ござい ます。 エルゴブレイ ンは非常に洗練されたロー ドレース用コンピュータです。 エル ゴパワーレバーとの組み合わせで、 斬新な機能が加わっています。 アス リー トの レースや ト レーニング用に作られた真の競技用コ ンピュータで、 使い方は非常に 簡単です。 この説明書はエルゴブレインの操作について記載 しています。 別冊の取付説明書を合わせて最後までよ く お読みいただき、 よ く ご理解いただ いたう えで大切にお取扱く ださい。 なおこれらの説明書は保証書と と もにいつで も見るこ とのできる ところに大切に保管 してく ださい。... -
Seite 53: エルゴブレインの特徴
エルゴブレインの特徴 セルフラーニング (自動学習) コンピュータです。 ・ セッ トアップとプログラムが簡単にできます。 ・ レース中にタイヤ変更を行ってもデータロスがほとんどあり ません。 チェ ーンポジショ ンの表示に加え、 スプロケッ ト とチェ ーン リ ングの組合せを表示 します。 スピー ド ・ ケイデンスセンサーが個別に着脱できます。 9 SpeedErgopowerの全機種と組合せて使用でき ます。 ( 99/2000バージョ ンに対応) 各部の名称 A ディ スプレー B S/Sボタン 1 メイ ンデータ C MODEボタン サブデータ... - Seite 54 初期設定 初めて使う ときと、 電池を交換した後は次の手順に した がって初期設定を行います。 設定には前輪のタイヤ周長 が必要です。 あ らかじめタイヤ周長を求めておきます。 参考 : 設定が2度目以降の場合は簡略化できます。 ACボタンだけで初期化す る と全ての設定項目が前回の値になっているので、 SETボタンを押す だけで次へ進めます。 チェーンリ ングシフ トタイ ミ ングのみS/Sボタンを 押 してく ださい。 1. ACボタンを押してエルゴブレインを初期化します。 注意 : 積算距離データを0に戻 したいと きは次の操作を します。 SETボタンを 押 しながらACボタンを押 し、 ACボタンを離 して画面が全点灯後スピー ド単 位選択画面なるのを確認...
- Seite 55 3. タイヤ周長をプリセットします。 求めていた前輪のタイヤ周長を入力 します。 まず周長Aから入力 します。 MODEボタンは数値をプラス します。 S/Sボタンは数値をマイナス します。 2つ目の周長をプリ セッ トする と きはSETボタンを長押 しする と周長Bに変わ り、 同様に入力できます。 SETボタンを押すと決定 します。 数値を プラス MODE 数値をマイナス 2sec. AとBの切替え 次のステ ッ プへ 4. ケイデンスセンサーを選択します。 ケイデンスセンサーを装着 したと きは[ON]を、 装着 していないと きは[OFF]を MODEボタンで選択 します。 SETボタンで決定...
-
Seite 56: チェーンリ ングの設定
6. チェーンリングの歯数を入力します。内側のリングから始めます。 MODEボタンは数値をプラス します。 S/Sボタンは数値をマイナス します。 SETボタンを押すと決定 し、 次のギアの入力に移動 します。 S/SボタンとMODEボタンを同時に押すと1つ前のギアに戻り ます。 チェーンリ ングの設定が終わる とスプロケッ トへ移り ます。 参考 : CDCセンサーを[ON]に したと きはスプロケッ トの設定は不要になり スキップされます。 8.へ進みます。 7. スプロケット(コグセット)の歯数を入力します。 スプロケッ トの入力は7種類のコグセッ トから選択 します。 コグセッ トに含まれ ない場合はFREEを選択する と全ギアを手入力できます。 注意 : スプロケッ トはタイヤ周長AとBで個別に設定する必要があり ます。 片方の周長でコグセッ... -
Seite 57: チェーンリ ングシフ トタイ ミ ングの設定
警告 この操作は自転車に乗りながら行ってください。事故がおこる のを防ぐため、この操作は交通量の少ない、障害物の無い、広 い場所で行ってください。 8. チェーンリングシフトタイミングの設定を行います。 参考 : 設定が 2 回目以降の場合で、 チェーンリ ングの交換や、 ディ レーラー ・ ワイヤーの調整を していないと きはこの設定はスキップできます。 この設定をスキッ プするにはシフ ト操作を行わずにS/Sボタンを押 し てく ださい。 初期設定が完了 し、 計測画面へ移動します。 エルゴブレイ ン本体を自転車に装着して自転車を走らせます。 チェーンリ ングを1枚目 (内側) 、 スプロケッ トを5枚目に入れてからタイ ミ ング の設定を行います。 重要 : シフ ト位置を計りますのでエルゴパワーのレバー操作はゆっ く り と 確実に行ってく... -
Seite 58: 基本操作 計測画面
基本操作(計測画面) このエルゴブレイ ンC1は画面の上段にメ イ ンデータ と してスピー ド1を、 下段に サブデータの選択データ2を表示 します。 画面右下にはギアインジケータで現 在のチェーンポジショ ンを表示34 し、 チェーンリ ングとスプロケッ トのギア歯数 を交互に表示5 します。 走行中はペースアロー6で平均速度と現在スピー ドの 比較を矢印で表示 します。 自転車が走りだすと自動的にタイマーがカウン トを始め計測を開始 し、 止まる と 計測をス ト ップ します。 これをオー トタイマー (AT) スク リ ーンとよび次のページの 図の左側のデータを計測 ・ 表示 します。 オー トタイマー (AT) スク リーンを表示 し ている... -
Seite 59: オー トタイマースク リーン
ス ト ップウォ ッチ (STW) を作動させるにはS/Sボタンを押 します。 も う一度押すと STWは停止します。 計測データを リセッ トするにはS/SボタンとMODEボタンを同時に押 します。 リ セッ ト操作はA T スク リーンと S TWスク リ ーンは別々に行います。 A T スク リ ーン は図の 「リ セッ トマーク」 のある表示でリ セッ ト操作を行う と リ セッ トされます。 S TW スク... - Seite 60 オートタイマー(AT)スクリーン オー トタイマースク リーンは自転車の走行 ・ 停止をエルゴブレイ ンが判断 し自動 で計測をスター ト ・ ス トップ します。 メインモード MODEボタンを押すとメイ ンモー ドの機能が順次切替り ます。 ※CDC/SPDはケイデンスセンサー装着時のみ表示 します。 サブモード メイ ンモー ドからMODEボタンを2秒間長押 しする とサブモー ドに切替り ます。 メインモー ドに戻るにはもう1度MODEボタンを押します。 サブモー ドからサブ モー ドへは直接移動できません。 ATスクリーンデータのリセット TM/DST/AV/MXデータ を表示 している時にリ セッ ト操作を行う と、 ATスク リ ーン の各データがリセッ...
-
Seite 61: ストップウォッチスクリーン
ストップウォッチ(STW)スクリーン ATスク リーンの走行時間TM表示からMODEボタンを 2 秒間長押 しする とス トッ プウォ ッチ (STW) スク リーンになり ます。 どのSTWモー ドでもMODEボタ ンを長押 しする とATスク リ ーンの走行時間TM表 示へ戻り ます。 STWスク リ ーンの各モー ドはS/Sボタン操作によって計測をスター ト ・ ス トップ し ます。 STWの計測中はス ピー ド単位が点滅 します。 STWのスター ト ・ ス ト ッ プや計 測はどのスク... -
Seite 62: 節電機能
時刻の設定 オー トタイマースク リ ーン (サブモー ド) の時計 表示でSETボタンを押 します。 時刻表示はスピー ド単位をKMHに したと きは24時間表示、 MPHに したと きは12 時間表示で時刻を設定 します。 MODE MODE – – 設定 時刻設定へ 分へ切替え 設定完了 節電機能 エルゴブレイ ンは15分間無信号の状態が続 く とス リ ープ状態に入り ます。 ス リ ープ 中は時計表示だけとなり ます。 走行を開始するか本体のボタン操作を行う と解除 します。... -
Seite 63: セルフラーニング(自己学習)機能
セルフラーニング(自己学習)機能 エルゴブレイ ンはCDCセンサーを装着 している と、 走行するこ とでスプロケッ ト の歯数を自動的に算出 します。 これをセルフラーニングとよびます。 設定時にス プロケッ トの歯数を入力する必要があり ません。 またレース途中のタイヤ交換時 ではセルフラーニングの更新をするだけで自動設定され、 データロスがほとんど あり ません。 スプロケッ ト (コグセッ ト) を交換したと きはセルフラーニングの更新をする必要 があり ます。 ●セルフラーニングの更新 セルフラーニングは自転車を走らせながら実行 します。 どのチェーンポジショ ン でも行えますが空回りせずにスムーズにクランクが回っている こ とが重要です。 表示を計測画面に しS/Sボタンを2秒以上押 し続ける と更新を開始 します。 警告... -
Seite 64: メンテナンス
メンテナンス 日常のお手入れは次のよ うに行ってく ださい。 ・定期的にSPDセンサー ・ CDCセンサーと各マグネ ッ ト との位置関係と取付状 態を点検 してく ださい。 ・エルゴブレイ ン本体やブラケッ ト等が汚れたと きは、 水で洗い流すか薄めた中 性洗剤を しめ らせた柔らかい布で拭いた後乾拭き して く ださい。 ベンジン ・ アル コール等の有機溶剤は表面を傷めますので使用 しないでく ださい。 ・エルゴブレイ ン本体やブラケッ トの接点が濡れたと きは放置せずに乾いた布 でふき取って く ださい。 放置 してサビが発生 した場合、 計測不良の原因になり ますので注意... - Seite 65 SETボタンを押 して初期設定に戻り チェーン リ ングシフ トタイ ミ ングの設定をやり直 して く ださい。 ( 7ページ) 仕様 チェーンリ ングシフ トタイ ミ ング設定の時 「Error」 と表示される。 エルゴパワー レバーのセンサーコー ドが断線 している。 ブラケッ トセッ トを新 しいものと交換 します。 ErgoBrain C-1製品仕様 表示機能 表示範囲/標準精度 0.0(4.0)∼110.7 km/h [mph] / ±0.5 km/h[mph] スピー ド...
- Seite 67 INHALT Einleitung ---------------------------------------------------------------- S. 2 Achtung ------------------------------------------------------------------ S. 2 Wichtig ------------------------------------------------------------------- S. 2 Merkmale ---------------------------------------------------------------- S. 3 Gerätebeschreibung -------------------------------------------------- S. 3 Formatierung/Initialisierung ----------------------------------------- S..4 Maßeinheit für die Geschwindigkeit wählen -------------------- S. 4 Umfang des Vorderrads eingeben --------------------------- S. 5 Trittfrequenz On/Off wählen ----------------------------------- S. 5 Anzahl der Zahnkränze wählen ------------------------------ S.
-
Seite 68: Einleitung
Einleitung Wir danken Ihnen, dass Sie einen Campagnolo ErgoBrain, den modern- sten je entwickelten Bordcomputer für Rennräder, gekauft haben. Durch das Integrieren von Computer und Ergopower-Schalthebeln werden ab- solut neue Funktionen angeboten. Der ErgoBrain ist eine echter Wettkampfcomputer, der für die Verwen- dung bei Rennen und beim Training entwickelt wurde, und dabei doch im Gebrauch immer einfach und intuitiv bleibt. -
Seite 69: Merkmale
Merkmale Der ErgoBrain ist der erste Computer mit automatischer Erkennungsfunktion: • Er ist einfach zu gebrauchen und zu programmieren. • Er gestattet den Radwechsel bei Rennen, ohne dass die programmier- ten Daten verloren gehen. • Er zeigt die Kombination Zahnkranz/Ritzel und zudem die Kettenposition an. -
Seite 70: Formatierung/Initialisierung
Formatierung / Initialisierung Wenn Sie den ErgoBrain das erste Mal oder nach ei- nem Batteriewechsel benutzen, müssen Sie die Ein- heit formatieren. Bevor Sie dies tun, sollten Sie den Umfang Ihres Vorderrads kennen. Hinweis: Die nachfolgenden Formatierungen werden dann einfacher sein. Wenn Sie die AC-Taste drücken, bleiben der Umfang des Vorderrads und die Informationen über Zahn-... -
Seite 71: Umfang Des Vorderrads Eingeben
3. Umfang des Vorderrads eingeben. Beginnen Sie mit dem Rad A. Drücken Sie die MODE-Taste, damit der Wert zunimmt und die S/S-Taste, damit er abnimmt. Um den Umfang des zweiten Vorderrads (Rad B) einzugeben, halten Sie die SET-Taste gedrückt. Drücken Sie die SET-Taste zur Bestätigung. Wert nimmt zu MODE Wert nimmt ab... -
Seite 72: Zähneanzahl Der Zahnkränze Beginnend Beim Kleinsten Zahnkranz Eingeben
6. Zähneanzahl der Zahnkränze beginnend beim kleinsten Zahnkranz eingeben Drücken Sie die MODE-Taste, um den Wert zu erhöhen und die S/S- Taste, um ihn zu senken. Drücken Sie die SET-Taste zur Bestätigung, dann wechselt das Display zum nächsten Zahnkranz. Wenn Sie zum vorherigen Zahnkranz zurückkehren wollen, drücken Sie gleichzeitig die S/S-Taste und die MODE-Taste. -
Seite 73: Umwerfvorgang Synchronisieren
8. Umwerfvorgang synchronisieren Gefahr! Dieser Vorgang ist beim Fahren auszuführen. Um das Unfallrisiko herabzusetzen, sollten Sie diesen Vorgang daher nur dann ausführen, wenn Sie viel Platz haben, wenn keine Hindernisse vorhanden sind und wenn wenig Verkehr herrscht. Hinweis: Falls es sich hierbei nicht um die allererste Einstellung handelt und Sie seit dem letzten Mal die Zahnkränze nicht gewechselt oder die Spannung des Umwerferkabelzugs nicht nachgestellt haben, kön- nen Sie diesen Vorgang überspringen. -
Seite 74: Hauptfunktionen
5. Zähneanzahl von Zahnkranz/Ritzel 6. Pfeilindikator unter/über mittlerer Geschwindigkeit Verwendung der Tasten Der ErgoBrain besitzt zwei große und zwei kleine Tasten. Die an den Ergo- power-Schalthebeln vorhandenen Druckknöpfe haben genau die gleiche Funktion wie die beiden großen Tasten an den Seiten der Basiseinheit. -
Seite 75: Auto Timer-Anzeige
Zum Starten der Stoppuhr drücken Sie die S/S-Taste, um die Stoppuhr anzuhalten, drücken Sie S/S erneut. Zur Nullstellung drücken Sie gleichzeitig die S/S-Taste und die MODE- Taste. Die Nullstellung erfolgt für AT und STW unabhängig voneinander. Um die AT-Daten auf Null zu stellen, ist die Nullstellung in denjenigen Funktionen auszuführen, die in der Darstellung mit dem Symbol „Reset“... - Seite 76 Auto Timer-Anzeige In diesem Modus erkennt der ErgoBrain die Bewegung des Rennrads und startet/stoppt die Messung automatisch. Hauptfunktionen Drücken Sie die MODE-Taste, um die Hauptfunktionen nacheinander auf- zurufen. *Die Funktion CDC/SPD ist nur bei installiertem Trittfrequenzsensor verfügbar. Zusatzfunktionen Halten Sie die MODE-Taste zwei Sekunden lang gedrückt, um von einer Hauptfunktion zu deren Zusatzfunktion zu wechseln.
-
Seite 77: Stoppuhr-Anzeige
Stoppuhr-Anzeige (STW) Wenn Sie die MODE-Taste in der Funktion TM von Auto Timer zwei Sekun- den lang gedrückt halten, wechseln Sie zur Stoppuhr-Anzeige (STW). Um wieder zur Auto Timer-Anzeige zurückzukehren, halten Sie die MODE- Taste in einer beliebigen Funktion der Stoppuhr-Anzeige zwei Sekunden lang gedrückt (Sie kehren so zur Funktion TM der Auto Timer-Anzeige zurück). -
Seite 78: Einstellen Der Uhrzeit
Einstellen der Uhrzeit Drücken Sie die SET-Taste in der Funktion CLK in der Auto Timer-Anzeige. Wenn Sie die Geschwindigkeitsmessung in KMH gewählt haben, funktio- niert die Uhr im 24-Stunden-Modus. Haben Sie hingegen MPH gewählt, so funktioniert die Uhr im 12-Stunden-Modus. MODE MODE –... -
Seite 79: Automatische Erkennungsfunktion
Automatische Erkennungsfunktion Wenn der Trittfrequenzsensor (CDC) an Ihrem Fahrrad installiert ist, be- rechnet der ErgoBrain automatisch die Zähneanzahl Ihrer Ritzel (Deshalb müssen Sie in diesem Fall nicht, wie in Seite 6 beschrieben, die Zähnean- zahl der Ritzel eingeben). Diese Funktion wird als automatische Erkennungsfunktion bezeichnet. -
Seite 80: Unterhalt Und Pflege
Unterhalt und Pflege Prüfen Sie in regelmäßigen Abständen Position und Zustand des Geschwindigkeitsfühlers und des Trittfrequenzsensors sowie der Magnete. Wenn die Basiseinheit oder die Montageeinheit verschmutzt sind, reini- gen Sie sie mit einem verdünnten, neutralen Reinigungsmittel und einem feuchten Tuch und trocknen Sie sie danach sofort ab. Verwenden Sie zum Reinigen niemals Waschbenzol, Alkohol oder andere organische Lösungsmittel, damit die Oberfläche der Einheiten nicht be- schädigt wird. -
Seite 81: Technische Merkmale
Haben Sie die Ritzel gewechselt? Wenn der Trittfrequenzsensor aktiv ist, führen Sie den auf Seite 13 beschriebe- nen Aktualisierungsvorgang aus. Wenn der Trittfrequenzsensor nicht aktiv ist, drücken Sie die SET-Taste und ge- ben Sie die Ritzelkombination oder die Zähneanzahl neu ein (Seite 6). Die Zeit für den Umwerferwechsel entspricht nicht den angezeigten Angaben. - Seite 83 INDICE Introducción ---------------------------------------------------------- Pag. 2 Atención -------------------------------------------------------------- Pag. 2 Importante ------------------------------------------------------------ Pag. 2 Características ------------------------------------------------------ Pag. 3 Nombre de las piezas --------------------------------------------- Pag. 3 Formateado/Inicialización Selección escala velocidad -------------------------------- Pag. 4 Introducción circunferencia rueda ------------------------ Pag. 5 Seleccionar cadencia on/off -------------------------------- Pag. 5 Seleccionar engranajes ------------------------------------- Pag.
-
Seite 84: Introducción
La integración entre el ordenador y los mandos Ergopower ofrece funciones absolutamente nuevas. ErgoBrain es un verdadero ordenador de competición, proyectado para utilizarlo en carrrera y durante los entrenamientos, de utilización fácil e intuitiva. -
Seite 85: Características
Características ErgoBrain es el primer ordenador auto-aprendente • Fácil de configurar y programar • Permite el cambio de rueda durante la competicón sin perdida de datos • Indica la combinación piñón/plato mientras muestra la posición de la cadena • Sensores de velocidad y cadencia desmontables •... -
Seite 86: Formateado/Inicialización
Formateado / Inicialización Se si utiliza ErgoBrain por primera vez, o después de ha- ber sustituido la pila, debéis formatear la unidad. Antes, calculad la circunferencia de vuestra rueda anterior. Nota: Las funciones de inicialización sucesivas serán sim- plificadas. Apretando el pulsante AC quedan en la memoria los datos precedentes de circunferencia de la rueda anterior y la información sobre platos y piñones, en tal caso será... -
Seite 87: Seleccionar Cadencia On/Off
3. Introducción de la circunferencia de la rueda anterior. Iniciad con la rueda A. Apretad el pulsante MODE para aumentar el valor, y el pulsante S/S para disminuirlo. Para introducir la circunferencia de la segunda rueda anterior (rueda B), mantened apretado el pulsante SET. Apretad el pulsante SET para confirmar. - Seite 88 6. Introducir el número de dientes de los platos iniciando por el más pequeño. Apretad el pulsante MODE para aumentar el valor, y el pulsante S/S para disminuirlo. Apretad el pulsante SET para confirmar, la pantalla pasa al plato sucesivo. Para volver al plato precedente, apretad los pulsantes S/S y MODE contemporaneamente.
- Seite 89 8. Ajuste del tiempo de cambio de los platos. Peligro! Esta operación debe de ser efectuada mientras se conduce la bicicleta. En tal caso para reducir el riesgo de accidente, efectuad dicha operación en un lugar amplio, sin obstaculos ni tráfico. Nota: Si este no es el primer ajuste y no habéis cambiado los platos o ajustado la tensión del cable del desviador desde la última vez, podéis saltaros este proceso.
- Seite 90 Las pantallas AT y STW realizan mediciones independientes. Mientras una se visualiza, la medición se realiza contemporaneamente en la otra pantalla no visualizada. ErgoBrain ofrece dos modos de medición, el Auto Timer con incremento de 1 segundo y el Cronómetro (STW) con incremento de 0.1 segundos. Pantalla 1.
-
Seite 91: Pantallas
Para poner en marcha el cronómetro, apretad el pulsante S/S y para pa- rarlo apretad S/S nuevamente. Para poner a cero apretad los pulsantes S/S y MODE contemporaneamente. La puesta a cero tiene efecto sobre AT y STW de manera independiente. Para poner a cero los datos de las pantallas AT, efectuad la puesta a cero durante las funciones señaladas con el simbolo "Reset"... - Seite 92 Visualización Auto Timer En este modo ErgoBrain reconoce el movimiento e inicia/finaliza automaticamente la medición. Funciones Principales Apretar el pulsante MODE para moverse entre las funciones principales. *La función CDC/SPD funciona solo con el sensor de cadencia instalado. Funciones Secundarias Mantened apretado el pulsante MODE durante dos segundos para pa- sar de una función principal a su función secundaria.
- Seite 93 Visualización Cronómetro (STW) Mantened apretado el pulsante MODE durante dos segundos en la fun- ción TM de Auto Timer para pasar a la visualización cronómetro (STW). Para volver a la visualización Auto Timer, mantened apretado el pulsante MODE durante dos segundos en cualquiera de las funciones de la visua- lización cronómetro (volveréis a la función TM de la visualización Auto Timer).
-
Seite 94: Función Ahorro De Energía
Ajuste del reloj Apretad el pulsante SET en la función CLK en visualización Auto Timer. Si habéis elejido la medición de la velocidad en KMH el reloj funcionará en modo 24 horas. Si habéis elejido MPH el reloj funcionará en modo 12 horas. MODE MODE –... -
Seite 95: Función De Auto Aprendizaje
Función de Auto-aprendizaje Si el sensor de cadencia (CDC) está instalado en vuestra bicicleta, ErgoBrain calcula automáticamente el número de dientes de vuestros piñones (Por ello no es necesario introducir el número de dientes de los piñones en Página 6). Esta función se llama Auto-apredizaje. -
Seite 96: Manutención
Manutención Periodicamente verificad la posición y el estado de los sensores de velo- cidad y cadencia y de los imanes. Si la unidad principal o la base estuvieran sucias, limpiarlas con un deter- gente neutro diluido usando un paño suave y secarlas inmediatamente. No utilizar gasolina, alcohol u otros disolventes orgánicos para no dañar la superficie. -
Seite 97: Especificaciones
Habéis cambiado los piñones? Si el sensor de cadencia está conectado, efectuar el proceso de actualización ilustrado en la página 13. Si el sensor de cadencia no está conectado, apretar el pulsante SET e introducir nuevamente la combinación de piñones o el número de dientes (página 6). El tiempo de cambio del desviador no corresponde a las indicaciones visualizadas. -
Seite 98: Modifications
Modifications The FCC requires the user to be notified that any changes or modifications made to this device that are not expressly approved by CAMPAGNOLO S.R.L. may void the user’s authority to operate the equipment. - Seite 99 TABELLA COMPARATIVA DIMENSIONI / CIRCONFERENZA DELLA COPERTURA SETTING VALUES CROSS REFERENCE TABLE QUERVERWEISTABELLE MIT SOLLWERTEN タイヤ周長表 TABLE DE REFERENCE DES VALEURS DE REGLAGE TABLA DE MEDIDAS Tire Size L(mm) Tire Size L(mm) 24 x 1 1753 26 x 2.35 2083 24 x 3/4 Tubular 1785 27 x 1...
- Seite 100 SÃO PAULO/SP - BRASIL FAX: +39-0-444-225400 PHONE: +55-11-444-9123 Website: www.campagnolo.com FAX: +55-11-449-2344 E-mail: campagnolo@campagnolo.com E-mail: campagnolo@macbbs.com.br CAMPAGNOLO DEUTSCHLAND GMBH CAMPAGNOLO IBERICA S.L. AN DER SCHUSTERINSEL 15 PINTOR JESUS APELLANIZ, 17 51379 LEVERKUSEN - GERMANY 01008 VITORIA - SPAIN PHONE: +49-2171-72430...