Inhaltsverzeichnis
Werbung
Verfügbare Sprachen
Verfügbare Sprachen
Quicklinks
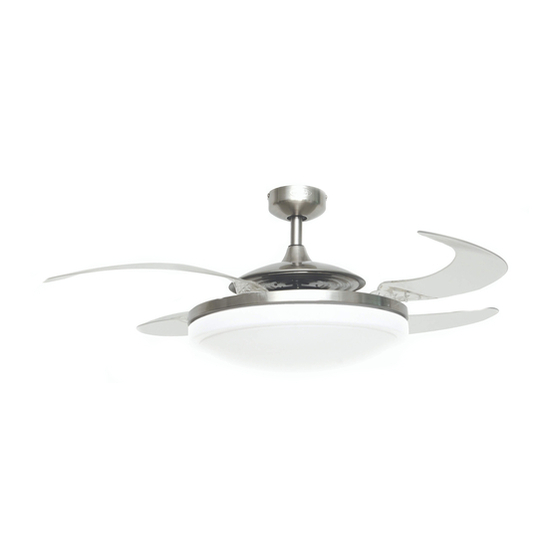
Deckenventilator und Lampe mit versenkbaren Flügelblättern
Ventilateur de plafond à pales rabattables avec luminaire
Ventilador de techo con paletas retráctiles y lámpara
Ventilatore da soffitto a pale retrattili e lampadario
Plafondventilator met intrekbare bladen en licht
GB
Installation Instruction Manual ...................................................................................................... 2
D
Installationsanleitung .....................................................................................................................11
Guide d'installation.........................................................................................................................20
F
E
Manual de instrucciones de instalació n............................................................ ..............................29
I
Manuale delle istruzioni di installazione..........................................................................................38
NL
Installatiehandleiding.......................................................................................................................47
EVO3 Version 1.1 –WS – Last updated on May 30, 2012 – © Copyright 2012 – Fanaway
Retracting Blade Ceiling Fan and Light
Werbung
Inhaltsverzeichnis

Verwandte Anleitungen für Fanaway Evo 3

Inhaltszusammenfassung für Fanaway Evo 3
- Seite 1 Plafondventilator met intrekbare bladen en licht Installation Instruction Manual ...................... 2 Installationsanleitung ........................11 Guide d’installation.........................20 Manual de instrucciones de instalació n..................29 Manuale delle istruzioni di installazione..................38 Installatiehandleiding........................47 EVO3 Version 1.1 –WS – Last updated on May 30, 2012 – © Copyright 2012 – Fanaway...
-
Seite 2: Important Safety Instructions
IMPORTANT SAFETY INSTRUCTIONS 1) This appliance is NOT intended for use by persons (including children) with reduced physical, sensory or mental capabilities, or lack of experience and knowledge, unless they have been given supervision or instruction concerning use of the appliance by a person responsible for their safety. 2) The all-poles disconnection must be incorporated in the fixed wiring in accordance with the wiring rules. - Seite 3 Figure 1.
-
Seite 4: Specification
Handle the unit assembly which includes motor, retraction mechanism, blades in retracted position and light kit with care. It is recommended to wear cotton gloves when installing the fan so that fingerprints are not left on the surface of the fan. SPECIFICATION Model Rated Voltage... - Seite 5 Figures 3...
- Seite 6 Wiring information between the wall controller and terminal block in the mounting bracket Ratory switch & Capacitor wiring diagram...
- Seite 7 INSTALL THE CANOPY Loose ball joint via loosening the set screw. Insert the lead wires and down rod through canopy, and then secure ball joint back to down rod. Figure 4 INSTALL THE FAN TO MOUNTING BRACKET ON CEILING 1) Lift the fan to the ceiling and seat the ball joint in mounting bracket socket, make sure the tab on the mounting bracket socket is properly seated in the groove in the ball joint.
- Seite 8 INSTALL THE LIGHT BASE TO FAN 1. Loose the screw (1-Fig.5, arrow mark) from base bracket. Align two slot screws with the keyhole slots of light base. 2. Turn the light base counterclockwise until slot screws are firmly at the end of slots. 3.
- Seite 9 REVERSE FUNCTION Your ceiling can operate either in fan mode or reverse fan mode. SUMMER Mode: The reverse switch shall be in “down” (SUMMER) position to make the fan rotate in the anticlockwise direction. The airflow will be directed downwards, for cooling in summer. WINTER Mode: The reverse switch shall be “up”...
-
Seite 10: Care And Cleaning
better, then securely stick on the weight at this location on the base plate. 3) After balancing the fan, assemble the light dome to the light base. NOISE: When it is quiet (especially at night) you may hear occasional small noises. Slight power fluctuations and frequency signals superimposed in the electricity for off-peak hot water control, may cause a change in fan motor noise. -
Seite 11: Wichtige Sicherheitshinweise
WICHTIGE SICHERHEITSHINWEISE 1) Dieses Gerät ist NICHT für den Gebrauch durch Personen (einschließlich Kinder) geeignet, die über eingeschränkte körperliche, sensorische oder mentale Fähigkei ten oder über mangelnde Erfahrung und Kenntnisse verfü gen, es sei denn, ihr Gebrauch des Gerätes wird durch eine Person, die für deren Sicherheit verantwortlich ist, entsprechend beaufsichtigt oder angeleitet. - Seite 12 Abbildung 1...
- Seite 13 Bitte beim Umgang mit dem Gerät, einschließlich Motor, Einzugsmechanismus, den eingezogenen Flügelblättern und der Leuchte vorsichtig umgehen. Es empfiehlt sich, bei der Installation des Ventilators Baumwollhandschuhe zu tragen, damit keine Fingerabdrücke auf der Oberfläche des Ventilators hinterlassen werden. Technische Daten Nennspannung Fernbedienung Ventilator...
- Seite 14 Abbildung 3...
-
Seite 15: Vac Netzspannung
Anschlusshinweise für die Verschaltung zwischen Wandsteuerung und Anschlussblock in der Halterung. English German Ventilator Wall Controller Wandregler Terminal block in mounting bracket Klemmleiste (an Aufhängevorrichtung) 220 – 240 VAC NETZSPANNUNG SUPPLY INPUT 220-240VAC Rotary switch Ventilator schalter Light switch Licht schalter L (Fan Live) L (Ventilator phase) N(Fan &... -
Seite 16: Installation Der Abdeckung
INSTALLATION DER ABDECKUNG Lösen Sie die Kugelverbindung indem Sie die Arretierschraube lösen. Führen Sie die Kabel durch die das Verlängerungsrohr und die Abdeckung, und befestigen Sie die untere Hängestange wieder an der Kugelverbindung. Abbildung 4 BEFESTIGUNG DES VENTILATORS AN DER DECKENPLATTE 1) Den Ventilator zur Decke hoch heben und das Kugelgelenk in die Fassung der Deckenplatte setzen. -
Seite 17: Befestigung Der Leuchten-Grundplatte Am Ventilator
BEFESTIGUNG DER LEUCHTEN-GRUNDPLATTE AM VENTILATOR 1) Die Schraube (1 – Abbildung 5) von der Halterung an der Grundplatte lockern. Die beiden Schlitzschrauben auf die besonders gekerbten Schlitze an der Leuchten-Grundplatte ausrichten. 2) Die Leuchten-Grundplatte entgegen Uhrzeigersinn drehen, bis die Schlitzschrauben fest am Ende der Schlitze sitzen. - Seite 18 RÜCKLAUFFUNKTION Der Ventilator kann sowohl im Vorlauf als auch im Rücklauf betrieben werden. SOMMERBETRIEB: Wenn der Schalter für die Rücklauffunktion auf “down” (SOMMER) steht, dreht der Ventilator sich gegen den Uhrzeigersinn. Die Luftbewegung wird nach unten gelenkt und bringt im Sommer den gewünschte n Abkühlungseffekt.
-
Seite 19: Reinigungs- Und Pflegehinweise
2) Die Grundplatte in vier Bereiche einteilen (A, B, C, D). Eines der Gewichte zum Auswuchten an den Rand der Grundplatte (z. B. im Bereich A) kleben. Falls der Ventilator dann stärker wackelt, das Gewicht auf die gegenüberliegende Seite (z. B. B) kleben. Falls der Ventilator dann noch stärker wackelt, das Gewicht auf die anderen Bereiche (z. -
Seite 20: Recommandations De Sécurité Importantes
RECOMMANDATIONS DE SÉCURITÉ IMPORTANTES 1) Cet appareil N’est PAS destiné à être utilisé par des personnes (y compris des enfants) avec des capacités physiques, sensorielles ou mentales limitées, ou un manque d’expérience et de connaissances, à moins qu’ils ne bénéficient de la supervision ou qu’il ne leur ait été dispensé des instructions concernant l’utilisation de l’appareil par une personne responsable de leur sécurité. - Seite 21 Figure 1...
-
Seite 22: Installation Du Support De Montage
Manipulez avec précaution l’ensemble constituant l’unité, à savoir le moteur, le mécanisme de rétractation, les pales en position rabattue et le kit d’éclairage. Il est recommandé de porter des gants en coton pour l’installation du ventilateur de sorte qu’il ne reste pas de marques de doigts sur la surface du ventilateur. Spécifications Tension nominale Commande à... - Seite 23 Figure 3...
- Seite 24 Informations pour le raccordement entre le contrôleur mural et le bloc terminal dans le crochet de montage English French Ventilateur Wall Controller Interrupteur mural Terminal block in mounting bracket Bloc de jonction (sur support de suspension) ALIMENTATION 220-240 VAC SUPPLY INPUT 220-240VAC Rotary switch interrupteur du ventilateur Light switch...
- Seite 25 INSTALLATION DU BALDAQUIN Desserrez la boule de jointure en devissant les vis. Inserez les fils de connexion le long de la tige dans le baldaquin, puis serrez la boule de jointure sur la tige basse. Illustration 4 INSTALLATION DU VENTILATEUR AVEC LE SUPPORT DE MONTAGE DU PLAFOND 1) Levez le ventilateur jusqu’au plafond et positionnez la rotule de suspension dans le support de montage, assurez-vous que l’ergot situé...
-
Seite 26: Changement De L'ampoule
INSTALLEZ LE SUPPORT DE LUMINAIRE 1) Desserrez la vis (1-Figure 5) du support de base. Alignez deux vis pour fentes avec les trous oblongs dans le support de luminaire. 2) Tournez le support de luminaire dans le sens antihoraire jusqu’à ce que les vis arrivent en butée en fin de course des fentes. -
Seite 27: Après L'installation
FONCTIONNEMENT INVERSÉ Votre ventilateur peut être opéré en mode ventilateur et en mode ventilateur inversé . Mode ÉTÉ: Positionner l'interrupteur inverseur sur “down” (SUMMER) afin de faire tourner le ventilateur dans le sens inverse des aiguilles du montre. Le jet d'air orienté vers le bas cré e un courant d'air frais. Mode HIVER: Positionner l'interrupteur inverseur sur “up”... -
Seite 28: Nettoyage Et Entretien
fermement dans cette zone de la plaque de base. 3) Après avoir équilibré le ventilateur, montez le dôme lumineux sur le support d’éclairage. BRUIT : Lorsque tout est tranquille (tout spécialement la nuit) il se peut que vous entendiez des bruits occasionnels. De légères fluctuations de ré... -
Seite 29: Instrucciones Importantes De Seguridad
INSTRUCCIONES IMPORTANTES DE SEGURIDAD 1) Este aparato NO ha sido diseñado para ser utilizado por personas (incluidos niños) con capacidades fí sicas, sensoriales o mentales disminuidas, o falta de experiencia o conocimiento, a menos que haya una persona responsable de su seguridad que los supervise o brinde instrucción respecto al uso del dispositivo. - Seite 30 FIGURA 1...
-
Seite 31: Instalación Del Soporte De Montaje
Manipule con cuidado el conjunto ensamblado que incluye el motor, el mecanismo retráctil, las paletas en posición cerrada y el artefacto luminoso. Se recomienda usar guantes de algodó n para instalar el ventilador a fin de evitar que queden marcas de dedos en la superficie del ventilador Especificaciones Tensión nominal Control remoto... - Seite 32 Figura 3...
- Seite 33 Información de cableado entre el regulador de pared y el bloque de terminal en el soporte de montaje English Spanish ventilador Wall Controller Interruptor de pared Terminal block in mounting bracket Regleta de conexió n (en soporte de techo) ALIMENTACIÓN 220-240 VCA SUPPLY INPUT 220-240VAC Rotary switch interruptor de ventilador...
- Seite 34 INSTALAR LA PANTALLA Afloje la junta esférica aflojando el tornillo de fijación. Introduzca los cables conductores y la varilla vertical a través de la pantalla y vuelva a a segurar la junta esférica a la varilla vertical. Figura 4 INSTALACIÓN DEL VENTILADOR EN EL SOPORTE DE MONTAJE DEL CIELO RASO 1) Levante el ventilador hacia el cielo raso y coloque la junta esférica en el receptáculo del soporte de montaje.
- Seite 35 INSTALACIÓN DE LA BASE DE LA LÁMPARA EN EL VENTILADOR 1) Afloje el tornillo (1- Figura 5) del soporte de base. Alinee los dos tornillos ranurados con las ranuras bocallaves de la base de la lá mpara. 2) Gire la base de la lá mpara en sentido antihorario hasta que los tornillos ranurados lleguen al extremo de las ranuras.
- Seite 36 FUNCIÓN DE GIRO INVERSO EL ventilador puede girar en dirección del sentido de las agujas del reloj o en el contrario. Modo VERANO: Si el interruptor para dirección del giro está hacia abajo “down” (SOMMER) el ventilador girará en sentido de las agujas del reloj. El flujo de aire estará dirigido hac ia abajo para enfriar con una brisa directa en verano.
-
Seite 37: Limpieza Y Cuidado
si la oscilación empeora, desplácelo al punto C o D adyacente, si la oscilación mejora, fije firmemente el peso en esta zona de la placa de base. 3) Despué s de nivelar el ventilador, monte la pantalla en forma de cú pula en la base de la lámpara. RUIDO: Cuando esté... -
Seite 38: Istruzioni Importanti Per La Sicurezza
ISTRUZIONI IMPORTANTI PER LA SICUREZZA 1) Questa unità NON è intesa per l’uso da parte di persone (e bambini) con ridotte capacità fisiche, sensoriali o mentali e inesperte, a meno che non siano sorvegliate o abbiano ricevuto le istruzioni sull’uso dell’unità... - Seite 39 figura 1...
-
Seite 40: Installazione
Maneggiare con cura il gruppo dell’unità, comprendente motore, meccanismo di ritrazione, pale in posizione ritratta e gruppo della luce. Si consiglia di indossare guanti di cotone per l’installazione del ventilatore, in modo da non lasciare impronte sulla superficie. Specifications Tensione Telecomando Ventilatore Lampada... - Seite 41 Figura 3...
- Seite 42 Informazioni sul cablaggio tra il controller a parete e il morsetto nella staffa di montaggio English Italian Ventilatore Wall Controller Regolatore da parete Terminal block in mounting bracket Morsettiera (sul dispositivo di sospensione) TENSIONE DI RETE 220 – 240 VAC SUPPLY INPUT 220-240VAC Rotary switch Ventilatore interruttore...
- Seite 43 INSTALLARE LA CALOTTA Allentare il giunto svitando la vite di fermo. Inserire i cavi e l'asta discendente nella calotta, quindi fissare il giunto all'asta discendente. Figura 4 INSTALLARE IL VENTILATORE ALLA STAFFA A SOFFITTO 1) Sollevare il ventilatore al soffitto e adagiare il giunto sferico nel vano della staffa di montaggio, verificando che la linguetta sul vano si inserisca nella scanalatura del giunto.
-
Seite 44: Sostituire La Lampadina
INSTALLARE LA BASE DEL LAMPADARIO AL VENTILATORE 1) Allentare la vite (1 – Figura 5) dalla staffa della base. Allineare le due viti scanalate alle fessure sulla base. 2) Ruotare la base in senso antiorario per innestare saldamente le viti scanalate nella parte più stretta delle fessure. -
Seite 45: Dopo L'installazione
FUNZIONE DI RITORNO Il ventilatore può essere azionato in senso orario e antiorario. Modo ESTIVO: se l'interruttore della funzione di ritorno si trova su “down” (ESTATE), significa che ventilatore gira in senso antiorario.In questo caso l'aria viene deviata in basso rinfrescando il locale in estate. Modo INVERNALE: se l'interruttore della funzione di ritorno si trova su “up”... -
Seite 46: Cura E Pulizia
RUMORE: Il ventilatore può occasionalmente produrre rumori, avvertibili soprattutto nel silenzio della notte. Le lievi fluttuazioni elettriche ed i segnali di frequenza sovraimposti nella corrente elettrica possono provocare variazioni nel rumore prodotto dal motore del ventilatore. Questa condizione è normale. Concedere al ventilatore un periodo di rodaggio di 24, la maggioranza dei rumori scompare in quest’arco di tempo. -
Seite 47: Belangrijke Veiligheidsinstructies
BELANGRIJKE VEILIGHEIDSINSTRUCTIES 1) Dit apparaat is NIET bestemd voor gebruik door personen (inclusief kinderen) met beperkt fysiek, zintuiglijk of mentaal vermogen, of gebrek aan ervaring en kennis, tenzij ze instructies hebben gekregen over het gebruik van het apparaat of onder toezicht staan van een persoon die verantwoordelijk is voor hun veiligheid. - Seite 48 AFBEELDING 1...
- Seite 49 De eenheid met de motor, het intrekmechanisme, de bladen in ingetrokken stand en de lampset voorzichtig hanteren. Het verdient aanbeveling om bij het installeren van de ventilator katoenen handschoenen te dragen zodat er geen vingerafdrukken op de ventilator achterblijven. Specificaties Nominale Afstandsbedie Ventilator...
- Seite 50 afbeelding 3...
- Seite 51 Informatie over de bedrading tussen de muur-regelaar en het aansluitblok in de montagesteun English Dutch VENTILATOR Wandregelaar Wall Controller Terminal block in mounting bracket Klemstrip (aan ophangsteun) 220 – 240 NETSPANNING SUPPLY INPUT 220-240VAC Rotary switch ventilatorschakelaar Light switch lichtschakelaar L (Fan Live) L (ventilator, Phase) N (Fan &...
- Seite 52 DE PLAFONDKAP INSTALLEREN Maak het kogelgewricht los door de aanzetschroef los te draaien. Steek de looddraden en de stang door het kogelgewricht en zet het kogelgewricht vervolgens weer vast aan de stang. Afbeelding 4 INSTALLEER DE VENTILATOR OP DE MONTAGEBEUGEL AAN HET PLAFOND Hef de ventilator naar het plafond toe en plaats het kogelgewricht in de holte in de montagebeugel, waarbij u erop let dat de lip aan de montagebeugelholte juist in de groef in het kogelgewricht komt te zitten.
-
Seite 53: De Lamp Vervangen
DE LICHTBASIS OP DE VENTILATOR INSTALLEREN Maak de schroef (1- afbeelding 5) van de basisbeugel los. Lijn de twee sleufschroeven uit met de sleutelgatopeningen in de lichtbasis. Draai de lichtbasis linksom tot de sleufschroeven stevig aan het einde van de sleuven zitten. Zet dan de achterste schroef 1 vast aan de basisbeugel. - Seite 54 OMKEERFUNCTIE De ventilator kan zowel voorwaarts als achterwaarts worden toegepast. ZOMER-toepassing: Wanneer de schakelaar voor de omkeerfunctie op “down” (ZOMER) staat, draait de ventilator tegen de klok in. De luchtbeweging wordt naar beneden gericht en zorgt in de zomer voor het gewenste koelende effect.
-
Seite 55: Reiniging En Verzorging
GELUID: Wanneer het rustig is (vooral ‘s nachts), hoort u soms geluidjes. Kleine schommelingen in de voeding en frequentiesignalen die de elektriciteit regelen, kunnen het geluid van de ventilatormotor wijzigen. Dit is normaal. Voorzie een periode van 24 uur voor “inlopen”; de meeste geluiden van een nieuwe ventilator zullen tijdens die periode verdwijnen.