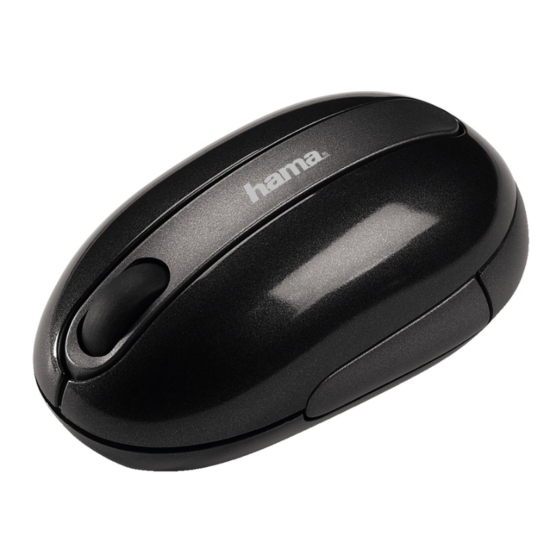
Hama 00057258 Handbuch
Vorschau ausblenden
Andere Handbücher für 00057258:
- Bedienungsanleitung (15 Seiten) ,
- Bedienungsanleitung (18 Seiten)
Inhaltszusammenfassung für Hama 00057258
- Seite 1 All manuals and user guides at all-guides.com www.hama.de Hama GmbH & Co KG Postfach 80 86651 Monheim/Germany Tel. +49 (0)9091/502-0 Fax +49 (0)9091/502-274 hama@hama.de www.hama.de 00057258-01.05...
- Seite 2 All manuals and user guides at all-guides.com 00057258 Wireless Optical Mouse...
-
Seite 3: Einlegen Der Batterien
All manuals and user guides at all-guides.com l Optische Funkmaus Abb.1 Abb.2 Abb.3 1. Hardware Installation 1.1 Einlegen der Batterien • Drücken Sie wie in Abb.1+2 ersichtlich mit Daumen und Zeigefi nger gegen die Seitenlaschen der Maus um das Batteriefach zu öffnen. •... -
Seite 4: Anschließen Des Mini Usb Empfängers
All manuals and user guides at all-guides.com 1.2 Anschließen des Mini USB Empfängers • Verbinden Sie den Mini USB Empfänger (Abb.5) mit einem freien USB Anschluss am PC oder USB-Hub. Ihr System erkennt die neue Hardware automatisch. • Je nach Windows-Version kann es sein, dass Sie nach der Windows Installations-CD gefragt werden. - Seite 5 All manuals and user guides at all-guides.com l Bedienungsanleitung DSL Modem Windows Standardeinstellung Im “verbesserten Scroll-Modus” können Sie die “Rad-Geschwindigkeit” selbst bestimmen. Hier können Sie der 3. (Rad-)Taste verschiedene Funktionen zuweisen.
- Seite 6 (z.B. bei Verbindungsproblemen) gehen Sie wie folgt vor: • Betätigen Sie zunächst die Verbindungstaste am Empfänger (abb5), anschließend die Verbindungstaste auf der Unterseite der Maus. (Abb.4). Bitte beachten Sie das hierbei das Zeitfenster von 10 Sekunden. Die Konformitätserklärung nach der R&TTE-Richtlinie 99/5/EG fi nden Sie unter www.hama.de...
-
Seite 7: Inserting The Batteries
All manuals and user guides at all-guides.com L Wireless Optical Mouse Fig.1 Fig.2 Fig.3 1. Hardware installation 1.1 Inserting the batteries • Press with your thumb and index fi nger against the lateral parts of the mouse in order to open the battery compartment – see picture 1+2. •... - Seite 8 All manuals and user guides at all-guides.com 1.2 Connecting the mini USB receiver • Connect the mini USB receiver (picture 5) with a free USB port on the PC or USB hub. Your system automatically detects the hardware. • According to your Windows version, you are eventually asked for the Windows installation CD.
- Seite 9 All manuals and user guides at all-guides.com Windows Standard settings You can set the wheel speed yourself in the improved scroll mode. This allows you to assign various functions to the 3rd (wheel) button.
- Seite 10 • Actuate the connect button on the receiver (picture 5), then the connect button on the bottom of the mouse (picture 4). Please pay attention to the time window of 10 seconds. Under www.hama.de, you will fi nd the declaration of conformity according to the R&TTE guideline 99/5/EC.
- Seite 11 All manuals and user guides at all-guides.com ¬ Souris radio optique image.1 image.2 image.3 1. Installation du matériel 1.1 Insérer les batteries • Pressez avec le pouce et l’index contre les parties latérales de la souris pour ouvrir le compartiment pour les batteries – voir image 1+2. •...
- Seite 12 All manuals and user guides at all-guides.com 1.2 Connecter le récepteur mini USB • Connectez le récepteur mini USB (image 5) avec un port USB libre de votre PC ou de votre hub USB. Votre système reconnaît automatiquement le nouveau matériel. •...
- Seite 13 All manuals and user guides at all-guides.com Windows Paramètres par défaut Vous pouvez déterminer la « vitesse de la molette » dans « mode de défi lement amélioré ». Vous pouvez assigner différentes fonctions à la 3ème touche de la souris (molette).
- Seite 14 • Actionner d’abord la touche de connexion du récepteur (image 5), puis la touche de connexion située sur le dessous de la souris (image 4). Veuillez tenir compte la fenêtre de temps de 10 secondes. Sous www.hama.de, vous trouverez la déclaration de conformité selon la directive R&TTE 99/5/CE.
- Seite 15 L See www.hama.de for the declaration of conformity with R&TTE Directive 99/5/EC. ¬ La déclaration de conformité à la directive R&TTE 99/5/CE se trouve sur www.hama.de. fl La declaratión de conformidad según la directiva R&TTE 99/5/EC la encontratá en www.hama.de...


