Grundig RCD 400 Serviceanleitung
Inhaltsverzeichnis
Quicklinks
Service
Zusätzlich erforder-
Manual
liche Unterlagen
für den
RCD 400
Komplettservice:
Additionally
required Service
Sach-Nr./Part No.
Manuals for the
72010-747.05
Complete Service:
R C D 4 0 0
POWER IO
POWER IO
A NTE NNA
5 9
TU NED
8 A E P A
RCD 400
IR-Geber / IR Remote Control
Änderungen vorbehalten
Subject to alteration
Service
Manual
Sicherheit
Safety
Sach-Nr./Part No.
72010-800.00
H I F I C D R E C E I V E R
STOP
STOP
R D S
OPEN/
OPEN/
INFO
INFO
CLOSE
CLOSE
3
SERVICE MANUAL
TUNER BAND
TUNER BAND
PAUSE
PLAY
PAUSE
PLAY
SKIP/STATION
SKIP/STATION
CD
CD
SEARCH/TUNING
SEARCH/TUNING
SHUFFLE
REPEAT
EDIT
CANCEL
MEMORY
TAPE/AUX
SHUFFLE
REPEAT
EDIT
CANCEL
MEMORY
TAPE/AUX
MONO
MONO
ANT/CABLE
ANT/CABLE
(9.79805-8151 / G.LF 1751)
(75954-032.17)
Printed in Germany
VK 232 0296
DEFEAT
DEFEAT
LOUDNESS
LOUDNESS
TREBLE
TREBLE
VOLUME
VOLUME
-
-
+
+
BASS
BASS
-
+
-
+
BALANCE
BALANCE
L
L
R
R
HEADPHONES
HEADPHONES
Service Manual Sach-Nr.
Service Manual Part No.
*
RCD 400
SLEE P
PT Y
TUNE R
ST AT IO N
CD
–
DISC
+
TA PE
-
+
V OLUME
RC 400
72010-747.05
Inhaltsverzeichnis

Verwandte Anleitungen für Grundig RCD 400


Inhaltszusammenfassung für Grundig RCD 400
- Seite 1 SERVICE MANUAL Service Service Zusätzlich erforder- Manual Manual liche Unterlagen für den RCD 400 Sicherheit Komplettservice: Safety Additionally required Service Sach-Nr./Part No. Sach-Nr./Part No. Manuals for the 72010-747.05 72010-800.00 RCD 400 Complete Service: SLEE P PT Y TUNE R ST AT IO N –...
-
Seite 2: Inhaltsverzeichnis
Explosionszeichnungen ..... 4 - 1...4 - 6 Exploded Views ........4 - 1...4 - 6 Explosionszeichnung RCD 400 ............ 4 - 1 Exploded View RCD 400 .............. 4 - 1 Exploded View CD Drive Mechanism ........... 4 - 3 Explosionszeichnung CD-Laufwerk ..........4 - 3 Ersatzteiliste .................. -
Seite 3: Technische Daten
RCD 400 Allgemeiner Teil / General Section Technische Daten Specifications Verstärker Amplifier Ausgangsleistung (DIN45500) Output power (DIN45500) Musikleistung (4Ω) ............2 x 50W Music (4Ω) ................ 2 x 50W Sinusleistung (4Ω, 0,7% Klirrfaktor, 1kHz) ....... 2 x 30W Nominal (4Ω, 0.7% distortion, 1kHz) ........ 2 x 30W... -
Seite 4: Bedienhinweise
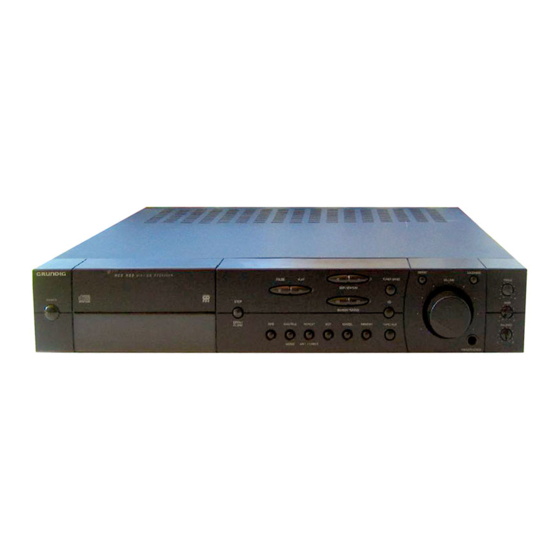
Bedienhinweise Hinweis: Dieses Kapitel enthält Auszüge aus der Bedienungsanleitung. Weitergehende Informationen entnehmen Sie bitte der gerätespezifischen Bedienungsanleitung, deren Sachnummer Sie in der entsprechenden Ersatzteilliste finden. Bedienungselemente Display Fernbedienung STOP SEARCH/TUNING SKIP/STATION Display Fernbedienung LOUDNESS POWER OPEN/CLOSE PAUSE ; PLAY B TUNER BAND TAPE/AUX DEFEAT... - Seite 5 Verstärker Radio Ein- und Ausschalten Klangeinstellung Einschalten Automatischer Sendersuche Schalten Sie Ihr Gerät ein, indem Sie den Netzschalter POWER betätigen. Die VOLUME Sie regulierenen die Lautstärke mit dem Einsteller VOLUME. • Wählen Sie den Tuner durch Drücken der Taste TUNER BAND. •...
-
Seite 6: Radiotext
Radio Radio Festsenderspeicher (STATION MEMORY) Aufrufen eines Senderspeichers RDS (Radio Data System) Programmart-Kennung (PTY) Sie haben 59 Speicherplätze zur Verfügung. • Möchten Sie einen Senderspeicher (Speicherplatz) aufrufen, betätigen Sie Ihr Gerät ist in der Lage, RDS-Informationen, die mit dem Sendersignal RDS bietet Ihnen die Möglichkeit, FM-Sender nach Programmarten auszuwählen. -
Seite 7: Cd (Ic-Block-Diagramme Tda1313T, Saa6579T)
Allgemeines Umschalten der Anzeigen Programm-Betrieb Wiedergeben des Programmes • Durch Betätigen der Taste INFO auf dem Gerät oder der Taste auf der Jede CD läßt sich in der Reihenfolge der Titel programmieren. • Drücken Sie die Taste B (PLAY), beginnt die Wiedergabe Ihres Um die Disc aus ihrem Gehäuse zu nehmen, fassen Fernbedienung können in der Anzeige verschiedene Informationen Die Reihenfolge der Programmplätze bestimmt die Reihenfolge beim... -
Seite 8: Operating Hints
Operating Hints Note: This chapter contains excerpts from the operating instructions. For further particulars please refer to the appropriate user instructions the part number of which is indicated in the relevant spare parts list. Operating elements Uhr und Timer STOP SEARCH/TUNING SKIP/STATION Uhreinstellung... -
Seite 9: Remote Control
Amplifier part Display Remote Control Display Remote Control Switching on and off Sound control When you want to switch your receiver on, press the POWER button. The red VOLUME The volume can be adjusted with the rotary VOLUME knob. LED in the middle of the button indicates that the unit is on. The volume can also be controlled via the remote control with the VOLUME +/–... - Seite 10 Radio Radio Switching on Automatic station search Station memory Calling up a stored station • Select the radio input by pressing the TUNER BAND button. • To activate automatic station search (AUTO TUNING), press TUNING Q 59 memory locations are available for storing stations. •...
- Seite 11 Radio RDS Radio Data System Programme type PTY (on the remote control) General information Changing the display Your unit is capable of receiving and evaluating RDS information which is broad- RDS allows you to select FM stations according to programme type. There are •...
- Seite 12 The Clock and Timer Programming Programme playback Setting the clock The SLEEP function (on the remote control) You can programme your own track sequence for each CD. • To play the programme you have created, press B (PLAY). Your unit has a 24 hour clock. Your unit is provided with a sleep function which switches the unit off after a set The order of the programmed tracks determines the order in which they are –...
-
Seite 13: Disassembly Instructions
RCD 400 Allgemeiner Teil / General Section Ausbauhinweise Disassembly Instructions 1. Cabinet Top 1. Gehäuseoberteil - 6 Schrauben am Gehäuseoberteil herausschrauben. - Undo 6 screws at the cabinet top. - Remove cover. - Deckel abnehmen. 2. Tunerplatte 2. Tuner PCB - Undo 2 screws A (Fig. - Seite 14 Allgemeiner Teil / General Section RCD 400 5. Lautstärkereglerplatte 5. Volume Control PCB - Lautstärkeknopf abziehen. - Pull off the volume control knob. - Mutter H (Fig. 6) abschrauben. - Unscrew nut H (Fig. 6). - Steckverbinder lösen. - Disconnect the plug-in connections.
- Seite 15 RCD 400 Allgemeiner Teil / General Section 14. CD-Leiterplatte 14. Removing the CD PCB - Die 3 Schrauben Q herausschrauben (Fig.10). - Unscrew the 3 screws Q (Fig.10). - Die Leiterplatte vorsichtig vom Laufwerk abheben und den Flexprint - Carefully lift off the PCB from the drive and disconnect the flexprint R (Fig.11) abziehen.
- Seite 16 Allgemeiner Teil / General Section RCD 400 16. Ausbau des Antriebsriemens (Fig. 16 und 17) 16. Removing the Drive Belt (Fig. 16 and 17) - CD-Laufwerk ausbauen (Punkt 12). - Remove the CD drive (para 12). - Mit einem kleinen Schraubendreher die Abdeckung T abheben.
- Seite 17 RCD 400 Abgleichvorschriften / Adjustment Procedures Abgleichvorschriften Meßgeräte: Wobbler, Meßsender, Stereokoder, Tongenerator, Oszilloskop, Digitalvoltmeter, NF-Voltmeter, Klirrfaktormeßgerät Hinweis: Das Frontend ist ein komplett abgeglichener Baustein. Nur das ZF-Filter muß dem ZF-Verstärker angeglichen werden (1). Die Abstimmspannungen des Frontends haben folgende Größen: 87,5MHz = typ.
-
Seite 18: Adjustment Procedures
Ableichvorschriften / Alignment Procedure RCD 400 Adjustment Procedures Test Equipment: Sweep generator, Test generator, Stereo coder, AF generator, Oscilloscope, Digital voltmeter, AF voltmeter, Distortion meter Note: The frontend is a completely preadjusted module. Only the IF filter must be adjusted to the IF amplifier (1). The values of the tuning voltages are: 87.5MHz = typ. - Seite 19 RCD 400 Abgleichvorschriften / Adjustment Procedures Abgleichlageplan / Alignment Scheme 120-150µH R114 R123 R119 Tabelle für ZF-Programmierung / Table for IF-Programming 0 = Brücke geöffnet / 0 = Bridge opened 1 = Brücke geschlossen / 1 = Bridge closed ZF (MHz)
-
Seite 20: Layout Of The Pcbs And Circuit Diagrams
Platinenabbildungen und Schaltpläne / Layout of the PCBs and Circuit Diagrams RCD 400 Platinenabbildungen und Schaltpläne / Layout of the PCBs and Circuit Diagrams Display SHUFFLE REPEAT A B REMAIN TOTAL ######## PROGRAM ANTENNA CABLE TUNED SHUFFLE REPEAT A B... -
Seite 21: Wiring Diagram
RCD 400 Platinenabbildungen und Schaltpläne / Layout of the PCBs and Circuit Diagrams RCD 400 Platinenabbildungen und Schaltpläne / Layout of the PCBs and Circuit Diagrams Verdrahtungsplan / Wiring Diagram SPEAKERS TAPE LEFT RIGHT AM ANT. FM ANT. BU303 BU302... - Seite 22 Platinenabbildungen und Schaltpläne / Layout of the PCBs and Circuit Diagrams RCD 400 Platinenabbildungen und Schaltpläne / Layout of the PCBs and Circuit Diagrams RCD 400 Schaltbild – CD / Circuit Diagram – CD R101 ca. 1.5V +4.7V DOBM IC03...
- Seite 23 RCD 400 Platinenabbildungen und Schaltpläne / Layout of the PCBs and Circuit Diagrams RCD 400 Platinenabbildungen und Schaltpläne / Layout of the PCBs and Circuit Diagrams Platinenabbildungen – CD / Layout of the PCBs – CD Ansicht von der Lötseite / View of solder side Ansicht von der Bestückungsseite / View of components...
- Seite 24 Platinenabbildungen und Schaltpläne / Layout of the PCBs and Circuit Diagrams RCD 400 Platinenabbildungen und Schaltpläne / Layout of the PCBs and Circuit Diagrams RCD 400 Platinenabbildungen – Tuner / Layout of the PCBs – Tuner Ansicht von der Lötseite / View of solder side Ansicht von der Bestückungsseite / View of components...
- Seite 25 RCD 400 Platinenabbildungen und Schaltpläne / Layout of the PCBs and Circuit Diagrams RCD 400 Platinenabbildungen und Schaltpläne / Layout of the PCBs and Circuit Diagrams Schaltbild – Tuner / Circuit Diagram – Tuner 100R IFOUT +12V 0...5P BF998 3.1V...
- Seite 26 RCD 400 Platinenabbildungen und Schaltpläne / Layout of the PCBs and Circuit Diagrams GL7812 +12V +12V R104 2.5V 2.5V 2.5V 2.5V LA1266 3.3V POST FM - IF Q.D. BUFFER BUFFER 1U/100V +12V +19V C104 1.5V R118A AM-ZF 3.4V BC548B 1.8K LA1266 2.7V...
-
Seite 27: Tuner
Platinenabbildungen und Schaltpläne / Layout of the PCBs and Circuit Diagrams RCD 400 Schaltbild / Circuit Diagram: -Hauptplatte / Main Board -Klangreglerplatte / Tone Control Board -Kopfhörerplatte / Headphone Board -Display- und Tastenplatte / Display and Key Board -Netzteilplatte / Mains Board -Lautstärkeplatte / Volume Board... - Seite 28 (..) = RCD 261 ONLY +12V R532 CD+B T508 R534 T506 BC517 POWER TRANSFORMER C506 R206A R206 BC558B R537 T201 P/N:445.0090.00 =RCD 400 BC548B PWR_DOWN (P/N:445.0099.00 =RCD 261) R541 R205 C204 T505 BC548B R538 D503 R542 1N4148 R207 CT201 C505...
-
Seite 29: Ansicht Von Der Lötseite / View Of Solder Side
RCD 400 Platinenabbildungen und Schaltpläne / Layout of the PCBs and Circuit Diagrams Platinenabbildungen – Hauptplatte / Layout of the PCBs – Main Board Für die tatsächliche Bauteilbestückung ist das Schaltbild maßgebend! The circuit diagram is relevant for the actual component assembly! Ansicht von der Lötseite / View of solder side... -
Seite 30: Ansicht Von Der Bestückungsseite / View Of Components
RCD 400 Platinenabbildungen und Schaltpläne / Layout of the PCBs and Circuit Diagrams Ansicht von der Bestückungsseite / View of components R543 C502 R544 R350 R349 R542 R541 C335 C503 R351 R527 D203 D204 R526 IC502 R530 D202 D201 R352... - Seite 31 RCD 400 Platinenabbildungen und Schaltpläne / Layout of the PCBs and Circuit Diagrams + Ua + Ua (POWER) TDA 7294 IN – – IN + IN + MUTE /SUR MUTE MUTE THERMAL BOOTSTRAP SHUT DOWN PROTECTION STBY STAND-BY STBY GND –...
- Seite 32 Platinenabbildungen und Schaltpläne / Layout of the PCBs and Circuit Diagrams RCD 400 Platinenabbildungen und Schaltpläne / Layout of the PCBs and Circuit Diagrams RCD 400 Platinenabbildungen / Layout of the PCBs: -Klangreglerplatte / Tone Control Board -Kopfhörerplatte / Headphone Board -Lautstärkeplatte / Volume Board...
- Seite 33 Platinenabbildungen und Schaltpläne / Layout of the PCBs and Circuit Diagrams RCD 400 Klangreglerplatte / Tone Control Board Ansicht von der Bestückungsseite / View of components Ansicht von der Lötseite / View of solder side C325 C325 R329 R329 VR302...
-
Seite 34: Spare Parts List And Exploded Views
Ersatzteilliste und Explosionszeichnungen / Spare Parts List and Exploded Views RCD 400 Ersatzteilliste und Explosionszeichnungen / Spare Parts List and Exploded Views Ersatzteilliste und Explosionszeichnungen / Spare Parts List and Exploded Views Explosionszeichnung RCD 400 / Exploded View RCD 400 GRUNDIG Service 4 - 1 GRUNDIG Service... -
Seite 35: Exploded View Cd Drive Mechanism
Ersatzteilliste und Explosionszeichnungen / Spare Parts List and Exploded Views RCD 400 Ersatzteilliste und Explosionszeichnungen / Spare Parts List and Exploded Views RCD 400 Explosionszeichnung CD-Laufwerk / Exploded View CD Drive Mechanism Ersatzteilliste Spare Parts List 32700 # 10 / 95 RCD 400 SACH-NR. - Seite 36 RCD 400 Ersatzteilliste und Explosionszeichnungen / Spare Parts List and Exploded Views POS. SACHNUMMER BEZEICHNUNG POS. SACHNUMMER BEZEICHNUNG POS. PART NUMBER DESCRIPTION POS. PART NUMBER DESCRIPTION 75954-032.13 BUCHSE CINCH2X2 RJ1073-02 R 101 75952-030.92 SI.-WIDERST.4,7 1/4W ERD 75954-032.12 BUCHSE LAUTSPR.CJ9020-080 R 116 75954-012.14...
- Seite 37 Ersatzteilliste und Explosionszeichnungen / Spare Parts List and Exploded Views RCD 400 POS. SACHNUMMER BEZEICHNUNG POS. SACHNUMMER BEZEICHNUNG POS. PART NUMBER DESCRIPTION POS. PART NUMBER DESCRIPTION TUNER 75954-010.20 TUNER 8302-638-030 TRANS.2 SK 30 A-TM-Y1 75954-010.19 ANTENNENBUCHSE 75952-030.38 TRANS.BC 558 B...