Herunterladen Inhalt Inhalt Diese Seite drucken

Werbung

Verfügbare Sprachen
  • DE

Verfügbare Sprachen

  • DEUTSCH, seite 1
Charleston
Deckenventilator
Ceiling Fan
Ventilateur de plafond
Ventilador de techo
Ventilatore a soffitto
10028294

Werbung

Inhaltsverzeichnis
loading

Inhaltszusammenfassung für Klarstein Charleston

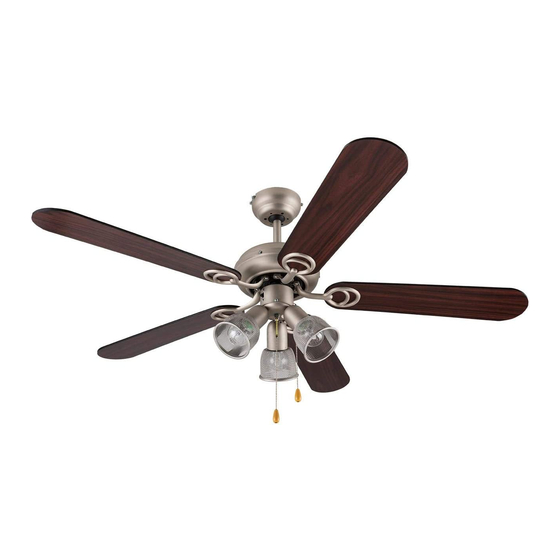
  • Seite 1 Charleston Deckenventilator Ceiling Fan Ventilateur de plafond Ventilador de techo Ventilatore a soffitto 10028294...
  • Seite 3: Technische Daten

    Sehr geehrter Kunde, wir gratulieren Ihnen zum Erwerb Ihres Gerätes. Lesen Sie die folgenden Hinweise sorgfältig durch und befolgen Sie diese, um möglichen Schäden vorzubeugen. Für Schäden, die durch Missachtung der Hinweise und unsachgemäßen Gebrauch entstehen, übernehmen wir keine Haftung. Scannen Sie den folgenden QR-Code, um Zugriff auf die aktuellste Bedienungsanleitung und weitere Informationen rund um das Produkt zu erhalten.
  • Seite 4: Sicherheitshinweise

    SICHERHEITSHINWEISE • Befestigen Sie den Lüfter niemals an einer Steckdose, sondern an der Decke selbst. • Der Mindestabstand zwischen den Ventilatorblättern und dem Boden muss mehr als 2,3 m betragen. Die Mindesttragfähigkeit des Hakens, an dem der Ventilator aufgehängt wird, muss 100 kg betragen. •...
  • Seite 5 Schließen Sie die Richten Sie die Ziehen Sie alle Kabel von der Seitenlöcher der Schrauben fest und Stromquelle und der Abdeckung an den versichern Sie sich, dass Montagehalterung zu Klammern aus. Heben die Abdeckung fest den Anschlussklemmen Sie die Abdeckung an, sitzt.
  • Seite 6 Befestigen Sie die Befestigen Sie die Befestigen Sie die Birnen Lampenfassung mit drei Lampenschirme, indem (max. 60 W E27, nicht Schrauben. Sie sie im Uhrzeigersinn in enthalten). Schalten die Fassung drehen. Sie den Ventilator ein und überprüfen Sie ob Licht und Ventilator funktionieren.
  • Seite 7 Mit dem Schalter am Motorgehäuse lässt sich die Richtung des Luftstroms beeinflussen, den die Rotorblätter erzeugen. • Kaltes Wetter: Stellen Sie den Schalter auf UP, damit die Blätter die warme Luft unter der Decke in den Raum darunter verteilen. • Warmes Wetter: Stellen Sie den Schalter auf DOWN, damit die Blätter einen kühlenden Luftstrom erzeugen und in den Raum verteilen.
  • Seite 9: Technical Data

    Dear Customer, Congratulations on purchasing this equipment. Please read this manual carefully and take care of the following hints to avoid damages. Any failure caused by ignoring the items and cautions mentioned in the instruction manual is not covered by our warranty and any liability. Scan the QR code to get access to the latest user mannual and other information about the product.
  • Seite 10: Safety Instructions

    SAFETY INSTRUCTIONS • Never attach the fan to a power point,but to the ceiling itself. • The minimum distance between the blades of the fan and the floor must be more than 2.3 m.The minimum carrying capacity of the hook from which the fan is hung must be 100 kg.
  • Seite 11 Connect wires from Attach canopy to the Insert the other two set supply and bracket to bracket by aligning screws and washers. the wiring terminals as canopy side holes Tighten all the screws, follow: with the bracket side make sure that the holes.
  • Seite 12: Use And Operation

    Insert light kit cover onto Install the shade onto the Install a light blulb (E27 the light kit and secure switch housing. MAX.60W, not supplied) with three set screws. to the lampholder.Switch the power on to check the operation of the light kit and fan.
  • Seite 13: Hints On Disposal

    The switch on motor housing for controlling the fan blades rotating direction controls the direction of air movement. • Cold weather: Push the switch “UP” so that the blades will bring the warm air trapped near the ceiling fan to move downwards throughout the room. •...
  • Seite 15: Datos Técnicos

    Estimado cliente, Le felicitamos por la adquisición de este producto. Lea atentamente el siguiente manual y siga cuidadosamente las instrucciones de uso con el fin de evitar posibles daños. La empresa no se responsabiliza de los daños ocasionados por un uso indebido del producto o por haber desatendido las indicaciones de seguridad.
  • Seite 16: Indicaciones De Seguridad

    INDICACIONES DE SEGURIDAD • Nunca fije el ventilador a una toma de corriente, sino al propio techo. • La distancia mínima entre las hojas del ventilador y el suelo debe ser de más de 2,3 m. La capacidad de carga mínima del gancho que sostenga el ventilador debe ser de al menos 100 kg.
  • Seite 17 Conecte los cables de Oriente los agujeros Apriete bien todos los la fuente de corriente laterales de la tapa a tornillos. Asegúrese de y del soporte a la las pinzas de sujeción. que la tapa queda bien terminal de las clemas Levante la tapadera sujeta.
  • Seite 18: Puesta En Marcha Y Funcionamiento

    Fije el portalámparas al Ajuste las pantallas de la Enrosque ahora las ventilador con los tres lámpara girándolas en los bombillas (60W máx. tornillos. soportes en el sentido de E27, no incluidas en las agujas del reloj. el lote). Ya puede encender el ventilador y comprobar si tanto el aparato como la luz...
  • Seite 19: Retirada Del Aparato

    Con el interruptor situado en el cuerpo del ventilador es posible determinar la dirección de la corri- ente de aire generada por las palas de rotación. • Baja temperatura exterior: coloque el interruptor en la posición UP para que las palas distribuyan el aire caliente por toda la habitación.
  • Seite 21: Fiche Technique

    Chère cliente, cher client, Toutes nos félicitations pour l’acquisition de ce nouvel appareil. Veuillez lire attentivement et respecter les instructions de ce mode d’emploi afin d’éviter d’éventuels dommages. Nous ne saurions être tenus pour responsables des dommages dus au non-respect des consignes et à...
  • Seite 22: Consignes De Sécurité

    CONSIGNES DE SÉCURITÉ • Ne connectez jamais le ventilateur à une prise électrique, mais au plafond lui- même. • La distance minimale entre les pales du ventilateur et le sol doit être supérieure à 2,3 m. La capacité de charge minimale du crochet sur lequel le ventilateur est suspendu doit être de 100 kg.
  • Seite 23 Connecter les câbles Aligner les trous Serrer toutes les vis et de la source électrique du capot avec les veiller à ce que le capot de terre et du support agrafes. Soulever le soit bien fixé. Attention de montage avec ventilateur jusqu’à...
  • Seite 24: Mise En Marche Et Utilisation

    Fixer la douille de Fixer les abat-jour sur la Insérer les ampoules lampe à l’aide de trois lampe en les tournant (max. 60 W E27, non vis. dans le sens des aiguilles fournies) dans la douille d’une montre. de la lampe. Allumer le ventilateur et s’assurer que les lampes et le ventilateur fonctionnent.
  • Seite 25: Informations Sur Le Recyclage

    L’interrupteur sur le boîtier du moteur permet de changer la direction du courant d’air produit par les pales. • Par températures froides : régler l’interrupteur sur UP pour que les pales redirigent l’air chaud bloqué sous le plafond dans toute la pièce. •...
  • Seite 27: Dati Tecnici

    Gentile Cliente, La ringraziamo per aver acquistato il dispositivo. La preghiamo di leggere attentamente le seguenti istruzioni per l’uso e di seguirle per evitare possibili danni tecnici. Non ci assumiamo alcuna responsabilità per danni scaturiti da una mancata osservazione delle avvertenze di sicurezza e da un uso improprio del dispositivo.
  • Seite 28: Avvertenze Di Sicurezza

    AVVERTENZE DI SICUREZZA • Non fissare mai il ventilatore a una presa elettrica, ma al soffitto stesso. • La distanza minima tra le pale del ventilatore e il pavimento deve essere maggiore di 2,3 m. La capacità di carico minima del gancio a cui viene fissato il ventilatore deve essere di 100 kg.
  • Seite 29 Collegare i fili della Allineare i fori Serrare tutte le viti fonte di alimentazione laterali della calotta e assicurarsi che la e i fili della staffa utilizzando le calotta sia ben fissata. di montaggio viti. Sollevare la Attenzione a non ai connettori di calotta finché...
  • Seite 30: Messa In Funzione E Utilizzo

    Fissare il portalampada Fissare il paralume Avvitare le lampadine utilizzando tre viti. nel portalampada (max. 60 W E27, non avvitandolo in senso incluse nella consegna). orario. Accendere il ventilatore e verificare che la luce e il ventilatore funzionino. MESSA IN FUNZIONE E UTILIZZO •...
  • Seite 31: Smaltimento

    E’ possibile direzionare la corrente dell’aria con l’interruttore posto sul motore. • Se fa freddo: Posizionare l’interruttore su UP affinché le pale possano distribuire l’aria calda nella stanza. • Se fa caldo: Posizionare l’interruttore su DOWN affinché le pale possano produrre e distribuire un flusso d’aria fresco nella stanza.

Inhaltsverzeichnis