Inhaltsverzeichnis
Werbung
Verfügbare Sprachen
Verfügbare Sprachen
Quicklinks
Werbung
Inhaltsverzeichnis

Inhaltszusammenfassung für Ayce M1Y-KZ-125
- Seite 1 MINI-TAUCHSÄGE MINI-SCIE PLONGEANTE MINI SEGA AD AFFONDAMENTO MINI PLUNGE SAW GEBRAUCHSANWEISUNG I MANUEL D'UTILISATION I MANUALE D'ISTRUZIONI I OPERATOR'S MANUAL 180321_ayce_Multi-Tauchsäge_IM_rz.indd 1 21.03.18 13:31...
-
Seite 2: Liste Der Hauptteile
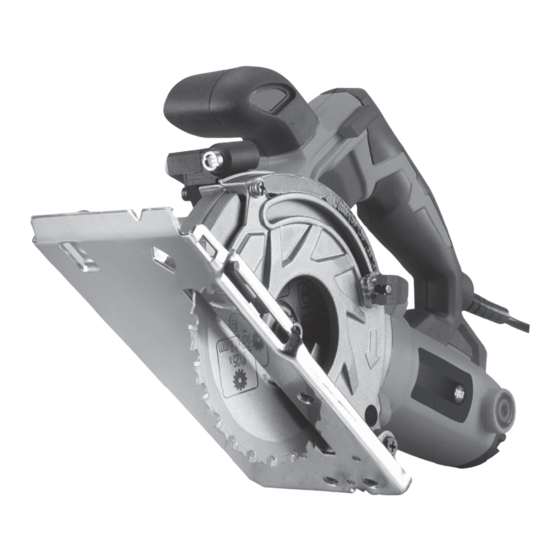
LISTE DER HAUPTTEILE Einschaltsperre Spindelarretierung EIN/AUS-Schalter Führungsschienen Handgriff Inbusschlüssel Kohlebürstenabdeckung (x2) Verbindungsstangen Multi Purpose (MP) Blatt 24 Schnitttiefenanschlagsknopf Zähne Grundplatte Laserlicht Schraube Diamant Sägeblatt Sägeblatt 22,5 mm Flansche (M14) Schnittlinie Parallelführung Feststellknopf Parallel-/ Staubsaugschlauch inkl. Adapter Führungsschienenanschlag Absaugstutzen Schraubzwinge Skala für Schnitttiefenanschlag Aufrechter Rand Zusatzhandgriff 180321_ayce_Multi-Tauchsäge_IM_rz.indd 2... -
Seite 3: Technische Daten
TECHNISCHE DATEN Modell M1Y-KZ-125 Nennspannung: 230-240V~/50Hz Nennleistung : 1000 W Leerlaufdrehzahl: 5300 min Sägeblattgrösse (mm): Ø125x Ø10 SchalldruckLpA 100.1dB(A) K=3 dB(A) SchalldruckLwA 111.1 dB(A) K=3 dB(A) Laserklasse Wellenlange Laser 650nM Leistung Laser ‹ 1 mW, Stromversorgung Lasermodul DC3-6 V, 30 mA (Max.) -
Seite 4: Bestimmungsgemässe Verwendung
WICHTIGE INFORMATIONEN Ayce Power Tool behält sich das Recht vor, das Design und die technischen Spezikationen dieses Produktes jederzeit und ohne Vorankündigung zu modi- zieren und zu verbessern. BESTIMMUNGSGEMÄSSE VERWENDUNG Die Tauchsäge ist zum Sägen von Holz, holzähnlichen Werkstoen, gips- und zementgebundenen Faserstoen sowie Kunststoen vorgesehen, Fliesen, Granit oder Beton vorgesehen. - Seite 5 12. Ziehen Sie immer den Stecker aus der Steckdose, bevor Sie Einstellungen am Werkzeug vornehmen oder wenn Sie das Werkzeug nicht benutzen. 13. Stecken Sie den Stecker nur in die Steckdose, wenn das Werkzeug ausge- schaltet ist. Ziehen Sie den Stecker nach dem Gebrauch des Werkzeugs wieder heraus.
-
Seite 6: Sicherheitsvorschriften Für Laserlicht
26. Bremsen Sie das Sägeblatt nach dem Ausschalten niemals durch seitliches Gegendrücken ab. Legen Sie die Säge erst ab, wenn das Sägeblatt zum Still- stand gekommen ist. 27. Setzen Sie die Säge keinen hohen Temperaturen, Feuchtigkeit und starken Stössen aus. Dadurch kann die Säge beschädigt werden. SICHERHEITSVORSCHRIFTEN FÜR LASERLICHT Attention: Laserstrahlung Nicht in den Strahl blicken... -
Seite 7: Allgemeine Sicherheitshinweise Zur Verwendung Des Geräts
WARNUNG: Schauen Sie nicht direkt in den Laserstrahl. Es kann gefährlich sein, direkt in den Laserstrahl zu schauen. Bitte folgen Sie allen Sicherheitsvorschriften wie folgt: • Der Laser muss gemäss den Herstelleranweisungen genutzt und gewartet werden. • Zielen Sie mit dem Laserstrahl niemals auf eine Person oder ein Objekt; nur auf das Werkstück. - Seite 8 2) Elektrische Sicherheit Der Netzstecker des Elektrowerkzeugs muss in die Steckdose passen. Neh- men Sie niemals Änderungen am Netzstecker vor. Verwenden Sie schutzgeer- dete Elektrowerkzeuge niemals mit Adaptersteckern. Unveränderte Stecker und passende Steckdosen verringern das Risiko eines elektrischen Schlags. Vermeiden Sie jeglichen Körperkontakt mit geerdeten Oberfl ächen wie Roh- ren, Heizkörpern, Herden und Kühlschränken.
- Seite 9 Sie das Elektrowerkzeug in Betrieb nehmen. Ein Werkzeug oder Schlüssel, das/der sich noch an einem drehenden Geräteteil bendet, kann zu Verletzun- gen führen. Lehnen Sie sich nicht zu weit nach vorn. Achten Sie jederzeit auf einen siche- ren Stand und gutes Gleichgewicht. So haben Sie in unerwarteten Situationen eine bessere Kontrolle über das Elektrowerkzeug.
- Seite 10 der jeweiligen Arbeitsbedingungen und der auszuführenden Arbeiten. Die be- stimmungsfremde Verwendung von Elektrowerkzeugen kann zu gefährlichen Situationen führen. 5) Service Lassen Sie das Gerät von qualifi ziertem Reparaturpersonal instand setzen, das ausschliesslich Original-Ersatzteile verwendet. Damit wird sichergestellt, dass die Sicherheit des Elektrogeräts gewahrt bleibt. GERÄUSCH-/VIBRATIONSINFORMATIONEN Ermittlung der Geräuschmesswerte gemäss EN 60745-1.
-
Seite 11: Beschreibung Der Symbole
BESCHREIBUNG DER SYMBOLE 1. Sicherheitssymbole Die in diesem Handbuch verwendeten Symbole dienen dazu, Sie auf eventuelle Risiken aufmerksam zu machen. Die Sicherheitssymbole und die dazugehörigen Erläuterungen müssen genau verstanden werden. Die Sicherheitshinweise an sich schliessen keine Risiken aus und sind kein Ersatz für korrekte Massnahmen zur Vermeidung von Unfällen. -
Seite 12: Betrieb
2. Produktsymbole In diesem Handbuch und/oder an dem Gerät nden Sie die nachstehenden Symbole. Sie geben wichtige Informationen über das Produkt oder Hinweise zur Bedienung. 1000 W 5300/min Nennleistung Leerlaufdrehzahl mi n 5300 rpm 230-240 V~50 HZ 125 mm Nennspannung Durchmesser der Scheibe 125 X 10 mm... - Seite 13 WARNUNG: Ein ungeschütztes, nachlaufendes Sägeblatt bewegt die Säge entgegen der Schnittrichtung und sägt, was ihm im Weg ist. Beachten Sie dabei die Nachlaufzeit der Säge. EIN/AUS-Schalter Zum Einschalten der Tauchsäge, drücken Sie den EIN/AUS-Schalter (2). Zum Ausschalten der Tauchsäge, lassen Sie den EIN/AUS-Schalter (2) los. Durch Betätigen der Einschaltsperre (1) wird die Eintauchvorrichtung ent- riegelt, sodass der Motor nach unten bewegt werden kann.
- Seite 14 3. Vorgehensweise für den Betrieb Vorbereitung HINWEIS: • Kontrollieren Sie vor jedem Einsatz die Funktion aller Einbauvorrichtungen an der Tauchsäge und verwenden Sie die Tauchsäge nur, wenn diese ordnungs- gemäss funktioniert. • Befestigen Sie das Werkstück stets so, dass es sich beim Bearbeiten nicht bewegen oder verbiegen kann.
- Seite 15 (Diamant) Sägeblattwechsel WARNUNG: Schalten Sie die Tauchsäge immer aus und ziehen Sie den Netzstecker, bevor Sie Arbeiten an der Säge vornehmen. Drücken Sie die Einschaltsperre (1) nach innen und drücken Sie den Motor nach unten. Drücken Sie die Spindelarretierung (14) nach unten und halten Sie diese gedrückt.
- Seite 16 Verbindungsstangen für Führungsschienen Zum Verbinden beider Führungsschienen schieben Sie die erste Verbindungs- stange von der unteren Seite in die Nut der Führungsschienen. Schieben Sie auch die andere Verbindungsstange in die zweite Nut. Schrauben Sie die Madenschrauben mit dem Inbusschlüssel der Grösse 3 mm bis zum Anschlag hinein, damit die Schienen fest verbunden werden.
- Seite 17 Multifunktions-Sägeblatt Aussendurchmesser: Ø 125 mm Bohrungsdurchmesser: Ø 10 mm Stärke: 1.8 mm Anzahl der Zähne/Segmente: 24 Max. zulässige Drehzahl: 10,000 min Anwendung: Sägearbeiten Material: Holz, Stahl, Nichteisenmetall, Laminat, Kunststoff usw. Diamant-Sägeblatt Aussendurchmesser: Ø 125 mm Bohrungsdurchmesser: Ø 10 mm Stärke: 2 mm Anzahl der Zähne/Segmente: 9 Max.
- Seite 18 HINWEIS: • Vergewissern Sie sich, dass der Staubsauger für den Einsatz mit einem Elektrowerkzeug geeignet ist. • Die Staubabsaugung ist besonders sinnvoll, wenn viele Schnitte nacheinander ausgeführt werden. Dann ist es seltener nötig, zum Reinigen des Elektrowerk- zeuges und Arbeitsplatzes Pausen einzulegen. •...
- Seite 19 Herzlichen Glückwunsch! Sie haben mit dem Kauf dieses Qualitätsprodukts eine ausgezeichnete Wahl getroffen. Unsere Qualitätsverpflichtung schliesst auch unseren Kundendienst ein. Jumbo bietet einen ausgezeichneten Reparaturdienst für alle ayce Produkte an. Sollte Ihr Gerät entgegen aller Erwartungen bei der priva- ten Nutzung innerhalb von FÜNF JAHREN ab Kaufdatum einen Mangel aufgrund von Material- oder Herstellungs- fehlern aufweisen, können Sie unsere Garantieleistung...
- Seite 20 GARANTIESCHEIN Vorname Nachname Strasse/Hausnummer Telefon Postleitzahl Mobil Artikelnummer Barcode (EAN) Garantie (bitte ankreuzen) Kaufbeleg Nr./Datum (Bitte ebenfalls eine Kopie des Kaufbelegs Nein beifügen) Das Gerät wurde in der folgenden Jumbo-Filiale gekauft: Aufgetretene Mängel (bitte auflisten) (Bitte beschreiben Sie das Problem oder die Betriebsstörung Ihres Gerätes so genau wie möglich.
- Seite 21 19 20 19 20 180321_ayce_Multi-Tauchsäge_IM_rz.indd 21 21.03.18 13:31...
- Seite 22 No. BESCHREIBUNG No. BESCHREIBUNG SCHRAUBE MX10 (LINKS) SITZ FÜR TIEFENANSCHLAG SÄGEBLATT-KLEMME BEGRENZUNGSKREIS SÄGEBLATT Ø 125 SÄGEBLATT-ABDECKUNG SÄGEBLATT-KLEMME ANZEIGER KOMBIKREUZSCHLITZSCHRAUBE GETRIEBEGEHÄUSE M4 × 20 SÄGEBLATT-ABDECKUNG EXZENTRISCHE TASTE KREUZSCHLITZSCHRAUBE 4 × 10 ZYLINDERSTIFT 3 × 15 KOMBIKREUZSCHLITZSCHRAUBE DREHFEDER M4 × 10 SCHUTZABDECKUNG SPINDELSCHRAUBE SICHERUNGSRING FÜR WELLE 24 ZUSÄTZLICHE ABDECKUNG...
- Seite 23 GRUNDPLATTE RECHTER GRIFF BODENPLATTE BLECHSCHRAUBE ST 4,2 × 19 STUFENSCHRAUBE BLECHSCHRAUBE ST 4,2 × 16 KREUZSCHLITZSCHRAUBE M4 × 6 LAGER 6000-2RS DREHKNAUF FÜR ANSCHLAG RINGE FÜR WELLE 12 FÜHRUNGSANSCHLAG ZAHNRAD DER ABTRIEBSWELLE LINKER GRIFF ABTRIEBSWELLE KABEL FLACHKEIL 3 × 3 X 10 KABELKLEMME NADELLAGER 8 ×...
- Seite 24 NADELLAGER 8 × 12 × 8 MUTTER M6 GETRIEBEABDECKUNG LUFTUMLENKRING KOMBIKREUZSCHLITZSCHRAUBE BLECHSCHRAUBE ST 4,2 × 70 M4 × 10 LAGER 6000 BÜRSTENHALTERUNG ROTOR KOHLEBÜRSTE LAGER 627 BÜRSTENHALTERUNG LAGERMANSCHETTE STATOR INNENSECHSKANTSCHRAUBE M4 GEHÄUSE × 12 KOMBIKREUZSCHLITZSCHRAUBE BLECHSCHRAUBE ST 2,9 × 6,5 M4 ×...
- Seite 25 NOTIZEN 180321_ayce_Multi-Tauchsäge_IM_rz.indd 25 21.03.18 13:31...
- Seite 26 LISTE DES PRINCIPAUX ELEMENTS Interrupteur de verrouillage Blocage de l’arbre Interrupteur marche/arrêt Rails de guidage Poignée Clé hexagonale Couvercle de la boite à charbons (x2) 17 Raccords de rails Bouton de réglage de profondeur Lame de scie Multi Matériaux de coupe (MM) 24 dents Support Interrupteur du laser...
-
Seite 27: Caractéristiques Techniques
CARACTÉRISTIQUES TECHNIQUES Modèle M1Y-KZ-125 Tension/Fréquence c.a. 230-240V~/50Hz Puissance: 1000 W Vitesse à vide: 5300 min Dimension de la lame (mm): Ø125x Ø10 Pression acoustique (LpA) 100.1dB(A) K=3 dB(A) Puissance acoustique (LwA) 111.1 dB(A) K=3 dB(A) Classe du laser Longueur d’onde du laser... -
Seite 28: Utilisation Prévue
INFORMATIONS IMPORTANTES AVERTISSEMENT: À tout moment et sans préavis, AYCE Power tool se réserve le droit de modier et d'améliorer la conception et les spécications techniques de ce produit. UTILISATION PRÉVUE La scie plongeante est destinée à couper du bois et des matériaux similaires, tels que matériaux en plâtre/ciment avec liant en bre et en plastique, la tuile, granit ou béton. - Seite 29 13. Branchez l’appareil uniquement quand son interrupteur est sur la position Arrêt. Débranchez l’appareil après utilisation. 14. Cet appareil ne doit pas être utilisé par des personnes (y compris les enfants) dont les capacités physiques, sensorielles ou mentales sont réduites, ou des personnes dénuées d’expérience ou de connaissance, sauf si elles ont pu bé- nécier, par l’intermédiaire d’une personne responsable de leur sécurité, d’une surveillance ou d’instructions préalables concernant l’utilisation de l’appareil.
- Seite 30 MESURES DE SÉCURITÉ POUR LES FAISCEAUX LASER Attention : Rayonnement laser Ne pas regarder dans le faisceau Appareil à laser de classe 2 Spécications laser selon la norme EN 60825-1:2014 NE REGARDEZ JAMAIS LE FAISCEAU LASER. Tout contact du faisceau avec les yeux par pourrait causer des blessures. Ne pas utiliser le laser lors de la coupe de matériaux rééchissants NE VISEZ PAS DES PERSONNES OU DES SURFACES RÉFLÉCHISSANTES AVEC LE FAISCEAU LASER.
- Seite 31 AVERTISSEMENT. Ne regardez pas directement en direction du faisceau la- ser. Des risques peuvent survenir si vous regardez délibérément à l’intérieur du faisceau. Veuillez observer les directives de sécurité suivantes : • Le laser doit être utilisé et entretenu conformément aux instructions du fab- ricant.
- Seite 32 Évitez tout contact du corps avec des surfaces reliées à la terre telles que les tuyaux, les radiateurs, les cuisinières et les réfrigérateurs.Il existe un risque accru de choc électrique si votre corps est relié à la terre. Ne pas exposer les outils à la pluie ou des conditions humides.La pénétration d'eau à...
- Seite 33 Si des dispositifs sont prévus pour le raccordement d’équipements pour l'extraction et la récupération des poussières, s'assurer qu’ils sont connectés et correctement utilisés.Utiliser des collecteurs de poussière peut réduire les risques dus aux poussières. 4) Utilisation et entretien de l'outil Ne pas forcer sur l’outil.
- Seite 34 mément à EN 60745-1. L’amplitude d’oscillation indiquée dans ces instructions d’utilisation a été mesurée suivant les méthodes de mesurage normées dans EN 60745-1 et peut être utilisée pour une comparaison d’appareils. Elle est également appropriée pour une esti- mation préliminaire de la sollicitation vibratoire. L’amplitude d’oscillation change en fonction de l’utilisation de l’appareil électroportatif et peut, dans certains cas, être supérieure à...
-
Seite 35: Description Des Symboles
DESCRIPTION DES SYMBOLES 1. SYMBOLES DE SÉCURITÉ L’utilisation des symboles dans ce manuel a pour but d’attirer l’attention sur les risques possibles. Les symboles de sécurité et les explications qui les accompa- gnent doivent être parfaitement compris. Les avertissements en eux-mêmes ne suppriment pas les risques et ne peuvent se substituer aux mesures correctes de prévention des accidents. - Seite 36 2. Produktsymbole In diesem Handbuch und/oder an dem Gerät nden Sie die nachstehenden Symbole. Sie geben wichtige Informationen über das Produkt oder Hinweise zur Bedienung. 1000 W 5300/min Puissance nominale Vitesse nominale mi n 5300 rpm 230-240 V~50 HZ 125 mm Tension nominale Disque de Meulage 125 X 10 mm...
- Seite 37 AVERTISSEMENT : Une lame de scie non protégée et qui n’est pas encore à l’arrêt total fait bouger la scie dans le sens contraire au sens de coupe et scie tout ce qui est sur son chemin. Tenir compte du temps de ralentissement de la lame. Interrupteur marche/arrêt Appuyez sur l'interrupteur ON/OFF (2) pour mettre en marche la scie plon- geante.
- Seite 38 3. Mode d'emploi Préparations REMARQUE: • Avant chaque utilisation, vérifi ez le bon fonctionnement de tous les acces- soires d'installation de la scie plongeante et n'utilisez cette dernière que si tout fonctionne correctement. • Placez la pièce de manière qu'elle ne puisse bouger ou se tordre pendant la coupe.
- Seite 39 Changement de la lame de scie / lame diamanté AVERTISSEMENT :Arrêtez toujours la scie plongeante et débranchez-la du secteur avant toute opération d'entretien. Appuyez sur le bouton de verrouillage (1) et abaissez le moteur. Maintenez enfoncé le dispositif d'arrêt de l'arbre (14). Utilisez une clé...
- Seite 40 Tiges de raccordement des rails de guidage Pour raccorder les deux rails de guidage, insérez la première tige de raccordement par le bas dans la rainure du rail de guidage. Insérez l'autre tige de raccordement dans la deuxième rainure. Utilisez une clé Allen 3 mm pour serrer les vis sans tête jusqu'à la butée an de raccorder les rails.
- Seite 41 Multi Matériaux) Diamètre extérieur: Ø 125 mm Diamètre intérieur: Ø 10 mm Épaisseur: 1.8 mm Nombre de dents / segments: 24 Vitesse de rotation maximale: 10,000 min Application: travaux de sciage Matériau: le bois, l’acier, les métaux non fer- reux, stratié, plastique, etc. Diamanté...
-
Seite 42: Entretien
REMARQUE: • Assurez-vous que l’aspirateur soit approprié à une utilisation avec l’appareil électrique. • L’aspiration de la poussière est particulièrement judicieuse lorsque de nom- breuses coupes sont exécutées les unes après les autres. Il est alors plus rarement nécessaire de faire des pauses an de nettoyer l’appareil électrique ou le poste de travail. -
Seite 43: Certificat De Garantie
Félicitations ! Vous avez fait un excellent choix en achetant ce produit de qualité. Notre engagement de qualité inclut également notre service de réparation. Jumbo offre un excellent service de réparation, pour tous les produits ayce Si, contre toute attente, vous rencontrez un problème dû à... -
Seite 44: Carte De Garantie
CARTE DE GARANTIE Prénom Nom de famille Rue/N° Téléphone Code postal Ville Tél. portable : N° de modèle Code-barres (EAN) Garantie (cochez la case) Numéro/date du reçu de vente (Fournissez également une copie du reçu de vente) Acheté dans un magasin Jumbo Quel problème est survenu (veuillez expliquer) (Décrivez le problème ou le dysfonctionnement de votre appareil aussi précisément que possible. - Seite 45 43 44 43 44 ible. ption assé » ible. ption assé » 180321_ayce_Multi-Tauchsäge_IM_rz.indd 45 21.03.18 13:31...
-
Seite 46: Liste Des Pièces
LISTE DES PIÈCES Nr. Dénomination Qté Nr. Dénomination Qté VIS MX10 (GAUCHE) SIÈGE D'AIGUILLE DE PROFONDEUR SERRE-JOINTS DE LARNE DE SCIE CERCLE LIMITE LAME DE SCIE Ø 125 COUVERCLE DE LA LAME DE SCIE SERRE-JOINTS DE LAME DE SCIE POINTEUR VIS COMBINÉE À... - Seite 47 BASE DE SUPPORT POIGNÉE DROITE PLAQUE INFÉRIEURE VIS TARAUDEUSE ST4.2 × 19 VIS ÉTAGÉE VIS TARAUDEUSE ST4.2 × 16 VIS CRUCIFORME M4 × 6 ROULEMENT 6000-2RS BOUTON DE RÈGLE ANNEAUX POUR ARBRE 12 RÈGLE DE GUIDAGE ENGRENAGE DE L'ARBRE DE SORTIE POIGNÉE GAUCHE ARBRE DE SORTIE CÂBLE...
- Seite 48 ROULEMENT À AIGUILLES8 × 12 × 8 ÉCROU M6 COUVRE CARTER D’ENGRENAGE ANNEAU COUPE-VENT VIS COMBINÉE À TÊTE CRUCIFOR- VIS TARAUDEUSEST4.2 × 70 MEM4 × 10 ROULEMENT 6000 SUPPORT DE LA BROSSE ROTOR BROSSE CARBONE ROULEMENT 627 SUPPORT DE LA BROSSE MANCHON DE ROULEMENT STATOR VIS À...
- Seite 49 NOTES 180321_ayce_Multi-Tauchsäge_IM_rz.indd 49 21.03.18 13:31...
-
Seite 50: Elenco Dei Componenti Principali
ELENCO DEI COMPONENTI PRINCIPALI Interruttore di blocco Blocco dell’albero Interruttore on/o Binari di guida Impugnatura Chiave a brugola Tappo spazzola al carbonio (x2) Barre di giunzione Manopola di regolazione della Lama multifunzione 24 denti profondità Piastra di base Interruttore laser Vite Disco diamantato Lama... -
Seite 51: Caratteristiche Tecniche
CARATTERISTICHE TECNICHE Modello: M1Y-KZ-125 Motore a corrente alternata: 230-240V~/50Hz Potenza nominale : 1000 W Velocità a vuoto: 5300 min Lama riportata in metallo duro (mm): Ø125x Ø10 Livello di pressione sonora LpA 100.1dB(A) K=3 dB(A) Livello di potenza sonora LwA 111.1 dB(A) K=3 dB(A) -
Seite 52: Uso Previsto
INFORMAZIONI IMPORTANTI Ayce Power si riserva il diritto di modicare e migliorare il prodotto e le sue speciche tecniche in qualsiasi momento e senza preavviso. USO PREVISTO La sega ad aondamento è concepita per il taglio di legno e ani, gesso e materiali in bra legati con cemento e plastica, piastrelle, granito o calcestruzzo. - Seite 53 13. Inserire la spina dell'apparecchio nella presa elettrica solo quando l'apparecchio è spento. Scollegare la spina dalla presa elettrica dopo l'uso. 14. Questo apparecchio non deve essere utilizzato da persone (bambini inclusi) con ridotte capacità siche, mentali o sensoriali oppure senza esperienza e conoscenza del prodotto, a meno che non siano sorvegliate o istruite sulle modalità...
- Seite 54 NORME DI SICUREZZA PER LE LUCI LASER Attenzione: raggio laser Non rivolgere lo sguardo verso il raggio laser Classe del laser 2 Speciche laser secondo la norma EN 60825-1:2014 NON FISSARE DIRETTAMENTE IL RAGGIO LASER. Il contatto del raggio con gli occhi può causare lesioni. Non usare il laser con ma- teriali da taglio riettenti.
-
Seite 55: Norme Di Sicurezza Generali
AVVERTENZA. Non ssare direttamente il raggio laser. Se si ssa deliberata- mente il laser, ci possono essere conseguenze per gli occhi. Si raccomanda di osservare le seguenti regole di sicurezza. • Utilizzare e sottoporre a manutenzione il laser secondo le istruzioni del pro- duttore. -
Seite 56: Sicurezza Personale
Evitare eventuali contatti con le superfi ci messe a terra o a massa (vale a dire tubi, radiatori, cucine, frigoriferi, ecc.).I rischi di scosse elettriche aumenta- no se una parte del proprio corpo è a contatto con superci messe a terra o a massa. -
Seite 57: Manutenzione
Indossare un abbigliamento adatto. Non indossare indumenti ampi o gioielli. Mantenere i capelli, gli indumenti e le mani a distanza dai componenti mobili. Gli abiti ampi, i gioielli e i capelli lunghi potrebbero rimanere impigliati nelle parti in movimento dell’apparecchio. Nel caso in cui l’apparecchio abbia in dotazione un dispositivo di aspirazione della polvere, assicurarsi che venga installato ed utilizzato in modo corretto. - Seite 58 Informazioni sulla rumorosità e sulle vibrazioni Valori misurati conformemente alla norma EN 60745-1. INDOSSARE DISPOSTIVI DI PROTEZIONE PER LA ORECCHIE! Il livello di vibrazioni indicato nelle presenti istruzioni è stato rilevato seguendo una procedura di misurazione conforme alla norma EN 60745-1 e può essere utilizzato per confrontare gli elettroutensili.
- Seite 59 SIMBOLI DEL PRODOTTO 1. Simboli di sicurezza L’uso di simboli nel presente manuale ha lo scopo di informare circa i possibili rischi. È opportuno acquisire una perfetta familiarità con i simboli sulla sicurezza e le relative spiegazioni. Le avvertenze implicite non annullano i rischi e non posso- no sostituire le contromisure corrette per la prevenzione degli incidenti.
-
Seite 60: Funzionamento
2. Simboli sul prodotto In questo manuale e/o sulla macchina, possono essere presenti i seguenti simboli, che evidenziano informazioni o istruzioni importanti relative al prodotto. Potenza nominale: Velocità a vuoto: 1000 W 5300/min mi n 5300 rpm Tensione nominale: 125 mm 230 V~50 Hz Dischi di diametro 125 X 10 mm... - Seite 61 AVVERTENZA: Una lama non protetta, che gira per inerzia, farà rimbalzare all'indietro la sega, tagliando tutto ciò che trova sul suo percorso. Tenere conto del tempo necessario per arrivare all’arresto completo della lama una volta rilasciato l’interruttore. Interruttore di accensione/spegnimento (ON/OFF) Premere l’interruttore ON/OFF (2) per accendere la sega ad aondamento.
- Seite 62 3. Uso dell’apparecchio Preparazione NOTA: • Prima dell’uso controllare sempre il corretto funzionamento di tutti i com- ponenti installati e montati sulla sega ed utilizzarla solo se tutto funziona correttamente. • Fissare il pezzo da lavorare di modo tale che non possa muoversi o piegarsi durante il lavoro.
- Seite 63 Sostituzione della lama/disco diamantato AVVERTENZA : Prima di effettuare qualsiasi intervento di manutenzione, spegnere sempre la sega e staccare la spina dalla presa di corrente. Premere l’interruttore di blocco (1) e spingere il motore verso il basso. Tenere premuto il blocco del mandrino (14). Utilizzare una chiave a brugola di 5 mm (16) per girare leggermente in senso orario o antiorario la vite (7) sulla lama della sega no a far scattare in posizio- ne il mandrino.
- Seite 64 Barre di giunzione per binari di guida Per collegare due binari di guida far scorrere la prima barra dal basso all’interno della scanalatura del binario. Inlare l’altra barra nella seconda scanalatura. Utilizzare la chiave a brugola di 3 mm per stringere le viti prigioniere al necorsa per unire i binari.
- Seite 65 MM (multi-materiale) Diametro esterno: Ø 125 mm Diametro foro: Ø 10 mm Spessore: 1.8 mm Numero di denti/settore: 24 Velocità di rotazione massima consentita: 10,000 min Applicazione: Segare Materiale: legno, acciaio, materiale non ferroso, laminato, plastica etc Diamentato Diametro esterno: Ø 125 mm Diametro foro: Ø...
- Seite 66 NOTA: • Accertarsi che l’aspiratore utilizzato sia indicato per l’uso con l’apparecchio elettrico. La maggior parte degli aspirapolvere per uso domestico sono indica- ti per questa applicazione. • L’aspiratore è particolarmente indicato nel caso di più tagli praticati in succes- sione.
-
Seite 67: Certificato Di Garanzia
Congratulazioni per avere acquistato questo prodotto di alta qualità. Il nostro impegno per la qualità include anche l'assistenza. Jumbo dispone di un eccellente servizio di riparazione, per tutti e prodotti ayce. Qualora si riscontrino difetti relativi ai materiali o allafa- bbricazione entro CINQUE ANNI dalla data di acquisto del prodotto, l'utente potrà... -
Seite 68: Scheda Di Garanzia
SCHEDA DI GARANZIA Nome Cognome Via/Num. Telefono Codice postale Città Telefono cellulare Codice articolo Codice a barre (EAN) Garanzia (contrassegnare con una croce) Numero/data dello scontrino (Allegare una copia dello Sì scontrino di vendita) Acquistato presso un punto vendita Jumbo Problema riscontrato (specificare) (Descrivere il problema nel modo più... - Seite 69 67 68 67 68 180321_ayce_Multi-Tauchsäge_IM_rz.indd 69 21.03.18 13:31...
- Seite 70 ELENCO COMPONENTL Nr. NOME COMPONENTE NOME COMPONENTE VITE MX10(SINISTRA) SEDE AGO PROFONDITÀ FISSAGGIO LAMA DELLA SEGA CERCHIO DI DELIMITAZIONE LAMA DELLA SEGA Ø 125 COPRILAMA FISSAGGIO LAMA DELLA SEGA PUNTATORE VITE INTAGLIO A CROCE COMBINATO SCATOLA INGRANAGGI M4 × 20 COPRILAMA PULSANTE ECCENTRICO VITE CON INTAGLIO A CROCE 4 ×...
- Seite 71 BASE DI SUPPORTO IMPUGNATURA DESTRA PIASTRA DI FONDO VITE AUTOFILETTANTE ST4.CX19 VITE A GRADINI VITE AUTOFILETTANTE ST4.2 × 16 VITE CON INTAGLIO A CROCE M4 × 6 CUSCINETTO 6000 - 2RS MANOPOLA RIGHELLO ANELLI PER ALBERO 12 INGRANAGGIO DELL’ALBERO DI RIGHELLO DI GUIDA USCITA IMPUGNATURA SINISTRA...
- Seite 72 CUSCINETTO AD AGHI 8 × 12 × 8 DADO M6 COUVRE CARTER D’ENGRENAGE ANELLO FRANGIVENTO VITE INTAGLIO A CROCE COMBINATO VITE AUTOFILETTANTE ST4.2 × 70 M4 × 10 CUSCINETTO 6000 PORTASPAZZOLA ROTORE SPAZZOLA DI CARBONIO CUSCINETTO 627 PORTASPAZZOLA MANICOTTO DEL CUSCINETTO STATORE VITE AD ESAGONO INCASSATO M4 ALLOGGIAMENTO...
- Seite 73 NOTE 180321_ayce_Multi-Tauchsäge_IM_rz.indd 73 21.03.18 13:31...
- Seite 74 LIST OF MAIN PART Locking Swtich Shaft Lock ON/OFF Swtich Guide rails Main Handle Allen Key Carbon Brush Cap (x2) Connecting Rods Depth Adjustment Knob Multi Purpose Blade 24 teeth Base Plate Laser Switch crew Diamond Blade Blade 22.5 mm Flange (M14) Cutting Line Parallel Guide Parallel guide/Rail Connector...
-
Seite 75: Delivery Scope
CARATTERISTICHE TECNICHE Modell M1Y-KZ-125 Voltage/Frequency: 230-240V~/50Hz Input power : 1000 W No-load speed: 5300 min Blade size (mm): Ø125x Ø10 Sound Pressure level LpA 100.1dB(A) K=3 dB(A) Sound Power level LwA 111.1 dB(A) K=3 dB(A) Laser class Laser wave length... -
Seite 76: Intended Use
IMPORTANT INFORMATION At any time and without prior notice Ayce Power tool reserves the right to change and improve the design and the technical specications of this product. INTENDED USE The plunge saw is intended to cut wood and similar materials, gypsum and cement- bonded bre materials and plastics, tile, granite or concrete. - Seite 77 of their safety. 15. Do not bring your hands in the cutting area and the saw blade. 16. Keep in mind that even a worn saw blade is still very sharp. Always grasp the saw blade on the sides. Do not ing the saw blade and do not drop it. 17.
-
Seite 78: Safety Rules For Laser Lights
SAFETY RULES FOR LASER LIGHTS Attention: Laser radiation Do not stare into the beam Class 2 laser Laser specication according to EN 60825-1:2014 NEVER LOOK INTO THE LASER BEAM. Any contact with the eyes by the beam could cause injury. Do not use the laser when cutting reective materials. - Seite 79 WARNING. Do not stare directly at the laser beam. A hazard may exist if you deliberately stare into the beam, please observe all safety rules as follows; • The laser shall be used and maintained in accordance with the manufacturer’s instructions.
- Seite 80 Do not abuse the cord. Never use the cord for carrying, pulling or unplugging the power tool. Keep cord away from heat, oil, sharp edges or moving parts. Damaged or entangled cords increase the risk of electric shock. When operating a power tool outdoors, use an extension cord suitable for outdoor use.
-
Seite 81: Noise/Vibration Information
power tool before making any adjustments, changing accessories, or storing power tools. Such preventive safety measures reduce the risk of starting the power tool accidentally. Store idle power tools out of the reach of children and do not allow persons unfamiliar with the power tool or these instructions to operate the power tool. -
Seite 82: Description Of The Symbols
DESCRIPTION OF THE SYMBOLS 1. Safety symbols The use of symbols in this manual is intended to draw your attention to possible risks. The safety symbols and the explanations that accompany them must be per- fectly understood. The warnings in themselves do not remove the risks and cannot replace correct actions for preventing accidents. - Seite 83 2. Product symbols In this manual and/or on the machine the following symbols are used. These re- present important information about the product or instructions on its use. 1000 W 5300/min Rated output No load speed mi n 5300 rpm 230-240 V~50 HZ 125 mm Rated voltage...
-
Seite 84: Operation
OPERATION 1. Before use • Remove any packing material and loose parts from unit. • Check the accessories before use. They should fi t with the machine and your purpose 2. Functions Guard function • Check guard for proper closing before each use. Do not operate the saw if guard does not move freely and close instantly. - Seite 85 WARNING: An unprotected, coasting bladewill cause the saw to walk backwards, cutting whatever is in its path. Be aware of the time it takes for the balde to stop after switch is released. ON/OFF swtich Press the ON/OFF switch (2) to switch the plunge saw on. Release the ON/OFF switch (2) to switch the plunge saw o.
- Seite 86 3. Operation of the appliance Preparation NOTE: • Before each use check the proper function of all installation fi xtures of the plunge saw and only use the plunge saw if everything works properly. • Attach the work piece in such way that it cannot move or bend during work. Line the work piece respectively.
- Seite 87 Change saw blade / diamond blade WARNING: Before any maintenance work always switch off the plunge saw and disconnect from mains power. Press the locking switch (1) down and push the motor down. Press and hold the spindle lock (14) down. Use a 5 mm Allen key (16) to turn the screw (7) at the saw blade slightly clock- wise or counter-clockwise until the spindle clicks into place.
- Seite 88 Conneting rods for guide rails To connect both guide rails slide the rst connecting rod from the bottom into the groove of the guide rail. Slide the other connecting rod into the second groove. Use the 3 mm Allen key to tighten the stud screws to the limit stop to connect the rails.
- Seite 89 MM (Multi Material) External diameter: Ø 125 mm Bore diameter: Ø 10 mm Strength: 1.8 mm Number of teeth/segment: 24 Max. permissible rotation speed: 10,000 min Application: Saw work Material: wood, steel, non-ferro, laminate, plastic etc Diamond External diameter: Ø 125 mm Bore diameter: Ø...
- Seite 90 NOTE: • Make sure that the vacuum cleaner is suitable for use with the electric power tool. Most dry vacuum cleaners for domestic use are well suited to this purpose. • The vacuum cleaner is particularly useful if many cuts are being performed successively.
-
Seite 91: Warranty Certificate
Additional note service center: Defect products can be returned to every jumbo store during the warranty period. After the warranty period, the ayce products are accepted in any jumbo store, so the product may be tested in accordance. CH-Import & Distribution exklusiv durch: Jumbo-Markt AG, Industriestrasse 34, 8305 Dietlikon 180321_ayce_Multi-Tauchsäge_IM_rz.indd 91... -
Seite 92: Warranty Card
WARRANTY CARD First name Last name Street/No. Telephone Postal Code City Mobile Item number Barcode (EAN) Warranty (please mark with an «“X”) Sales receipt number/Date (please also attach a copy of the sales receipt) Purchased at Jumbo store Which error occurred (please specify) (Please describe the problem or malfunction of your device as accurately as possible. - Seite 93 91 92 91 92 180321_ayce_Multi-Tauchsäge_IM_rz.indd 93 21.03.18 13:31...
-
Seite 94: Part List
PART LIST No. DESCRIPTION No. DESCRIPTION SCREW MX10(LEFT) DEPTH NEEDLE SEAT SAW BLADE CLAMP LIMIT CIRCLE SAW BLADE Ø 125 SAW BLADE COVER SAW BLADE CLAMP POINTER CROSS COMBINATION SCREW M4 GEAR BOX × 20 SAW BLADE COVER ECCENTRIC BUTTON VIS CRUCIFORME 4 ×... - Seite 95 SUPPORTING BASE RIGHT HANDLE BOTTOM PLATE TAPPING SCREW ST4.2 × 19 STEPPED SCREW TAPPING SCREW ST4.2 × 16 CROSS HEAD SCREW M4 × 6 BEARING 6000-2RS RULER KNOB RINGS FOR SHAFT 12 GUIDE RULER GEAR OF THE OUTPUT SHAFT LEFT HANDLE OUTPUT SHAFT CABLE FLAT KEY 3 ×...
- Seite 96 NEEDLE BEARING 8 × 12 × 8 NUT M6 GEAR BOX COVER BREAK WIND RING CROSS COMBINATION SCREW M4 TAPPING SCREW ST4.2 × 70 × 10 BEARING 6000 BRUSH HOLDER ROTOR CARBON BRUSH BEARING 627 BRUSH HOLDER BEARING SLEEVE STATOR HESAGAN SOCKET CAP SCREW M4 HOUSE ×...
- Seite 97 NOTE 180321_ayce_Multi-Tauchsäge_IM_rz.indd 97 21.03.18 13:31...
- Seite 98 CH-Import & Distribution exklusiv durch: Jumbo-Markt AG Industriestrasse 34, 8305 Dietlikon 180321_ayce_Multi-Tauchsäge_IM_rz.indd 98 21.03.18 13:31...