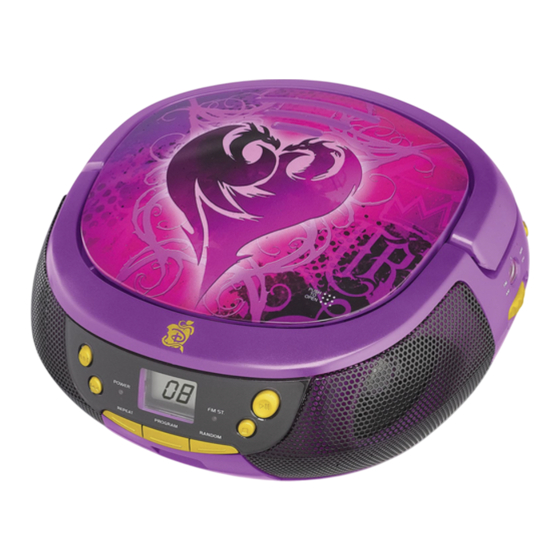
eKids 430 Bedienungsanleitung
Cd-boombox mit mikrofon
Inhaltsverzeichnis
Verfügbare Sprachen
Verfügbare Sprachen
IMPORTANT SAFETY INSTRUCTIONS
1. Read these instructions.
2. Keep these instructions.
3. Heed all warning.
4. Follow all instructions.
5. Do not use this apparatus near water.
6. Clean only with dry cloth.
7. Do not block any ventilation openings. Install in accordance with the
manufacture's instructions.
8. Do not install near any heat sources such as radiators, heat registers, stoves, or
other apparatus (including amplifiers) that produce heat.
9. Do not defeat the safety purpose of the polarized or grounding plug. A polarized
plug has two blades with one wider than the other. A grounding plug has two
blades and a third grounding prong. The wide blade or the third prong is
provided for your safety. If the provided plug does not fit into your outlet, consult
an electrician for replacement of the obsolete outlet.
10. Protect the power cord from being walked on or pinched particularly at the plugs,
convenience receptacles, and at the point where they exit from the apparatus.
11. Only use attachments/accessories specified by the manufacturer.
12. Use only with the cart, stand, tripod, bracket, or table specified by the
manufacturer, or sold with the apparatus. When a cart or rack is used, use caution
when moving the cart/apparatus combination to avoid injury from tip-over.
13. Unplug the apparatus during lightning storms or when unused for long periods
of time.
14. Refer all servicing to qualified personnel.
Servicing is required when the apparatus has
been damaged in any way.
Examples of
damage include: Power supply cord or plug is
damaged, liquid has been spilled or objects
have fallen into the apparatus, the apparatus
has been exposed to rain or moisture, does
not operate normally, or has been dropped.
Portable Cart Warning
WARNING:
To reduce the risk of fire or electric shock, do not expose this appliance to rain or moisture.
CAUTION:
Use of controls or adjustments or performance of procedures other than those
specified may result in hazardous radiation exposure.
CAUTION
- TO REDUCE THE RISK OF ELECTRIC SHOCK, DO NOT REMOVE
COVER (OR BACK) NO USER-SERVICEABLE PARTS INSIDE. REFER TO
QUALIFIED SERVICE PERSONNEL.
This lightning flash with arrowhead symbol within an equilateral triangle,
is intended to alert the user to the presence of non-insulated
"dangerous voltage" within the product's enclosure that may be of
sufficient magnitude to constitute a risk of electric shock to persons.
The exclamation point within an equilateral triangle is intended to alert
the user to the presence of important operating and maintenance
(servicing) instructions in the literature accompanying the appliance.
• The a p p a r a t u s s hall n o t b e ex p os ed to dr i p p i n g o r s p l a sh i n g a n d t ha t
no o b je c ts f il led w it h l iqu id s , s uc h as v a se s , sh a l l be p l ac e d o n
ap p a ra tu s.
• Main s p lu g is u se d a s di s c on n ec t d e vi ce a n d i t sh o u l d r em a i n r ea d i l y
op e ra b le d u r in g i nt en d ed us e . I n or d e r to di sc o nn e ct th e a p p a r a tu s
from th e m a in s c o m ple t ely, t h e m a in s p l u g s h o ul d be di sc o nn e ct e d
form th e m a i ns s o c k e t o ut le t c o m pl e tel y.
• Batt e r y sh a ll n o t b e ex po s ed to e xc e ssi v e h e a t s uc h as su n sh i n e ,
fi re o r t h e like .
BASIC FUNCTION
SWITCHING ON THE UNIT
Slide the FUNCTION switch to CD/AUX or RADIO and the power indicator will
light up on the front of the unit.
NOTE: In CD/Aux in mode, when the unit is not providing the main function for 15
minutes, the unit will automatically switch into standby mode. To turn on the unit
again, press "PLAY/PAUSE" button (controls 12).
TURNING OFF THE UNIT
• Slide the FUNCTION switch to OFF, and the power indicator will turn off.
ADJUSTING VOLUME
Rotate the VOLUME CONTROL clockwise or counterclockwise to increase or
decrease volume.
RADIO OPERATION
1. Slide the FUNCTION switch to RADIO position.
2. Slide the BAND switch to select AM or FM.
3. Tune to your desired station by rotating the TUNING KNOB.
4. Extend the TELESCOPIC ANTENNA to its full length if you are listening to FM
broadcasting.
Note: The FM STEREO indicator will be on if you are receiving an FM stereo program.
5. Rotate the unit back and forth to get the best reception in AM program, or place
the unit in open space.
6. Turn off the radio by sliding the FUNCTION switch to "OFF" position.
Note: This unit includes a built-in FM antenna for added safety.
CD OPERATION
Discs for playback
This system is CD/DA-CDR-CDRW compatible. Keep discs free of dirt and
scratches. Do not touch the unit's CD lens.
LOADING A DISC
1. Set the FUNCTION switch to CD/AUX position.
2. Open the CD door.
3. Place an audio CD into the tray with the label side facing up.
4. Close the CD door. The total number of tracks will appear in the display.
5. To start playback, press PLAY/PAUSE button.
Note:
• To ensure good system performance, wait until the disc tray completely reads the
disc before proceeding.
• If no disc is loaded into the compartment, or the disc is placed upside down, the
display will show " No ".
PLAYING A DISC
1. Press the PLAY/PAUSE button on the unit to start playback. The playback starts
from track 1, "►" will appear on the display.
2. To interrupt playback, press the PLAY/PAUSE button, "►" and the track number
will flash on the display.
3. To resume playback, press the PLAY/PAUSE button again.
4. To stop playback, press the STOP button, and the total number of tracks will
appear in the display.
SELECTING A DESIRED TRACK/PASSAGE
• Press the CD SKIP/SEARCH NEXT/BACK buttons repeatedly in stop mode or
during play until the desired track appears on the display.
• Press the PLAY/PAUSE button to start play.
To search for a particular passage during playback, press and hold the CD
SKIP/SEARCH NEXT/BACK buttons to scan the current playing track at high
speed until desired point passage, and then release the button. Playback will start
again from this point.
MICROPHONE OPERATION
This unit provides one 3.5mm Mic Jack for Karaoke function. The microphone is
available in all modes. Connect a 3.5mm microphone to the mic jack, then turn on
the microphone.
DANGER!
This Compact disc player is classified
as a Class 1 LASER PRODUCT.
THE CLASS 1 LASER PRODUCT
label is located on the rear exterior.
l Avoid installing the unit in locations described below:
1. Places exposed to direct sunlight or close to heat radiating appliances
such as electric heaters, or other equipments that radiate too much
heat.
2. Places subjected to constant vibration.
3. Unventilated or dusty places.
4. Humid or moist places.
l Operate buttons and switches as instructed in the manual.
l Before turning on the power for the first time, make sure that the power
cord is properly installed and the voltage switch is correctly set.
l Store your CD or other devices in a cool area to avoid damage from heat.
CONTROLS
1. HANDLE
9. CD SKIP/SEARCH
2. AM/FM
BACK BUTTON
3. TUNING CONTROL
10. REPEAT BUTTON
4. DIAL SCALE
11. PROGRAM BUTTON
5. CD COMPARTMENT
12. PLAY/PAUSE BUTTON
6. FUNCTION SWITCH
13. CD STOP BUTTON
7. VOLUME CONTROL
14. RANDOM BUTTON
8. CD SKIP/SEARCH
15. SPEAKERS
NEXT BUTTON
16. POWER INDICATOR
CD Boombox
Getting Started
ACCESSORIES:
Instruction Booklet: 1pc
AC Cord: 1 pc
Microphone: 1 pc
POWER SOURCE
This unit is designed to be operated on AC or DC power.
AC OPERATION
Plug the tail of AC power cord into AC socket on the unit and
the plug into household AC outlet.
DC OPERATION
Open the BATTERY COMPARTMENT DOOR. Install 6 pcs
UM-2/C size batteries (not included) into compartment. Please
follow correct polarities as indicated. Disconnect the power
supply cable from the back of unit.
For the Best Possible Performance
• Only use the recommended/supplied batteries or equivalent.
• Use alkaline batteries for longer life.
• Do not mix old and new batteries, and do not mix alkaline, carbon-zinc or rechargeable nickel-cadmium batteries.
• Insert batteries with proper polarity (+/–) as indicated.
• Remove exhausted batteries from product.
• Recharge rechargeable batteries under adult supervision.
• Do not attempt to recharge non-rechargeable batteries.
• Do not open batteries or heat them beyond normal ambient temperatures.
• To prevent battery leakage or damage remove batteries from a product if it will not be used for a month or longer.
• Use extreme caution handling leaking batteries (avoid direct contact with eyes and skin). If battery leakage comes in contact with
eyes, IMMEDIATELY flush the eye with lukewarm and gently flowing water for at least 30 minutes. If skin contact occurs, wash skin
with clear water for at least 15 minutes. Seek medical attention if any symptoms occur.
• Store in cool, dry, ventilated area away from hazardous or combustible material.
• Do not dispose of batteries in the household trash or fire.
• Follow applicable laws and local regulations for the disposal and transportation of batteries.
• Batteries must be disposed of separately at your local waste recycling center. Do not dispose of them in your household waste bin.
PROGRAM TRACKS
1. In stop mode, press the PROGRAM button, the PROG will flash and the 01
indicator will be on.
2. Press the CD SKIP/SEARCH NEXT button to select the first desired track to be
programmed.
3. Press the PROGRAM button to enter. The display will show "02".
4. Repeat steps 2 & 3 to store other desired tracks until all tracks are programmed
(max 20 tracks).
5. Press "PROG" button once more and all the programmed track numbers will be
shown one by one.
6. Press the PLAY/PAUSE button to start playback from the first programmed track.
(Press the STOP button to stop program playback.)
Note: To erase the Program memory, you can either press the STOP button when the
disc is stopped, or open the CD compartment lid.
REPEAT
You can play one track or all tracks on the disc repeatedly.
1. To repeat a single track, press the REPEAT button once in play mode, "REPEAT
1" will flash on the display. To cancel, press the REPEAT button until " REPEAT 1"
disappears from the display.
2. To repeat ALL tracks, press REPEAT button until "REPEAT ALL" shows steady on
the display. To cancel, press the REPEAT button control until " REPEAT ALL "
disappears from the display.
RANDOM PLAY
Press the RANDOM button in play mode until " RDM " shows steady on the display.
The random play will start from the next track automatically (or press CD skip forward
button), until all tracks are played. Press the RANDOM button again to cancel.
AUX-IN OPERATION
This unit has an AUX-IN jack, through this jack other audio sources (MP3 players,
etc) can be connected to this unit and be amplified.
1. Set the FUNCTION switch to CD/AUX position.
2. Connect the audio cable into the AUX-IN jack and the other end connect to the
AUDIO OUT jack of the external audio source. The unit will change to AUX mode
24
automatically.
3. Press PLAY on the external audio source to start playback.
25
17. LCD DISPLAY
18. FM STEREO INDICATOR
19. FM TELESCOPIC ANTENNA
20. BATTERY COMPARTMENT
21. AC SOCKET
22. AUX-IN JACK
23. MIC JACK
24. MICROPHONE
25. AC POWER CORD
with Microphone
Model: 430
POWER REQUIREMENTS:
Power Source: AC230V ~ 50Hz
DC 9V 1.5V UM-2/C x 6pcs (battery not included)
BATTERY
INSTALLATION
DC 1.5V
DC 1.5V
UM-2 "C"size
UM-2 "C"size
DC 1.5V
DC 1.5V
UM-2 "C"size
UM-2 "C"size
OPEN
OPEN
DC 1.5V
DC 1.5V
UM-2 "C"size
UM-2 "C"size
Inhaltsverzeichnis

Verwandte Anleitungen für eKids 430

Inhaltszusammenfassung für eKids 430
-
Seite 12: Wichtige Sicherheitshinweise
2. Bewahren Sie diese Bedienungsanleitung auf. DAS KLASSE 1 LASER PRODUCT 3. Beachten Sie alle Warnungen. Label befindet sich auf der Rückseite. Modell: 430 Erste Schritte 4. Befolgen Sie alle Anleitungen. ANFORDERUNGEN AN DIE 5. Verwenden Sie das Gerät nicht in der Nähe von Wasser.