Icy Box IB-RD2252 Benutzerhandbuch
External 2bay 2.5" sata raid enclosure

Inhaltszusammenfassung für Icy Box IB-RD2252
- Seite 1 IB-RD2252 External 2bay 2.5" SATA RAID Enclosure Benutzerhandbuch / Manual Version 1.0...
-
Seite 2: Mac Anforderungen
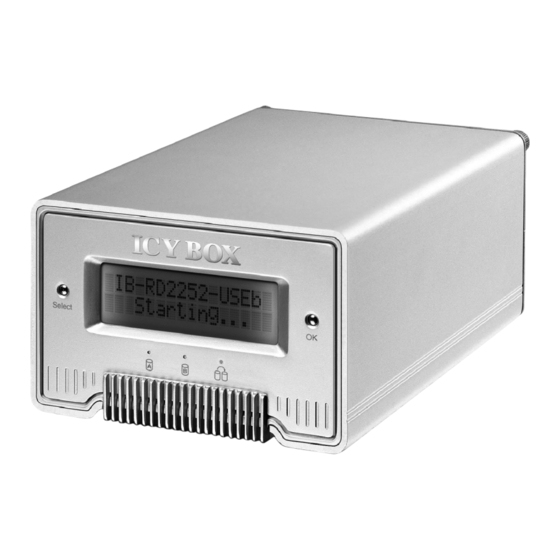
IB-RD2252 2x 2,5" RAID Gehäuse EInlEITunG Systemanforderungen 1.1.1 PC Anforderungen • Minimum Intel Pentium III CPU 500MHz, 128 MB RAM • PC mit eSATA Anschluss: Windows XP/Vista/7 • PC mit FireWire 800 Anschluss: Windows XP/Vista/7 • PC mit USB 2.0 Anschluss: Windows XP/Vista/7 • Ihre Hardware muss über eine entsprechende Datenschnittstelle verfügen (z.B. USB 2.0 Host Controller) • Plug & Play Unterstützung für eSATA Host Controller 1.1.2 Mac Anforderungen • Minimum Apple G4 Prozessor, 128 MB RAM • Mac mit eSATA Anschluss: Mac OS 10.4 oder höher • Mac mit FireWire 800 Anschluss: Mac OS 10.2 oder höher • Mac mit USB 2.0 Anschluss: Mac OS 10.2 oder höher • Ihre Hardware muss über eine entsprechende Datenschnittstelle verfügen (z.B. USB 2.0 Host Controller) • Plug & Play Unterstützung für eSATA Host Controller 1.1.3 Unterstützte Festplatten... - Seite 3 IB-RD2252 2x 2,5" RAID Gehäuse Übersicht IB-RD2252 1.5.1 Frontansicht IB-RD2252 lED/Taste Status • Grün = Datenzugriff (lesen/schreiben) • Rot = Fehler oder leerer Festplattensteckplatz • Aus = Festplattenstatus normal • Orange = Datenwiederherstellung Select • Wählen des Auswahl- oder Setupmenüs • Bestätigung der aktuellen Auswahl oder Setupmenü aktivieren.
- Seite 4 IB-RD2252 2x 2,5" RAID Gehäuse 1.5.2 Rückansicht IB-RD2252 Beschriftung Bedeutung DC IN Stromanschluss USB 2.0 USB 2.0 Datenschnittstelle FW800 FireWire 800 Datenschnittstelle eSATA eSATA Datenschnittstelle RAID RAID Modus ist gesperrt und kann nicht verändert werden. RAID RAID Modus kann über das LCD Display verändert werden.
-
Seite 5: Raid 0 - Disk Striping (Zugriffsbeschleunigung Ohne Redundanz)
IB-RD2252 2x 2,5" RAID Gehäuse RAID Modi Bevorzugt sollten Festplatten der gleichen Kapazität verwendet werden. Sollten die Kapazitäten unter- schiedlich sein, wird die Summe der zur Verfügung stehenden Gesamtkapazität immer nur der kleineren Festplatte entsprechen. Einen Geschwindigkeitsunterschied wird immer nur über schnelle Datenschnitt- stellen wie z.B. eSATA erkennbar und nutzbar sein. 1.6.1 RAID 0 – Disk Striping (Zugriffsbeschleunigung ohne Redundanz) Hier werden beide Festplatten als ein großes Laufwerk abgebildet, allerdings wird nur die Kapazität der kleineren Platte verdoppelt. Diese Einstellung sollte verwendet werden, wenn es primär um sehr schnelle Datenzugriffe geht, allerdings steht dann keine Redundanz zur Verfügung. Wenn also eine Festplatte ausfällt, bedeutet dies meist den Verlust sämtlicher gespeicherten Daten. Storage Capacity Data Safety Performance 2 Fest- platten 1.6.2 RAID 1 - Disk Mirroring (Festplattenspiegelung) Hier werden beide Festplatten ebenfalls als ein Laufwerk abgebildet, allerdings nur mit 50% der Gesamt- kapazität beider Festplatten, basierend auf der kleineren Festplatte. Im RAID 1 Modus wird eine genaue Kopie der ersten Festplatte auf die zweite Festplatte erstellt (Spiegelung). Diese Einstellung sollte ver- wendet werden, wenn Datensicherheit einer höheren Kapazität vorzuziehen ist. Wenn also eine Festplatte... -
Seite 6: Systemeinrichtung
IB-RD2252 2x 2,5" RAID Gehäuse Anmerkung Das Wechseln des RAID Modus erfordert ein Neuformatieren der Festplatten. Durch diesen Vorgang werden alle Daten auf den Festplatten gelöscht. Stellen Sie sicher, das vorher alle vorhanden Daten auf einen anderen Datenträger gesichert werden. Wichtig Damit ein Computer auf Datenträger größer 2 TB zugreifen kann, muss die Hardware, sowie das Be- triebssystem diese Funktion unterstützen (z.B. Windows Vista 32bit/64bit oder Mac OS 10.4 und höher). SYSTEM EInRICHTunG IB-RD2252 Festplatteninstallation Zur Festplatteninstallation gehen Sie bitte wie folgt vor: Entfernen Sie die Schrauben an der Rückseite des Gerätes und entfernen den oberen Teil der Abdeckung. den oberen Teil der Abdeckung. Ziehen Sie den Festplattenträger aus dem Gehäuse heraus. - Seite 7 IB-RD2252 2x 2,5" RAID Gehäuse Setzen Sie die Festplatte in den Träger ein und befestigen Sie diese mit zwei Schrauben auf jeder Seite. Wiederholen die vorhergehenden Schritte für die zweite Festplatte. Setzen Sie die Abdeckung der Rückseite Schieben Sie die Festplattenträger wieder ein und drehen die Schrauben mit eingesetzter Festplatte unter leichtem wieder ein um die Installation Druck in das Gehäuse zurück. abzuschließen. Verbinden Sie das Gerät mit der Stromversorgung und stellen unter Verwendung des LCD Displays Ihren bevorzugten RAID Modus ein. Verbinden Sie das IB-RD2252 mittels Datenkabel mit Ihrem Computer. PC Benutzer können unter Verwendung der Datenträgerverwaltung, MAC Benutzer unter Verwendung der Festplattenverwaltung, eine entsprechende Partitionierung und anschließende Formatierung vornehmen. Fertig! Ihre IB-RD2252 ist nun einsatzbereit.
- Seite 8 I st ein RAID 1 Modus eingestellt, wird der Datenträgerverbund automatisch wiederhergestellt. Während dieses Prozesses blinkt die Wiederherstellungs-LED. Der Wiederherstellungsprozess des RAID-Verbundes kann abhängig von der Festplattenkapazität, einige Stunden in Anspruch neh- men. I st ein RAID 0 Modus eingestellt, wechseln Sie in das RAID-Einstellungsmenü, wählen erneut RAID 0 und bestätigen diese Einstellung. Nach dem Neustart des Gerätes, formatieren Sie das entstandene Laufwerk in gewohnter Weise. Anmerkung Stellen Sie sicher, dass die Stromversorgung während des Wiederherstellungsprozesses nicht unterbro- chen wird. Sollte dies trotzdem geschehen, wird der Wiederherstellungsprozess nach der Verbindung mit der Stromquelle fortgesetzt. Verbindung mit dem Computer Einige Anmerkungen zur Verwendung des IB-RD2252: • Setzen Sie das Gerät keine Nässe oder hoher Luftfeuchtigkeit aus. • Verdecken Sie auf keinen Fall die Lüftungsöffnungen. • V or der ersten Verbindung mit dem Computer setzen Sie bitte entsprechende Festplatten ein und wählen den bevorzugten RAID Modus. • Z um sicheren Entfernen der IB-RD2252 vom Computer unter der Vermeidung von Datenverlust, folgen Sie der korrekten Trennung Ihrer Hardware entsprechend Ihres Betriebssystems. • D amit ein Computer auf Datenträger größer 2 TB zugreifen kann, muss die Hardware, sowie das Betriebssystem diese Funktion unterstützen (z.B. Windows Vista 32bit/64bit oder Mac OS 10.4 und höher). Ist dies nicht der Fall, deaktivieren Sie die > 2 TB Option im Einstellungsmenü. • W enn der Computer in den Stand-By Modus gesetzt wird, erfolgt ein Festplatten Spin-Down (Ruhezustand). • Es kann nur eine Datenschnittstelle zur gleichen Zeit verwendet werden.
-
Seite 9: Zur Datensicherheit
IB-RD2252 2x 2,5" RAID Gehäuse Zur Datensicherheit Um Ihre Daten zu sichern und Datenverlust zu vermeiden, sollten Sie immer mindestens zwei Kopien Ihre Daten anlagen. Einmal auf der IB-RD2252 und einmal auf einem anderen Laufwerk oder entspre- chenden Speichermedien wie CD, DVD, Blu-Ray o.ä. Jeglicher Datenverlust oder -schaden durch die Benutzung der IB-RD2252 liegt in der Verantwortung des Benutzers und es kann unter keinen Umständen der Hersteller für die Wiederherstellung der Daten oder deren Kosten zur Verantwortung gezogen werden. lCD DISPlAY Um ein Menü zu wählen oder Einstellungen zu verändern, verwenden Sie die SELECT Taste an der Vorderseite. Um ein Menü zu öffnen oder eine Änderung zu bestätigen, verwenden Sie die OK Taste an der Vorderseite. Für zusätzliche Details, folgen Sie den Anweisungen am LCD Display oder lesen die folgenden Schritt für Schritt Anleitungen: Startmenü Verwenden Sie die SELECT Taste um zwischen den verschiedenen Menüpunkten zu wechseln und betäti- gen die OK Taste um ein Menü auszuwählen. Die Standardanzeige stellt den Produktnamen und den derzeit eingestellten RAID Modus dar. D ie Systeminformation gibt Auskunft über nähere Informationen zur Konfi guration und Hardware des Gerätes. Die Festplatten Information gibt Auskunft über die installierten Festplatten. Das Einstellungsmenü ermöglicht die Konfi guration des Gerätes zu verändern. -
Seite 10: Systeminformationen
IB-RD2252 2x 2,5" RAID Gehäuse System Informationen Um diesen Menüpunkt zu aktivieren drücken Sie die SELECT Taste bis das System Informationsmenü er- scheint und drücken anschließend die OK Taste um weitere Optionen zu Einstellungen und Konfi guration aufzurufen. Die verschiedenen Unteroptionen werden automatisch alle ca. 8 Sekunden weitergescrollt. Für ein schnelleres erreichen der gewünschten Unteroption verwenden Sie die SELECT Taste. Startanzeige des System-Informationsmenüs. Die Seriennummer ist eine Kombination der 1394 Hersteller ID, der Chip ID Hi und der Chip ID Lo. Zeigt die aktuelle Firmwareversion der IB-RD2252 an. Der I/O Status zeigt die aktuell verwendete Datenschnittstelle zum Computer an. Zeigt den aktuellen Status der >2 TB- und Alarmfunktion an. Z eigt an, wie der RAID Modus gesetzt wurde (LCM = über LCD Display, AP = Computerprogramm) und die zur Verfügung stehende Gesamtkapazität des Systems. Festplatteninformation Um diesen Menüpunkt zu aktivieren drücken Sie die SELECT Taste bis das Festplatten Informationsmenü erscheint und drücken anschließend die OK Taste um weitere Optionen zu den eingebauten Festplatten aufzurufen. Die verschiedenen Unteroptionen werden automatisch alle ca. 8 Sekunden weitergescrollt. Für ein schnelleres erreichen der gewünschten Unteroption verwenden Sie die SELECT Taste. Startanzeige des Festplatteninformationsmenüs. Zeigt die Bezeichnung und die Seriennummer der installierten Festplatte 1 an. Zeigt die Gesamtkapazität und Temperatur der installierten Festplatte 1 an. Zeigt die Bezeichnung und die Seriennummer der installierten Festplatte 2 an. Zeigt die Gesamtkapazität und Temperatur der installierten Festplatte 2 an. - Seite 11 IB-RD2252 2x 2,5" RAID Gehäuse Einstellungen Um diesen Menüpunkt zu aktivieren drücken Sie die SELECT Taste bis das Einstellungsmenü erscheint und drücken anschließend die OK Taste um weitere Optionen aufzurufen. Für ein erreichen der gewünschten Unteroption verwenden Sie die SELECT Taste und drücken anschlie- ßend die OK Taste um Einstellungen vornehmen zu können. Einstellung zum aktivieren oder deaktivieren der Unterstützung für Datenträgervolumen größer 2 TB. Einstellungsmenü für die RAID Funktionen. Einstellung zum aktivieren oder deaktivieren der Alarmfunktion. Einstellungsmenü für die Dauer der LCD Display Hintergrundbeleuchtung. Verlassen des Einstellungsmenüs und Rückkehr zu Startmenü. 3.4.1 > 2TB Volume Modus Damit ein Computer auf Datenträger größer 2 TB zugreifen kann, muss die Hardware, sowie das Be- triebssystem diese Funktion unterstützen (z.B. Windows Vista 32bit/64bit oder Mac OS 10.4 und höher). Ist dies nicht der Fall, deaktivieren Sie die > 2 TB Option im Einstellungsmenü • [ Enabled] Unterstützt Datenträger größer 2 TB Kapazität. Sollte die Gesamtkapazität 2 TB über- schreiten, können ältere Betriebssysteme das Laufwerk weder mounten noch darauf zugreifen. • [ Disabled] Unterstützt nur Datenträger bis zu 2 TB Kapazität. Sollte die Gesamtkapazität 2 TB überschreiten, kann auf die verbleibende Speicherkapazität nicht zugegriffen werden, aber ältere Betriebssysteme hätten die Möglichkeit auf den Datenträger zuzugreifen. Drücken Sie die [OK] Taste um in das Setupmenü zu gelangen und verwenden die [Select] Taste um durch die verschiedenen Optionen zu scrollen. • U m das Menü zu verlassen ohne Änderungen vorzunehmen, drücken Sie bitte die [Select] Taste bis die EXIT Anzeige erscheint und drücken dann die [OK] Taste.
-
Seite 12: Einstellung Des Raid Modus
IB-RD2252 2x 2,5" RAID Gehäuse 3.4.2 Einstellung des RAID Modus IB-RD2252: Um Einstellungen des RAID Modus vornehmen zu können, stellen Sie bitte sicher, dass der RAID Schie- beschalter an der Rückseite des Gerätes entriegelt ist. • [RAID 1] RAID 1 Spiegelungsmodus bestätigen. • [RAID 0->1] Ändern des Modus von RAID 0 zu RAID 1. • [RAID 0] RAID 0 Beschleunigungssmodus bestätigen. • [RAID 1->0] Ändern des Modus von RAID 1 zu RAID 0. Drücken Sie die [OK] Taste um in das Setupmenü zu gelangen und verwenden die [Select] Taste um durch die verschiedenen Optionen zu scrollen. • U m das Menü zu verlassen ohne Änderungen vorzunehmen, drücken Sie bitte die [Select] Taste bis die EXIT Anzeige erscheint und drücken dann die [OK] Taste. • U m die Einstellungen zu ändern drücken Sie bitte die [Select] Taste um die bevorzugte Einstellung auszuwählen, dann die [OK] Taste um die Auswahl vorzunehmen und nochmals die [OK] Taste um die Änderung zu bestätigen. Anschließend ein weiteres Mal die [OK] Taste drücken um zu be- stätigen, dass alle Daten gelöscht werden sollen. Das Gerät daraufhin automatisch neu gestartet. Nach dem Neustart ist eine weitere Bestätigung des neu eingestellten RAID Modus notwendig. -
Seite 13: Alarmeinstellungen
IB-RD2252 2x 2,5" RAID Gehäuse Anmerkung Bei Erstinstallation und Wechsel des RAID Modus werden alle vorhandenen Daten auf den Festplatten gelöscht. Stellen Sie sicher, das vorher alle vorhanden Daten auf einem anderen Datenträger gesichert werden. 3.4.3 Alarm Einstellungen Der allgemeine Alarmton ist ein kurzes Piepen, das Sie hören, wenn das Gerät gestartet wird oder ein Fehler vorliegt. Um den Alarmton zu aktivieren oder zu deaktivieren, wählen Sie entsprechend die Ein- stellung ON oder OFF. • [ON] Signalton und Alarm ist aktiviert. • [OFF] Signalton und Alarm ist deaktiviert. Drücken Sie die [OK] Taste um in das Setupmenü zu gelangen und verwenden die [Select] Taste um durch die verschiedenen Optionen zu scrollen. • U m das Menü zu verlassen ohne Änderungen vorzunehmen, drücken Sie bitte die [Select] Taste bis die EXIT Anzeige erscheint und drücken dann die [OK] Taste. • U m die Einstellungen zu ändern drücken Sie bitte die [Select] Taste um die bevorzugte Einstellung auszuwählen, dann die [OK] Taste um die Auswahl zu bestätigen. -
Seite 14: Einstellungen Der Hintergrundbeleuchtung
IB-RD2252 2x 2,5" RAID Gehäuse 3.4.4 Einstellungen der Hintergrundbeleuchtung Die Hintergrundbeleuchtung des LCD Displays kann aktiviert, deaktiviert oder auf Automatik gestellt werden, so dass die Beleuchtung nach voreingestellter Zeit selbstständig erlischt. • [ON] Immer aktiviert. • [OFF] Immer deaktiviert. • [ 1min] Die Hintergrundbeleuchtung erlischt automatisch, wenn das LCD Display länger als eine Minu- te nicht verwendet wird. • [ 3min] Die Hintergrundbeleuchtung erlischt automatisch, wenn das LCD Display länger als drei Minu- ten nicht verwendet wird. • [ 5min] Die Hintergrundbeleuchtung erlischt automatisch, wenn das LCD Display länger als fünf Minu- ten nicht verwendet wird. Drücken Sie die [OK] Taste um in das Setupmenü zu gelangen und verwenden die [Select] Taste um durch die verschiedenen Optionen zu scrollen. • U m das Menü zu verlassen ohne Änderungen vorzunehmen, drücken Sie bitte die [Select] Taste bis die EXIT Anzeige erscheint und drücken dann die [OK] Taste. • U m die Einstellungen zu ändern drücken Sie bitte die [Select] Taste um die bevorzugte Einstellung auszuwählen, dann die [OK] Taste um die Auswahl zu bestätigen. -
Seite 15: Display-Informationen
IB-RD2252 2x 2,5" RAID Gehäuse Display Informationen Zusätzlich zu den Details zur Hardware- und Geräteinformation, zeigt das LCD Display bestimmte Infor- mationen zu verschiedenen Vorkommnissen an. Eine Liste der Meldungen und ihrer Bedeutungen lauten wie folgt: • [HDD Error / Remaining 1xHDD] W enn im RAID 0 Modus eine Festplatte ausfällt, ertönt zunächst der Alarm und das Display zeigt an, dass nur noch eine funktionstüchtige Festplatte verbleibt. Die defekte Festplatte wird durch die zugehörige LED in der Front angezeigt. • [RAID Warning / Degraded Array] W enn im RAID 1 Modus eine Festplatte ausfällt, ertönt zunächst der Alarm und das Display zeigt diese Meldung an. Drücken Sie die [OK] Taste um den Alarm vorrübergehend zu deaktivieren. Die defekte Festplatte wird durch die zugehörige LED in der Front angezeigt. • [XX Cable / Connected] Zeigt an welches Schnittstellenkabel verbunden ist. • [Cable / Disconnected] Zeigt an, dass das Schnittstellenkabel getrennt wurde.