Instar IN-9010 Bedienungsanleitung
Inhaltsverzeichnis
Verfügbare Sprachen
Verfügbare Sprachen
Bedienungsanleitung
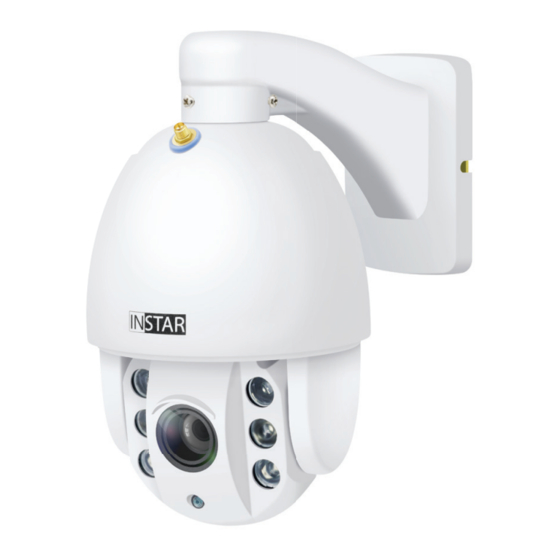
IN-9010 Full HD
IN-9010 Full HD
Außenkamera
Außenkamera
www.instar.de
www.instar.de
- Steuerbare Full-HD-Aussenkamera mit Autofokus-Objektiv
- Panasonic Wide-Dynamic-Range (WDR) Full-HD-Bildsensor
- Benutzerfreundliche und moderne HTML5-Weboberfl äche (WebUI)
- Unterstützt alle modernen Webbrowser (IE 11, Edge, Firefox, Chrome, Safari, etc.)
- Unterstützt MicroSD (max. 128GB) für Alarm- und manuelle Aufnahmen
- Alarmbenachrichtigung per E-Mail, Push (Textmitteilung) und / oder Alarmserver
- Speicherung von Bildern, Videos und / oder Fotoserien per FTP(S)
- TLS- / SSL-Verschlüsselung für sichere HTTPS- und FTPS-Verbindungen
- Sichere Archivierung der Alarmvideos in der INSTAR Cloud (optional)
Kapitel
Inhaltsverzeichnis

Verwandte Anleitungen für Instar IN-9010


Inhaltszusammenfassung für Instar IN-9010
- Seite 1 - Alarmbenachrichtigung per E-Mail, Push (Textmitteilung) und / oder Alarmserver - Speicherung von Bildern, Videos und / oder Fotoserien per FTP(S) - TLS- / SSL-Verschlüsselung für sichere HTTPS- und FTPS-Verbindungen - Sichere Archivierung der Alarmvideos in der INSTAR Cloud (optional)
-
Seite 2: Inhaltsverzeichnis
6. Smartphone Apps 10-DE 7. Fernzugriff 11-DE 8. Zurücksetzen der Kamera 12-DE 9. Autofokus-Zoom-Objektiv 13-DE 10. Online-Material 14-DE 11. INSTAR Cloud 15-DE 12. Technische Daten 16-DE 13. Garantie & Entsorgung 17-DE 14. Rechtliche Informationen 18-DE 1-DE Gehen Sie auf http://install.instar.de... -
Seite 3: Vorstellung Der Kamera
Bitte beachten Sie, dass diese Anleitung sowohl die WLAN- als auch die PoE-Version der IN-9010 Full HD beschreibt. Daher kann es sein, dass einige Punkte nur die WLAN-Variante und andere Punkte nur die PoE-Variante besch- reiben. So bezieht sich z.B. die WPS-Funktion für die WLAN-Verbindung einzig auf die WLAN-Variante. -
Seite 4: Sicherheitsvorschriften
Installieren Sie das Gerät bitte nicht in der Nähe von leicht entzündlichen Ge- genständen. • Der Hersteller INSTAR haftet für keinerlei Schäden, die durch Zubehör oder Firmware von Drittanbietern entstehen. • ACHTUNG: Die Anschlüsse am Anschlusskabel sind nicht wetterfest und müs- sen wettergeschützt installiert werden! -
Seite 5: Produktmerkmale
Kostenfreier Point-2-Point-Zugriff mit InstarVision, unterstüzt IPv6 DDNS Kostenfreie DDNS-Adresse für die Verbindung über das Internet Cloud Opt. Speicherung / Verwaltung der Alarmvideos in der INSTAR Cloud FTP-Upload Übertragung von Alarmbildern / Videos per FTP(S) WiFi Protected Setup (WPS) zur einfachen WLAN-Einrichtung WLAN / WiFi 2,4Ghz WLAN, IEEE 802.11b/g/n und WPA/WPA2-Verschlüsselung... -
Seite 6: Aufbau Der Kamera
4. Aufbau der Kamera 4.1. Verpackungsinhalt 4.2. Kameraaufbau 5-DE Gehen Sie auf http://install.instar.de... - Seite 7 10 - Netzwerkanschluss RJ45-LAN-Anschluss für Cat5e-LAN-Kabel oder höher 11 - Alarmeingang Unterstützt externe Alarmgeräte, z. B. PIR-Wärmesensor 12 - Stromanschluss Für mitgeliefertes 12V / 2A DC Netzteil 13 - Anschlusskabel Mit LAN- u. Stromanschluss sowie Alarmeingang 6-DE Gehen Sie auf http://install.instar.de...
-
Seite 8: Installation
Bitte öff nen Sie den Webbrowser und gehen Sie auf: http://install.instar.de um den Kamera-Installations-Assistenten zu öff nen Schritt 2 Wählen Sie Ihre Sprache und das Kameramodell IN-9010 Folgen Sie jedem Schritt des Einrichtungs-Assistenten Schritt 3 Schritt 4 Bei der Anmeldeseite Ihrer Kamera verwenden Sie folgende... -
Seite 9: Wandhalterung: Installation
Schritt 5: Bringen Sie jetzt die Wandhalterung an der Wand an, indem Sie diese auf die in Schritt 3 befestigte Metallplatte aufset- zen. Anschließend fi xieren Sie die Halterung durch Anziehen der Schraube auf der Unterseite. 8-DE Gehen Sie auf http://install.instar.de... -
Seite 10: Deckenhalterung: Installation
Schrauben und Dübel, um die Halterung Abb. 3 an der Decke zu befestigen. Schritt 3: Lösen Sie die Schraube an der Halterung und fi xieren Sie die Kamera an der Halterung durch Festziehen der Schrauben. 9-DE Gehen Sie auf http://install.instar.de... -
Seite 11: Smartphone Apps
Weboberfl äche (WebUI): Sie können die Weboberfl äche in jedem aktuellen Webbrowser öff nen, der HTML5 unterstützt. Nutzen Sie einfach das INSTAR Camera Tool, um die IP-Adresse der Kamera zu fi nden und diese im Webbrowser zu öff nen. Die WebUI erlaubt es Ihnen, die Kamera nach Ihren Wünschen zu konfi gurieren. -
Seite 12: Fernzugriff
über eine externe Internetverbindung testen. Beachten Sie bitte, dass eine Portweiterleitung nur bei einem öff entlichen IPv4-Internetanschluss funktioniert. Für Informationen zur Portweiterleitung bei Ihrem Router und dem DDNS-Service im Allgemeinen schauen Sie bitte auf: http://remote.instar.de 11-DE Gehen Sie auf http://install.instar.de... -
Seite 13: Zurücksetzen Der Kamera
8. Zurücksetzen der Kamera 1. Die IN-9010 Full HD Kamera kann durch das Online-Web-User-Interface oder durch das INSTAR Kamera-Tool zurückgesetzt werden. Beide Methoden benöti- gen ein Passwort für den Vorgang. Falls Sie Ihr Passwort vergessen haben, können Sie die Kamera durch die Mi- croSD-Karte zurücksetzen. -
Seite 14: Autofokus-Zoom-Objektiv
9. Autofokus-Zoom-Objektiv Die IN-9010 Full HD ist mit einem Autofokus-Zoom-Objektiv ausgestattet und hat einen Zoombereich von 2,8mm bis 12mm. Somit ermöglicht dieses Ob- jektiv einen diagonalen Bildausschnitt von 36 Grad bis 120 Grad. Durch einen fortschrittlichen Algorithmus kann das Objektiv automatisch die Schärfe so aus- richten, dass man ein gestochen scharfes Bild erhält. -
Seite 15: Online-Material
4. Wie kann man sich die Aufnahmen auf der Speicherkarte herunterladen und vieles mehr... 10.2. Firmware-Update INSTAR Kameras erhalten kostenfreie Firmware-Updates. Öff nen Sie die WebUI und gehen Sie auf System -> Firmware-Update, um zu prüfen, ob eine neue Firmware für Ihre Kamera verfügbar ist. Sie können diese dann herunterladen und über die WebUI installieren. -
Seite 16: Instar Cloud
11. INSTAR Cloud https://cloud.instar.de Was ist die INSTAR Cloud? Die INSTAR Cloud ist ein rein optionaler und kostenpfl ichtiger Service, um Ihre Aufnahmen sicher aufzubewahren. Testen Sie die INSTAR Cloud jetzt kostenfrei für 30 Tage unter https://cloud.instar.de. Die INSTAR Cloud kostet in etwa 1/3 von dem, was andere Anbieter verlangen. -
Seite 17: Technische Daten
Stromverbrauch Max. 16 Watt (im Normalbetrieb 5 Watt) Betriebstemperatur - 20°C bis 55°C Anforderungen Webbrowser Webbrowser mit HTML5-Unterstützung CPU / Grafi kkarte Dual-Core (min. 2Ghz) / 256MB + Grafi kkarte Bandbreite min. 512kbs pro Kamera 16-DE Gehen Sie auf http://install.instar.de... -
Seite 18: Garantie Entsorgung
Sie bitte support@instar.de, um eine RMA-Num- mer zu beantragen. Mit dieser RMA können Sie dann das Gerät zur Reparatur einsenden. Das INSTAR SERVICE CENTER fi nden Sie aktuell an folgendem Standort: Firma: INSTAR Deutschland GmbH Hotline: +49 (6438) 9198992 Raiff... -
Seite 19: Rechtliche Informationen
Störungen, die einen uner- en akzeptieren, einschließlich Störungen, die einen uner- wünschten Betrieb verursachen können. Das FCC Compliance Statement fi nden Sie auf folgender Internetseite: http://www.instar.de/legal/fcc © INSTAR ist eine geschützte Marke der INSTAR Deutschland GmbH. 18-DE Gehen Sie auf http://install.instar.de... - Seite 20 INSTAR Deutschland GmbH Ihr Spezialist für Netzwerk- und Sicherheitstechnik...
- Seite 40 INSTAR Deutschland GmbH Your Specialist for Network and Security Equipments...