APA 16473 Bedienungsanleitung
Lithium-powerpack 35.000 mah mit starthilfe 12/24 v
Vorschau ausblenden
Andere Handbücher für 16473:
- Bedienungsanleitung (32 Seiten) ,
- Bedienungsanleitung (6 Seiten)
Inhaltsverzeichnis
Werbung
Verfügbare Sprachen
Verfügbare Sprachen
Quicklinks
DE Lithium-Powerpack 35.000 mAh mit Starthilfe 12/24 V
Art.-Nr. 16473
Inhalt
WARNUNG
Lesen Sie die Bedienungsanleitung vor Inbetriebnahme sorgfältig durch und beachten Sie alle Sicher-
heitshinweise!
Nichtbeachtung kann zu Personenschäden, Schäden am Gerät oder Ihrem Eigentum führen!
Bewahren Sie die Originalverpackung, den Kaufbeleg sowie diese Anleitung zum späteren Nachschla-
gen auf! Bei der Weitergabe des Produkts geben Sie auch diese Anleitung weiter.
Prüfen Sie vor Inbetriebnahme den Inhalt der Verpackung auf Unversehrtheit und Vollständigkeit!
1. Bestimmungsgemäßer Gebrauch
Das Powerpack dient als Starthilfe für Kraftfahrzeuge mit 12 V Bordspannungsnetz. Mit dem integrierten Kompressor können
Autoreifen, Fahrradreifen, Bälle etc. aufgepumpt werden. Der eingebaute Bleiakku wird entweder mit dem Stecker-Ladege-
rät oder mit dem 12 V - Zigarettenanzünder-Ladekabel aufgeladen. Zusätzlich ist das Powerpack noch mit einer LED-Leuchte
ausgestattet, die als Arbeitslicht genutzt werden kann. Eine andere Verwendung als zuvor beschrieben führt zur Beschädigung
dieses Produktes, darüber hinaus ist dies mit Gefahren, wie z.B. Kurzschluss, Brand, elektrischem Schlag etc. verbunden.
Dieses Gerät ist nicht dafür bestimmt, durch Kinder und Personen mit eingeschränkten geistigen Fähigkeiten oder ohne er-
1
2
2
2
3
3
3
3
3
4
4
4
4
4
4
5
5
6
6
6
6
6
1
Werbung
Kapitel
Inhaltsverzeichnis

Verwandte Anleitungen für APA 16473


Inhaltszusammenfassung für APA 16473
-
Seite 1: Inhaltsverzeichnis
DE Lithium-Powerpack 35.000 mAh mit Starthilfe 12/24 V Art.-Nr. 16473 Inhalt 1. Bestimmungsgemäßer Gebrauch 2. Lieferumfang 3. Spezifikationen 4. Sicherheitshinweise 5. Symbolerklärung 6. Bedienungsanleitung 6.1 Übersicht 6.2 Aufladen des Powerpacks: 6.2.1 Aufladen mit dem Stecker-Ladegerät: 6.2.2 Aufladen mit dem Kfz-Ladekabel 6.3 Starthilfe... -
Seite 2: Lieferumfang
forderliches Fachwissen benutzt zu werden. Kinder sind von dem Gerät fernzuhalten. Das Gerät ist nicht für den gewerblichen Einsatz bestimmt. Zum bestimmungsgemäßem Gebrauch gehört auch die Beachtung aller Informationen in dieser Anleitung, insbesondere die Beachtung der Sicherheitshinweise. Jede andere Verwendung gilt als nicht bestimmungsgemäß und kann zu Sach- oder Personenschäden führen. -
Seite 3: Symbolerklärung
• Laden Sie den Akku des Powerpacks nicht mit einem beschädigten Ladegerät auf. • Benutzen Sie nur das mitgelieferte Zubehör zum Aufladen des Power Packs. • Versuchen Sie niemals eine Starthilfe bei eingefrorener Batterie durchzuführen, es besteht Explosionsgefahr. 5. Symbolerklärung Geräte mit diesem Zeichen dür- entspricht den Elektroprodukt darf nicht in den... -
Seite 4: Aufladen Mit Dem Kfz-Ladekabel
6.2.2 Aufladen mit dem Kfz-Ladekabel Drehen Sie den Schalter für Starthilfe (Position 1 in der Übersicht) in die Stellung OFF. Stecken Sie den Hohlstecker des Kfz-La- dekabels (Position 14 in der Übersicht) in die Ladebuchse des Powerpacks (Position 4 in der Übersicht). Stecken Sie jetzt den 12 V Kfz-Stecker in die 12 V Steckdosen Ihres Fahrzeugs. -
Seite 5: Befüllen Eines Reifens Mit Autoventil / Schraderventil
6.4.1 Befüllen eines Reifens mit Autoventil / Schraderventil Um mit dem Kompressor arbeiten zu können, nehmen Sie zuerst den Luftschlauch (Position 7 in der Übersicht) aus seiner Halte- rung, dazu müssen kurzfristig die rote (+) Polzange von ihrer Halterung lösen. Öffnen Sie die Setzen Sie den Verriegeln Sie den... -
Seite 6: Wartung Und Pflege
B Adapter für Bälle: Öffnen Sie die Verriegelung des Ventilanschlusses (Bild 2). Setzen Sie den Adapter für Bälle in den Ventilanschluss ein. Verrie- geln Sie den Ventilanschluss (Bild 3). Setzen Sie den Adapter in das Ventil des Balls ein. Jetzt können Sie durch Einschalten des Kompressors den Ball befüllen. -
Seite 7: Intended Use
GB Power pack with compressor Item number 16540 Contents 1. Intended use 2. Scope of delivery 3.Specifications 4. Safety Precautions 5. Explanation of symbols 6. Operating instructions 6.1 Overview 6.2 Charging the power packs: 6.2.1 Charging with the plug-in charger 6.2.2 Charging with the 12V cigarette lighter charging cable 6.3 Starter aid 6.3.1 Connecting the power pack (vehicles with negative earth) -
Seite 8: Specifications
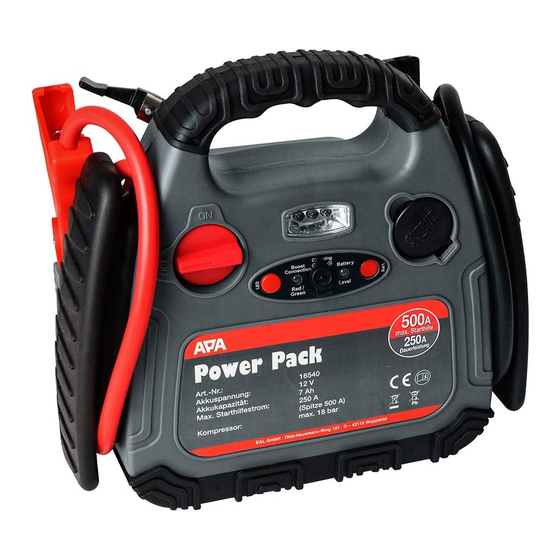
3.Specifications Battery voltage: 12V Battery capacity: 7 Ah Max. starter-aid current: 250 A (Peak 500A) Dimensions: 250 x 150 x 230 [mm] Cable length: 400 mm Weight: 3.755 kg Compressor: max. 18 bar 4. Safety Precautions • This is not a toy. Keep out of reach of children and do not let children operate this device. •... -
Seite 9: Operating Instructions
6. Operating instructions 6.1 Overview 1 Switch for starting aid 2 Switch for working light 3 Control lamp for starting aid/ incorrect poles 4 Charging socket 5 Working light 6 Control button for charge status 7 Control lamp for charge status 8 12 V motor vehicle socket 9 Pole callipers, black (-) 10 Manometer... -
Seite 10: Starter Aid
6.3 Starter aid Make sure that the power pack is fully charged. To do so, press the battery test switch (position 4 in the overview). Once the control LED is green (position 5 in the overview), the power pack is ready for use. The starter aid function of the power pack is only for vehicles with 12V on-board voltage. -
Seite 11: Use Of The Included Valve Adapters: (Position 14 In The Overview)
To inflate, switch the compressor on with the on-off switch. The manometer (position 9 in the overview) is used for the general inspection of the air pressure. Once you have reached the desired air pressure, switch off the compressor. Remove the valve connector in reverse order (figures 5 – 2). During the filling process, always ensure that the air pressure is correct (refer to the operating inst- ruction of your vehicle for this). -
Seite 12: Care
Exchanging the fuse for the 12V cigarette lighter charging cable: Turn the knurled screw at the tip of the 12V plug counter clockwise until it is disconnected from the plug and remove it. The fuse is released and can be pulled out from the plug. Replace it with a new fuse of the same strength and screw the knurled screw back into the plug. -
Seite 13: Utilisation Conforme
FR Bloc d‘alimentation d‘aide au démarrage avec compresseur Réf. 16540 Sommaire 1.Utilisation conforme 2. Fourniture 3.Spécifications 4. Safety Precautions 5. Explanation of symbols 6. Signification des symboles 6.1 Mode d‘emplo 6.2 Recharge du bloc d‘alimentation: 6.2.1 Recharge à l‘aide du chargeur à fiche 6.2.2 Recharge à... - Seite 14 3.Spécifications Tension de la batterie : 12 V Capacité de la batterie : 7 Ah Courant max. d‘aide au démarrage : 250 A (crête 500 A) Dimensions : 250 x 150 x 230 [mm] Longueur du câble : 400 mm Poids : 3,755 kg Compresseur : max.
-
Seite 15: Mode D'emplo
6. Mode d‘emploi 6.1 Vue d‘ensemble 1 Interrupteur pour l‘aide au démarrage 2 Interrupteur pour la lampe de travail 3 Lampe de contrôle de l‘aide au démarrage/d‘une permutation des pôles 4 Douille de chargement 5 Lampe de travail 6 Touche de contrôle d‘état de charge 7 Lampe de contrôle d‘état de charge 8 Prise pour l‘allume-cigare de 12 V 9 Pince crocodile noire (-) -
Seite 16: Aide Au Démarrage
ATTENTION : Rechargez uniquement le bloc d‘alimentation pendant que vous roulez ou lorsque le mo- teur est en marche pour éviter de décharger la batterie du démarreur de votre véhicule. Lorsque la batterie est entièrement rechargée, la LED de contrôle verte s‘allume. Après le chargement, retirez d‘abord la fiche de 12 V de la prise de votre véhicule et retirez ensuite la fiche du connecteur de chargement du bloc d‘alimentation. -
Seite 17: Utilisation Des Adaptateurs Pour Valve Fournis : (Position 14 Sur La Vue D'ensemble)
Ouvrez le système de Placez le raccord Verrouillez Vous pouvez Öffnen Sie die Setzen Sie den Verriegeln Sie den können jetzt verrouillage de valve sur la raccord de valve maintenant gonfler Verriegelung Ventilanschluß auf Ventilanschluß den Reifen mit dem au niveau du raccord valve le pneu avec le am Ventilanschluß... -
Seite 18: Entretien Et Nettoyage
C Adaptateur universel pour articles de loisirs Ouvrez le système de verrouillage de raccord de valve (figure 2). Insérez l‘adaptateur universel dans le raccord de valve. Verrouil- lez le raccord de valve (figure 3). Insérez l‘adaptateur universel dans la valve de votre article de loisirs. En fonction du modèle, il se peut que l‘adaptateur universel doive être maintenu durant le gonflage. - Seite 19 NL Powerpack met compressor Art.-nr. 16540 Inhoud 1.Reglementair gebruik 2. Fourniture 3.Specificaties 4. Veiligheidsvoorschriften 5. Symboolverklaring 6. Gebruiksaanwijzing 6.1 Overzicht 6.2 Opladen van het powerpack: 6.2.1 Opladen met de stekkeroplader 6.2.2 Opladen met de 12 V-aanstekerlaadkabel 6.3 Starthulp 6.3.1 Aansluiten van het powerpack (voertuigen met negatieve massa) 6.3.2 Starten 6.3.3 Verwijderen van het powerpack 6.4 Compressor...
-
Seite 20: Specificaties
3.Specificaties Accuspanning: 12 V Accucapaciteit: 7 Ah Max. starthulpstroom: 250 A (Peak 500) Afmetingen: 250 x 150 x 230 [mm] Kabellengte: 400 mm Gewicht: 3,755 kg Compressor: Max. 18 bar 4. Veiligheidsvoorschriften • Dit apparaat is geen speelgoed. Houd het buiten het bereik van kinderen en laat ze het apparaat niet bedienen! •... -
Seite 21: Gebruiksaanwijzing
6. Gebruiksaanwijzing 6.1 Overzicht 1 Schakelaar voor de starthulp 2 Schakelaar voor de werklamp 3 Controlelampje voor starthulp/ompoling 4 Laadbus 5 Werklamp 6 Controletoets voor de laadtoestand 7 Controlelampje voor de laadtoestand 8 12 V-autostopcontact 9 Pooltang, zwart (-) 10 Manometer 11 Aan-/uitschakelaar voor de compressor 12 Luchtslang met autoventielaansluiting 13 Pooltang rood (+) -
Seite 22: Starthulp
6.3 Starthulp: Zorg dat het powerpack volledig is opgeladen. Druk daartoe op de accutestschakelaar (positie 4 in het overzicht). Als de contro- le-LED (positie 5 in het overzicht) groen brandt, is het powerpack klaar voor gebruik. De starthulpfunctie van het powerpack is uitsluitend geschikt voor voertuigen met 12 V-boordspan- ning. -
Seite 23: Gebruik Van De Meegeleverde Ventieladapters: (Positie 14 In Het Overzicht)
Voor het vullen schakelt u de compressor aan met de aan-/uitschakelaar (positie 8 in het overzicht). De manometer (positie 9 in het overzicht) dient daarbij als globale controle van de luchtdruk. Als de gewenste luchtdruk is bereikt, schakelt u de compressor uit. Verwijder de ventielaansluiting in omgekeerde volgorde (afbeeldingen 5 – 2). Let bij het vullen altijd op de correcte luchtdruk (lees daartoe de handleiding van uw voertuig erop na). -
Seite 24: Verzorging
Zekering vervangen bij de 12 V-aanstekerlaadkabel: Verwijder de kartelmoer van de punt van de 12 V-stekker door deze linksom te draaien. De zekering is nu vrij en kan uit de stek- ker worden getrokken. Vervang deze door een nieuwe zekering van gelijke waarde en draai de kartelmoer weer op de stekker. Zekering: 6,0 x 30 mm, F, 2 A, 250 V 7.2 Verzorging: Schakel het powerpack uit voordat u het gaat reinigen. -
Seite 25: Powerpack
IT Powerpack con compressore Cod. art. 16540 Indice 1.Uso conforme 2. Volume di consegna 3.Specifiche 4. Avvertenze di sicurezza 5. Spiegazione dei simboli 6. IIstruzioni per l‘uso 6.1 Schema 6.2 Ricarica di Power Pack 6.2.1 Ricarica con il caricabatterie 6.2.2 Carica con il cavo di ricarica dell‘accendisigari a 12 V 6.3 Avviamento di emergenza 6.3.1 Collegamento di Power Pack (veicoli con massa negativa) 6.3.2 Tentativo di avvio... - Seite 26 3.Specifiche Tensione batteria ricaricabile: 12 V Capacità batteria ricaricabile: 7 Ah Max corrente avviamento d‘emergenza: 250 A (500 A, punta) Dimensioni: 250 x 150 x 230 [mm] Lunghezza cavo: 400 mm Peso: 3,755 kg Compressore: max. 18 bar 4. Avvertenze di sicurezza •...
-
Seite 27: Avviamento Di Emergenza
6. IIstruzioni per l‘uso 6.1 Schema: 1 Interruttore per avviamento di emergenza 2 Interruttore per lampada da lavoro 3 Spia di controllo avviamento di emergenza/inversione di polarità 4 Presa di ricarica 5 Lampada da lavoro 6 Pulsante di controllo livello carica 7 Spia di controllo livello carica 8 Presa auto 12 V 9 Morsetto nero (-) -
Seite 28: Chiudere L'attacco Verriegeln Sie Den Valvola Ventilanschluß
La funzione di avviamento d‘emergenza è prevista solo per i veicoli con tensione di bordo 12 V. Leggere le istruzioni per l‘uso del veicolo per capire se e come è consentito utilizzare un avviamento d‘emergen- za esterno. I veicoli moderni si avvalgono di un sistema elettronico e apparecchi di comando sensibili, che possono essere danneggiati da eventuali procedure errate. -
Seite 29: Utilizzo Degli Adattatori Per Valvole Forniti In Dotazione (Pos. 14 Dello Schema)
Per il gonfiaggio assicurarsi sempre che il valore della pressione sia idoneo (leggere le istruzioni per l‘uso del veicolo). Il compressore può raggiungere una pressione massima di 18 bar. Se la pressione è troppo elevata, esiste il pericolo di esplosione e lesioni. Non utilizzare il compressore per oltre 10 minuti consecutivi, altrimenti esiste il pericolo di sur- riscaldamento. - Seite 30 Sostituzione del fusibile nel cavo di ricarica per accendisigari 12 V: Ruotare il dado zigrinato sulla punta del connettore 12 V in senso antiorario finché si stacca dal connettore, quindi rimuoverlo. Il fusibile è ora libero e può essere estratto dal connettore. Sostituirlo con un fusibile nuovo della stessa potenza e riavvitare il dado zigrinato nel connettore.
- Seite 31 CZ Power Pack s kompresorem Art. č. 16540 Obsah 1. Používání dle určení 2. Rozsah dodávky 3. Specifikace 4. Bezpečnostní upozornění 5. Vysvětlení symbolů 6. Návod k obsluze 6.1 Přehled 6.2 Nabíjení Power Packu 6.2.1 Nabíjení pomocí nabíječky do sítě 6.2.2 Nabíjení...
-
Seite 32: Specifikace
3. Specifikace Napětí akumulátoru: 12 V Délka kabelu: 400 mm Kapacita akumulátoru: 7 Ah Hmotnost: 3,755 kg Max. proud pomocného startovacího zařízení: 250 A (špička 500 A) Kompresor: max. 18 bar Rozměry: 250 x 150 x 230 [mm] 4. Bezpečnostní upozornění •... -
Seite 33: Návod K Obsluze
6. Návod k obsluze 6.1 Přehled 1 - Spínač pro pomocné startovací zařízení 2 - Spínač pro pracovní svítidlo 3 - Kontrolka pro pomocné startovací zařízení/ přepólování 4 - Nabíjecí zásuvka 5 - Pracovní svítidlo 6 - Tlačítko s kontrolkou stavu nabití 7 - Kontrolka stavu nabití... -
Seite 34: Připojení Power Pack (Vozidla Se Zápornou Kostrou)
Funkce pomocného startovacího zařízení Power Packu je vhodná pouze pro vozidla s 12 V palubním napětím. Nejdříve si přečtěte návod k obsluze vašeho vozidla, zda a jak se může používat externí pomocné startovací zařízení. Moderní vozidla sou vybavena citlivou elektronikou a řídicím jednotkami, které... -
Seite 35: Použití Dodaných Adaptérů Ventilů
Po nahuštění pneumatiky vzduchem opět zkontrolujte tlak v pneumatikách pomocí samostatného měřiče tlaku vzduchu (např. čerpací stanice, autoservis). 6.4.2 Použití dodaných adaptérů ventilů A Adaptér ventilu na jízdní kola (na ventily Dunlop a Sclaverand) B Adaptér na míče C Univerzální adaptér na výrobky využívané během volného dne (nafukovací... - Seite 36 Ze zákona jste povinni baterie a akumulátory vrátit zpět. Po použití je můžete vrátit zpět nám, odevzdat je ko- munálnímu sběrnému dvoru nebo dokonce i místnímu prodejci. Baterie obsahující škodlivé látky jsou označeny symbolem, který se skládá z přeškrtnutého kontejneru na odpad, a chemického symbolu (Cd, Hg nebo Pb) těžkého kovu, který...
- Seite 38 EAL GmbH Otto-Hausmann-Ring 107 +49 (0)202 42 92 83 0 info@eal-vertrieb.com www.eal-vertrieb.com +49 (0) 202 42 92 83 – 160 42115 Wuppertal, Deutschland © EAL GmbH, 16540, 11.2018...