Herunterladen Inhalt Inhalt Diese Seite drucken
level one WAB-6120 Handbuch

level one WAB-6120 Handbuch

150mbps wireless outdoor poe access point

Werbung

Verfügbare Sprachen
  • DE

Verfügbare Sprachen

  • DEUTSCH, seite 8
LevelOne
LevelOne
LevelOne
LevelOne
150Mbps Wireless Outdoor PoE Access Point
Quick Installation Guide
English
Deutsch
Français
Español
Nederlands
Dansk
Italiano
Ελληνικά
WAB-6120
- 1 -
Português
Svenska
Slovenščina
한국어
Русский
Polish

Werbung

Inhaltsverzeichnis
loading

Inhaltszusammenfassung für level one WAB-6120

  • Seite 1 LevelOne LevelOne LevelOne LevelOne WAB-6120 150Mbps Wireless Outdoor PoE Access Point Quick Installation Guide Quick Installation Guide Quick Installation Guide Quick Installation Guide English Português Deutsch Svenska Français Slovenščina Español Nederlands 한국어 Dansk Русский Italiano Polish Ελληνικά - 1 -...
  • Seite 2: Inhaltsverzeichnis

    Table of Content Table of Content Table of Content Table of Content English .................. - 3 - Deutsch ................. - 8 - Français ................- 13 - Español ................- 18 - Nederlands ................- 23 - Dansk .................. - 28 - Italiano .................
  • Seite 3: English

    English Hardware Installation 1. Grab the cover and pull it back harder to take it out 2. Plug Cat.5/5e/6 cable into the RJ-45 port. 3. Slide the cover back 4. plug the power cord into the DC port of the PoE injector - 3 -...
  • Seite 4 5. Put what in the Step.3 and Step.4 together by plugging the other side of the Cat.5/5e/6 cable in the Step.3 into the PoE port of the PoE injector in the Step.4. When you finish the Step.5, the complete set will be like the following picture.
  • Seite 5: Configuration

    Configuration Check Your Network Settings to login web UI Please make sure your PC can get IP address automatically, so the router can communicate with your PC during configuration. Select “Control Panel” > “Network Connections”. Right click the “Local Area Connection” and choose “Properties”. Select the TCP/IP protocol for your network card.
  • Seite 6 AP Mode 1. Choose Wireless > Basic Settings for the wireless basic settings Click save. Choose Security to change the security settings. Click Save. - 6 -...
  • Seite 7 Now, you can see SSID “LevelOne” in the list. Congratulations! The AP mode is now successfully configured. - 7 -...
  • Seite 8: Deutsch

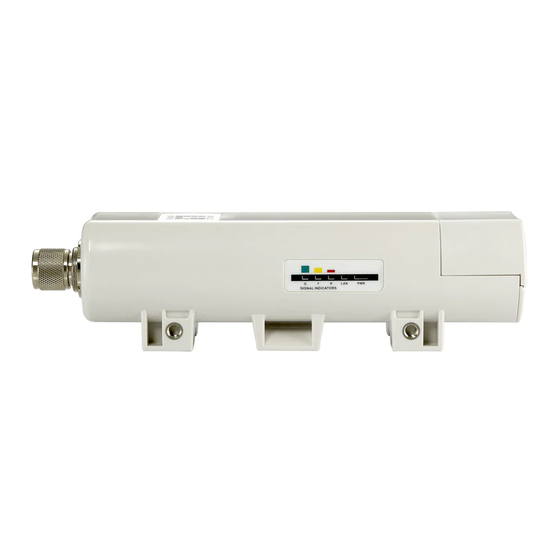
    Deutsch Hardware Installation Ergreifen Sie die Abdeckung und ziehen diese ab. Verbinden Sie das Cat.5/5e/6 Kabel mit dem RJ-45 Port. Schieben Sie dann die Abdeckung wieder ein. Verbinden Sie das Netzkabel mit dem DC-Port des PoE-Injektors. - 8 -...
  • Seite 9 Verbinden das das andere Ende des Cat.5/5e/6 Kabel mit dem PoE-Port des PoE-Injektors. Wenn Sie diesen Schritt 5 beendet haben, sollte Ihre Installation dem folgenden Bild entsprechen. Weitere Informationen finden Sie auf den Seiten 4 ~ 13 des Benutzerhandbuchs. - 9 -...
  • Seite 10: Konfiguration

    Konfiguration Überprüfen Sie Ihre Netzwerkeinstellungen für das Login web UI Bitte stellen Sie sicher, dass Ihr PC die IP-Adresse automatisch empfangen kann, so dass der Router mit Ihrem PC während der Konfiguration kommunizieren kann. Wählen Sie "Systemsteuerung" > “Netzwerkverbindungen". Klicken Sie rechts auf "Local Area Connection" und wählen Sie dann “Properties”. Wählen Sie bitte "TCP/IP-Protokoll"...
  • Seite 11 AP Modus Wählen Sie Wireless > Basic Settings um die Wireless Basis-Einstellungen vorzunehmen. Drücken Sie Save. 2. Wählen Sie Security um die Sicherheits-Einstellungen zu ändern. Drücken Sie Save. - 11 -...
  • Seite 12 Nun können Sie SSID “LevelOne” in der Liste sehen. Glückwunsch! Der AP Modus wurde erfolgreich konfiguriert. - 12 -...
  • Seite 13: Français

    Français Installation du matériel 1. Attrapez le capot et tirez-le vers l’arrière avec force pour le dégager 2. Branchez un câble Cat.5/5e/6 sur le port RJ-45. 3. Refaites glisser le capot en place. 4. Branchez le cordon d’alimentation sur le port DC de l’injecteur PoE. - 13 -...
  • Seite 14 5. Assemblez les éléments préparés aux étapes 3 et 4 en branchant l’autre extrémité du câble Cat.5/5e/6 de l’étape 3 sur le port PoE de l’injecteur PoE de l’étape 4. Une fois l’étape 5 terminée, l’ensemble complet a l’apparence ci-dessous. Pour plus de détails, veuillez consulter les pages 4 à...
  • Seite 15 Configuration Vérifiez vos paramètres réseau pour accéder à l’interface utilisateur web Veuillez vérifier que votre PC est bien en mesure d’obtenir automatiquement une adresse IP afin que le routeur puisse communiquer avec votre PC pendant la configuration. Sélectionnez “Panneau de configuration” > “Connexions réseau”. Faites un clic droit sur “Connexion au réseau local”...
  • Seite 16 Mode AP 1. Choisissez Wireless (Sans fil) > Basic Settings (Paramètres de base) pour les paramètres de base sans Cliquez sur Save (Enregistrer). Choisissez Security (Sécurité) pour modifier les paramètres de sécurité. Cliquez sur Save (Enregistrer). - 16 -...
  • Seite 17 Maintenant, vous pouvez voir SSID « LevelOne » (Me rejoindre) dans la liste. Félicitations ! Le mode AP a été configuré avec succès. - 17 -...
  • Seite 18: Español

    Español Instalación del Hardware 1. Hale la cubierta para removerla 2. Conecte el cable Cat.5/5e/6 en el puerto RJ-45. 3. Ponga la cubierta en su lugar nuevamente, deslizándola 4. Conecte el cable de corriente en el puerto DC del inyector PoE - 18 -...
  • Seite 19 5. Conecte el cable Cat.5/5e/6 al inyector PoE. La instalación complete deberá lucir como en la siguiente imagen. Para más detalles, por favor verifique el manual de usuario en las páginas 4 a 13. - 19 -...
  • Seite 20: Configuración

    Configuración Verifique su configuración de conexión Asegúrese de que su PC puede obtener una dirección IP automáticamente, de manera que el Router se pueda comunicar con su PC durante la configuración. Seleccione “Panel de Control” > “Conexiones de Red” Clic derecho en “Conexión de Área Local” y seleccione “Propiedades” Seleccione el protocolo TCP/IP para su tarjeta de red Haga clic en el botón Propiedades.
  • Seite 21 Modo AP 1. Seleccione Inalámbrico > Configuraciones Básicas, para la configuración inalámbrica básica Haga clic en Guardar. Seleccione Inalámbrico > Configuraciones de Seguridad, para cambiar las configuraciones de seguridad. Haga clic en Guardar. - 21 -...
  • Seite 22 Ahora puede ver SSID “LevelOne” en la lista. Felicitaciones! El modo AP está ahora configurado correctamente. - 22 -...
  • Seite 23: Nederlands

    Nederlands Hardware-installatie 1. Pak de afdekkap en trek er stevig aan om hem te verwijderen 2. Steek een Cat.5/5e/6-kabel in de RJ-45-aansluiting. 3. Doe de afdekkap weer dicht 4. Steek het voedingssnoer in de DC-aansluiting van de PoE-injector - 23 -...
  • Seite 24 5. Breng de delen uit stap 3 en stap 4 bij elkaar door het andere uiteinde van de Cat.5/5e/6 kabel in stap 3 te steken in de PoE-aansluitig van de PoE-injector uit stap 4. Is stap 5 voltooid, dan ziet het geheel er als volgt uit.
  • Seite 25 Configuratie Controleer de netwerkinstellingen om aan te melden bij de gebruikersinterface Zorg ervoor dat de computer zelf een IP-adres kan verkrijgen, zodat de router tijdens de configuratie met de computer kan communiceren. Selecteer “Configuratiescherm” > “Netwerkverbindingen”. Klik met de rechterknop op “Local Area Connection” en kies “Eigenschappen”. Selecteer het TCP/IP-protocol voor uw netwerkkaart.
  • Seite 26 AP-stand 1. Kies Wireless (Draadloos) > Basic Settings (Basisinstellingen) voor de draadloze basisinstellingen Klik op Save (Opslaan). Kies Security (Beveiliging) om de beveiligingsinstellingen te veranderen. Klik op Save (Opslaan). - 26 -...
  • Seite 27 U ziet nu SSID “LevelOne” in de lijst. Gefeliciteerd! De AP-stand is nu met succes geconfigureerd. - 27 -...
  • Seite 28: Dansk

    Dansk Hardware Installation 1. Grib fat I overdel og træk den bagud for at tage den ud 2. Indsæt Cat.5/5e/6 kabel ind I RJ-45 porten. 3. Skyd overdel tilbage 4. Indsæt strømkabel ind I DC porten på PoE injectoren - 28 -...
  • Seite 29 5. Sæt den anden ende af netværkskablet ind I PoE injektoreren . Når du er færdig med step 5, ser det komplette sæt således ud: For flere detaljer, tjek venligst din burger manual side 4~13 . - 29 -...
  • Seite 30: Konfiguration

    Konfiguration Tjek din netværks opsætninger til login web UI Venligst sikker dig at din PC kan modtage en IP adresse automatisk, så routeren kan kommunikere med din PC under konfigurationen. Vælg “Kontrol Panel” > “Netværks forbindelser”. Højre klik “Local Area Connection” og vælg “egenskaber”. Vælg TCP/IP protokol for dit netværks kort.
  • Seite 31 AP Mode 1. Vælg Wireless > Basic Settings for den trådløse basis opsætning Klik gem/ save. Vælg sikkerhed/security for at ændre sikkerheds opsætninger. Klik gem/save. - 31 -...
  • Seite 32 Nu, kan du se SSID “LevelOne” eller dit eget valgte SSID i listen. Tillykke! AP mode er successfuldt konfigureret. - 32 -...
  • Seite 33: Italiano

    Italiano Installazione dell’hardware 1. Afferrare il coperchio e tirarlo indietro con forza per estrarlo 2. Collegare il cavo Cat. 5/5e/6 alla porta RJ-45. 3. Rimettere il coperchio 4. Collegare il cavo d’alimentazione alla porta DC dell’iniettore PoE - 33 -...
  • Seite 34 5. Collegare gli elementi di cui ai punti 3 e 4 collegando l’altra estremità del cavo Cat. 5/5e/6 di cui al punto 3 alla porta PoE dell’iniettore PoE di cui la punto 4. Dopo avere completato le istruzioni del punto 5, il set completo sarà...
  • Seite 35: Configurazione

    Configurazione Controllare le impostazioni di rete per accedere all’interfaccia web Assicurarsi che il PC possa ottenere automaticamente l’indirizzo IP così che il router possa comunicare col PC durante la configurazione. Selezionare “Pannello di controllo” > “Connessioni di rete”. Fare clic col tasto destro del mouse su “Connessione alla rete locale (LAN)” e poi fare clic su “Proprietà”.
  • Seite 36 Modalità punto d'accesso 1. Scegliere Wireless > Basic Settings (Impostazioni di base) per le impostazioni wireless di base Fare clic su Save (Salva). Scegliere Security (Protezione) per modificare le impostazioni di protezione. Fare clic su Save (Salva). - 36 -...
  • Seite 37 Adesso, nell’elenco si vede SSID “LevelOne”. Congratulazioni! La modalità AP (Punto d’accesso) è stata configurata correttamente. - 37 -...
  • Seite 38: Ελληνικά

    Ελληνικά Οδηγός Εγκατάστασης 1. Τραβήξτε το καπάκι προς τα πίσω µε δύναµη για να το αφαιρέσετε 2. Συνδέστε το καλώδιο δικτύου(Cat.5/5e/6) στην υποδοχή RJ45. 3. Τοποθετήστε το καπάκι στην θέση του 4. Συνδέστε το καλώδιο τροφοδοσίας στην θύρα DC της συσκευής PoE injector - 38 -...
  • Seite 39 5. Συνδέστε την άλλη άκρη του καλωδίου δικτύου (Cat.5/5e/6) του AP, στην θύρα POE της συσκευής PoE Injector. (Στην συνέχεια θα χρειαστείτε σαφώς ένα δεύτερο καλώδιο δικτύου για την σύνδεση από τη θύρα LAN της συσκευής PoE Injector, στο τοπικό σας δίκτυο (switch, hub)). Τέλος συνδέστε το τροφοδοτικό...
  • Seite 40 Ρύθµιση Ελέγξτε τις ρυθµίσεις του δικτύου σας για πρόσβαση στην σελίδα διαχείρισης της συσκευής. Παρακαλώ ελέγξτε ότι ο υπολογιστής σας έχει την ρύθµιση ¨Αυτόµατη απόδοση ΙΡ¨, ώστε να µπορεί να επικοινωνεί µε τον Router καθ’ όλη την διάρκεια των ρυθµίσεων. Επιλέξτε...
  • Seite 41 Λειτουργία ΑΡ 1. Επιλέξτε Wireless > Basic Settings για τις βασικές ρυθµίσεις για το ασύρµατο Πατήστε save. Επιλέξτε Security για να αλλάξετε τις ρυθµίσεις για το ασύρµατο. Πατήστε Save. - 41 -...
  • Seite 42 Τώρα θα δείτε το SSID “LevelOne” στην λίστα των διαθέσιµων ασύρµατων δικτύων. Συγχαρητήρια! Ολοκληρώθηκαν οι βασικές ρυθµίσεις της συσκευής. - 42 -...
  • Seite 43: Português

    Português Instalação do hardware 1. Segure a tampa e puxe com força para trás para a remover 2. Ligue o cabo Cat.5/5e/6 à porta RJ-45. 3. Coloque novamente a tampa 4. Ligue o cabo de alimentação à entrada DC do injector PoE - 43 -...
  • Seite 44 5. Junte os dispositivos mencionados no passo 3 e passo 4 ligando a outra extremidade do cabo Cat.5/5e/6 mencionado no passo 3 à porta PoE do injector PoE mencionado no passo 4. Depois de concluir o passo 5, o conjunto complete deverá ser semelhante à imagem seguinte. Para mais detalhes consulte as páginas 4 a 13 do seu manual do utilizador.
  • Seite 45 Configuração Verifique as suas definições de rede para iniciar sessão na interface Web Certifique-se de que o seu PC consegue obter automaticamente o endereço IP para que o router consiga comunicar com o PC durante a configuração. Seleccione “Painel de controlo” > “Ligações de rede”. Clique com o botão direito em “Ligação de área local”...
  • Seite 46 Modo PA 1. Seleccione Wireless (Sem fios) > Basic Settings (Configurações básicas) para entrar nas configurações básicas do modo sem fios Clique em save (Guardar). Seleccione Security (Segurança) para alterar as definições de segurança. Clique em Save (Guardar). - 46 -...
  • Seite 47 Agora já conseguirá ver a rede SSID “LevelOne” na lista. Parabéns! O modo PA foi configurado com êxito. - 47 -...
  • Seite 48: Svenska

    Svenska Hårdvaruinstallation 1. Håll i locket och dra det bakåt med ett kraftigt ryck för att ta av det 2. Sätt i Cat.5/5e/6-sladden i RJ-45-porten. 3. Sätt tillbaka locket 4. Sätt i nätsladden i DC-porten på PoE-injektorn - 48 -...
  • Seite 49 5. Upprepa steg 3 och 4 genom att sätta i den andra änden av Cat.5/5e/6-sladden i steg 3 i PoE-porten på PoE-injektorn i steg 4. När du är klar med steg 5 skall uppkopplingen se ut som i följande bild. För ytterligare detaljer, se sid 4-13 i användarhandboken.
  • Seite 50 Konfiguration Kontrollera nätverksinställningarna för inloggning till webbgränssnittet Se till att din dator kan ges en IP-adress automatiskt så att routern kan kommunicera med datorn under konfigurationen. Välj “Kontrollpanel” > “Nätverksanslutningar”. Högerklicka på “Lokal nätverksanslutning” och välj “Egenskaper”. Välj TCP/IP-protokoll för ditt nätverkskort. Klicka på...
  • Seite 51 AP-läge 1. Välj Wireless (Trådlöst) > Basic Settings (Grundläggande inställningar) för grundläggande trådlösinställningar Klicka på save (spara). Tryck på Security (Säkerhet) för att ändra på säkerhetsinställningarna. Klicka på Save (spara). - 51 -...
  • Seite 52 Du kan nu se SSID “LevelOne” i listan. Gratulerar! Konfigurationen av AP-läget är nu klar. - 52 -...
  • Seite 53: Slovenščina

    Slovenščina Postavitev naprav 1. Držite pokrov in ga močneje potegnite, da se odpre. 2. Priključite Cat.5/5e/6 mrežni kabel v RJ-45 port. 3. Zaprite pokrov. 4. Vključite napajalni kabel v DC port na PoE injectorju - 53 -...
  • Seite 54 5. Z mrežnim kablom sedaj povežite PoE port na Injectorju in ko končate, mora shema povezanih naprav izgledati kot na spodnji sliki. Za podrobnejša navodila, si prosimo oglejte User manual, na straneh 4~13. - 54 -...
  • Seite 55 Konfiguracija Pred pričetkom preverite vaše mrežne nastavitve Prosimo poskrbite, da bo vaš računalnik samodejno pridobil IP naslov in da bo lahko komuniciral z usmerjevalnikom med postopkom konfiguracije. Izberite “Nadzorna Plošča” > “Omrežne povezave”. Desni klik na “Povezava lokalnega omrežja” in izberite “Lastnosti”. Izberite TCP/IP protocol za vašo mrežno kartico.
  • Seite 56 AP Mode 1. Za osnovne nastavitve izberite Wireless > Basic Settings Na koncu kliknite “Save”. Za varnostne nastavitve izberite Security. Na koncu kliknite “Save”. - 56 -...
  • Seite 57 Sedaj lahko na seznamu brezžičnih omrežij vidite SSID “LevelOne” . Čestitamo! Dostopna točka je bila uspešno konfigurirana. - 57 -...
  • Seite 58 繁體中文 繁體中文 繁體中文 繁體中文 硬體安裝 1. 請抓住機體下蓋, 並往下拉以取下下蓋 2. 請插入 Cat.5/5e/6 網路線至機體上的 RJ-45 孔. 3. 請推回機體下蓋至原處 4. 請插入電源線至 PoE 供電器的 DC 孔內 - 58 -...
  • Seite 59 5. 請將您網路線的另一端插入 PoE 供電器的 PoE 孔內, 以完成完整組裝, 如下圖. 詳細內容請參照使用者手冊裡的第 4 ~ 13 頁. - 59 -...
  • Seite 60 網路設定 網路設定 網路設定 網路設定 檢查您的網路設定 為了您的網路配置能正常運作, 請確定您的個人電腦能自動得到 IP 位址 請選擇 “Control Panel” > “Network Connections”. 請在 “Local Area Connection” 上按滑鼠右鍵並選擇 “Properties”. 請在你所要設定的網路介面卡裡勾選 TCP/IP protocol. 點選 Properties 選項. 您將會看見以下畫面並確定你勾選了 “Obtain IP address automatically” 以及 “Obtain DNS server address automatically” 請打開您的網路瀏覽器(建議使用 Internet Explorer). 請輸入: http://192.168.1.1 使用者帳號: admin 密碼: admin...
  • Seite 61 AP 模式 1. 請選擇 Wireless > Basic Settings 以設定無線網路基礎設定 請點選 ” Apply” 請選擇 Security Settings 以變更無線網路安全設定. 請點選 ”Apply” - 61 -...
  • Seite 62 你將會看到 SSID “LevelOne” 在名單之內. 恭 恭 恭 恭 喜你 喜你 喜你 喜你! AP 模式已設定完成. - 62 -...
  • Seite 63: 한국어

    한국어 한국어 한국어 한국어 제품 설치 2. RJ-45 포트에 랜케이블(Cat.5/5e/6) 을 연결합니다. - 63 -...
  • Seite 64 (4~14 - 64 -...
  • Seite 65 네트워크 환경 설정 웹 UI 로그인하기 위해, 네트워크 설정 Check l” 선택 > “ “ ”. ” 선택. “ ” > “ (TCP/IP) 선택. , ‘ ’ ‘ ’ .” : http://192.168.1.1 User name: admin Password: admin - 65 -...
  • Seite 66 AP Mode 1. Wireless > Basic Settings for the wireless basic settings 선택하고, Save 버튼 클릭. , Security Save - 66 -...
  • Seite 67 SSID “LevelOne” Congratulations! AP mode 가 성공적으로 연결되었습니다. - 67 -...
  • Seite 68: Русский

    Русский Установка оборудования 1. Возьмитесь за крышку и снимите ее, потянув с усилием. 2. Подсоедините кабель категории 5/5e/6 к порту RJ-45. 3. Задвиньте крышку на место 4. Подсоедините кабель питания к порту постоянного тока на PoE-инжекторе - 68 -...
  • Seite 69 5. Соедините элементы вместе, подключив разъем на другом конце кабеля категории 5/5e/6, подключенного на шаге 3, к порту PoE-инжектора, подключенного на шаге 4. После выполнения шага 5 должен получиться готовый набор, показанный на иллюстрации. Дополнительные сведения см. в руководстве пользователя, стр. 4–13. - 69 -...
  • Seite 70 Настройка Проверьте настройки сети для входа в веб-интерфейс пользователя Удостоверьтесь, что компьютер получает IP-адрес автоматически, чтобы маршрутизатор мог осуществлять обмен данными с компьютером во время настройки. Выберите пункты «Панель управления» > «Подключение по локальной сети». Щелкните правой кнопкой мыши значок «Local Area Connection» и в контекстном меню выберите...
  • Seite 71 Режим точки доступа 1. Выберите пункты «Wireless» (Беспроводная сеть) > «Basic Settings» (Основные настройки), чтобы настроить основные параметры беспроводной сети. Нажмите кнопку «Save» (Сохранить). Выберите пункт «Security» (Безопасность), чтобы изменить параметры безопасности. Нажмите кнопку «Save» (Сохранить). - 71 -...
  • Seite 72 Теперь в списке беспроводных сетей должна отображаться сеть SSID «LevelOne». Поздравляем! На этом этапе режим точки доступа настроен. - 72 -...
  • Seite 73: Polish

    Polish Instalacja urządzenia 1. Chwyć za pokrywę i pociągnij ją mocno do tyłu w celu odłączenia 2. Podłącz kabel kat.5/5e/6 do portu RJ-45. 3. Wsuń z powrotem pokrywę 4. Podłącz przewód zasilający do portu prądu stałego injectora PoE - 73 -...
  • Seite 74 5. Ustaw razem elementy wymienione w czynności 3 i czynności 4, podłączając by złącze z drugiej strony kabla kat.5/5e/6 do portu PoE injectora PoE wskazanego w czynności 4. Po zakończeniu czynności 5, kompletny zestaw będzie wyglądał jak na następującej ilustracji. Dalsze szczegółowe informacje znajdują...
  • Seite 75 Konfiguracja Sprawdź ustawienia sieciowe logowania do interfejsu u ytkownika sieci web Sprawdź, czy u ywany komputer PC mo e automatycznie uzyskać adres IP, aby router mógł komunikować się z komputerem PC podczas konfiguracji. Wybierz “Panel sterowania” > “Połączenia sieciowe”. Kliknij prawym przyciskiem “Połączenie lokalne” i wybierz “Właściwości”. Wybierz protokół...
  • Seite 76 Tryb AP 1. Wybierz Wireless (Połączenie bezprzewodowe) > Basic Settings (Ustawienia podstawowe) dla wykonania podstawowych ustawień połączenia bezprzewodowego Kliknij save (zapisz). Wybierz Security (Zabezpieczenie), aby zmienić ustawienia zabezpieczenia. Kliknij Save (Zapisz). - 76 -...
  • Seite 77 Na liście wyświetla się teraz SSID “LevelOne”. Gratulujemy! Tryb AP został pomyślnie skonfigurowany. - 77 -...

Inhaltsverzeichnis