Herunterladen Inhalt Inhalt Diese Seite drucken
Inhaltsverzeichnis

Werbung

Verfügbare Sprachen
  • DE

Verfügbare Sprachen

  • DEUTSCH, seite 55
WebShare 340/440
VPN ROUTER ADSL2+
A02-RA440
A02-RA340
MULTILANGUAGE
QUICK START GUIDE
A02-RA3(4)40_GX01
Where solutions begin
Company certified ISO 9001:2000

Werbung

Inhaltsverzeichnis
loading

Inhaltszusammenfassung für Atlantis Land WebShare 340

  • Seite 1 WebShare 340/440 VPN ROUTER ADSL2+ A02-RA440 A02-RA340 MULTILANGUAGE QUICK START GUIDE A02-RA3(4)40_GX01 Where solutions begin Company certified ISO 9001:2000...
  • Seite 3 Italiano fare riferimento al sito www.atlantis-land.com. ENGLISH This product is covered by Atlantis Land 3 years Fast Swap warranty. For more detailed informations please refer to the web site www.atlantis-land.com. For more detailed instructions on configuring and using this device, please refer to the online manual.
  • Seite 4 WARRANTY. Copyright The Atlantis Land logo is a registered trademark of Atlantis Land SpA. All other names mentioned mat be trademarks or registered trademarks of their respective owners. Subject to change without notice.
  • Seite 5: Inhaltsverzeichnis

    MULTILANGUAGE QUICK START GUIDE ITALIANO 1.1 Contenuto della confezione ....... 9 1.2 I LED frontali............9 1.3 Le porte posteriori..........10 1.4 Cablaggio ............11 1.5 Settaggi di Default ..........12 1.6 Configurazione di IE .......... 13 1.7 Configurazione del PC ........13 Configurazione del PC in Windows 95/98/ME ..
  • Seite 6 MULTILANGUAGE QUICK START GUIDE FRANCAIS 1.1 Contenu de la boîte ........... 40 1.2 Face avant ............40 1.3 Face arrière ............41 1.4 Câblage ............... 42 1.5 Configuration initiale.......... 43 1.6 Configuration du TCP/IP........43 Configuration sous Windows 95/98/ME ....43 Configuration sous Windows NT4.0.......
  • Seite 7 MULTILANGUAGE QUICK START GUIDE ESPANOL 1.1 Contenido de la caja ......... 69 1.2 Los LED frontales ..........69 1.3 Las puertas posteriores ........70 1.4 Cablaje ..............71 1.5 Configuraciones por Defecto ......72 1.6 Configuracciòn de IE......... 72 1.7 Configuracciòn del PC ........73 Configuracciòn del PC en Windows 95/98/ME ..
  • Seite 8 MULTILANGUAGE QUICK START GUIDE A02-RA3(4)40_GX01(V1.01 January 2006)
  • Seite 9: Contenuto Della Confezione

    (Vera) o al manuale esteso presenti sul CDRom allegato. 1.1 Contenuto della confezione Atlantis Land WebShare ADSL2+ VPN Router, CD-Rom contenente il manuale e la guida interattiva multimediale, Guida di Quick Start, cavo RJ-11 ADSL, cavo CAT-5 LAN, Cavo Console RS232-PS2(DB9), Alimentatore (12V, 1A).
  • Seite 10: Le Porte Posteriori

    ITALIANO Acceso quando connesso ad un dispositivo Ethernet Verde= connessione a 100Mbps Arancio= connessione a 10Mbps Lampeggiante quando è trasmissione/ricezione. Acceso quando connesso in modalità ADSL DSLAM. Lampeggiante durante la fase di ADSL allineamento. Acceso verde fisso quando è attiva una sessione PPP.
  • Seite 11: Cablaggio

    ITALIANO connessione è opzionale. Connettere con un cavo UTP. LAN(RJ-45) Dopo che il dispositivo è acceso, Reset premere per effettuare il reset o il restore. operazioni sono seguenti: secondi: resettare dispositivo 3-6 secondi: nessuna azione 10 secondi o più: effettua un ritorno alle condizioni di default (utilizzare, per esempio, in caso si perdesse la password).
  • Seite 12: Settaggi Di Default

    ADSL) e consentono di utilizzare sulla stessa presa sia un telefono analogico che il WebShare VPN Router ADSL2+. Tale filtro non è incluso nella confezione e va acquistato separatamente. Atlantis Land raccomanda di utilizzare apparati certificati per il tipo di linee e consiglia la scelta dei codici A01-AF1 (filtro ADSL tripolare su specifiche Telecom Italia) o A01-AF2.
  • Seite 13: Configurazione Di Ie

    ITALIANO • Indirizzo IP: (192.168.1.254), Subnet Mask (255.255.255.0) • DHCP Server: abilitato 1.6 Configurazione di IE A questo punto è necessario lanciare IE, andare nel menù strumenti, poi scegliere la sezione Connessioni e spuntare una delle seguenti voci: • Non utilizzare mai connessioni remote •...
  • Seite 14: Configurazione Del Pc In Windows Nt4.0

    ITALIANO Configurazione del PC in Windows NT4.0 1. Andare su Start/Settings/ Control Panel. Cliccare per due volte su Network e poi cliccare su Protocols . 2. Selezionare TCP/IP Protocol e poi cliccare su Properties. 3. Selezionare l’opzione Obtain an IP address from a DHCP server e premere OK.
  • Seite 15 ITALIANO Nel TAB Generale cliccare Proprietà.
  • Seite 16: Configurazione Router

    ITALIANO Selezionare Internet Protocol (TCP/IP) e cliccare su Proprietà Selezionare l’opzione Ottieni automaticamente un indirizzo IP e successivamente Ottieni indirizzo server DNS automaticamente. Premere su OK per terminare la configurazione. 1.8 Configurazione Router Digitare nel browser web il seguente indirizzo IP: http://192.168.1.254 e premere il tasto invio.
  • Seite 17 ITALIANO Utilizzare admin (come nome utente) e atlantis (come password). Premere OK per continuare. Apparirà a questo punto il Menù Principale, nella cui parte sinistra è possibile accedere (come se si stessero vedendo i links in una homepage) a tutte le sezioni disponibili: •...
  • Seite 18 ITALIANO configurazione della sezione scelta, oppure si apriranno tutta una serie di sottosezioni tra cui scegliere prima di avere accesso alle configurazione vere e proprie. Seguendo i successivi passi è possibile rendere operativo il WebShare VPN Router ADSL2+ in pochissimo tempo a patto di usare le macchine della Lan configurate come client DHCP.
  • Seite 19 ITALIANO Gateway ed una subnet-mask) è molto probabile che il protocollo usato sia l’RFC 1483 Routed. Una volta scelto il protocollo ADSL utilizzato dall’ISP cliccare su Next per inserire i parametri.
  • Seite 20: Pppoe Routed/Pppoa Routed

    ITALIANO PPPoE routed/PPPoA routed PPPoE/PPPoA sono connessioni ADSL conosciute come dial-up DSL. Sono state concepite per integrare servizi a banda larga con un’attenzione particolare alla facilità di configurazione. L’utente può beneficiare di una grande velocità di accesso senza cambiare l’idea di funzionamento, condividere lo stesso account con l’ISP.
  • Seite 21 CDRom allegato al prodotto. Cliccare Save Config to Flash per rendere permanente la configurazione. Si ricorda che tale dispositivo non è adatto a gestire abbonamenti non FLAT o a consumo. Atlantis Land non potrà essere ritenuta responsabile qualsiasi problematica derivante dall’utilizzo di abbonamenti a...
  • Seite 22: Rfc1483 Routed / Ipoa Routed

    ITALIANO configurazione dell’apparato. In caso di dubbio contattare preventivamente l’assistenza tecnica. RFC1483 routed / IpoA routed Controllare che i parametri siano come in figura: • VPI:8 (se non diversamente specificato dall’ISP) • VCI:35 (se non diversamente specificato dall’ISP) • NAT:Enable •...
  • Seite 23 ITALIANO • RIP: Scegliere la versione del protocollo RIP utilizzare. Premere Apply per terminare. Il Led ADSL prima lampeggerà e poi diventerà fisso indicando l’avvenuto allineamento. questo punto accedendo alla sezione Status è possibile controllare l’avvenuta connessione e quindi cominciare la navigazione. Per ogni altro problema si invita alla consultazione del manuale completo o guida rapida multimediale presenti sul CDRom allegato al prodotto.
  • Seite 24 ITALIANO...
  • Seite 25: English

    ENGLISH For more detailed instructions on configuring and using the WebShare VPN Router ADSL2+, please refer to the online manual. Before beginning the configuration of the Router you have to know the parameters of your subscription ADSL. There are four ways PPPoE, PPPoA, RFC1483 routed, RFC1483 Bridge for the device to have a public IP address and then to access Internet.
  • Seite 26: Package Contents

    Subnet mask Default Gateway (IP address) IP address (DNS) 1.1 Package contents Atlantis Land WebShare VPN Router ADSL2+, CD-Rom with manual, Quick Start Guide, cable RJ-11 ADSL, cable CAT-5 LAN, Power Adapter AC-DC (12V, 1A). 1.2 The Front Panel LEDs...
  • Seite 27: The Rear Ports

    ENGLISH MEANING Lit when power ON. Lit steady when system is ready. Lit when connected to Ethernet device Green for 100Mbps; Orange for 10Mbps Blinking when data transmit/received. Lit when successfully connected to an ADSL ADSL DSLAM. Lit steady when there is a PPPoA / PPPoE connection.
  • Seite 28: Cabling

    ENGLISH PORT MEANING Connect the supplied RJ-11 cable to Line (RJ11) this port when connecting to the ADSL/telephone network. Connect a PS2/RS232(DB9) cable to this port when connecting to a PC’s RS-232 port. Connect an UTP Ethernet cable to LAN( RJ-45) one of the four LAN ports when connecting to a PC or an office/home network of 10Mbps or 100Mbps.
  • Seite 29: Default Settings

    ENGLISH Router ADSL2+ and then to the socket. The product will carry on immediately a diagnosis (60 seconds). Finished this the Led PWR, SYS (eventually even the Led LAN, if connected to PCs) will be fixed green. The Led ADSL, if suitably connected, at first will be flashing and then it will remain fixed.
  • Seite 30: Ie Configuration

    ENGLISH Before you configure this WebShare ADSL Router2+, you need to know the following default settings: • Username:admin • Password:atlantis • IP address (192.168.1.254), Subnet Mask (255.255.255.0) • DHCP Server: enable 1.6 IE Configuration Now open IE, go to Instruments menu, select the Connections tab and select one of the following options: •...
  • Seite 31: Configuring Pc (Windows Nt4.0)

    ENGLISH Configuring PC (Windows NT4.0) Go to Start / Settings / Control Panel. In the Control Panel, double-click on Network and choose the Protocols tab. Select TCP/IP Protocol and click Properties. Select the Obtain an IP address from a DHCP server radio button and click OK.
  • Seite 32 ENGLISH Double-click Local Area Connection. In the LAN Area Connection Status window, click Properties.
  • Seite 33: Browser Configuration

    ENGLISH Select Internet Protocol (TCP/IP) click Properties. Select the Obtain an IP address automatically and the Obtain DNS server address automatically radio buttons. Click OK to finish the configuration 1.8 Browser configuration Open the web browser, enter the local port IP address of this WebShare VPN Router ADSL2+, which default at 192.168.1.254, and click “Go”...
  • Seite 34 ENGLISH The default username is admin, password atlantis and click “OK” to continue. At the configuration homepage, the left navigation pane where bookmarks are provided links you directly to the desired setup page, including: • Status (ARP Table, Routing Table, DHCP Table, PPTP Status, IPSec Status, L2TP Status, Email Status, Event Log, Error Log, Nat Sessions,...
  • Seite 35: Pppoe Routed/Pppoa Routed

    ENGLISH mode. Refer to manual on Installation CD if you need personalized configuration. If the ADSL Led flashes periodically You have force modulation. Click Configuration, WAN then ADSL. On the combo-box Connection Mode please choose ADSL. Press Apply and then click on Save Config to Flash.
  • Seite 36 ENGLISH These are configuration parameters: • Virtual Circuit: Enable • VPI: 0 or 1 (check with your ISP) • VCI: 38 or 50 (check with your ISP) • NAT: Enable • Username: Enter the username provided by your ISP(case sensitive). •...
  • Seite 37 ENGLISH disconnected by the ISP. Chose Connect on Demand If you want to establish a PPPoE session only when there is a packet requesting access to the Internet. • Idel Timeout: Auto-disconnect the Router when there is no activity on the line for a predetermined period of time. •...
  • Seite 38: Rfc1483 Routed / Ipoa Routed

    ENGLISH RFC1483 routed / IpoA routed These are configuration parameters: • VPI: 0 or 1 (check with your ISP) • VCI: 38 or 50 (check with your ISP) • NAT:Enable • Encapsulation: please use LLC Routed. If You have problem You have to check with your ISP about which Encapsulation Method is adopted.
  • Seite 39 FRANCAIS Ce guide d’installation rapide vous permet d’installer et de configurer le WebShare VPN Router ADSL2+ suivant des paramètres standards. Pour plus de précisions, tant méthodes configuration paramétrage avancé, reportez-vous au Manuel sous format électronique (PDF) ou à la Multimedia Guide disponible sur le CD Rom fourni.
  • Seite 40: Contenu De La Boîte

    FRANCAIS VPI/VCI RFC1483 VC-based ou LLC-based multiplexing Routed Adresse IP Masque de sous-réseau Adresse IP du Default Gateway Adresses IP des serveurs DNS VPI/VCI IPoA VC-based ou LLC-based multiplexing Adresse IP Masque de sous-réseau Adresse IP du Default Gateway Adresses IP des serveur DNS 1.1 Contenu de la boîte Avant l’installation, assurez-vous de disposer des éléments suivants : WebShare VPN Router ADSL2+, câble réseau...
  • Seite 41: Face Arrière

    FRANCAIS SIGNIFICATION Allumé quand le WebShare VPN Router ADSL2+ est sous tension. Allumé pour indiquer que le système est actif. Allumé quand le LAN (réseau) est connecté Vert= connexion à 100Mbps Orange= connexion à 10Mbps Il clignote lors des transferts de données. Si allumé...
  • Seite 42: Câblage

    FRANCAIS PORT USAGE Connectez le câble (fourni) RJ11 au ADSL(RJ11) filtre ADSL (optionnel) et enfin à la prise téléphonique. Relier directement avec le câble au PC (connexion optionnelle). Relier directement avec un câble LAN (RJ-45) Ethernet standard ou croisé aux PC ou à...
  • Seite 43: Configuration Initiale

    FRANCAIS Internet). Si la LED ADSL clignote toujours, regardez la section 1.8 du manuel, pour résoudre le problème. 1.5 Configuration initiale Avant de commencer la configuration du WebShare VPN Router ADSL2+ il est nécessaire de connaître la configuration initiale (paramètres par défaut). Pour pouvoir utiliser le WebShare VPN Router ADSL2+ en peu de temps, il suffit de garder la configuration par défaut, de mettre les PC en client DHCP et de configurer l’accès...
  • Seite 44: Configuration Sous Windows Nt4.0

    FRANCAIS Dans l’onglet Adresse IP Sélectionnez l’option « obtenir automatiquement une adresse IP ». Sélectionnez l’onglet DNS. Sélectionnez l’option Désactiver DNS et cliquez sur OK pour terminer la configuration. Vous devez redémarrer l’ordinateur pour que les changements prennent effet. Configuration sous Windows NT4.0 Allez au Panneau de Configuration.
  • Seite 45: Configuration Sous Windows Xp

    FRANCAIS Cliquez sur OK pour terminer la configuration Configuration sous Windows XP Allez sur Panneau de Configuration. Double-cliquez sur Accès Réseau Double-cliquez sur Connexion au Réseau local. Cliquez Propriétés.
  • Seite 46 FRANCAIS Sélectionnez Internet Protocol (TCP/IP) et cliquez sur Properties. Sélectionnez Obtenir adresse automatiquement et après Obtenir les adresses des serveurs DNS automatiquement.
  • Seite 47: Vérification

    FRANCAIS Cliquez sur OK pour terminer la configuration. 1.7 Vérification Pour vérifier le succès de la configuration (après avoir redémarré le PC, opération nécessaire sous Win98, SE, ME) utiliser le PING. Dans la fenêtre Dos écrivez: PING 192.168.1.254. Si le message suivant apparaît: Pinging 192.168.1.254 with 32 bytes of date: Reply from 192.168.1.254: bytes=32 times <10ms TTL=64...
  • Seite 48: Configuration Avec Le Browser

    FRANCAIS Reply from 192.168.1.254: bytes=32 times <10ms TTL=64 Vous pouvez procéder en allant au point suivant (1.8 Configuration). Si par contre le message suivant apparaît: Pinging 192.168.1.254 with 32 bytes of date: Request timed out. Request timed out. Request timed out. Vérifiez que le Led LAN est bien allumé.
  • Seite 49 FRANCAIS Il apparaîtra à ce point le Menu Principal (pour accéder à l'interface en français cliquer sur Langage et sélectionner French). Dans la partie gauche on pourra accéder, à toutes les sections: • Etat (Table ARP, Table de Routage, Table DHCP, Statut PPTP, Statut IPSec, Statut L2TP, Statut Email, Log des événements, Log d’erreurs,...
  • Seite 50 FRANCAIS Sessions NAT, Diagnostique, Ports UPnP) • Démarrage rapide • Configuration (LAN, WAN, Système, Pare Feu, VPN, QoS, Serveur Virtuel, Calendrier, Avancé) • Sauvegarde en mémoire • Language (English, Français) En suivant les indications ci-dessous il est possible de rendre opérationnel le WebShare VPN Router ADSL2+ en peu de temps à...
  • Seite 51: Pppoe Routed /Pppoa Routed

    FRANCAIS Presser sur Configuration, puis WAN et après FAI (Changer) pour choisir le type de protocole ADSL. PPPoE Routed /PPPoA Routed Le protocole PPPoE (Point to Point Protocol over Ethernet) est l’une des méthodes utilisées en France. Il a été conçu (comme le PPPoA) pour compléter le service ADSL avec une attention spéciale pour facilité...
  • Seite 52 FRANCAIS Auto – PAP – CHAP). Ce choix dépend de votre FAI, laisser par défaut sur Auto, le routeur se chargera du choix en fonction de la ligne. • Connexion (Connection) : Cochez Toujours connecté (Always On) si vous désirez que votre connexion ADSL soit toujours active.
  • Seite 53: Rfc1483 Routed / Ipoa Routed

    Atlantis-Land. Atlantis Land ne pourra pas être considérée responsable en cas d’erronée ou mauvaise configuration de l’appareil. Il ne faut pas utiliser le dispositif avec des abonnements non Forfait (non Flat).
  • Seite 54 FRANCAIS • VCI: 67 ou 35 ou 32 (contacter le FAI) • NAT: Valide Enable) • Méthode d'encapsulation (Encapsulation): Routé (contacter le FAI). Cochez Utiliser l’adresse IP suivante et aprés introduisez: • Adresse IP(Static IP Address)= introduisez l’adresse • Masque de sous réseau(Subnet Mask)= introduisez le masque de sous-réseau.
  • Seite 55: Deutsch

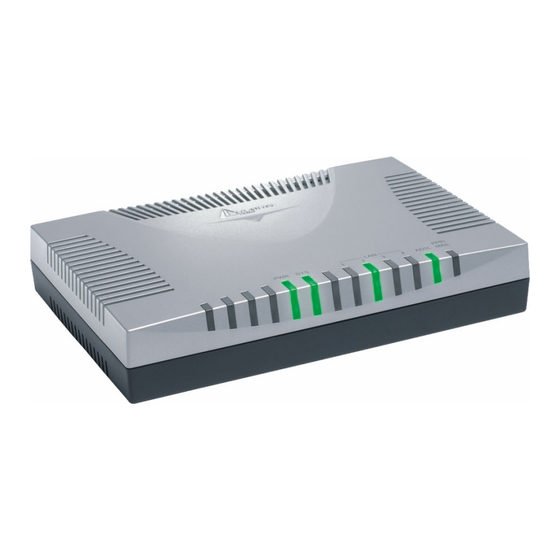
    Sie Bezug auf das vollig Hanbuch, das im CD ist,wenn Sie weitere Einzelheiten uber die Konfiguration brauchen. 1.1 Inhalt der Verpackung Atlantis Land WebShare VPN Router ADSL2+, CD- ROM,der das Handbuch enthalt, Quick Start Anleitung, Kabel RJ-11 ADSL,...
  • Seite 56: Die Hinterturen

    DEUTSCH Orangengelb= Verbindung zu 10Mbps Es blitzt, wenn es Ubersendung/Empfang gibt. Es ist fest eingeschaltet,wenn es in ADSL DSLAM weise verbunden ist. Es blitzt ADSL wahrend des Ausrichtenzeit. Es fest eingeschaltet, wenn das PPP fertig PPP/MAIL 1.3 Die Hinterturen TUREN BENUTZUNG Verbinden Sie den RJ-11 Kabel zu...
  • Seite 57: Verdrahtung

    DEUTSCH Taste,um der reset oder der restore zu machen. Verbinden Sie den Speiser mit diesem POWER (jack) jack. Verbinden Sie den Speiser mit diesem POWER jack. (On/Off) 1.4 Verdrahtung Zunächst müssen Sie das Produkt dem ADSL Linie durch das gegebenen RJ11 Kabel (in die LINE Tur), verbinden, dann verbinden Sie die PC Ihrer Lan oder die Switch den Türen RJ45.
  • Seite 58: Die Ie Konfiguration

    DEUTSCH eingehende Konfiguration,nehmen Sie Bezug auf den Handbuch,das im CD findet. Die Konfigurationen des Default des Atlantis WebShare VPN Router ADSL2+ sind: • Username:admin • Password:atlantis • IP (192.168.1.254), Subnet Mask (255.255.255.0) • DHCP Server staatlich 1.6 Die IE Konfiguration Jeztz ist es notwendig,IE einzufuhren, in Menu Instrument zu gehen, dann der tab Verbindungen wahlen und eine der folgende Stimmen zu wahlen:...
  • Seite 59: Konfiguration Des Pc In Windows Nt4.0

    DEUTSCH Wahlen Sie die Option Obtain an IP address automatically (nachdem Sie IP Address gewahlt haben). Gehen Sie auf DNS Configuration. Wahlen Sie die Option Disable DNS und drucken Sie auf OK, um die Konfiguration zu enden. Leiten Sie wieder den PC,damit die Anderung geschehen.
  • Seite 60: Konfiguration Des Pc In Windows Xp

    DEUTSCH Wahlen Sie die Option Obtain an IP address automaticall und spater Obtain DNS server address automatically. Drucken Sie auf OK,um die Konfiguration zu enden. Konfiguration des PC in Windows XP Gehen Sie auf Start dann auf Control Panel. Drucken Sie zweimal auf Network (in Classic View) Connections.
  • Seite 61 DEUTSCH Wahlen Sie Internet Protocol (TCP/IP) und drucken Sie auf Properties. Wahlen Sie die Option Obtain an IP address automatically und spater Obtain DNS server address automatically . Drucken Sie auf OK,um die Konfiguration zu enden..
  • Seite 62 DEUTSCH...
  • Seite 63: Konfiguration Des Router

    DEUTSCH 1.8 Konfiguration des Router Mit dem browser web, kommen Sie in den folgenden IP Adresse (wo man den URL steckt)dessen default ist: 192.168.1.254,und drucken Sie die Taste Ubersendung. Benutzen Sie admin (als user name) und atlantis (als password). Drucken Sie OK, um weiter zu gehen. Jeztz wird den Hauptmenu erscheinen,links wird man in alle Abschnitten: •...
  • Seite 64 DEUTSCH Wenn man auf die gewunschte Abschnitt druckt,wird man im Raum des Homepage alle Einstellung des gewahlten Konfiguration sehen,oder eine Reihe von Abschnitte wird offnen,und Sie kann unter sie wahlen,bevor Sie in den wahre Konfigurationen kommen. Wenn Sie die nachste Schnitten folgen,konnen Sie in kurze Zeit WebShare ADSL...
  • Seite 65: Pppoe Routed/Pppoa Routed

    DEUTSCH PPPoE routed/PPPoA routed PPPoE/PPPoA sind ADSL Verbindungen,und sie sind als dial-up DSL bekannt.Sie sind ausgedacht werden,um Weitstreifen Verbindungen zu erganzen,.mit einer besonders Aufmerksamkeit der Leichtigkeit des Konfiguration. Der Benutzer kann eine grosse Zugriffschnelligkeit geniessen, ohne die Arbeitsweise zu andern,und derselbe account mit ISP teilen.
  • Seite 66 DEUTSCH • Password: Stecken Sie den von Ihren ISP gegebenen Password (case sensitive). • IP Address:0.0.0.0 • Authentication Protocol: Auto • Connection : Always On • Idle Timeout : • RIP: No RIP • MUT : 1492(PPPoE), 1500(PPPoA) Drucken Sie auf Apply, um die neue Konfiguration operativ machen.Wenn Konfiguration beendet...
  • Seite 67: Rfc1483 Routed / Ipoa Routed

    DEUTSCH RFC1483 routed / IpoA routed Sehen wir den Paremeter, die man darstellen muss: • VPI: 8 (ISP) • VCI: 35 (ISP) • NAT: Enable • Encapsulation Method: LLC Routed Wahlen Sie die Einkapselungmethode Ihres provider. • IP Address: Stecken Sie Ihren offentlich IP. •...
  • Seite 68 DEUTSCH Jetzt,wenn Sie in die Sektion Status kommen, konnen Sie geschehene Verbindung kontrollieren Schutzstand beginnen.Fur jederen anderen Problemen,befragen Sie das vollstandige Handbuch,das sich anliegend im CDRom befindet.
  • Seite 69: Espanol

    Este manual ha sido creado como guía rápida, para más detalles relativos a la configuración acude al manual extenso que está en el CD. 1.1 Contenido de la caja Atlantis Land WebShare VPN Router ADSL2+, CD-Rom contenente el manual, Guía rápida, cable RJ-11 ADSL, cable CAT-5 LAN , Alimentador (12V, 1A).
  • Seite 70: Las Puertas Posteriores

    ESPAÑOL funcionamiento del link a 10Mbps. Si brilla indica transferencia de datos, si está apagado indica que un link no funciona. El encendido verde fijo indica la correcta ADSL alineación, si brilla está alineándose. El encendido verde cuando son transferidos datos en la WAN (PPPoA/PPPoE).
  • Seite 71: Cablaje

    ESPAÑOL Luego haber encendido Reset dispositivo, aprieta delicadamente durante segundos. Router efectuará un reboot y volver a las condicciones de default. Jack conexionar POWER(Jack) alimentador. Para encender o apagar el aparato. POWER(On/Off) 1.4 Cablaje Primero tienes que conectar el produco a la linea ADSL por medio del cable RJ11 suministrado (en la puerta LINE), luego conecta a las puertas RJ45 los PC de tu Lan o los Switch.
  • Seite 72: Configuraciones Por Defecto

    ESPAÑOL està conexionado un telèfono analogico. Hay filtres idòneos que han 2 sortidas (una PSTN y una ADSL) y permiton de utilizar sobre la misma enchufe el telèfono analogico y el Router ADSL tambièn. Esto filtro no es includo en el producto y tiene que ser adquirido separadamente.
  • Seite 73: Configuracciòn Del Pc

    ESPAÑOL • utilizza la conexiòn remota si no està disponible una conexiòn de red 1.7 Configuracciòn del PC Configuracciòn del PC en Windows 95/98/ME 1. Ve a Start/Settings/Control Panel. Cliccare 2 veces Network y elege Configuration. 2. Elege TCP/IP -> NE2000 Compatible, o cualquiera Network Interface Card (NIC) del PC.
  • Seite 74: Configuración Del Pc En Windows 2000

    ESPAÑOL Configuración del PC en Windows 2000 1. Ve a Start/Settings/Control Panel. pulsa 2 veces Network and Dial-up Connections. 2. Pulsa 2 veces Local Area Connection. 3. En Local Area Connection Status pulsa Properties. 4. Elige Internet Protocol (TCP/IP) y pulsa Properties. 5.
  • Seite 75: Configuracciòn Router

    ESPAÑOL 4. Elige Internet Protocol (TCP/IP) y pulsa Properties. 5. Elige la opcion Obtain an IP address automatically y luego Obtain DNS server address automatically . 6. Aprieta OK para concluir configuración. 1.8 Configuracciòn Router Entrar por medio del browser web a la siguiente direcciòn IP (donde inserta URL)
  • Seite 76 ESPAÑOL Utiliza admin (como nombre usuario) y atlantis (como password). Aprieta OK para seguir. Aparecerà pues el Menù Principal, en su parte izquierda se podrà acceder (como si se veieran los links en una homepage) a todas las secciones: • Status (ARP Table, Routing Table, DHCP Table, PPTP Status, IPSec Status, L2TP Status, Email Status, Event Log, Error Log,...
  • Seite 77: Pppoe Routed/Pppoa Routed

    ESPAÑOL de la Lan y del Router hacer referencia al manual sobre el Elege el protocolo idòneo o apreta Quick Start para efectuar una configuracciòn automàtica. Picar sobre Configuration, WAN y luego ISP(Change). Aparecerá la siguiente imagen en que es posible elegir el protocolo utilizado por el ADSL.
  • Seite 78 ESPAÑOL up DSL. Han sido creadas para integrar servicios de banda ancha con una atención particular a la facilidad de configuración. El usuario puede beneficiarse de una gran velocidad de acceso sin cambiar la idea de funcionamiento y compartir la misma cuenta con el ISP. No es necesario ningun software suplementario.
  • Seite 79: Rfc1483 Routed / Ipoa Routed

    ESPAÑOL RFC1483 routed / IpoA routed Vemos los parametros de configurar: • VPI: 8 • VCI: 35 • NAT: Enable • Encapsulation: Inserte el protocolo suministrato por vuestro ISP (LLC Routed) Seleccionar Use the Following IP Address • IP address: deja esto parametro con el valor correcto.
  • Seite 80 ESPAÑOL...
  • Seite 81 Atlantis Land S.p.A. Viale De Gasperi, 122 Mazzo di Rho – MI – Italy info@atlantis-land.com sales@atlantis-land.com Where solutions begin Company certified ISO 9001:2000...

Diese Anleitung auch für:

Webshare 440A02-ra340A02-ra440

Inhaltsverzeichnis