Herunterladen Inhalt Inhalt Diese Seite drucken
Klarstein 10022113 Anschluss- Und Anwendungshinweise

Klarstein 10022113 Anschluss- Und Anwendungshinweise

Eiscrememaschine

Werbung

Verfügbare Sprachen
  • DE

Verfügbare Sprachen

  • DEUTSCH, seite 1
Eiscrememaschine
10022113
10022114
10028711

Werbung

Inhaltsverzeichnis
loading

Inhaltszusammenfassung für Klarstein 10022113

  • Seite 1 Eiscrememaschine 10022113 10022114 10028711...
  • Seite 2: Inhaltsverzeichnis

    Konformitätserklärung ..........8 Technische Daten Artikelnummer 10022113 10022114 10028711 Stromversorgung 220-240 V...
  • Seite 3 • Setzen Sie dieses Gerät nicht dem Regen aus. • Ausschließlich das empfohlene Zubehör verwenden. • Reparieren Sie dieses Gerät nicht selbst. Wenden Sie sich zur Wartung an qualifiziertes Kundendienstper- sonal. • Stellen Sie keine schweren Gegenstände auf dieses Gerät. •...
  • Seite 4: Geräteübersicht

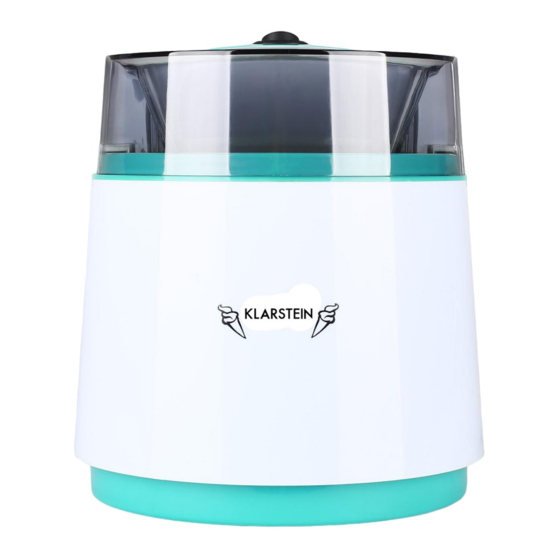
    Geräteübersicht Antrieb 2 Deckel 3 Rührerführung 4 Rührer 5 Ein- und Ausschalter 6 Eisbehälter Bedienung • Reinigen Sie alle Einzelteile vor der ersten Nutzung. • Stellen Sie den Tank für ca. 8-12 Stunden in einen Gefrierschrank mit einer Temperatur von -18 °C. •...
  • Seite 5 1. Setzen Sie den Antrieb und den Deckel ineinander, bis es klickt. 2. Setzen die Rührerführung und den Rührer in den Deckel ein. 3. Setzen Sie die Gesamtkonstruktion in den Eisbehälter ein. Sichern Sie den Sitz durch eine Drehbewegung gegen den Uhrzeigersinn.
  • Seite 6: Rezepte

    4. Schalten Sie das Gerät ein. Rezepte Milcheis Zutaten Zubereitung 130 ml Milch 1. Stellen Sie die Schüssel vor der Zubereitung mind. 8 Stunden in einen Tiefkühler. 130 ml Schlagsahne 2. Schlagen Sie die Sahne steif. 40 g Zucker 3. Vermischen Sie die alle Zutaten gründlich. 4.
  • Seite 7 30 g Zucker 2. Schlagen Sie die Sahne steif. Pürieren Sie die Mangos. 2 reife Mangos 3. Vermischen Sie die alle Zutaten gründlich. (ca. 160 g) 4. Kühlen Sie die Mischung auf 5-10° C runter. 5. Geben Sie die Mischung in den Eisbehälter und schalten Sie das Gerät an. Erdbeereis Zutaten Zubereitung...
  • Seite 8: Reinigung Und Pflege

    Reinigung und Pflege • Schalten Sie das Gerät aus und nehmen Sie es auseinander. • Eisbehälter: ◦ Lassen Sie den Eisbehälter auf Raumtemperatur erwärmen, bevor Sie ihn reinigen. ◦ Waschen Sie ihn innen gründlich mit warmen Wasser aus. Wischen Sie das Äußere mit einem feuch- ten Lappen.
  • Seite 9: Technical Data

    Declaration of Conformity ......... 15 Technical Data Item number 10022113 10022114 10028711 Voltage 220-240 V...
  • Seite 10 • Use only the recommended accessories. • Do not repair the appliance by yourself. Turn to the customer support. • Do not place heavy objects on this device. • Please keep the original packaging. To ensure sufficient protection when transporting this device, put it back in the original packaging.
  • Seite 11: Overview

    Overview Power unit 2 Lid 3 Spindle 4 Paddle 5 On/off button 6 Freezer bowl Operation • Wash the parts before first use. • Place the freezer tank into a freezer 8-12 hours in advance. • Prepare the ice cream or sorbet mixture (see recipe). Allow the mixture to cool down in the refrigerator to 5-10 °C.
  • Seite 12 1. Connect the power unit to the lid, It will click into place. 2. Assemble the spindle and paddle into the power unit. 3. Take out the freezer tank from the freezer. 4. Place the assembled power uint/lid/spindle/ paddle onto the freezer tank. Then turn anti- clockwise to lock into position.
  • Seite 13: Recipes

    5. You can now turn on the ice cream maker. Recipes Milk ice cream Ingredients Preparation 130 ml pure milk, 130 ml 1. Place the cooling bowl in the freezer for at least 8 hours prior to preparing whipping cream your ice cream mixture.
  • Seite 14: Strawberry Ice Cream

    30 g sugar 2. Mash the mango. 2 mangos 3. Stir the light cream until sticky status. (ca. 160 g) 4. Mix the mashed mango, pure milk, light cream and white sugar. Then store them inside acooler and cool down to 5-10 °C. 5.
  • Seite 15: Cleaning And Care

    Cleaning and Care • Always switch off, unplug and dismantle the appliance before cleaning. • Freezer bowl ◦ Allow the freezer bowl to reach room temperature before attempting to clean it. ◦ Wash it thoroughly from the inside with warm water, from the outside, wipe the tank with a damp cloth.
  • Seite 16: Dati Tecnici

    Dichiarazione di conformità ........22 Dati tecnici Numero articolo 10022113 10022114 10028711 Alimentazione 220-240 V...
  • Seite 17 • Utilizzare esclusivamente l’ a ccessorio consigliato. • Non aprire mai il prodotto e non tentare mai di ripararlo autonomamente. • Non posizionare oggetti pesanti sul dispositivo. • Conservare la confezione originale. Per garantire la massima protezione durante il trasporto, riporre il di- spositivo nella confezione originale.
  • Seite 18: Descrizione Del Prodotto

    Descrizione del prodotto Testa motore 2 Coperchio 3 Albero della pala mescolatrice 4 Pala mescolatrice 5 Interruttore di accensione/ spegnimento 6 Ciotola Messa in funzione e utilizzo • Prima di utilizzare il dispositivo per la prima volta, lavare tutti i componenti. •...
  • Seite 19 1. Assemblare la testa motore e il coperchio fino a sentire un clic. 2. Assemblare l’ a lbero della pala mescolatrice e la pala mescolatrice nel coperchio. 3. Inserire la parte assemblata (testa motore, coperchio, albero della pala mescolatrice, pala mescolatrice) nella ciotola e ruotarla in senso antiorario per bloccarla.
  • Seite 20: Ricette

    4. Accendere il dispositivo. Ricette Gelato al latte Ingredienti Preparazione 130 ml di latte 1. Lasciare la ciotola per almeno 8 ore nel congelatore prima dell’utilizzo. 130 ml di panna 2. Montare la panna. 40 g di zucchero 3. Mescolare accuratamente tutti gli ingredienti. 4.
  • Seite 21: Gelato Alla Fragola

    110 ml di latte 1. Lasciare la ciotola per almeno 8 ore nel congelatore prima dell’utilizzo. 60 ml di panna 2. Montare la panna. Frullare i manghi. 30 g di zucchero 3. Mescolare accuratamente tutti gli ingredienti. 2 manghi maturi 4.
  • Seite 22: Pulizia E Manutenzione

    Pulizia e manutenzione Spegnere il dispositivo e smontarne le parti. Ciotola: • Prima di pulire la ciotola, farla intiepidire a temperatura ambiente. • Lavare accuratamente l’interno con acqua calda. Lavare la parte esterna con un panno umido. • Lasciarla asciugare. Pala Mescolatrice: •...
  • Seite 23: Données Techniques

    Déclaration de conformité ......... 29 Données techniques Numéro d’article 10022113 10022114 10028711 Alimentation électrique 220-240 V...
  • Seite 24 • Ne pas réparer l’ a ppareil soi-même. S’ a dresser au service après-vente pour la maintenance de l’ a ppareil. • Ne placer aucun objet lourd sur l’ a ppareil. • Veuillez conserver la boîte d’ e mballage originale. Ranger l’ a ppareil dans cette dernière, lors de son trans- port, pour obtenir une meilleure protection.
  • Seite 25: Aperçu De L'appareil

    Aperçu de l’appareil Moteur 2 Couvercle 3 Axe d’ e ntraînement 4 Pale 5 Interrupteur marche/arrêt 6 Cuve à glace Fonctionnement • Nettoyer tous les éléments avant la première utilisation. • Placer la cuve au congélateur pendant 8 à 12 heures à une température de -18 °C. •...
  • Seite 26 1. Placer le moteur sur le couvercle jusqu’ à ce qu’il s’ e nclenche. 2. Fixer l’ a xe d’ e ntraînement et la pale au couvercle. 3. Sortir la cuve à glace du réfrigérateur. 4. Placer à présent le moteur sur la cuve. Le fixer en le tournant dans le sens inverse des aiguilles d’une montre.
  • Seite 27: Recette

    5. Allumer l’ a ppareil. Recette Glace au lait Ingrédients Préparation 130 ml de lait 1. Placer la cuve au congélateur pendant au moins 8 heures avant de l’utiliser. 130 ml de crème 2. Fouettez la crème. 40 g de sucre 3.
  • Seite 28: Glace À La Fraise

    30 g de sucre 2. Fouettez la crème. Réduire en purée les mangues. deux mangues 3. Bien mélanger tous les ingrédients. mûres (environs 4. Laisser la base refroidir au réfrigérateur à une température de 5 à 10 °C. 80 g) 5.
  • Seite 29: Entretien Et Nettoyage

    Entretien et nettoyage • Éteindre et débrancher l’ a ppareil. • Cuve à glace : ◦ Laisser la cuve atteindre la température ambiante avant de la nettoyer. ◦ Bien nettoyer l’intérieur de la cuve avec de l’ e au chaude. Nettoyer la surface extérieure avec un chiffon humide.
  • Seite 30: Datos Técnicos

    Declaración de conformidad ........36 Datos técnicos Artikelnummer 10022113 10022114 10028711 Stromversorgung 220-240 V...
  • Seite 31 • Proteja el aparato de la lluvia. • Utilice solamente los accesorios recomendados por el fabricante. • Nunca abra el producto por su cuenta ni intente repararlo. Las reparaciones deberán ser realizadas sola- mente por personal técnico autorizado. • No coloque objetos pesados encima del aparato. •...
  • Seite 32: Descripción Del Aparato

    Descripción del aparato Motor 2 Tapa 3 Eje de las varillas 4 Varillas 5 Interruptor On/Off 6 Depósito Montaje • Limpie todas las partes antes de utilizar el aparato por primera vez. • Meta el depósito en el congelador durante 8-12 horas a una temperatura de -18 °C. •...
  • Seite 33 1. Encaje el motor en la tapa hasta que escuche un chasquido. 2. Acople el eje y las varillas en la tapa. 3. Encaje las piezas ya montadas en el depósito. Asegure ambas partes girándolas en el sentido contrario de las agujas del relojSchalten Sie das Gerät ein.
  • Seite 34: Recetario

    4. Encienda el aparato Recetario Helado de leche Ingredientes Preparación 130 ml de leche 1. Meta el depósito al menos 8 horas en el congelador antes de preparar el 130 ml de nata líquida helado. 40 g de azúcar 2. Bata la nata. 3.
  • Seite 35: Helado De Mango

    Helado de mango Ingredientes Preparación 110 ml de leche 1. Meta el depósito al menos 8 horas en el congelador antes de preparar el helado. 60 ml de nata líquida 2. Bata la nata y triture el mango. 30 g de azúcar 3.
  • Seite 36: Limpieza Y Cuidado

    Limpieza y cuidado Apague el aparato y desmóntelo Recipiente para el helado • Deje que el recipiente alcance la temperatura ambiente antes de limpiarlo. • Lávelo con agua tibia y frote el exterior con un paño húmedo. • Deje que el recipiente se seque. Varillas •...

Diese Anleitung auch für:

1002211410028711

Inhaltsverzeichnis