Herunterladen Inhalt Inhalt Diese Seite drucken
Inhaltsverzeichnis

Werbung

Verfügbare Sprachen
  • DE

Verfügbare Sprachen

  • DEUTSCH, seite 39
INSTALLATION GUIDE
AXIS P5544 PTZ Dome Network Camera

Werbung

Inhaltsverzeichnis
loading

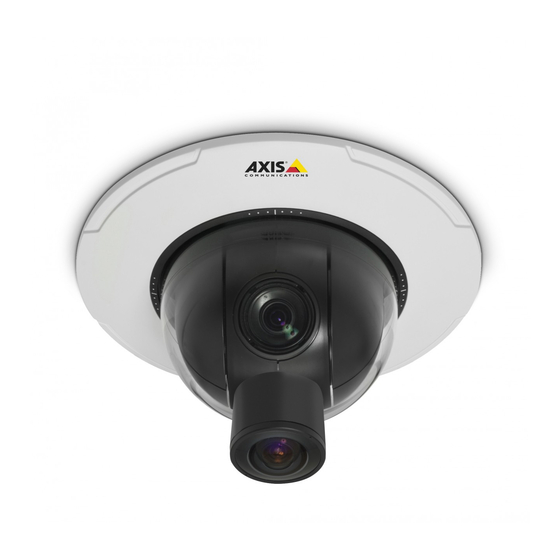
Inhaltszusammenfassung für Axis P5544 PTZ

  • Seite 1 INSTALLATION GUIDE AXIS P5544 PTZ Dome Network Camera...
  • Seite 2 • download user documentation and firmware updates この装置は、家庭環境で使用することを目 的として • find answers to resolved problems in the FAQ database. いますが、この装置がラジオやテレビジョン受信機 Search by product, category, or phrases に近接して使用されると、 受信障害を引き起こすこ • report problems to Axis support by logging in to your とがあります。 取扱説明書に従って正しい取り扱い private support area. をして下さい。...
  • Seite 3: Battery Replacement

    Battery Replacement This Axis product uses a 3.0 V CR2032 lithium battery as the power supply for its internal real-time clock (RTC). Under normal conditions this battery will last for a minimum of 5 years. Low battery power affects the operation of the RTC, causing it to reset at every power-up.
  • Seite 4 Dome Cover Cleaning • Be careful not to scratch or damage the dome cover. Do not clean a dome cover that looks clean to the eye and never polish the surface. Excessive cleaning can damage the surface. • For general cleaning of a dome cover it is recommended to use a non-abrasive, solvent-free neutral soap or detergent with water and a soft cloth.
  • Seite 5: Installation Steps

    Page 5 AXIS P5544 Installation Guide This Installation Guide provides instructions for installing an AXIS P5544 PTZ Dome Network Camera on your network. For all other aspects of using the product, please see the User Manual available at www.axis.com Installation Steps 1.
  • Seite 6: Hardware Overview

    Page 6 AXIS P5544 Installation Guide Hardware Overview Camera unit Control button SD card slot Status indicator LED Restart button Dome cover Dome cover Panopsis lens Top cover Sealing ring Dome ring screw (6x) Dome ring...
  • Seite 7 AXIS P5544 Installation Guide Page 7 Hard ceiling mount Mounting plate Mounting plate screw Drop ceiling mount (3x) Bracket arm (3x) Bracket arm screw and washer (3x) Trim ring Safety wire Camera base lid Camera base lid screw (4x) Hook for safety wire Unit holder (3x) Part number (P/N) &...
  • Seite 8 When connecting external equipment to the Axis product, a multi-connector cable is required in order to maintain the IP51 rating. The multi-connector cable can be purchased from your Axis reseller. For more information, please see the User Manual available at www.axis.com SD card slot –...
  • Seite 9 Multi-Connector Cable (sold separately) When connecting external equipment to the Axis product, a multi-connector cable (available from Axis) is required in order to maintain the product’s IP rating. The multi-connector cable can be purchased from your Axis reseller. Connect the multi-connector cable to the product’s multi-connector, see illustration on page 7. The cable provides the following connectors: Power connector –...
  • Seite 10 Page 10 AXIS P5544 Installation Guide • Digital input — An alarm input for connecting devices that can toggle between an open and closed circuit, for example: PIRs, door/window contacts, glass break detectors, etc. When a signal is received the state changes and the input becomes active (shown under System Options >...
  • Seite 11 AXIS P5544 Installation Guide Page 11 Camera LED Indicators Color Indication Unlit Connection and normal operation. Amber Steady during startup. Flashes during firmware upgrade. Amber/red Flashes amber/red if network connection is unavailable or lost. Flashes red for firmware upgrade failure.
  • Seite 12: Install The Hardware

    Install the Hardware • Do not lift the Axis product, the top cover or the dome cover by the panopsis lens. • Be careful not to scratch or damage the dome cover. Use a soft cloth to wipe clean before attaching the dome cover to the camera unit.
  • Seite 13 After remounting, the alignment of the lens may differ slightly and the PTZ mechanics should be recalibrated. Go to Basic Setup or System Options > Maintenance and click Cal- ibrate PTZ. For more information, see the User Manual available at www.axis.com Hard ceiling mount 1.
  • Seite 14 7. Slide the unit holders on the network camera into the slots on the mounting plate and rotate the camera unit. 8. Install the Axis midspan, see Install the Midspan, on page 17. 9. Check that the indicator LEDs on the midspan indicate the correct conditions, see the table on page 11 for further details.
  • Seite 15 10. Slide the unit holders on the network camera into the slots on the mounting plate and rotate the camera unit. 11. Install the Axis midspan, see Install the Midspan, on page 17. 12. Check that the indicator LEDs on the midspan indicate the correct conditions. See the table on...
  • Seite 16 Wall bracket (mounting example, sold separately) 6. Install the Axis midspan, see Install the Midspan, on page 17. 7. Check that the indicator LEDs on the midspan indicate the correct conditions. See the table on page 11 for further details.
  • Seite 17 11. Remove the protective plastic film. Install the Midspan The supplied midspan enables Axis network video products with high power consumption to receive data and power over the same Ethernet cable. Follow these instructions to connect the midspan. 1. Connect the midspan (Data in) to the network switch using a shielded network cable (STP).
  • Seite 18 The Live View Page The product’s Live View page appears in your browser. Click Setup to open the product’s Setup pages, which allow you to customize the Axis product. Setup - Provides all the tools for Help - Displays online help on configuring the product to all aspects of using the camera.
  • Seite 19: Resetting To The Factory Default Settings

    Installation and Management Software CD. It is also possible to reset parameters to the original factory default settings via the web interface. For more information, see the online help or the User Manual available at www.axis.com Further Information The User Manual is available from the Axis Web site at www.axis.com Tip! Visit www.axis.com/techsup to check if there is updated firmware available for your...
  • Seite 21: Mesures De Sécurité

    Remplacement des piles Ce produit Axis nécessite une pile au lithium CR2032 de 3,0 V pour l'alimentation de son horloge en temps réel interne. Dans des conditions normales d'utilisation, cette pile est censée durer au moins 5 ans. Si la pile est faible, le fonctionnement de l'horloge en temps réel peut être affecté...
  • Seite 22 Nettoyer la bulle du dôme • Veillez à ne pas rayer ou endommager la bulle du dôme. Ne nettoyez pas la bulle du dôme si elle semble propre à l'œil nu et ne frottez jamais sa surface. Un nettoyage excessif peut l'endommager. •...
  • Seite 23: Guide D'installation

    AXIS P5544 Guide d'installation Ce guide d'installation explique comment installer une Caméra réseau dôme PTZ AXIS P5544 sur votre réseau. Pour toute autre question concernant l’utilisation du produit, reportez-vous au Manuel de l'utilisateur, que vous trouverez sur le site www.axis.com.
  • Seite 24: Présentation Du Matériel

    Page 24 AXIS P5544 Guide d’installation Présentation du matériel Caméra Bouton de commande Logement de carte SD Voyant DEL d'état Bouton Redémarrer Bulle du dôme Bulle du dôme Lentille Panopsis Couvercle supérieur Anneau d’étanchéité Anneau du dôme vis (x6) Anneau du dôme...
  • Seite 25: Fixation Au Plafond

    AXIS P5544 Guide d'installation Page 25 Fixation au plafond Plaque de fixation Support vis de plaque Fixation au faux plafond (x3) Bras de support (x3) Bras de support vis et rondelle (x3) Rondelle décorative Fil de sécurité Couvercle de base de la caméra Vis du couvercle de base de la caméra (x4)
  • Seite 26 • Bloc d’alimentation CA/CC Lors du branchement d'un équipement externe au produit Axis, un câble multiconnecteur est requis afin de maintenir la classification IP51. Le câble multiconnecteur est disponible auprès de votre revendeur Axis. Pour de plus amples informations, reportez-vous auManuel de l'utilisateur disponible sur www.axis.com.
  • Seite 27 Câble multiconnecteur (vendu séparément) Lors du branchement d'un équipement externe au produit Axis, un câble multiconnecteur (fourni par Axis) est requis afin de maintenir la classification IP51 du produit. Le câble multiconnecteur est disponible auprès de votre revendeur Axis. Branchez le câble multiconnecteur au produit sur le “multi-connecteur” comme le montre l'illustration à...
  • Seite 28 Page 28 AXIS P5544 Guide d’installation • Entrée numérique — Entrée d'alarme utilisée pour connecter des périphériques pouvant passer d'un circuit ouvert à un circuit fermé, p. ex., les détecteurs infrarouge passifs, les contacts de porte/fenêtre, les détecteurs de bris de verre, etc. Lorsqu’un signal est reçu, l’état change et l’entrée devient active (ce qui est visible sous Options système >...
  • Seite 29 AXIS P5544 Guide d'installation Page 29 Voyants DEL de la caméra Couleur Indication Éteint Connexion et fonctionnement normal Orange Stable pendant le démarrage. Clignote pendant les mises à niveau du microprogramme. Orange/rouge Clignote en orange/rouge en cas d’indisponibilité ou de perte de connexion réseau.
  • Seite 30: Installation Du Matériel

    AXIS P5544 Guide d’installation Installation du Matériel • Ne soulevez pas le produit Axis, le couvercle supérieur ou la bulle du dôme par la lentille Panopsis. • Veillez à ne pas rayer ou endommager la bulle du dôme. Utilisez un chiffon doux pour nettoyer le couvercle du dôme avant de le fixer à...
  • Seite 31 PTZ doivent être recalibrées. Accédez à Configuration de base ou Options système > Maintenance et cliquez sur Calibrer PTZ. Pour de plus amples informations, reportez-vous au Manuel de l'utilisateur disponible sur www.axis.com. Fixation au plafond 1. Préparez le plafond pour monter la plaque de fixation. Marquez les emplacements des trous à...
  • Seite 32 7. Glissez les supports de rack de la caméra réseau dans les logements de la plaque de fixation, puis faites tourner la caméra. 8. Pour installer l'injecteur Axis, reportez-vous à la Installation de l'injecteur, à la page 35. 9. Vérifiez que les voyants DEL sur l’injecteur indiquent les conditions requises. Pour plus d’informations, reportez-vous au tableau à...
  • Seite 33 Plaque de plafond 10. Glissez les supports de rack de la caméra réseau dans les logements de la plaque de fixation, puis faites tourner la caméra. 11. Pour installer l'injecteur Axis, reportez-vous à la Installation de l'injecteur, à la page 35.
  • Seite 34 à la caméra réseau. Support mural (exemple de fixation, vendu séparément) 6. Pour installer l'injecteur Axis, reportez-vous à la Installation de l'injecteur, à la page 35. 7. Vérifiez que les voyants DEL sur l’injecteur indiquent les conditions requises. Pour plus d'informations, reportez-vous au tableau de la page 29 .
  • Seite 35 11. Retirez le film protecteur en plastique. Installation de l'injecteur L'injecteur fourni permet aux produits vidéo Axis, dont la consommation d´énergie est importante, de recevoir des données et l'alimentation via le même câble Ethernet. Procédez comme suit pour connecter l'injecteur.
  • Seite 36 Page Live View La page Live View du produit s'affiche dans votre navigateur. Cliquez sur Configuration pour ouvrir les pages Configuration du produit qui vous permettent de personnaliser le produit Axis.. Configuration : contient tous les outils Aide : affiche l'aide en ligne sur tout ce nécessaires pour configurer le produit en...
  • Seite 37: Autres Informations

    Manuel de l'utilisateur disponible sur www.axis.com. Autres informations Le Manuel de l'utilisateur est disponible sur le site Web d'Axis à l'adresse www.axis.com. Conseil Consultez le site www.axis.com/techsup pour vérifier si des microprogrammes à jour sont disponibles pour votre caméra réseau.
  • Seite 39: Sicherheitsvorkehrungen

    Sicherheitsvorkehrungen Bitte lesen Sie diese Installationsanleitung sorgfältig durch, bevor Sie mit der Installation des Axis Produkts beginnen. Halten Sie die Installationsanleitung bereit, falls Sie darauf zurückgreifen müssen. • Lagern Sie das Axis-Produkt in einer trockenen und belüfteten Umgebung. • Setzen Sie das Axis Produkt keinen Vibrationen, Erschütterungen oder starkem Druck aus. Installieren Sie das Produkt nicht an instabilen Halterungen oder instabilen oder vibrierenden Oberflächen oder...
  • Seite 40: Reinigung Der Kuppelabdeckung

    Reinigung der Kuppelabdeckung • Achten Sie darauf, die Kuppelabdeckung nicht zu zerkratzen oder zu beschädigen. Reinigen Sie die Kuppelabdeckung nicht, solange sie sauber aussieht, und polieren Sie niemals die Oberfläche. Übermäßiges Reinigen kann die Oberfläche beschädigen. • Zur allgemeinen Reinigung einer Kuppelabdeckung wird die Verwendung einer nicht aggressiven, lösungsmittelfreien neutralen Seife bzw.
  • Seite 41: Installationsschritte

    AXIS P5544 Installationsanleitung Seite 41 AXIS P5544 Installationsanleitung In dieser Installationsanleitung wird die Installation der AXIS P5544 PTZ-Dome-Netzwerk-Kamera in Ihrem Netzwerk beschrieben. Alle weiteren Hinweise zur Verwendung des Produkts finden Sie im Benutzerhandbuch, das unter „www.axis.com“ zur Verfügung steht. Installationsschritte 1.
  • Seite 42: Hardwareübersicht

    Seite 42 AXIS P5544 Installationsanleitung Hardwareübersicht Kameraeinheit Steuertaste SD-Speicherkarteneinschub Statusanzeige (LED) Neustarttaste Kuppelabdeckung Kuppelabdeckung Panopsis-Objektiv Obere Abdeckung Dichtungsring Kuppelring Schraube (6x) Kuppelring...
  • Seite 43: Halterung Für Massivdecke

    AXIS P5544 Installationsanleitung Seite 43 Halterung für Massivdecke Montageplatte Montage- Befestigungs- Hängedeckenmontage schraube (3x) Halterungs- (3x) Halterungsarm Schraube und Unterleg- scheibe 3x) Montagering Sicherungsdraht Kameragrundplatte Schraube für Kameragrundplatte (4x) Haken für Sicherheitsdraht Kamerabefestigung (3x) Bestellnummer (P/N) und Seriennummer (S/N). Die Seriennummer wird für die Installation benötigt.
  • Seite 44 • Eingabe-/Ausgabegeräte • AC/DC-Netzteil Wenn Sie externe Geräte an das Axis Produkt anschließen, benötigen Sie ein Mehrfachanschlusskabel, damit der IP51-Schutz erhalten bleibt. Das Mehrfachanschlusskabel können Sie von Ihrem Axis-Händler erwerben. Weitere Informationen finden Sie im Benutzerhandbuch unter www.axis.com. SD-Speicherkarteneinschub – Eine Standard- oder Hochleistungs-SD-Speicherkarte (nicht im Lieferumfang enthalten) kann zur lokalen Aufzeichnung mit Wechselmedien verwendet werden.
  • Seite 45: Mehrfachanschlusskabel (Separat Erhältlich)

    AXIS P5544 Installationsanleitung Seite 45 Mehrfachanschlusskabel (separat erhältlich) Wenn Sie externe Geräte an das Axis Produkt anschließen, benötigen Sie ein Mehrfachanschlusskabel (bei Axis erhältlich), damit der IP-Schutz des Produkts erhalten bleibt. Das Mehrfachanschlusskabel können Sie von Ihrem Axis-Händler erwerben. Verbinden Sie das Mehrfachanschlusskabel mit dem Mehrfachanschluss des Produkts, siehe Abbildung auf Seite 43.
  • Seite 46 Seite 46 AXIS P5544 Installationsanleitung Funktion Hinweise Spezifikationen Masse (GND) 1 Masse 3.3 V Gleich- Kann für die Stromversorgung von Zusatzgeräten verwendet Max. Stromstärke = strom werden. 250 mA Hinweis: Dieser Anschluss kann nur für die Stromversorgung verwendet werden. Konfigurier- 3-6 Digitaler Eingang –...
  • Seite 47: Kamera-Led-Anzeigen

    AXIS P5544 Installationsanleitung Seite 47 Kamera-LED-Anzeigen Farbe Bedeutung Leuchtet nicht Verbindung und Normalbetrieb. Gelb Konstant während der Inbetriebnahme. Blinkt bei der Firmware-Aktualisierung. Gelb/rot Blinkt gelb/rot, wenn die Netzwerkverbindung nicht verfügbar ist oder unterbrochen wurde. Blinkt rot bei Scheitern der Firmware-Aktualisierung.
  • Seite 48: Installieren Der Hardware

    Seite 48 AXIS P5544 Installationsanleitung Installieren der Hardware • Heben Sie das Axis Produkt, die obere Abdeckung oder die Kuppelabdeckung nach am Panopsis-Objektiv hoch. • Achten Sie darauf, die Kuppelabdeckung nicht zu zerkratzen oder zu beschädigen. Säubern Sie die Kuppelabdeckung mit einem weichen Tuch, bevor Sie sie an der Kameraeinheit anbringen.
  • Seite 49: Installation Einer Sd-Speicherkarte (Nicht Im Lieferumfang Enthalten)

    AXIS P5544 Installationsanleitung Seite 49 Installation einer SD-Speicherkarte (nicht im Lieferumfang enthalten) Das Installieren einer Standard- oder Hochleistungs-SD-Speicherkarte (nicht im Lieferumfang enthalten), die zur lokalen Aufzeichnung mit Wechselmedien verwendet werden kann, ist optional. 1. Lösen Sie die vier Schrauben der oberen Abdeckung und nehmen Sie die Abdeckung ab. Siehe Abbildung auf Seite 43.
  • Seite 50 7. Schieben Sie die Kamerabefestigungen an der Netzwerk-Kamera in die Aussparungen in der Montageplatte und drehen Sie die Kameraeinheit. 8. Installation des Axis Midspans, siehe Installieren des Midspans, auf Seite 54. 9. Überprüfen Sie, ob die LED-Anzeigen die Betriebszustände korrekt angeben. Weitere Informationen hierzu finden Sie in der Tabelle auf Seite 47.
  • Seite 51 AXIS P5544 Installationsanleitung Seite 51 • Das Gesamtgewicht von Kamera und Deckenhalterung beträgt etwa 2,3 kg. Vergewissern Sie sich, dass das Deckenmaterial stabil genug ist, um dieses Gewicht zu tragen. • Die Stärke der Deckenplatte sollte 5 mm–60 mm (0,2 Zoll–2,4 Zoll) betragen.
  • Seite 52 10. Schieben Sie die Kamerabefestigungen an der Netzwerk-Kamera in die Aussparungen in der Montageplatte und drehen Sie die Kameraeinheit. 11. Installation des Axis Midspans, siehe Installieren des Midspans, auf Seite 54. 12. Überprüfen Sie, ob die LED-Anzeigen am Midspan die Betriebszustände korrekt angeben.
  • Seite 53: Montage An Halterung (Separat Erhältlich)

    5. Verbinden Sie das Netzwerkkabel und bei Bedarf das Mehrfachanschlusskabel mit der Netzwerk-Kamera. 6. Installation des Axis Midspans, siehe Installieren des Midspans, auf Seite 54. 7. Überprüfen Sie, ob die LED-Anzeigen am Midspan die Betriebszustände korrekt angeben. Weitere Informationen hierzu finden Sie in der Tabelle auf Seite 47.
  • Seite 54: Installieren Des Midspans

    11. Entfernen Sie den Plastik-Schutzfilm. Installieren des Midspans Mit dem mitgelieferten Midspan können Netzwerk-Videoprodukte von Axis mit einem großen Stromverbrauch über dasselbe Ethernet-Kabel sowohl mit Daten als auch mit Strom versorgt werden. Führen Sie zum Anschließen des Midspans die folgenden Schritte aus.
  • Seite 55: Kalibrierung Des Ptz-Mechanismus

    B. wenn die obere Abdeckung entfernt und wieder angebracht wurde. Gehen Sie zum Kalibrieren des PTZ-Mechanismus zu Basic Setup (Basiskonfiguration) oder System Options > Maintenance (Systemoptionen > Wartung) und klicken Sie auf Calibrate PTZ (PTZ kalibrieren). Weitere Informationen finden Sie im Benutzerhandbuch unter www.axis.com.
  • Seite 56: Die Live-Ansicht-Seite

    AXIS P5544 Installationsanleitung Die Live-Ansicht-Seite Die Live-Ansicht-Seite des Produkts erscheint in Ihrem Browser. Klicken Sie auf Setup, um die Einstellungsseiten des Produkts zu öffnen, auf denen Sie die persönlichen Einstellungen des Axis Produkts vornehmen können.. Setup: Enthält alle zur Hilfe: Zum Aufrufen der benutzerspezifischen Konfiguration des Online-Hilfe für die Kamera.
  • Seite 57: Wiederherstellen Der Werkseitigen Standardeinstellungen

    Weitere Informationen finden Sie in der Online-Hilfe oder im Benutzerhandbuch unter www.axis.com. Weitere Informationen Das Benutzerhandbuch steht auf der Website von Axis unter www.axis.com zur Verfügung. Tipp! Unter „www.axis.com/techsup“ finden Sie Firmware-Aktualisierungen für Ihre Netzwerk- Kamera. Informationen zur aktuellen Firmware-Version finden Sie unter About (Info) auf den Einstellungsseiten des Produkts.
  • Seite 58 Seite 58 AXIS P5544 Installationsanleitung...
  • Seite 59: Sostituzione Della Batteria

    Conservare il prodotto Axis in un ambiente asciutto e ben ventilato. • Evitare di esporre il prodotto Axis alle vibrazioni, agli urti o a forte pressione. Non installare il prodotto su staffe instabili, superfici o pareti instabili o soggette a vibrazioni, poiché potreste danneggiare il prodotto.
  • Seite 60 Pulizia della copertura a cupola • Fare attenzione a non graffiare o danneggiare la copertura a cupola. Non pulire una copertura a cupola visivamente pulita e non lucidare mai la superficie. Una pulizia eccessiva potrebbe danneggiare la superficie. • Per la pulizia generale della copertura a cupola si raccomanda l'uso di un sapone neutro, non abrasivo e privo di solventi o di un detergente con acqua e un panno morbido.
  • Seite 61: Guida All'installazione

    Pagina 61 AXIS P5544 Guida all'installazione Questo documento fornisce le istruzioni necessarie per l'installazione di una AXIS P5544 PTZ Dome Network Camera nella rete. Per ulteriori informazioni sull’utilizzo del prodotto, consultare la Guida per l'utente disponibile su www.axis.com Procedura di installazione 1.
  • Seite 62: Panoramica Dell'hardware

    Pagina 62 AXIS P5544 Guida all'installazione Panoramica dell’hardware Telecamera Pulsante di comando Slot per scheda di memoria SD LED di stato Pulsante Riavvia Copertura a cupola Copertura a cupola Obiettivo Panopsis Copertura superiore Anello di tenuta Vite anello cupola (6x)
  • Seite 63: Montaggio A Soffitto

    AXIS P5544 Guida all'installazione Pagina 63 Montaggio a soffitto Piastra di montaggio Vite piastra di montaggio Montaggio su soffitto mobile (3x) Braccio staffa (3x) Vite del braccio staffa e rondella (3x) Anello perimetrale Cavo di sicurezza Coperchio base telecamera Vite coperchio base telecamera (4x)
  • Seite 64 • Alimentazione CA/CC Per la connessione delle periferiche esterne al prodotto Axis è necessario un cavo a connettori multipli per mantenere la classe IP51. È possibile acquistare il cavo a connettori multipli presso il proprio rivenditore Axis. Per ulteriori informazioni, fare riferimento alla Guida per l'utente disponibile sul sito www.axis.com...
  • Seite 65 Cavo a connettori multipli (venduto separatamente) Per la connessione delle periferiche esterne al prodotto Axis, è necessario un cavo a connettori multipli (disponibile da Axis) per mantenere la classe IP del prodotto. È possibile acquistare il cavo a connettori multipli presso il proprio rivenditore Axis.
  • Seite 66 Pagina 66 AXIS P5544 Guida all'installazione • Ingresso digitale — Un ingresso utilizzabile per collegare periferiche di allarme come sensori di movimento, contatti porta/finestra, rilevatori di rottura vetri, eccetera. Esso può usare lo stato circuitale chiuso o aperto. Dopo la ricezione del segnale lo stato cambia e l’ingresso diventa attivo (visualizzato in System Options (Opzioni di sistema) >...
  • Seite 67 AXIS P5544 Guida all'installazione Pagina 67 Indicatori LED della telecamera Colore Indicazione Spento Connessione e normale utilizzo. Giallo Luce fissa durante l'avvio. Luce lampeggiante durante l'aggiornamento firmware. Giallo/rosso Luce lampeggiante gialla/rossa se la connessione di rete non è disponibile o è persa.
  • Seite 68: Installazione Dell'hardware

    Preparare l'installazione Leggere le istruzioni prima di preparare l'installazione del prodotto Axis poiché per diverse fasi della procedura di installazione è necessario rimuovere la copertura superiore e sarebbe opportuno che le operazioni venissero effettuate insieme.
  • Seite 69 System Options (Opzioni di sistema) > Maintenance (Manutenzione) e fare clic su Calibrate PTZ (Calibrare PTZ). Per ulteriori informazioni, fare riferimento alla Guida per l'utente disponibile sul sito www.axis.com Montaggio a soffitto 1. Preparare il soffitto per l'installazione della piastra di montaggio. Usare la maschera di foratura fornita in dotazione per posizionare i fori.
  • Seite 70 7. Far scorrere i supporti per l'unità presenti sulla telecamera di rete negli slot sulla piastra di montaggio e ruotare la telecamera. 8. Installare il midspan di Axis, vedere la Installare il Midspan, a pagina 74. 9. Verificare che i LED sul midspan indichino le condizioni corrette, vedere la tabella a Pagina 67 per maggiori dettagli.
  • Seite 71 AXIS P5544 Guida all'installazione Pagina 71 • Il peso totale della telecamera e degli accessori necessari per il montaggio a soffitto è di circa 2,3 kg. Verificare che il materiale del soffitto sia abbastanza resistente da sostenere questo peso. • Il pannello del soffitto deve avere uno spessore di 5 mm - 60 mm.
  • Seite 72 10. Far scorrere i supporti per l'unità presenti sulla telecamera di rete negli slot sulla piastra di montaggio e ruotare la telecamera. 11. Installare il midspan di Axis, vedere la Installare il Midspan, a pagina 74. 12. Verificare che i LED sul midspan indichino le condizioni di funzionamento corrette. Per ulteriori dettagli, vedere la tabella a Pagina 67.
  • Seite 73 6. Installare il midspan di Axis, vedere Installare il Midspan, a pagina 74. 7. Verificare che i LED sul midspan indichino le condizioni di funzionamento corrette. Per ulteriori dettagli, vedere la tabella a Pagina 67.
  • Seite 74 AXIS P5544 Guida all'installazione Installare il Midspan Il midspan fornito in dotazione consente ai prodotti video di rete Axis con elevato consumo di energia di ricevere i dati e l'alimentazione su un unico cavo Ethernet. Seguire queste istruzioni per collegare il midspan.
  • Seite 75 è stata rimossa e poi rimontata. Per calibrare i movimenti PTZ, andare a Basic Setup (Impostazione di base) o System Options (Opzioni di sistema)> Maintenance (Manutenzione) e fare clic suCalibrate PTZ (Calibrare PTZ). Per ulteriori informazioni, fare riferimento alla Guida per l'utente disponibile sul sito www.axis.com...
  • Seite 76 Help (Guida): visualizza la Guida in linea relativa alla tutti gli strumenti necessari per modalità di utilizzo della telecamera. configurare il prodotto. La pagina Live View può essere visualizzata in modalità panoramica o normale. Per ulteriori informazioni, fare riferimento alla Guida per l'utente disponibile sul sito www.axis.com...
  • Seite 77: Ripristino Delle Impostazioni Predefinite

    Guida in linea o fare riferimento alla Guida per l'utente disponibile sul sito www.axis.com Ulteriori informazioni La Guida per l'utente della telecamera è disponibile sul sito web di Axis all'indirizzo www.axis.com Suggerimento Visitare il sito di Axis all’indirizzo www.axis.com/techsup per verificare se sono stati pubblicati aggiornamenti del firmware per la telecamera di rete.
  • Seite 78 Pagina 78 AXIS P5544 Guida all'installazione...
  • Seite 79: Medidas Preventivas

    Sustitución de la batería Este producto Axis utiliza una batería de litio CR2032 3.0 de 3,0 V como fuente de alimentación para su reloj de tiempo real interno (RTC). En condiciones normales, esta batería durará un mínimo de 5 años. Cuando la batería tiene poca carga, el funcionamiento del RTC se puede ver afectado, ya que esto puede hacer que se reinicie cada vez que se encienda.
  • Seite 80 Limpieza de la cubierta del domo • Tenga cuidado de no arañar ni dañar la cubierta del domo. No limpie una cubierta del domo que parezca limpia y no pula nunca la superficie. El exceso de limpieza podría dañar la superficie. •...
  • Seite 81: Pasos Para La Instalación

    AXIS P5544 Esta guía de instalación incluye las instrucciones necesarias para instalar una cámara de red domo PTZ AXIS P5544 en su red. Para cualquier otra cuestión relativa al uso del producto, consulte el Manual del usuario, disponible en www.axis.com.
  • Seite 82: Presentación Del Hardware

    Página 82 Guía de instalación de AXIS P5544 Presentación del hardware Unidad de cámara Botón de control Ranura para tarjeta SD LED indicador de estado Botón de reinicio Cubierta del domo Cubierta del domo Objetivo Panopsis Cubierta superior Anillo de sellado...
  • Seite 83 Guía de instalación de AXIS P5544 Página 83 Montaje en techo duro Placa de montaje Tornillos de la Montaje en falso techo placa de montaje Brazo de la escuadra (3) Tornillos y arandelas del brazo de la escuadra Anillo de ajuste Cable de seguridad Tapa de la base de la cámara...
  • Seite 84 • Alimentación eléctrica CA/CC Para conectar equipos externos al producto Axis es necesario un cable multiconector a fin de mantener la clasificación IP51. El cable multiconector se puede adquirir en un proveedor de Axis. Para obtener más información, consulte el Manual del usuario disponible en www.axis.com Ranura para tarjeta SD –...
  • Seite 85 Cable multiconector (se vende por separado) Para conectar equipos externos al producto Axis es necesario un cable multiconector (disponible en Axis) a fin de mantener la clasificación IP51 del producto. El cable multiconector se puede adquirir en un proveedor de Axis.
  • Seite 86 Página 86 Guía de instalación de AXIS P5544 • Entrada digital — Una entrada de alarma para conectar dispositivos que puedan alternar entre circuito cerrado y abierto, como por ejemplo: detectores PIR, contactos de puertas y ventanas, detectores de rotura de cristales, etc. Cuando se recibe una señal, el estado cambia y la entrada se vuelve activa (indicado en System Options (Opciones del sistema) >...
  • Seite 87 Guía de instalación de AXIS P5544 Página 87 Indicadores LED de la cámara Color Indicación Apagado Conexión y funcionamiento normal. Ámbar Fijo durante el inicio. Parpadea durante la actualización del firmware. Ámbar/rojo Parpadea en ámbar/rojo si la conexión de red no está disponible o se pierde.
  • Seite 88: Instalación Del Hardware

    Guía de instalación de AXIS P5544 Instalación del hardware • No levante el producto Axis, la cubierta superior ni la cubierta del domo por el objetivo Panopsis. • Tenga cuidado de no arañar ni dañar la cubierta del domo. Utilice un paño suave para limpiar antes de unir la cubierta del domo a la unidad de cámara.
  • Seite 89 Guía de instalación de AXIS P5544 Página 89 Instalación de una tarjeta SD (no incluida) La instalación de una tarjeta SD estándar o de gran capacidad (no incluida), que puede utilizarse para la grabación local con almacenamiento extraíble, es opcional.
  • Seite 90 7. Deslice los soportes de la unidad de la cámara de red por las ranuras de la placa de montaje y gire la unidad de cámara. 8. Instale el midspan de Axis, consulte la Instalación del midspan, en la página 93. 9. Compruebe que los indicadores LED del midspan indiquen las condiciones correctas, consulte la tabla de la página 87 para obtener más información.
  • Seite 91 Guía de instalación de AXIS P5544 Página 91 • El grosor de la placa del techo debe ser de entre 5 mm y 60 mm. 3. Monte la escuadra de techo. 4. Coloque la escuadra de techo en la placa del techo, consulte la ilustración en la página 91.
  • Seite 92 10. Deslice los soportes de la unidad de la cámara de red por las ranuras de la placa de montaje y gire la unidad de cámara. 11. Instale el midspan de Axis, consulte la Instalación del midspan, en la página 93. 12. Compruebe que los indicadores LED del midspan indiquen las condiciones adecuadas. Para obtener información más detallada, consulte la tabla de la página 87.
  • Seite 93 11. Retire la lámina de plástico de protección. Instalación del midspan El midspan suministrado permite que los productos de vídeo en red de Axis con un consumo eléctrico elevado reciban datos y alimentación por el mismo cable Ethernet. Siga estas instrucciones para conectar el midspan.
  • Seite 94 Página 94 Guía de instalación de AXIS P5544 3. Conecte el midspan a una toma de corriente CA (100 – 240 V CA) utilizando el cable de alimentación suministrado. AXIS T8123 Salida de datos y alimentación Entrada de datos LED de puerto LED de entrada de CA Cámara de red...
  • Seite 95 Para calibrar el mecanismo PTZ, vaya a Basic Setup (Configuración básica) o System Options (Opciones del sistema) > Maintenance (Mantenimiento) y haga clic en Calibrate PTZ (Calibrar PTZ). Para obtener más información, consulte el Manual del usuario disponible en www.axis.com...
  • Seite 96 La página Visualización en directo puede utilizarse en el modo de visión completa o en el modo normal. Para obtener más información, consulte el Manual del usuario disponible en www.axis.com...
  • Seite 97: Más Información

    Manual del usuario disponible en www.axis.com Más información El Manual del usuario está disponible en el sitio web de Axis en www.axis.com. Un consejo: Visite www.axis.com/techsup para comprobar si hay disponible firmware actualizado para su cámara de red.
  • Seite 98 Página 98 Guía de instalación de AXIS P5544...
  • Seite 100 Installation Guide Ver. 1.1 Printed: May 2012 AXIS P5544 © Axis Communications AB, 2012 Part No. 47249...

Inhaltsverzeichnis