Herunterladen Diese Seite drucken

Werbung

Verfügbare Sprachen
  • DE

Verfügbare Sprachen

  • DEUTSCH, seite 6
Getting Started Guide
Erste Schritte
Guide de démarrage
Guida introduttiva
Guía de introducción
Краткое руководство пользователя
快速安裝指南
Guia inicial
Petunjuk Pemasangan
本製品のご利用にあたって

Werbung

loading

Inhaltszusammenfassung für D-Link EasySmart

  • Seite 1 Getting Started Guide Erste Schritte Guide de démarrage Guida introduttiva Guía de introducción Краткое руководство пользователя 快速安裝指南 Guia inicial Petunjuk Pemasangan 本製品のご利用にあたって...
  • Seite 2: About This Guide

    This guide gives step-by-step instructions for setting up The switch can be mounted in an EIA standard size 11- all D-Link EasySmart switches. Please note that the inch rack, which can be placed in a wiring closet with model you have purchased may appear slightly different other equipment.
  • Seite 3 SmartConsole Utility. (the factory-default IP address) in the address box. Then press <Enter>. If you want to manage only one D-Link EasySmart Switch, the Web-Based Management is the better option. Each switch must be assigned its own IP Address, which...
  • Seite 4 4. After successfully installing the SmartConsole Utility, you can open the utility by clicking Start > Programs > D-Link SmartConsole Utility. 5. Just connect the EasySmart Switch to the same L2 network segment your SmartConsole Utility to discover the EasySmart Switches.
  • Seite 6: Schritt 2 - Switch Installieren

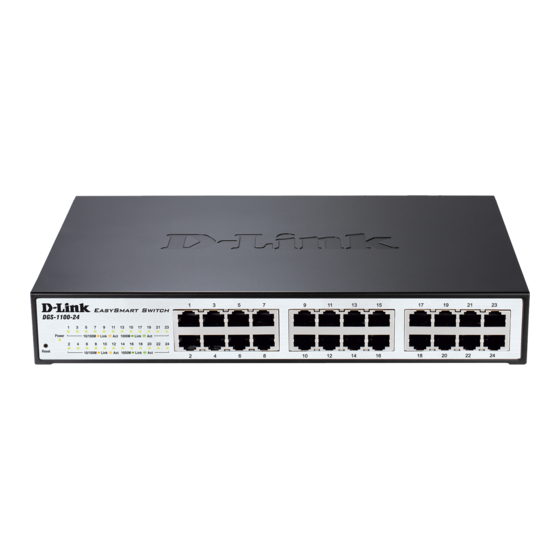
    Über dieses Handbuch Diese Kurzanleitung für die Installation hilft Ihnen Schritt für Schritt bei der Inbetriebnahme aller EasySmart Switches von D-Link. Bitte beachten Sie, dass das von Ihnen erworbene Modell im äußeren Erscheinungsbild leicht von den in den Illustrationen abgebildeten Modellen abweichen kann.
  • Seite 7: Verwaltungsoptionen

    Netzstecker des Switch wieder einstecken. Abbildung 6: Ethernetkabel anschließen Verwaltungsoptionen Schritt 2 Das Management des D-Link EasySmart Switch ist über Zur Anmeldung und um den Switch über eine Ethernet- einen Webbrowser oder einen PC mithilfe der Verbindung zu konfigurieren, muss der PC eine IP- SmartConsole-Hilfsanwendung möglich.
  • Seite 8 4. Nachdem Sie SmartConsole erfolgreich installiert haben, können Sie das Dienstprogramm über Start > Programs (Programme) > D-Link SmartConsole Utility öffnen. 5. Schließen Sie den EasySmart Switches an das gleiche L2-Netzwerksegment Ihres PC an, und führen Sie mit SmartConsole eine Suche nach EasySmart Switches durch.
  • Seite 10: À Propos De Ce Guide

    À propos de ce guide Ce guide vous explique, étape par étape, comment configurer tous les EasySmart Switches Web de D-Link. Remarque : il se peut que votre modèle d’appareil diffère légèrement de ceux illustrés dans le présent manuel. Pour obtenir des informations plus détaillées sur votre Pieds en caoutchouc switch, ses composants, ses connexions réseau et ses...
  • Seite 11 Figure 6. Branchement du câble Ethernet Options d’administration Étape 2 Le commutateur EasySmart de D-Link peut être géré par Pour pouvoir ouvrir une session et configurer le le biais d’un navigateur Web ou via un PC utilisant commutateur via une connexion Ethernet, l'adresse IP du l’utilitaire SmartConsole.
  • Seite 12 4. Une fois l’utilitaire installé, ouvrez-le en cliquant sur Démarrer > Tous les programmes > D-Link SmartConsole Utility (Utilitaire D-Link SmartConsole). 5. Connectez le EasySmart Switch au même segment de réseau de niveau 2 que le PC et détectez les Smart Switches présents l’utilitaire SmartConsole.
  • Seite 14: Sobre Esta Guía

    Sobre esta guía Esta guía ofrece las instrucciones detalladas para configurar todos los switches EasySmart de D-Link. Tenga en cuenta que el modelo que ha comprado puede ser algo diferente al que se muestra en las ilustraciones. Si desea más información sobre el switch, sus componentes, la manera de realizar las conexiones de red o las especificaciones técnicas, consulte la Guía del...
  • Seite 15 Figura 6. Conectar el cable Ethernet Opciones de gestión Paso 2 El conmutador EasySmart D-Link se puede gestionar a Para iniciar sesión y configurar el switch a través de una través de un explorador de web o de cualquier PC que conexión Ethernet, el PC debe tener una dirección IP en...
  • Seite 16 4. Tras haber instalado correctamente la utilidad SmartConsole, abra la utilidad haciendo clic en Inicio > Programas > D-Link SmartConsole Utility. 5. Conecte el EasySmart Switch al mismo segmento de red L2 de su PC y use la utilidad SmartConsole para detectar los switches EasySmart.
  • Seite 18: Informazioni Sul Presente Manuale

    Informazioni sul presente manuale Il presente manuale rapido d’installazione fornisce le istruzioni per impostare tutti i EasySmart Switch di D-Link. Il modello acquistato potrebbe differire leggermente da quello riportato nelle illustrazioni. Maggiori informazioni sullo switch, i suoi componenti, le connessioni di rete e le specifiche tecniche sono Figura 1.
  • Seite 19 Per poter effettuare l'accesso e configurare lo switch tramite una connessione Ethernet, gli indirizzi IP del PC È possibile gestire il dispositivo D-Link EasySmart Switch e dello switch devono essere compresi nello stesso da un browser Web o da qualsiasi PC tramite intervallo.
  • Seite 20 Figura 8. Finestra di autenticazione dell'utente SmartConsole Utility La SmartConsole Utility inclusa nel CD di installazione è un programma che consente di individuare gli EasySmart Switch appartenenti al segmento di rete L2 connesso al PC. Questo strumento può essere utilizzato esclusivamente con computer dotati di sistema operativo Windows 2000, Windows XP o Windows Vista x64/86.
  • Seite 22 Введение Данное руководство содержит пошаговые инструкции для настройки всех коммутаторов серии D-Link EasySmart. Пожалуйста, имейте в виду, что приобретенная модель может незначительно отличаться от изображенной на иллюстрациях. За более подробной информацией о коммутаторе, его компонентах, подключении к сети и технической...
  • Seite 23: Функции Управления

    отключен. При восстановлении питания включите его снова. Рисунок 6. Подключение Ethernet-кабеля Функции управления Шаг 2 Управление коммутатором D-Link серии EasySmart Чтобы зарегистрироваться и настроить коммутатор осуществляется через web-браузер или через любой через Ethernet-соединение, необходимо назначить компьютер с помощью утилиты SmartConsole.
  • Seite 24 4. После окончания установки утилиты SmartConsole можно запустить ее, нажав на Пуск > Программы > D-Link SmartConsole Utility. 5. Подключите коммутатор серии EasySmart к тому же самому сетевому сегменту 2 уровня, что и компьютер и используйте утилиту SmartConsole для обнаружения коммутаторов EasySmart.
  • Seite 26 交換器可以安裝在 EIA 標準尺寸的 11 吋機架,安裝時, 您購買的產品可能與下列說明有些許差異。 請將利用螺絲將機架固定架固定鎖緊在交換器的側面(兩 邊均要安裝)。 更多關於您的交換器細節資訊、配件、設定網連接路與技 術規格,請參閱產品包裝中的使用手冊。 1 – 步驟 打開包裝 小心打開包裝後,請參閱包裝內容物資料,確認所有品項 數量正確以及均正常沒有損壞,假如有任何品項遺失或損 壞,請聯絡當地的零售商更換。 圖 2. 固定機架固定架 - D-Link Web 智慧型交換器。 - 機架固定架。 然後,使用包裝內所提供的螺絲,將交換器鎖到機架上 面。 - 電源線。 - 使用手冊光碟片(包含 SmartConsole Utility program)。 - 多國語言版設定指南。 - 一個附件包配一個接地螺絲。 2 – 步驟 交換器安裝 為了讓交換器安裝與運作安全,建議您以下幾件事情:...
  • Seite 27 管理設定 D-Link 智慧型交換器可以使用網路瀏覽器管理,或可以透 過任何電腦用 SmartConsole Uititlity 進行管理。 圖 7. 在瀏覽器輸入 IP 位址 10.90.90.90 假如您想要管理一部 D-Link 智慧型交換器,Web-based 網頁設定也可以透過 SmartConsole Utility 開啟,打開 Management 將會是較好的選擇,每部交換器會取得自己 SmartConsole Utility 當出現設備列表時,雙擊該交換 的 IP 位址,可以讓 Web-Based Management 或電腦在 器,將會自動下載設定至您的瀏覽器中。 相同的 IP 網段進行通訊溝通之用。 不過,假如您要管理多部的 D-Link 智慧型交換器, SmartConsole Utility 則是較好的選擇。 ,使用...
  • Seite 28 中,就可以透過 SmartConsole Utility 尋找到交換 器。 方式 2:透過手動安裝 SmartConsole Utility ,請依據下 面幾個步驟安裝。 將 Utility 光碟片放入您電腦的光碟機中。 在 Windows 中點選開始,選擇執行。 在 執 行 對 話 框 中 , 輸 入 D:\D-Link SmartConsole Utility\setup.exe(D:\表示您的光碟機位址),接著 點選 OK。 接著可以隨著螢幕的說明繼續安裝 Utility。 完成後,點選開始,選擇程式集 > D-Link SmartConsole Utility ,打開 SmartConsole Utility。...
  • Seite 30 Sobre esse Guia Este guia fornece instruções passo a passo para configurar todos os switches D-Link EasySmart. Favor observar que o modelo que você adquiriu pode ter um aspecto ligeiramente diferente dos mostrados nas ilustrações. Para informações mais detalhadas sobre o seu switch, seus componentes, estabelecimento das conexões de...
  • Seite 31 Para acessar e configurar o switch via uma conexão Ethernet, o PC deve ter um endereço IP no mesmo O Switch D-Link EasySmart pode ser gerenciado através alcance do switch. Por exemplo, se o switch tem o de um navegador web ou através de qualquer endereço IP 10.90.90.90, o PC deveria ter o endereço IP...
  • Seite 32 4. Após instalar com sucesso o SmartConsole Utility, você pode abrir o utilitário clicando em Iniciar > Programas > D-Link SmartConsole Utility. 5. Basta conectar o EasySmart Switch no mesmo segmento de rede L2 do seu PC e utilizar o SmartConsole Utility para identificar os EasySmart Switches.
  • Seite 34 Mengenai Petunjuk Ini Petunjuk memberikan langkah-langkah yang diperlukan untuk mengatur semua D-Link EasySmart Switch. Tolong perhatikan bahwa model yang anda beli mungkin sedikit berbeda dengan yang ditunjukkan dalam ilustrasi Untuk informasi yang lebih detil mengenai switch anda, mengenai komponen-komponen-nya, membuat koneksi jaringan dan spesifikasi teknis, silahkan melihat pada Gambar 1.
  • Seite 35 Langkah 2 : Pilihan Pengaturan Dalam rangka untuk login dan mengatur switch melalui D-Link EasySmart Switch dapat diatur melalui sebuah koneksi Ethernet, PC harus mempunyai sebuah alamat browser web atau melalui PC mana saja menggunakan IP yang berada dalam jangkauan yang sama. Sebagai SmartConsole Utility.
  • Seite 36 Start > Programs > D-Link SmartConsole Utility. 5. Hubungkan EasySmart Switch dengan segmen jaringan L2 yang sama dengan PC anda dan gunakan SmartConsole Utility untuk menemukan EasySmart Switches. Pilihan 2 : Ikuti langkah-langkah berikut untuk memasang SmartConsole Utility secara manual.
  • Seite 38 機種とは異なる場合があります。 ックマウントキットを付属のネジで本製品の両側面に取り付 けます。 お手元のスイッチの詳細や、付属品、ネットワーク設定の方 法、スペックなどについては、スイッチに付属のユーザマニュ アルをご覧ください。 1―パッケージ内容 梱包を開けて、中身をていねいに取り出します。ユーザマニ ュアルの付属品一覧を見て、同梱物がすべてそろっているか 確認してください。万一不足している部品や破損している部 品がありましたら、弊社ホームページにてユーザ登録を行い、 図2 ラックマウントキットを取り付ける サポート窓口までご連絡ください。 - D-Link スマートスイッチ 1台 次に、付属のネジを使用して、スイッチをラックに固定します。 - ラックマウントキット - 電源ケーブル - ユーザマニュアル CD(「SmartConsole ユーティリティ」を収 録) - スタートガイド(多言語版) - 接地ねじ用アクセサリキット 2―設置 安全にお使いいただくために、以下の点に注意してください。 図3 スイッチをラックに取り付ける ♦ 電源ケーブルを本体の電源コネクタに確実に差し込ん でください。 ♦ 本製品の周囲には、放熱と通気のために十分なスペ...
  • Seite 39 ステップ2 管理方法 イーサネット接続経由でスイッチへのログインや設定を行なう D-Link EasySmart Switch は WEB ブラウザもしくは には、PC はスイッチと同じ範囲内の IP アドレスを所有してい SmartConsole Utility がインストールされている PC から管理 る必要があります。スイッチが 10.90.90.90 の IP アドレスを所 することが可能です。 有している場合、PC は 10.x.y.z(x 及び y は 0~254、z は 1 ~254 の値)でサブネットマスクは 255.0.0.0 である必要があ D-Link EasySmart Switch を1台のみ管理する場合は、WEB ります。...
  • Seite 40 ストールされている場合は、必ず古いバージョンをアンインス トールしてから最新版をインストールしてください。 1:インストール CD のオートランを利用したインストール インストール CD をコンピュータの CD-ROM ドライブにセ ットする オートランが自動的にスタートします。 「Install SmartConsole Utility」ボタンをクリックする インストールウィザードの指示に従ってインストールしてく ださい。 インストールが完了したら、「スタート」メニューの「すべて のプログラム」から「D-Link SmartConsole Utility」をクリ ックし、SmartConsole ユーティリティを起動します。 スマートスイッチを設定用コンピュータと同じレイヤ2ネッ トワークセグメントに接続し、SmartConsole ユーティリテ ィを使ってスマートスイッチを検出してください。 2:手動インストール インストール CD をコンピュータの CD-ROM ドライブに セットする Windows の「スタート」メニューから、「ファイル名を指定 して実行」を選択する 「名前」に「D:\D-Link SmartConsole Utility\setup.exe (「D:」の部分はご使用の...
  • Seite 48 Ver. 1.00(ww) 2010/05/27 290726001100160...