Yealink SIP-T48G Schnellstartanleitung
Vorschau ausblenden
Andere Handbücher für SIP-T48G:
- Schnellstartanleitung (8 Seiten) ,
- Kurzanleitung (11 Seiten) ,
- Schnellstartanleitung (39 Seiten)

Verwandte Anleitungen für Yealink SIP-T48G


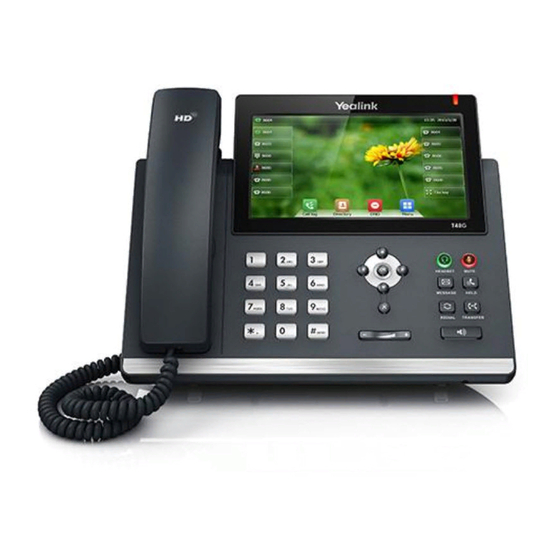
Inhaltszusammenfassung für Yealink SIP-T48G
- Seite 1 Ultra-elegant Gigabit IP Phone SIP-T48G Quick Start Guide (V72.4) English | Deutsch | Español | Italiano | Français...
- Seite 3 Table of Contents English ...........1 Deutsch .......... Español ........1 Italiano ........2 Français ........
-
Seite 5: Packaging Contents
You can pull out the silica gel when mounting your IP phone to a wall. Note: For more information on how to mount the IP phone to a wall, refer to Yealink Wall Mount Quick Installation Guide for SIP-T4X IP Phones. - Seite 6 3. Connect the network and power, as shown below: You have two options for network and power connections. Your system administrator will advise you on which one to use. PC Connection (Optional) Power Adapter (DC 5V) AC Power Option PoE (Power over Ethernet) Option PC Connection IEEE 802.3af compliant...
- Seite 7 Accessing the web user interface: 1. Press the OK key when the phone is idle to obtain the IP address of the phone. 2. Open the web browser on your computer, enter the IP address into the address bar (e.g., “http://192.168.0.10”...
- Seite 8 To enter the main menu, tap To return to the idle screen, tap To go back to the previous menu, tap To select a soft key, tap the soft key. To select an item, tap the item. To turn pages, tap on the touch screen.
-
Seite 9: Call Transfer
Using the speakerphone: or tap the End Call soft key. Press Using the headset: Tap the End Call soft key. Redial to enter the Placed call list, and then tap the desired entry. Press Press twice when the phone is idle to dial out the last dialed number. Call Mute and Un-mute Press to mute the microphone during a call. - Seite 10 2. Enter the number of the second party, and then tap the Send soft key. 3. Tap the Conference soft key again when the second party answers. All parties are now joined in the conference. 4. Tap the End Call soft key to disconnect all parties. Note: You can split the conference call into two individual calls by tapping the Split soft key.
-
Seite 11: Safety Instructions
Without prior written consent, no organization or individual is permitted to make any change to the structure or the safety design of the device. Yealink is under no circumstance liable to consequences or legal issues caused by such changes. Please refer to the relevant laws and statutes while using the device. Legal rights of others should be respected as well. - Seite 12 Date of Issue: 2015-05-07 We: Yealink Network Technology Co., Ltd, Address: 4th-5th Floor, South Building, No.63 Wanghai Road, 2nd Software Park, Xiamen, China Declare that the product meets the essential requirements and other relevant provisions according to the following EC directive Directive: 2006/95/EC, 2004/108/EC;...
-
Seite 13: Installation Des Telefons
Der EXT-Port kann auch für die Verbindung des Erweiterungsmoduls EXP40 verwendet werden. Weitere Informationen zur Nutzung des EHS36, des EXP40 und des Bluetooth USB- Dongles finden Sie in der Yealink EHS36 Bedienungsanleitung, Yealink EXP40 Bedienungsanleitung und der Yealink Bluetooth USB-Dongle BT40 Bedienungsanleitung . - Seite 14 dargestellt: Es gibt zwei Möglichkeiten für die Verbindung des Netzwerks und der Stromversorgung. Ihr Systemadministrator wird Sie über die entsprechende Methode informieren. PC-Verbindung (optional) Netzgerät (DC 5V) Stromversorgung PoE (Power over Ethernet) PC-Verbindung IEEE 802.3af-konformer (optional) PoE-Hub/Schalter Hinweis: Bei einer Online-Versorgung (PoE) muss das Netzgerät nicht angeschlossen werden. Vergewissern Sie sich, dass der Hub/Schalter PoE-kompatibel ist.
-
Seite 15: Netzwerkeinstellungen
1. Drücken Sie im Ruhezustand des Telefons die Taste OK, um die IP-Adresse des Telefons zu beziehen. 2. Öffnen Sie an Ihrem Computer den Webbrowser, geben Sie die IP-Adresse in die Adresszeile ein (z.B. „http://192.168.0.10“ oder „192.168.0.10“) und drücken Sie dann Enter. 3. -
Seite 16: Daten Eingeben Und Aktualisieren
Gebrauch Ihres Telefons Tippen Sie auf zum Öffnen des Hauptmenüs. Tippen Sie auf , um zum Ruhebildschirm zurückzukehren. Tippen Sie auf , um zum vorhergehenden Menü zurückzukehren. Tippen Sie zur Auswahl einer Bildschirmtaste auf die entsprechende Bildschirmtaste. Tippen Sie zur Auswahl eines Elements auf das entsprechende Element. Tippen Sie im Touchscreen auf oder , um Seiten umzublättern. -
Seite 17: Anruf Stumm Und Wieder Laut Stellen
Mit Headset: Tippen Sie auf die Bildschirmtaste End Call. lung Drücken Sie , um die Anrufliste Placed zu öffnen, und tippen Sie dann auf den gewünschten Eintrag. Drücken Sie im Ruhezustand zweimal die Taste , um die zuletzt gewählte Nummer erneut zu wählen. -
Seite 18: Sprachnachrichten
2. Geben Sie die Nummer des zweiten Teilnehmers ein und tippen Sie dann im Bildschirm auf Send. 3. Tippen Sie erneut auf die Bildschirmtaste Conference, sobald der zweite Teilnehmer den Anruf entgegennimmt. Alle Teilnehmer sind nun der Telefonkonferenz zugeschaltet. 4. Tippen Sie auf die Bildschirmtaste End Call, um alle Teilnehmer zu trennen. Hinweis: Sie können die Telefonkonferenz in zwei separate Anrufe aufteilen, indem Sie die Bildschirmtaste Split drücken. -
Seite 19: Sicherheitshinweise
Wartungscenter für eine Reparatur. Ohne vorherige schriftliche Zustimmung dürfen weder Unternehmen noch Einzelperson Änderungen an der Struktur oder dem Sicherheitskonzept des Geräts vornehmen. Yealink übernimmt unter keinen Umständen die Haftung für Folgen oder Rechtsansprüche, die auf solche Änderungen zurückzuführen sind. - Seite 20 Datum der Erklärung: 07.05.2015 Wir: Yealink Network Technology Co., Ltd., Adresse: 4th-5th Floor, South Building, No.63 Wanghai Road, 2nd Software Park, Xiamen, China Erklären hiermit, dass das Produkt die grundlegenden Anforderungen und anderen relevanten Bestimmungen der folgenden EG-Richtlinie erfüllt Richtlinie: 2006/95/EG, 2004/108/EG;...
- Seite 21 EXP40. Para más información sobre cómo usar el EHS36, el EXP40 y el dispositivo Bluetooth USB consulte Guía de Usuario del EHS36 de Yealink, Guía de Usuario del EXP40 de Yealink y Guía de Usuario del dispositivo Bluetooth USB BT40 de Yealink .
-
Seite 22: Puesta En Funcionamiento
Tiene dos opciones para las conexiones de red y de alimentación. El administrador de su sistema le recomendará cuál usar. Conexión a PC (opcional) Alimentador (5 VCC) Opción Alimentador Ñ Opción PoE (Power over Ethernet) Conexión a PC Hub/Switch PoE (opcional) conforme a IEEE 802.3af Nota: Si se proporciona alimentación en línea (PoE), no necesita conectar el alimentador. - Seite 23 Acceso a la interfaz de usuario en Internet: Pulse la tecla OK cuando el teléfono esté en reposo para obtener su dirección IP . Abra el navegador de Internet en su ordenador, introduzca la dirección IP en la barra de direcciones (es decir, “http://192.168.0.10”...
-
Seite 24: Hacer Una Llamada
Usar el teléfono Para entrar en el menú principal, toque Para volver a la pantalla en reposo, toque Para volver al menú anterior, toque Para seleccionar una tecla de función, tóquela. Para seleccionar un objeto, tóquelo. Para pasar páginas, toque en la pantalla táctil. - Seite 25 o la tecla de función End Call. Pulse casco: Toque la tecla de función End Call. Rellamada para entrar en la lista Placed call y a continuación toque la entrada deseada. Pulse Pulse dos veces cuando el teléfono esté en reposo para llamar al último número marcado. Pulse para silenciar el micrófono durante una llamada.
-
Seite 26: Historial De Llamadas
2. Introduzca el número de la otra parte y a continuación pulse la tecla de función Send. 3. Cuando la otra parte responda, pulse de nuevo la tecla de función Conference. Todas las partes están ahora participando en la conferencia. 4. - Seite 27 No se permite hacer modi caciones en la estructura ni el diseño de seguridad del dispositivo sin previo consentimiento por escrito. Yealink no será responsable bajo ninguna circunstancia de las consecuencias o problemas legales derivados de dichas modi caciones.
- Seite 28 Declarante: Yealink Network Technology Co., Ltd, Dirección: 4th-5th Floor, South Building, No.63 Wanghai Road, 2nd Software Park, Xiamen, China Declara que el producto: cumple con los requisitos esenciales y cualesquiera otras disposiciones aplicables o exigibles de las directivas: del Parlamento Europeo y del Consejo, de 8 de Junio de 2011, sobre restricciones a la utilización de determinadas sustancias peligrosas en aparatos eléctricos y electrónicos.
-
Seite 29: Contenuto Della Confezione
EHS36, il modulo EXP40 e il dongle Bluetooth USB, consultare la Guida dell'utente per Yealink EHS36, la Guida dell'utente per Yealink EXP40 e la Guida dell'utente per il dongle Bluetooth USB Yealink BT40 . - Seite 30 seguito: Sono disponibili due opzioni per collegare la rete e l'alimentazione. L'amministratore di sistema fornirà consigli su quale usare. Connessione PC (opzionale) Alimentatore (5 VCC) Opzione alimentazione CA Opzione PoE (Power over Ethernet) Connessione PC Hub/switch PoE (opzionale) conforme a IEEE 802.3af Nota: Se si utilizza l'alimentazione in linea (PoE), non è...
-
Seite 31: Icone Di Stato Della Registrazione Su Touchscreen
Accesso all'interfaccia web: 1. Premere OK mentre il telefono è inattivo, per ottenere l'indirizzo IP del telefono. 2. Aprire il browser web sul computer, immettere l'indirizzo IP nella barra degli indirizzi (ad esempio, "http://192.168.0.10" o "192.168.0.10"), quindi premere 3. Inserire il nome utente (predefinito: admin) e la password (predefinita: admin) nella pagina di accesso e fare clic su Conferma. -
Seite 32: Uso Del Telefono
Uso del telefono Per accedere al menu principale, toccare Per tornare alla schermata iniziale, toccare Per tornare al menu precedente, toccare Per selezionare un pulsante software, toccarlo. Per selezionare un elemento, toccarlo. Per sfogliare le pagine, toccare sul touchscreen. Per scorrere i valori in un elenco a discesa, premere Inserimento e aggiornamento dei dati Per inserire i dati: 1. - Seite 33 o toccare Termina chiamata. Premere Toccare Termina chiamata. Ricomposizione per accedere all'elenco delle chiamate effettuate, quindi toccare la voce Premere desiderata. Premere due volte mentre il telefono è inattivo per ricomporre l'ultimo numero chiamato. Premere per disattivare il microfono durante una chiamata. Premere nuovamente per ripristinare l'audio della chiamata.
-
Seite 34: Personalizzazione Del Telefono
2. Inserire il numero dell'interlocutore, quindi toccare 3. Quando l'interlocutore risponde, toccare nuovamente Conferenza. Tutti gli utenti ora stanno partecipando alla conferenza. 4. Toccare Termina chiamata per scollegare tutti i partecipanti. Nota: È possibile dividere la conferenza in due chiamate individuali toccando Un indicatore di messaggio in attesa sulla schermata iniziale indica che sono presenti uno o più... -
Seite 35: Contenu De La Boîte
EXP40. Pour en savoir davantage sur la façon d'utiliser l'EHS36, l'EXP40 et l'adaptateur/clé USB Bluetooth BT40, référez-vous au Guide d'utilisation de l'EHS36 de Yealink, au Guide d'utilisation de l'EXP40 de Yealink et au Guide d'utilisation de l'adaptateur/clé USB Bluetooth BT40 de Yealink . - Seite 36 3. Raccordez le réseau et l'alimentation, comme montré ci-dessous : Vous avez deux options pour les raccordements du réseau et de l'alimentation. Votre administrateur de système vous indiquera lequel utiliser. Connexion PC (facultative) Adaptateur secteur (5 V CC) Option Alimentation secteur Option PoE (Power over Ethernet)
- Seite 37 Accès à l'interface utilisateur web : 1. Appuyez sur la touche OK lorsque le téléphone est inactif pour obtenir l'adresse IP du téléphone. 2. Ouvrez le navigateur web sur votre ordinateur, saisissez l'adresse IP dans la barre d'adresse (par exemple « http://192.168.0.10 » ou « 192.168.0.10 ») et appuyez sur la touche Enter. 3.
-
Seite 38: Fonctions D'appel De Base
Aperçu des fonctions de l'écran tactile Pour accéder au menu principal, appuyez brièvement sur Pour retourner à l'écran inactif, appuyez brièvement sur Pour retourner au menu précédent, appuyez brièvement sur Pour actionner une touche, appuyez brièvement sur la touche. Pour sélectionner un élément, appuyez brièvement sur l'élément. Pour tourner les pages, appuyez brièvement sur ou sur sur l'écran tactile. -
Seite 39: Transfert D'appel
Recomposer pour accéder à la liste Placed call puis appuyez brièvement sur l'entrée Appuyez sur désirée. Appuyez sur deux fois lorsque le téléphone est inactif pour appeler le dernier numéro composé. Mettre un appel en sourdine et rétablir le son Appuyez sur pour couper le son du microphone pendant un appel. - Seite 40 2. Saisissez le numéro du second interlocuteur, puis appuyez sur la touche de fonction Send. 3. Appuyez encore une fois sur la touche de fonction Conference lorsque le second interlocuteur répond. Tous les interlocuteurs sont maintenant connectés à la conférence. 4.
- Seite 41 Sans consentement écrit préalable, aucune organisation ou individu n’est autorisé à apporter des changements à la structure ou au dispositif de sécurité de l’appareil. Yealink n’est en aucun cas responsable des conséquences ou des problèmes juridiques causés par ces changements.
- Seite 42 Date d’émission : 2015-05-07 Nous : Yealink Network Technology Co., Ltd, Adresse : 4th-5th Floor, South Building, No.63 Wanghai Road, 2nd Software Park, Xiamen, Chine Déclarons que le produit répond aux exigences essentielles et autres dispositions pertinentes conformément à la directive CE suivante Directive : 2006/95/CE, 2004/108/CE ;...