Futurelight Scan SC - 330 Bedienungsanleitung

Verwandte Anleitungen für Futurelight Scan SC - 330


Inhaltszusammenfassung für Futurelight Scan SC - 330
- Seite 1 BEDIENUNGSANLEITUNG USER MANUAL MODE D’EMPLOI © Copyright Für weiteren Gebrauch aufbewahren ! Keep this manual for future needs ! Nachdruck verboten ! Gardez ce mode d’emploi pour des Reproduction prohibited ! utilisations ultérieures ! Réproduction interdit !
- Seite 2 Weitere Produkte aus dem FUTURELIGHT-Sortiment: Further products from the FUTURELIGHT-range: www.futurelight.com Autres produits de l’assortiment de FUTURELIGHT: ARTIKELBESCHREIBUNG ............BEST.-NR. ARTICLE DESIGNATION ............NO. DESCRIPTION D’ARTICLE ............N° D’ART. FUTURELIGHT LICHTEFFEKTE FUTURELIGHT LIGHTING EFFECTS FUTURELIGHT EFFETS LUMINEUX FUTURELIGHT RT-150, DMX Zylinder,für EFR ......51830500 FUTURELIGHT FX-150, DMX Flower, für EFR ......
-
Seite 3: Inhaltsverzeichnis
Inhaltsverzeichnis 1. Sicherheit ........................4 1.1 Sicherheitshinweise ....................4 1.2 Bestimmungsgemäße Verwendung ................4 2. Einführung ........................6 2.1 Einsetzen der Lampe ....................6 3. Installation ........................7 3.1 Allgemeine Hinweise ....................7 3.2 Anschluß ans Netz ....................7 3.3 Anschluß an den DMX-512 Controller / Verbindung Projektor - Projektor ....7 4. -
Seite 4: Sicherheit
Achtung ! Gerät vor Feuchtigkeit und Nässe schützen ! Vor Öffnen des Gerätes Netzstecker ziehen ! LESEN SIE VOR DER ERSTEN INBETRIEBNAHME ZUR EIGENEN SICHERHEIT DIESE BEDIENUNGSANLEITUNG SORGFÄLTIG DURCH! 1. Sicherheit 1.1 Sicherheitshinweise Alle Personen, die mit der Aufstellung, Inbetriebnahme, Bedienung, Wartung und Instandhaltung dieses Gerätes zu tun haben, müssen - entsprechend qualifiziert sein - diese Betriebsanleitung genau beachten... - Seite 5 Nehmen Sie das Gerät erst in Betrieb, nachdem Sie sich mit seinen Funktionen vertraut gemacht haben. Lassen Sie das Gerät nicht von Personen bedienen, die sich nicht mit dem Gerät auskennen. Wenn Geräte nicht mehr korrekt funktionieren, ist das meist das Ergebnis von unsachgemäßer Bedienung! Das Gerät darf nicht in Betrieb genommen werden, nachdem es von einem kalten in einem warmen Raum gebracht wurde.
-
Seite 6: Einführung
Futurelight Scan SC - 330 Ultrakompakter Scanner Für lichtstarke 24V/250W Lampe • 11 unterschiedliche, dichroitische Farbfilter und weiß • Rainbow-Effekt in beide Richtungen • Goborad mit 8 Gobos, einem Multicolor-Gobo (mit cyan, magenta und gelb) und offen • Über die Kombination von Multicolor-Gobo und Farbrad sind weitere Farbmischungen möglich • Strobe-Effekt mit variabler Geschwindigkeit (1-7 Blitze/Sek.) über Goborad •... -
Seite 7: Installation
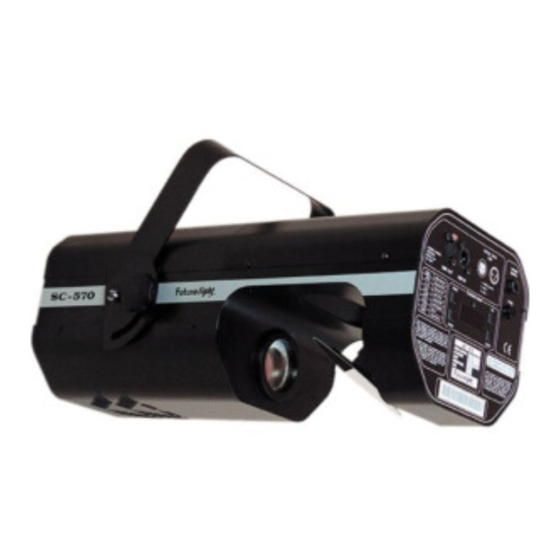
Setzen Sie nun die Lampe ein. Vermeiden Sie es, den Glaskörper mit bloßen Händen zu berühren. Beachten Sie auch unbedingt die Hinweise des Lampenherstellers. Vergewissern Sie sich, daß die Lampe auch richtig fest in der Fassung sitzt. Schließen Sie das Gehäuse wieder, und ziehen Sie die Gehäuseschrauben fest an. LA M PEN JUSTIER UN G SC -370: R IC H TIG FA LS C H... -
Seite 8: Bedienung
4. Bedienung 4.1 Funktionen der Steuerkanäle 4.1.1 Steuerkanal 1 - Pan Wenn Sie den Regler verschieben, bewegen Sie den Spiegel horizontal (PAN). Allmähliches Einstellen des Spiegels bei langsamen Schieben des Reglers (0-255, 128-Mitte). Der Spiegel kann an jeder gewünschten Einstellung angehalten werden. -
Seite 9: Steuerkanal 4 - Shutter, Strobe Und Gobos
4.1.3 Steuerkanal 3 - Farben Lineare Farbänderung gemäß der Bewegung des Reglers. Sie können den Farbwechsler an jeder gewünschten Position anhalten. Sie können ebenfalls zwischen zwei Farben anhalten und so zweifarbige Strahlen erzeugen. Zwischen 128 und 190 und zwischen 193 und 255 dreht sich der Farbwechsler ständig - der sogenannte Rainbow-Effekt entsteht. -
Seite 10: Kodierung Des Projektors
4.2 Kodierung des Projektors Kodierungstabelle: Projektornummer & Kanäle Projektor 1 - Kanäle 1-4 Projektor 2 - Kanäle 5-8 Projektor 3 - Kanäle 9-12 Projektor 4 - Kanäle 13-16 Projektor 5 - Kanäle 17-20 Projektor 6 - Kanäle 21-24 Projektor 7 - Kanäle 25-28 Projektor 8 - Kanäle 29-32 Projektor 9 - Kanäle 33-36 Projektor 10 - Kanäle 37-40... -
Seite 11: Wartung Und Reinigung
Farben - 11 austauschbare dichroitische Filter plus weiß - Farbwechsler mit einstellbarer Rotationsgeschwindigkeit Gobos - 9 Gobos plus Vollkreis - Davon 1 Multicolor-Gobo Strobe - Strobe-Effekt mit variabler Geschwindigkeit (1 - 7 Blitze pro Sekunde) über Goborad Motor - 4 hochwertige Steppermotoren (gesteuert durch Mikroprozessoren) Elektronik - Digitaler Serieneingang DMX-512 - 4 Steuerkanäle:...