Herunterladen Diese Seite drucken

Werbung

Verfügbare Sprachen
  • DE

Verfügbare Sprachen

  • DEUTSCH, seite 1

Werbung

loading

Inhaltszusammenfassung für Phocos MPPT100/30

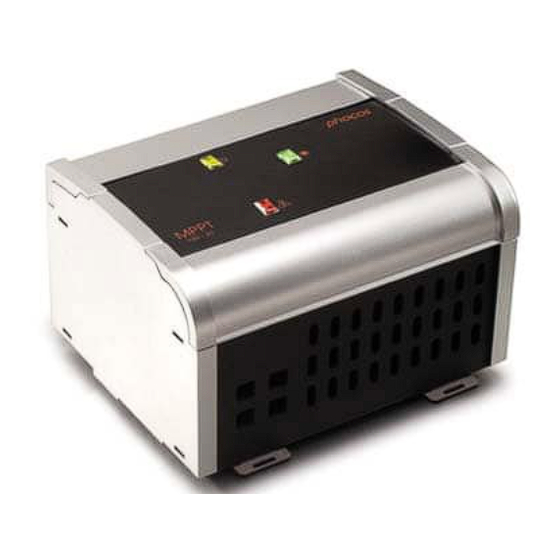
  • Seite 4 The Core of Independence The Core of Independence MPPT10/30 Maximum Power Point Tra- cker Bedienungsanleitung (Deutsch) Sehr geehrter Kunde, Wir bedanken uns für den Kauf dieses Phocos Produktes. Vor Benutzung lesen Sie sich bitte die Anleitung sorgfältig und gründlich durch.
  • Seite 5: Inhaltsverzeichnis

    Contents Hauptfunktionen Hinweise zum Betrieb Montage und Anschluss Erdung des Solarsystems Inbetriebnahme des Reglers Anzeigefunktionen Einstellungen Ihres MPPT Sicherheitshinweise Haftungsausschluss Technische Daten...
  • Seite 6: Hauptfunktionen

    Wir bedanken uns für den Kauf dieses Phocos Produktes. Mit Ihrem neuen MPPT Maximum Power Point Tracker steht Ihnen ein auf dem neuesten Stand der Technik entwickeltes Gerät zur Verfügung. Es zeichnet sich durch besondere Eigenschaften aus, wie beispielsweise: "MPP-Tracking"-Technologie, die die Leistungsfähigkeit Ihres PV-Systems erhöht Geeignet für den Gebrauch von preiswerteren Solar-Modulen für Netzkopplung in 12 - und 24 V...
  • Seite 7 Zuleitungen zur Batterie polrichtig an. Um spannungsfrei zu arbeiten, schließen Sie die Kabel zuerst an den MPPT an und danach an die Batterie. Achten Sie auf die Zuleitungslänge (siehe Tabelle im Kapitel Empfohlene Kabelquerschnitte für den MPPT100/30) Schließen Sie die Abdeckung an der Batterie-Seite.
  • Seite 8: Erdung Des Solarsystems

    HINWEIS: Beachten Sie auch die Hinweise des Batterieherstellers. Unmittelbar an der Batterie sollte eine Schmelzsicherung angebracht werden, um eventuelle Kurzschlüsse in den Batterieleitungen abzusichern. Der Nennstrom der Sicherung muß größer sein als derNennstrom des MPPTs . Vorschlag: Benutzen Sie eine träge 40A Schmelzsicherung. Erdung des Solarsystems Beachten Sie, dass die Minuspole des MPPT auf gleichem Potenzial liegen.
  • Seite 9: Einstellungen Ihres Mppt

    Einstellung Ihres MPPT Der MPPT verfügt über einen 8 poligen DIP-Schalter, um Ihren MPPT einzustellen. Die Schalter des DIP-Schalters müssen sich in Stellung Plus, oder in Stellung Minus befinden, die Mittelstellung ist nicht erlaubt. Die DIP-Schalter 1-4 sind zur Address-Einstellung im Modularen System vorgesehen – Bitte lesen Sie hierzu die MCU-Bedienungsanleitung.
  • Seite 10: Haftungsausschluss

    32 mm Abmessungen 185 x 150 x 115 mm Gewicht 1.6 kg Temperaturbereich -40 bis + 50 °C Schutzklasse IP 22 Änderungen vorbehalten Version: 20090909 ISO9001:2000 Hergestellt in einem der folgenden Ländern: China – Deutschland Phocos AG – Deutschland RoHS www.phocos.com...
  • Seite 11 The Core of Independence MPPT100/30 Maximum Power Point Tracker User Manual (English) The Core of Independence Dear Customer, Thank you very much for buying this Phocos product. Please read the instructions carefully and thoroughly before using the product.
  • Seite 12 Contents Major Functions Recommendations for Use Mounting and Connecting Grounding the Solar System Starting up the Controller Display Functions Setting up your MPPT Safety Recommendations Liability Exclusion Technical Data...
  • Seite 13: Major Functions

    With your new MPPT Maximum Power Point Tracker, you own a state-of-the art device which was developed according to the latest available technical standards. It comes with a number of outstanding features, such as: Maximum Power Point Tracking technology, which increases the efficiency of your PV system Allows the use of less expensive solar panels for grid connection systems for 12/24V stand-alone systems Automatically detects 12/24V system Voltage Temperature-Compensated, Three-Stage I-U Curve Charge Regulation...
  • Seite 14 To avoid any voltage from the wires, first connect the controller, then the solar array. Mind the recommended wire size (see table in chapter Recommended wiring for MPPT100/30) . Close the cover of solar side. NOTE: Place the positive and the negative wires close to each other to minimize electromagnetic effects.
  • Seite 15: Grounding The Solar System

    NOTE: Mind the recommendations of your battery manufacturer. We strongly recommend connecting a fuse directly to the battery to protect any short circuit in the battery wiring. The fuse must at least take the MPPT nominal current or more. Suggestion: Use a slow acting 40A fuse. Grounding the Solar System Be aware that the negative terminals of the MPPT are connected internally and therefore have the same electrical...
  • Seite 16: Setting Up Your Mppt

    Setting up your MPPT The MPPT comes with an 8 pole DIP-switch, which can be used to set up your MPPT. Note: DIP switches have to be in "ON" or "OFF" position only. The middle position is not allowed!! DIP No.1,2,3 and 4 are for the use in the modular system(for details see MCU manual). DIP No.5 and 6 are reserved for future functions.
  • Seite 17: Liability Exclusion

    185 x 150 x 115 mm Weight 1.6 kg Ambient Temperature range -40 to + 50 °C Case Protection IP 22 Subject to change without notice. ISO9001:2000 Version: 20090909 Made in one of the following countries: China – Germany RoHS Phocos AG – Germany www.phocos.com...
  • Seite 18 The Core of Independence MPPT100/30 Maximum Power Point Tracker Manual de Instrucciones [Español) Estimado Usuario, Muchas gracias por adquirir un producto de Phocos. Por favor antes de utilizar este producto lea las instrucciones detenidamente y poral completo.
  • Seite 19 Sumario Funciones Principales The Core of Independence Recomendaciones de Uso Montaje y Conexión Toma a Tierra del Sistema Solar Encendido del Controlador Funciones de Visualización Configuración de su MPPT Recomendaciones de Seguridad Exclusión de Responsabilidades Datos Técnicos...
  • Seite 20: Funciones Principales

    Con su nuevo MPPT Maximum Power Point Tracker, usted posee un dispositivo con tecnología de punta que ha sido diseñado siguiendo los últimos estándares técnicos disponibles. Incluye una serie de características sobresalientes, tales como: Tecnología de Seguimiento de Punto de Maxima Potencia (Maximum Power Point Tracking), que aumenta la eficacia de su sistema PV Permite el uso de módulos menos costosos conectados en forma de red para sistemas autónomos de 12 / 24V...
  • Seite 21 Para evitar el voltaje en los cables, conecte primero el MPPT y luego la batería. Utilice el tamaño de cable recomendado (ver tabla en el capítulo cableado recomendado para MPPT100/30).Cierre la tapa del lado de la batería.
  • Seite 22: Toma A Tierra Del Sistema Solar

    NOTA: Siga las recomendaciones del fabricante de su batería. Recomendamos encarecidamente conectar un fusible directamente a la batería, para protegerla contra cualquier cortocircuito en el cableado. El fusible debe como mínimo tomar la corriente nominal del MPPT o más. Sugerenciastión: Use un fusible de acción lenta de 40A. Toma a Tierra del Sistema Solar Tenga en cuenta que las terminales negativas del MPPT están conectadas internamente y, en consecuencia, tienen el mismo...
  • Seite 23: Configuración De Su Mppt

    Configuración de su MPPT El MPPT viene con un interruptor-DIP de 8 polos, que puede utilizarse para configurar su MPPT. Nota: Los DIP switches, deben estar en posicio ON o en posicion OFF. La posicion intermedia no esta permitida. DIP No. 1,2,3 y 4 son para uso en el sistema modular (para mas detalles vea el manul del MCU). DIP No.
  • Seite 24: Exclusión De Responsabilidades

    1.6 kg Rango de Temperatura Ambienteal -40 a + 50 °C Caja de protección IP 22 Sujeto a cambios sin previo aviso. Versión: 20090909 ISO9001:2000 Fabricado en uno de los siguientes países: China – Germany RoHS Phocos AG – Germany www.phocos.com...
  • Seite 25 The Core of Independence MPPT100/30 Maximum Power Point Tracker Guide de l'utilisateur (Français) Cher Client, Merci beaucoup d’avoir acheté un produit Phocos. Veuillez lire, avec attention, toutes les instructions avant d'utiliser le produit.
  • Seite 26 Sommaire Fonctions principales Recommandations d'utilisation Installation et connexion Mise à la masse du système solaire Mise en marche du contrôleur Fonctions d'affichage Installation de votre MPPT Précautions d'emploi Restrictions de responsabilité Fiche technique...
  • Seite 27: Fonctions Principales

    Votre nouveau MPPT vous fait bénéficier dorénavant de tous les avantages d'un dispositif de pointe conçu conformément aux standards techniques les plus avancés. Il comporte un certain nombre de caractéristiques qui font la différence, telles que: La technologie Maximum Power Point Tracking qui augmente l'efficacité de votre système. La possibilité...
  • Seite 28 REMAQUE : Branchez le MPPT en suivant les étapes décrites ci-dessous afin d'éviter tout problème d'installation. Veuillez consulter les Fig. 1, 2 et 3 qui expliquent comment installer le MPPT sur un rail DIN standard de 35mm. Assurez-vous attention que rien ne fasse obstruction à la bonne circulation d'air sur les cotés. Installez le rail DIN sur la surface verticale.
  • Seite 29: Mise À La Masse Du Système Solaire

    REMARQUE : Respectez les recommandations du fabricant de votre batterie. Nous vous recommandons fortement de raccorder un fusible directement à la batterie, afin d'éviter tout court-circuit au niveau du câblage de la batterie. Le fusible doit au moins supporter la tension nominale du MPPT. Suggestion : utilisez un fusible de 40 A à...
  • Seite 30: Installation De Votre Mppt

    Installation de votre MPPT Le MPPT est fourni avec un commutateur DIP à 8 pôles qui peut être utilisé pour installer votre MPPT. Les boutons DIP doivent seulement être sur la position "ON" ou "OFF". La position du milieu n'est pas autorisée. DIP no.
  • Seite 31: Restrictions De Responsabilité

    Poids 1.6 kg Température ambiante -40 à + 50 °C Protection du boîtier IP 22 Sujet à modification sans préavis ISO9001:2000 Version : 20090909 Fabriqué dans l'un des pays suivants : Chine – Allemagne RoHS Phocos AG – Allemagne www.phocos.com...
  • Seite 32 The Core of Independence MPPT100/30 Maximum Power Point Tracker Manual do Usuário (Português) Caro Cliente, Obrigado por comprar um produto Phocos. Favor ler as instruções cuidadosamente antes de usar o produto.
  • Seite 33 Conteúdo Principais Funções Recomendações de Uso Instalando e Conectando Sistema Solar ao terra Inicializando o ControladorLigando o Funções do Display Ajustando seu MPPT Recomendações de Segurança Exclusão de Responsabilidade Dados Técnicos...
  • Seite 34: Principais Funções

    Com o novo MPPT equipado com circuito seguidor automático do Ponto de Máxima Potência, está disponível agora um dispositivo de tecnologia de ponta, desenvolvido de acordo com os mais recentes padrões tecnológicos. O MPPT dispõe de vários recursos entre os quais se destacam: Tecnologia de seguimento do Ponto de Máxima Potência/Energia que aumenta a eficiência do seu Sistema de Energia Solar Fotovoltaica Permite o uso de módulos normalmente utilizados em sistemas conectados à...
  • Seite 35 Atente-se para o tamanho recomendado do fio (ver tabela no capítulo Fiação recomendada para MPPT100/30).Feche a tampa do lado do painel solar OBS: Conduza os condutores “positivo” e “negativo” próximos um ao outro de forma a minimizar os efeitos eletromagnéticos.
  • Seite 36: Sistema Solar Ao Terra

    OBS: Verifique as recomendações do fabricante da bateria. Recomenda-se sempre conectar um fusível diretamente ao polo da bateria de forma a protege-la contra quaisquer curtos-circuitos que possam ocorrer no circuito da bateria. O fusível deve suportar no mínimo a corrente nominal do MPPT. Sugestão: Utilizar fusível de 40A, ação retardada.
  • Seite 37: Ajustando Seu Mppt

    Ajustando seu MPPT O MPPT vem equipado com chave DIP de 8 interruptores e deve ser usada para ajustar o MPPT. Nota: As chaves DIP devem somente ser utilizadas nas posições “ON” ou “OFF”. A posição intermediária não deve ser utilizada. Chaves DIP No.
  • Seite 38: Exclusão De Responsabilidade

    1.6 kg Peso -40 a + 50 °C Faixa de temperatura ambiente IP 22 Gabinete protetor Sujeito a mudanças sem prévio aviso. Versão: 20090909 ISO9001:2000 Fabricado em um dos seguintes países: China – Alemanha RoHS Phocos AG – Alemanha www.phocos.com...
  • Seite 43 1 2 3 4 5 6 7 8 Address Mode LED2 LED1 LED3 1 2 3 4 5 6 7 8 Address Mode...

Diese Anleitung auch für:

Mppt seriesMppt 100/30