Intenso TAB 814 Bedienungsanleitung
Inhaltsverzeichnis
Verfügbare Sprachen
Verfügbare Sprachen
Kapitel
Inhaltsverzeichnis

Verwandte Anleitungen für Intenso TAB 814


Inhaltszusammenfassung für Intenso TAB 814
- Seite 1 INTENSO TAB 814 V1.2...
-
Seite 2: Inhaltsverzeichnis
TAB 814 Bedienungsanleitung Vielen Dank, dass Sie sich für das TAB814 entschieden haben. Folgen Sie bitte dieser Anleitung, um über die wichtigsten Funktionen des Gerätes informiert zu werden. 1.) Inhaltsverzeichnis 1.) Inhaltsverzeichnis ....................................1 2.) Hinweise ........................................ 2 3.) Geräteüberblick ..................................... 4 4.) Packungsinhalt ...................................... -
Seite 3: Hinweise
Dieses Handbuch enthält unter Umständen nicht alle Funktionen Ihres Gerätes. Für die Nutzung von Anwendungen die von Drittanbietern stammen, kontaktieren Sie bitte den Anbieter. Bitte beachten Sie, dass alle Angaben ohne vorherige Ankündigung geändert werden können. Aktuelle Informationen finden Sie unter www.intenso.de Markenzeichen Google™, das Google™-Logo und Android™... - Seite 4 Sollte das Gerät einmal nicht auf Ihre Eingaben reagieren, benutzen Sie bitte den Reset-Knopf auf der Rückseite des Gerätes, um es neu zu starten. Bei Nichtverwendung trennen Sie bitte das Netzteil von der Stromversorgung. Die Steckdose muss sich in der Nähe des Gerätes befinden und leicht zugänglich sein. ...
-
Seite 5: Geräteüberblick
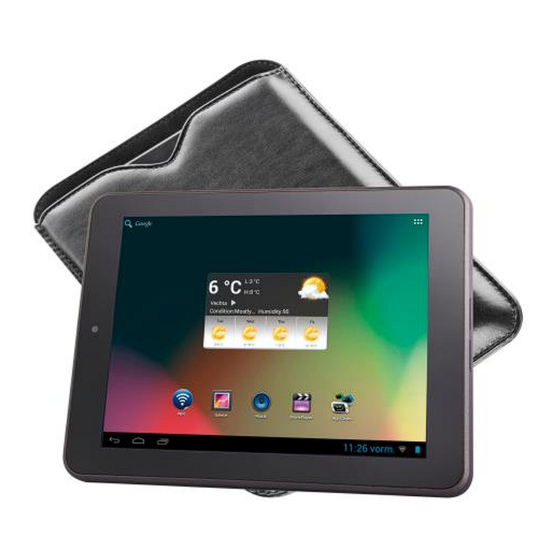
DC 5V 2A Eingang l) Micro-SD Kartenslot g) Micro-USB Buchse m)HDMI 4.) Packungsinhalt Bitte überprüfen Sie den Packungsinhalt auf Vollständigkeit: TAB 814 Stereo-Kopfhörer USB Kabel Netzteil 5V 2.0A Bedienungsanleitung Tasche in Lederoptik DE - 4... -
Seite 6: Laden Des Akkus
5.) Laden des Akkus Bitte laden Sie den Akku des Gerätes vor der ersten Benutzung vollständig auf. Verbinden Sie dazu das beiliegende Netzteil mit dem Gerät und einer Steckdose. Das vollständige Laden dauert ca. 5 Stunden. Der Ladezustand wird an der vorderen, linken Seite des Geräts angezeigt. Die LED leuchtet während des Aufladens Rot und wechselt zu Gelb, wenn der Akku vollständig geladen ist. -
Seite 7: Touchscreen
Um den Speicher zu deaktivieren, wählen Sie “USB-Speicher deaktivieren” aus. Wählen Sie beim Computer die Funktion „Sicher Entfernen“ aus, um das Gerät vom Computer zu trennen. Hinweis: Die vorinstallierten Anwendungen und das Android™ Betriebssystem nehmen einen Teil des vorhandenen internen Speichers ein. -
Seite 8: Der Startbildschirm
9.) Der Startbildschirm Ansicht Entsperren des Displays Wird der Touchscreen zwei Minuten lang nicht bedient, wechselt das Gerät in den Standby Modus. Drücken Sie kurz die Ein / Aus Taste, um in den aktiven Modus zu wechseln. Das Display ist zum Schutz vor ungewünschten Eingaben gesperrt. Berühren Sie das geschlossene Schloss auf dem Display und halten Sie dieses gedrückt. -
Seite 9: Statusleiste
Statusleiste Die Statusleiste finden Sie im unteren Bereich des Startbildschirms. Sie besitzt folgende Funktionalität: Sie erhalten Informationen über: die zuletzt genutzten Programme die Signalstärke der aktuellen WLAN Verbindung die aktuelle Uhrzeit den aktuellen Batterieladestand Sie können folgende Funktionen ausführen: ... -
Seite 10: Verschiedene Startbildschirme Nutzen
Verschiedene Startbildschirme nutzen Ihnen stehen fünf individuell einzurichtende Startbildschirme zur Verfügung. Durch eine leichte Wischbewegung nach links oder rechts, können Sie ganz leicht zwischen Ihnen wechseln. Durch Drücken der Home-Taste gelangen Sie immer automatisch zum mittleren Startbildschirm zurück. Vorinstallierte Anwendungen auf dem Startbildschirm Auf dem Startbildschirm sind verschiedene Anwendungen bereits vorinstalliert: Suchleiste für die Google™... -
Seite 11: A) Suchleiste Für Die Google™ Suche
a) Suchleiste für die Google™ Suche Tippen Sie kurz auf die Lupe, um die Google™ Suchfunktion zu öffnen. Geben Sie den gewünschten Suchbegriff über die virtuelle Tastatur ein und drücken Sie auf Los. Es werden Ihnen nun die verfügbaren Suchergebnisse der Google™ Suche angezeigt. ... -
Seite 12: C) Wettervorschau
c) Wettervorschau Das Wettervorschau Widget zeigt Ihnen auf einem Blick die aktuell eingestellte Uhrzeit, Datum, Wetterlage sowie Temperatur am eingestellten Ort. Um die Einstellungen zu ändern, wechseln Sie bitte in die Anwendungsübersicht und tippen Sie auf das Wettervorschau Icon. Hier können Sie nun die gewünschten Änderungen vornehmen. Einstellungsmenü... -
Seite 13: Manuelle Verbindung
Bestätigen Sie das gegebenenfalls eingegebene Passwort durch tippen auf die Enter Taste und tippen Sie nun auf Verbinden. Nach einem kurzen Moment ist die Verbindung hergestellt. Hinweise: a) Wenn das Gerät in den Standby Modus wechselt, wird WLAN automatisch deaktiviert. Dies verringert den Stromverbrauch und führt so automatisch zu einer längeren Akkulaufzeit. -
Seite 14: F) Musik
Um das nächste oder vorherige Bild angezeigt zu bekommen, schieben Sie das aktuelle Bild mit dem Finger einfach nach links oder rechts aus dem Display. Legen Sie zwei Finger auf den Touchscreen und ziehen Sie diese auseinander, um das Bild stufenlos zu vergrößern. Wenn Sie die Finger wieder zusammenführen, wird das Bild stufenlos verkleinert. - Seite 15 Wiedergabebildschirm (1) Aktuelle Wiedergabe (2) Zufallswiedergabe aktivieren / deaktivieren (3) Wiederholungsoptionen: Alle Titel werden wiederholt Aktueller Titel wird wiederholt Wiederholung ist deaktiviert (4) Titeldetails (5) Nächster / Vorheriger Titel (6) Play / Pause (7) Zeitleiste Tippen Sie auf das Pause Symbol , um die Wiedergabe anzuhalten.
-
Seite 16: G) Video
g) Video Tippen Sie kurz auf das Video Icon im Startbildschirm oder der Anwendungsübersicht, um die Videowiedergabe zu öffnen. Es werden Ihnen nun die verfügbaren Videodateien in einer Liste angezeigt. Wählen Sie die gewünschte Datei durch kurzes Antippen und das Video startet. h) App Center Auf dem Gerät ist das AndroidPIT App Center bereits vorinstalliert. -
Seite 17: Eingabe Von Sonderzeichen
Eingabe von Sonderzeichen Um ein Sonderzeichen wie etwa “ä” einzugeben, tippen Sie lange mit Ihrem Finger auf die Taste „a“ um das Sonderzeichenmenü aufzurufen. Gleiten Sie nun mit dem Finger auf das gewünschte Sonderzeichen, beispielsweise das „ä“ und lösen Sie den Finger wieder vom Display. Sie haben nun ein „ä“ eingeben. Nutzung des Web Browsers ... -
Seite 18: J) Anwendungsübersicht
j) Anwendungsübersicht Tippen Sie kurz auf das Anwendungsübersicht Icon , um die Anwendungsübersicht zu öffnen. Sie sehen nun eine Übersicht aller vorinstallierten und bereits von Ihnen installierten Anwendungen. Öffnen Sie die gewünschte Anwendung durch kurzes Tippen auf das entsprechende Icon. Anwendungsübersicht k) System Einstellungen Tippen Sie im Anwendungsmenü... -
Seite 19: Einstellungsübersicht
Einstellungsübersicht Drahtlos & WLAN Nehmen Sie hier Ihre WLAN-Einstellungen vor. Netzwerke Mehr Hier können Sie weitere Netzwerkeinstellungen vornehmen. Stellen Sie hier die gewünschte Lautstärke und den gewünschten Töne Benachrichtigungston ein. Weiterhin können Sie einen Bestätigungston bei Berührung des Touchscreens und einen Hinweiston beim Entsperren der Displaysperre aktivieren bzw. -
Seite 20: E-Book
10.) E-Book Dieses Gerät verfügt über einen vorinstallierten E-Book Reader. Kopieren von E-Books zwischen Computer und Gerät Sie können E-Books per USB Verbindung auf den internen Speicher ihres Gerätes kopieren. Bitte schauen Sie sich dazu den Absatz „ Übertragung von Daten zwischen dem Gerät und einem Computer per USB Kabel“... -
Seite 21: Lesen Starten
Verbinden Sie Ihr Gerät nun per USB Kabel mit dem Computer. Die Adobe™ Digital Edition Software sollte Ihr Gerät jetzt automatisch erkennen. Ziehen Sie das Cover des E-Book auf Ihr Gerät, um die Datei zu übertragen. Lesen starten Öffnen Sie die Anwendungsübersicht und tippen Sie auf das E-Book Reader Icon, um den E-Book Reader zu öffnen. -
Seite 22: Seiten Umblättern
Seiten umblättern Wenn Sie ein Buch lesen, können Sie mit dem Finger eine Wischbewegung ausführen, um seitenweise zu blättern. Sie können ebenfalls die Seiten automatisch umblättern lassen. Tippen Sie dazu auf die Menü Taste , um zu den erweiterten Einstellungen zu gelangen. -
Seite 23: Versand / Empfang Von E-Mails
11.) Versand / Empfang von E-Mails Auf diesem Gerät ist eine E-Mail Anwendung vorinstalliert. Sie können damit Ihre bereits bestehende E- Mail Adresse nutzen, um E-Mails zu versenden und zu empfangen. Hinweis: Für diese Funktion ist eine WLAN Verbindung zum Internet erforderlich Öffnen Sie die Anwendung über das „E-Mail“... -
Seite 24: Verwaltung Der E-Mail Accounts
Verwaltung der E-Mail Accounts Hinzufügen eines neuen Postfaches: (1) Öffnen Sie die E-Mail Anwendung und tippen Sie auf die Menü Taste zum Anzeigen der weiteren Optionen. Wählen Sie den Menüpunkt „Einstellungen und anschließend “Konto hinzufügen”, um ein neues Postfach anzulegen. (2) Folgen Sie dem Einrichtungsassistenten, um ein neues Postfach anzulegen. -
Seite 25: Verwaltung Von Anwendungen
12.) Verwaltung von Anwendungen Vorinstallierte Anwendungen Dieses Gerät wird mit bereits vorinstallierten Anwendungen ausgeliefert. Eine Übersicht der bereits installierten Anwendungen finden Sie in der Anwendungsübersicht . Hierzu gehören unter anderem der Video Player, Audio Player, Internet Browser, Alarm, Rechner und noch einige mehr. Um eine dieser Anwendungen zu öffnen, tippen Sie kurz auf das zugehörige Icon. -
Seite 26: Lesen Von Office Dokumenten
13.) Lesen von Office Dokumenten Auf diesem Gerät ist bereits die Anwendung “Office Suite” zum Lesen von Office Dokumenten vorinstalliert. Sie können Word, Excel, oder Powerpoint Dateien lesen. Kopieren Sie die gewünschten Office Dateien auf das Gerät. Öffnen Sie die Anwendung „Office Suite“. Navigieren Sie mit dem Explorer zu der gewünschten Datei. -
Seite 27: Eingeschränkte Garantiebedingungen
Symbol. 15.) Eingeschränkte Garantiebedingungen Die Garantie deckt nur den Ersatz dieses Intenso Produkts ab. Die Garantie gilt nicht für normale Verschleißerscheinungen, die sich aus fehlerhaftem, unsachgemäßem Gebrauch, Nachlässigkeit, Unfall, Inkompatibilität, oder aus mangelhafter Leistung einer bestimmten Computer Hardware oder Computer Software ergeben. -
Seite 28: Technische Daten
16.) Technische Daten 1.5 GHz Dualcore based on Cortex A9 Arbeitsspeicher 1 GB DDR 3 Betriebssystem Android 4.1.1 Windows XP / Vista / 7 / Linux 2,4 und höher / Mac 10.6 Kompatible Betriebssysteme und höher Anschlussmöglichkeiten Kopfhörer, Micro SD (SDHC), micro USB, HDMI WLAN WiFi (802.11 b/g/n) G-Sensor... -
Seite 96: Dichiarazione Di Conformità
Noi, la Intenso GmbH, con sede in Diepholzer Str. 15 a 49377 Vechta, Deutschland dichiariamo su nostra responsabilità che il prodotto: Modello: 8” TAB 814 (articolo n° 5510862) Descrizione: Tablet computer è conforme alle seguenti direttive e norme: Direttiva R&TTE 1999/5/EG ...