Yada BT53328F-1 Einbauanleitung
Rückfahr-videosystem
Inhaltsverzeichnis
Verfügbare Sprachen
Verfügbare Sprachen
Quicklinks
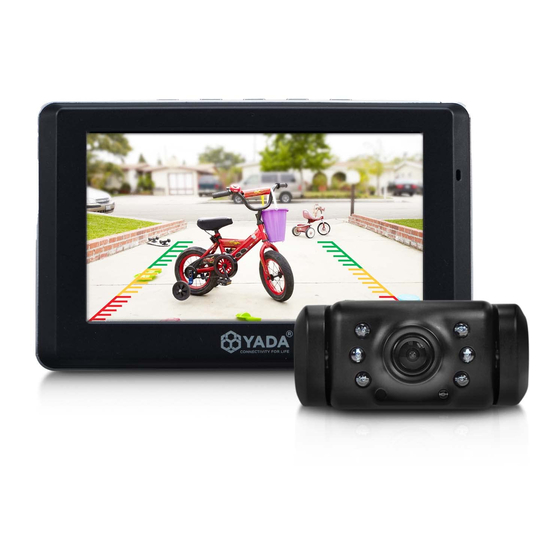
Rückfahr-Videosystem
Anhang zur Einbauanleitung der Kamera:
Montage der Kamera am Nummernschild:
In der Regel wird die Kamera am „unteren Rand" des Nummernschilds montiert (siehe Foto).
Sollte die Kamera am Kennzeichenhalter „oben" montiert werden, muss Folgendes beachtet
werden:
Die Halterung der Kamera muss um 180° gedreht werden, sonst steht das Bild im Monitor auf
dem Kopf. Lösen Sie dazu die Schrauben mit einem kleinen Kreuzschlitz-Schraubendreher an
der Halterung und drehen Sie die Haltung. Ziehen Sie die Schrauben wieder fest.
Siehe folgende Abbildungen:
Kapitel
Inhaltsverzeichnis

Inhaltszusammenfassung für Yada BT53328F-1
- Seite 1 Rückfahr-Videosystem Anhang zur Einbauanleitung der Kamera: Montage der Kamera am Nummernschild: In der Regel wird die Kamera am „unteren Rand“ des Nummernschilds montiert (siehe Foto). Sollte die Kamera am Kennzeichenhalter „oben“ montiert werden, muss Folgendes beachtet werden: Die Halterung der Kamera muss um 180° gedreht werden, sonst steht das Bild im Monitor auf dem Kopf.
- Seite 2 Unser Tipp: Falscher Einbau: Das ganze Nummernschild muss gut lesbar sein. Es dürfen keine Buchstaben und Zahlen verdeckt werden. ...
-
Seite 4: Inhaltsverzeichnis
TABLE DES MATIÈRES 1. Introduction ....................................1 2. Contenu de l’emballage ................................2 3. Spécifications du produit ................................3 4. Guide d’installation ..................................3 5. Jumelage et connexion ................................7 6. Utilisation ......................................7 7. Réglages ......................................8 8. Renseignements sur la sécurité .............................. 8 9. -
Seite 5: Introduction
1. INTRODUCTION Veuillez lire attentivement toutes les directives d’installation avant d’installer le produit. La garantie est annulée en cas d’installation inappropriée. Les directives d’installation ne s’appliquent pas à tous les types de véhicules et sont rédigées en tant que lignes directrices pour l’installation du système. Consultez un technicien d’expérience si vous avez des doutes au sujet de l’installation du produit. -
Seite 6: Contenu De L'emballage
2. CONTENU DE L’EMBALLAGE 1. Moniteur de 8,9 cm (3,5 po) ou de 10,9 cm (4,3 po) pour le tableau de bord ou moniteur de miroir de 8,9 cm (3,5 po) 2. Caméra de recul sans fil à moniteur de 8,9 cm (3,5 po) pour le tableau de bord l’épreuve des intempéries 3. -
Seite 7: Spécifications Du Produit
4. Commencez par faire correspondre les miroirs dans la partie supérieure, avec les pinces à ressort autour du rétroviseur original. 5. Tirez le miroir Yada vers le bas afin de permettre aux pinces à ressort de la partie inférieure de se fixer... - Seite 8 Assurez-vous que le miroir est centré avant de le fixer. 6. Une fois que le miroir Yada est installé, attachez les bandes de velcro à l’arrière ensemble une à la fois de sorte que le miroir Yada tienne solidement.
- Seite 9 INSTALLATION DE LA CAMÉRA DE RECUL Remarque : L’installation de la caméra dans des véhicules à moteur diesel peut nécessiter l’installation d’un câblage différent. Consultez les renseignements ci-dessous. Vous pouvez aussi regarder des vidéos décrivant les types d’installation usuels à www.letsyada.com pour plus d’information. Mise en garde : cet appareil est conçu pour fonctionner avec un système électrique de 12 V/24 V C.C.
- Seite 10 mettra alors automatiquement en marche lorsqu’il est connecté à une source d’alimentation. Si vous ne voyez pas d’image lorsque le véhicule est en marche arrière, consultez la section Jumelage et connexion pour obtenir plus de renseignements. 9. Mettez le véhicule en marche arrière. Si vous obtenez une image claire, mettez le véhicule en position de stationnement et tournez la clé...
-
Seite 11: Jumelage Et Connexion
et en arrêt. Si un interrupteur n’est pas installé, la caméra pourrait vider la batterie et la caméra pourrait aussi être endommagée. Assurez-vous d’utiliser un fusible lors du raccordement à la borne de la batterie. Des vidéos disponibles sur www.letsyada.com présentent les directives de montage détaillées. 5. -
Seite 12: Réglages
7. RÉGLAGES Vous pouvez ajuster le contraste et la luminosité du moniteur selon vos besoins. Remarque : Les réglages du contraste et de la luminosité NE sont disponibles QUE lorsque l’image de marche arrière est affichée à l’écran. Interrupteur Ligne de l’assistant Pour ajuster le contraste : de stationnement Menu... - Seite 13 autour du véhicule lorsque vous faites marche arrière de la même façon que si vous n’aviez pas de Caméra de recul numérique. Assurez-vous que la voie dans laquelle vous voulez vous diriger est libre. Si vous reculez votre véhicule en regardant uniquement l’affichage, vous pourriez heurter un véhicule, un piéton, un cycliste, un enfant, un animal ou d’autres objets et entraîner des blessures ou la mort.
- Seite 14 • Conformez-vous aux codes de la route applicables et à l’ensemble des règlements sur les véhicules automobiles applicables à cet appareil. • Consultez les lois et réglementations d’intérêt local pour connaître les restrictions relativement à l’installation ou l’emploi. • Ne laissez jamais un enfant jouer avec l’appareil. Les petites pièces pourraient présenter un risque d’étouffement.
-
Seite 15: Entretien Et Garantie
véhicule. Voici quelques conseils de sécurité qui vous aideront à éviter les accidents lors de la marche arrière. • Faites le tour de votre véhicule avant d’y embarquer. Vérifiez si des enfants, des jouets et des animaux sont présents avant d’embarquer dans le véhicule et de démarrer le moteur. • Sachez où... - Seite 16 Amérique du Nord ne formule aucune autre garantie que ce soit à l’exception de la garantie limitée expresse énoncée précédemment. REMARQUE : La garantie ne s’applique qu’aux clients de l’Amérique du Nord ou aux achats faits en Amérique du Nord. MODALITÉS DE LA GARANTIE Si au cours de la période de garantie d’un an, votre nouveau produit s’avère défectueux, Winplus Amérique du Nord procédera gratuitement à...
- Seite 17 Winplus Amérique du Nord n’offre aucune autre garantie outre la garantie expresse limitée mentionnée aux présentes. AVIS DE NON-RESPONSABILITÉ À L’ENDROIT DES GARANTIES, Y COMPRIS DES GARANTIES MARCHANDES ET DE CONVENANCE À UN USAGE PARTICULIER : À L’EXCEPTION DES MODALITÉS MENTIONNÉES AUX PRÉSENTES, AUCUNE GARANTIE OU REPRÉSENTATION, EXPRESSE OU IMPLICITE, NE COUVRE LA CAMÉRA DE VUE ARRIÈRE SUR RÉTROVISEUR POUR LA MARCHE ARRIÈRE.
- Seite 18 WINPLUS AUSTRALIE / HONG KONG GARANTIE LIMITÉE Ce produit Yada est garanti contre tout vice de fabrication pour une période de deux (2) ans à compter de la date d’achat. La responsabilité se limite au remplacement du produit et Winplus rejettera toute réclamation...
-
Seite 19: Renseignements Généraux
Si le produit est défectueux, retournez-le simplement au magasin où il a été acheté avec votre reçu afin de recevoir un produit de remplacement. Aucun remboursement ou crédit ne sera accordé. Le remplacement se limite à un produit Yada de même modèle ou d’un modèle similaire. 10. RENSEIGNEMENTS GÉNÉRAUX Service à... - Seite 20 • Réorienter ou déplacer l’antenne de réception • Accroître la séparation entre l’appareil et le récepteur • Brancher l’appareil dans une prise ou un circuit autre que celui auquel le récepteur est branché • Consulter un vendeur ou un technicien radio/TV expérimenté pour obtenir de l’aide Cet appareil est conforme à...
- Seite 21 Cet appareil est conforme aux limites de radioexposition d’Industrie Canada applicables à un milieu non contrôlé. Les utilisateurs finaux doivent suivre les instructions d’utilisation pertinentes afin de respecter les directives en matière d’exposition aux radiofréquences. Cet émetteur ne doit pas être installé au même endroit qu’une autre antenne ou émetteur ou utilisé conjointement à...
- Seite 22 11 On Lai Street, Shatin, N.T., Hong Kong www.winplus.com www.letsyada.com © 2013 Winplus North America Inc. All Rights Reserved. Winplus, the logo design, and Yada are trademarks or registered trademarks of Winplus North America Inc. The Bluetooth word mark and logos are owned by the ®...
- Seite 26 TABLE OF CONTENTS 1. Introduction ....................................1 2. Package Contents ..................................2 3. Product Specifications ................................3 4. Installation Guide ..................................3 5. Pairing and Connecting ................................7 6. Operation Guide ................................... 7 7. Settings ......................................8 8. Safety Information ..................................8 9.
-
Seite 27: Introduction
1. INTRODUCTION Please read all of the installation instructions carefully before installing the product. Improper installation will void manufacturer’s warranty. The installation instructions do not apply to all types of vehicles, and are written as guidelines to assist in installing the system. Consult an experienced technician if you are not comfortable installing the product. -
Seite 28: Package Contents
2. PACKAGE CONTENTS 1. 3.5” or 4.3” Dash Monitor or 3.5” Mirror Monitor 2. Weatherproof Rearview Camera 3. Windshield mount for Dash 3.5” Dash Monitor Monitor only 4. 12V/24V Power Adaptor 5. Hardwire Power Cable for Dash Monitor or 3.5” Mirror Monitor 4.3”... -
Seite 29: Product Specifications
4. INSTALLATION GUIDE MIRROR MONITOR INSTALLATION 1. Attach black Hook and Loop straps to the back of the Yada mirror by sliding the metal clip into the mirror brackets. Push in all the way until the straps are secure. 2. Make sure the connection for each strap is facing the same way- rather up or down- to allow for easy adjusting of the mirror. - Seite 30 Tip: Use both hands on either side of the mirror to snap into place evenly. Make sure the mirror is centered before snapping into place. 6. Once the Yada mirror is in place, reach behind and one by one reattach the Hook and Loop straps together to hold the Yada mirror tight in place.
- Seite 31 See Below. You can also watch some common installation videos at www.letsyada.com for more information. Caution: This unit is designed to operate on a 12V/24V DC NEGATIVE GROUND electrical system. Connecting to other types of electrical systems will cause damage to your vehicle. Please contact the manufacturer if you are unaware of the system type in your vehicle.
- Seite 32 rear hatch. 13. Standing with the license plate in one hand and the camera in the other hand, slide the Camera along the top of the license plate in order to determine the placement. Best placement is in the center of the license plate.
-
Seite 33: Pairing And Connecting
5. PAIRING AND CONNECTING Pairing is not necessary as the unit has already been paired. If you are not able to connect the camera, please try to pair the camera by the following steps: 1. Go to the monitor and do the following step: a. -
Seite 34: Settings
7. SETTINGS You can adjust the contrast and brightness of the Monitor according to your desired level. Note: Contrast and Brightness setting ONLY works while the backup image is on the screen. Power Menu Parking Aid Line To Adjust Contrast Down 1. - Seite 35 wide-angle lens is used. Objects in the rear view monitor will appear visually opposite than when viewed in the rear view and outside mirrors. Use the inside mirror or glance over your shoulder to properly judge distances to other objects. • The Backup Camera “night vision”...
- Seite 36 inclement weather. • When strong light directly enters a camera, objects may not be displayed clearly. • The screen may flicker under fluorescent light. • The colors of objects on the rear view monitor may differ somewhat from those of the actual object. • If dirt, rain or snow attaches to the camera, the monitor may not clearly display objects.
-
Seite 37: Maintenance & Warranty
9. MAINTENANCE & WARRANTY a. Cleaning • If dirt, rain or snow attaches to the camera, the monitor may not clearly display objects. If water droplets, snow or mud adhere to the camera lens, rinse with water and wipe with a dry cloth. • Do not use alcohol, benzene or thinner to clean the camera. - Seite 38 6. This is a “repair or replace” warranty only, and does not cover the costs incurred for the installation, removal or reinstallation of the product, or damage to any mobile phone device or vehicle. OWNER’S RESPONSIBILITIES: Winplus North America will make every effort to provide warranty service within a reasonable period of time.
- Seite 39 vehicle. You should always look around outside your vehicle and use your mirrors to confirm rearward clearance and that your vehicle can back up safely. Winplus North America and/or its affiliates are not responsible for a user’s intended or actual use of the Digital Wireless Backup Camera.
-
Seite 40: General Information
WINPLUS AUSTRALIA/HONG KONG LIMITED WARRANTY This Yada product is warranted against faulty workmanship for a period of 2 years from date of purchase. Liability is limited to replacement of the product and claims for associated or consequential loss or damage will not be accepted. - Seite 41 FCC/ICC Federal Communication Commission Interference Statement This equipment has been tested and found to comply with the limits for a Call B digital device, pursuant to Part 15 of the FCC Rules. These limits are designed to provide reasonable protection against harmful interference in a residential installation.
- Seite 42 2. This device must accept any interference, including interference that may cause undesired operation of the device. This device has been designed to operate with an antenna having a maximum gain of 0 dBi. Antenna having a higher gain is strictly prohibited per regulations of Industry Canada. The required antenna impedance is 50 ohms.
- Seite 44 11 On Lai Street, Shatin, N.T., Hong Kong www.winplus.com www.letsyada.com © 2013 Winplus North America Inc. All Rights Reserved. Winplus, the logo design, and Yada are trademarks or registered trademarks of Winplus North America Inc. The Bluetooth word mark and logos are owned by the ®...