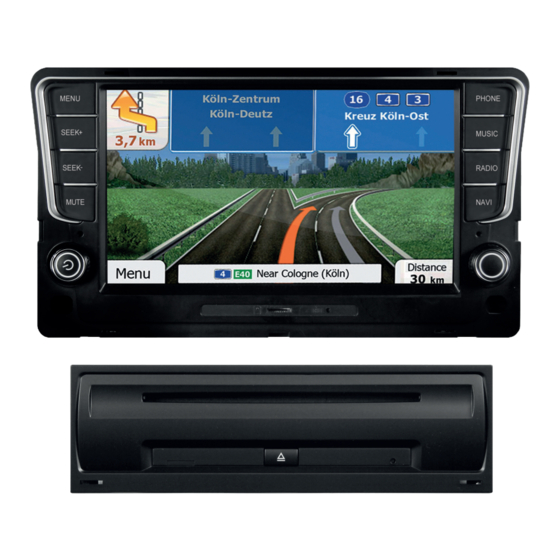
ESX VISION Naviceiver VN810 VW-G7-DAB Einbauanleitung
Vorschau ausblenden
Andere Handbücher für VISION Naviceiver VN810 VW-G7-DAB:
- Benutzerhandbuch (48 Seiten) ,
- Benutzerhandbuch (48 Seiten) ,
- Einbauanleitung (12 Seiten)
Werbung
Quicklinks
Werbung

Inhaltszusammenfassung für ESX VISION Naviceiver VN810 VW-G7-DAB
- Seite 1 VN81 0 VW-G7 VN810 VW-G7-DAB...
- Seite 2 SCOPE OF DELIVERY / Lieferumfang ITEM FIGURE SLOT QUANTITY Artikel Abbildung Steckplatz Anzahl MAIN DEVICE – Hauptgerät EXTERNAL DVD DRIVE – Externes DVD-Laufwerk RADIO PANEL (DARK RHODIUM) – Radioblende (Dark Rhodium) MAIN DEVICE DVD DRIVE CONNECTOR – Hauptgerät DVD-Laufwerk Verbindung STYLUS –...
- Seite 3 SCOPE OF DELIVERY / Lieferumfang ITEM FIGURE SLOT QUANTITY Artikel Abbildung Steckplatz Anzahl VIDEO OUT (DUAL ZONE) Video-Ausgang (Dual Zone) AUDIO OUT (DUAL ZONE) Audio-Ausgang (Dual Zone) AUDIO OUT (SUBWOOFER/CENTER) Audio-Ausgang (Subwoofer/Center) USB CABLE SET WITH 2 CONNECTORS USB Kabelsatz mit 2 Anschlüssen BT-MICROPHONE BT-Mikrofon GPS ANTENNA...
- Seite 4 IMPORTANT NOTE FOR YOUR VEHICLE‘S SERVICE STATION After installation of the ESX Naviceiver inside the vehicle, the device is not recognized as the original radio and causes an error message in the fault memory of the vehicle (depending on the vehicle, for example „Infotainment...
-
Seite 5: Wichtige Hinweise
Radio Blende in schwarz WICHTIGER HINWEIS FÜR IHREN FAHRZEUGSERVICE/IHRE FAHRZEUGWERKSTATT Nach Installation des ESX Naviceivers im Fahrzeug wird dieser nicht als Original-Radio erkannt und verursacht im sogenannten Ereignis- oder Fehlerspeicher des Fahrzeuges eine Fehlermeldung (fahrzeugabhängig z.B. „Infotain- ment CAN, keine Kommunikation“). Diese Fehlermeldung ist in Verbindung mit unserem ESX Gerät normal und kann... -
Seite 6: Installation Hints
If your car is not equipped with the factory CD drive in the glove box, you need the original glove box holder from Volkswagen to install the ESX DVD drive. Alternatively, you can simply omit the ESX drive. The function of the main device is not impaired. - Seite 7 In der Regel sollte das Kabel lang genug sein, um die A-Säule (Fahrerseite) über die Beifahrerseite zu erreichen. Ein evtl. werksseitig vorhandenes Mik- rofon ist nicht kompatibel mit dem ESX Gerät. Bitte verwenden Sie das mit- gelieferte Mikrofon. DAB-Antenna (if available): Lay the DAB antenna (19) to a suitable location on the windshield.
- Seite 8 INSTALLATION EXAMPLE / Einbaubeispiel VOLKSWAGEN GOLF VII COMPOSITION MEDIA Loosen at first the lower A/C panel on each side by using the mounting wedges (refer to pg. 5) in order to facilitate the installation. Lockern Sie zunächst die Blende der Klimaautomatik ringsum auf allen Seiten mithilfe der Montagekeile (Siehe S.
- Seite 9 INSTALLATION EXAMPLE / Einbaubeispiel VOLKSWAGEN GOLF VII COMPOSITION MEDIA Here you can see the exact position of the two screws (T20) of the glove box holder. Hier sehen Sie die genaue Position der beiden Schrauben (T20) der Hand- schuhfachhalterung. Open the glove box and unlock the flap by pressing the tabs on the marked points upwards.
- Seite 10 Gerät an. Schließen Sie ebenfalls den fahrzeugspezifischen Kabelstecker und den Antennenstecker an. Connect the white connector (4) with the new ESX drive and then slide it into the holder. But please do not slide it in completely into the slot until the functional test is not finished.
- Seite 11 Set the ESX device into the bay. Before you complete the installation of the new ESX device, check its function. Please note that it may take up to 15 minutes, until a GPS signal can be received (in the open).
- Seite 12 ESX Car Media Systems · Audio Design GmbH Am Breilingsweg 3 · D-76709 Kronau/Germany Tel. +49 7253 - 9465-0 · Fax +49 7253 - 946510 www.esxnavi.de - www.audiodesign.de ©2017 All Rights Reserved...


