Nikon PC-E NIKKOR 24mm f/3.5D ED Benutzerhandbuch
Vorschau ausblenden
Andere Handbücher für PC-E NIKKOR 24mm f/3.5D ED:
- Benutzerhandbuch (2 Seiten) ,
- Benutzerhandbuch (124 Seiten)
Inhaltsverzeichnis
PC-E NIKKOR
24mm f/3.5D ED
Nano Crystal Coat
使用説明書
User's Manual
Benutzerhandbuch
Manuel de l'utilisateur (P. 50–65)
Manual del Usuario
Anvädarhandbok
Руководство пользовэтеля (CTP. 98–113)
Gebruikshandleiding
Manuale d'uso
(P. 2–17)
(PP. 18–33)
(S. 34–49)
(PP. 66–81)
(S. 82–97)
(P. 114–129)
(PP. 130–145)
(P. 146–161)
(P. 162–177)
(P. 178–194)
J p
En
De
Fr
Es
Se
Ru
Nl
It
Ck
Ch
Kr
Inhaltsverzeichnis

Verwandte Anleitungen für Nikon PC-E NIKKOR 24mm f/3.5D ED


Inhaltszusammenfassung für Nikon PC-E NIKKOR 24mm f/3.5D ED
- Seite 1 PC-E NIKKOR 24mm f/3.5D ED Nano Crystal Coat 使用説明書 (P. 2–17) User’s Manual (PP. 18–33) Benutzerhandbuch (S. 34–49) Manuel de l’utilisateur (P. 50–65) Manual del Usuario (PP. 66–81) Anvädarhandbok (S. 82–97) Руководство пользовэтеля (CTP. 98–113) Gebruikshandleiding (P. 114–129) Manuale d’uso (PP.
- Seite 2 安全上のご注意 ご使用の前に「安全上のご注意」をよくお読みのうえ、正しくお使いく ださい。この 「安全上のご注意」 は製品を安全に正しく使用していただき、 あなたや他の人々への危害や財産への損害を未然に防止するために、重 要な内容を記載しています。お読みになった後は、お使いになる方がい つでも見られる所に必ず保管してください。 表示について 表示と意味は次のようになっています。 この表示を無視して、誤った取り扱いをすると、人が死亡または重 警告 傷を負う可能性が想定される内容を示しています。 この表示を無視して、誤った取り扱いをすると、人が傷害を負う可 注意 能性が想定される内容および物的損害の発生が想定される内容を示 しています。 お守りいただく内容の種類を、次の絵表示で区分し、説明しています。 絵表示の例 △記号は、注意(警告を含む)を促す内容を告げるものです。図の中や近 くに具体的な注意内容(左図の場合は感電注意)が描かれています。 記号は、禁止(してはいけないこと)の行為を告げるものです。図の中 や近くに具体的な禁止内容(左図の場合は分解禁止)が描かれています。 ●記号は、行為を強制すること(必ずすること)を告げるものです。図の 中や近くに具体的な強制内容(左図の場合は電池を取り出す)が描かれて います。 警 告 分解したり修理・改造をしないこと 感電したり、異常動作をしてケガの原因となります。 分解禁止 落下などによって破損し、内部が露出したときは、露出 部に手を触れないこと 接触禁止 感電したり、破損部でケガをする原因となります。 カメラの電池を抜いて、販売店またはニコンサービス機関に修理を 依頼してください。 すぐに修理依頼を...
- Seite 3 警 告 熱くなる、煙が出る、こげ臭いなどの異常時は、速やか にカメラの電池を取り出すこと 電池を取る そのまま使用すると火災、やけどの原因となります。電池を取り出 す際、やけどに充分注意してください。電池を抜いて、販売店また はニコンサービス機関に修理を依頼してください。 すぐに修理依頼を 水につけたり水をかけたり、雨にぬらしたりしないこと 発火したり感電の原因となります。 水かけ禁止 引火・爆発のおそれのある場所では使用しないこと プロパンガス・ガソリンなど引火性ガスや粉塵の発生する場所で使 用すると、爆発や火災の原因となります。 使用禁止 レンズまたはカメラで直接太陽や強い光を見ないこと 失明や視力障害の原因となります。 見ないこと 注 意 ぬれた手でさわらないこと 感電の原因になることがあります。 感電注意 製品は幼児の手の届かないところに置くこと ケガの原因になることがあります。 放置禁止 逆光撮影では、太陽を画角から充分にずらすこと 太陽光がカメラ内部で焦点を結び、 火災の原因になることがあります。 画角から太陽をわずかに外しても火災の原因になることがあります。 使用注意 使用しないときは、レンズにキャップをつけるか太陽光の あたらない所に保管すること 保管注意 太陽光が焦点を結び、火災の原因になることがあります。 三脚にカメラやレンズを取り付けたまま移動しないこと 転倒したりぶつけたりしてケガの原因になることがあります。 移動禁止 窓を閉め切った自動車の中や直射日光が当たる場所など、 異常に温度が高くなる場所に放置しないこと...
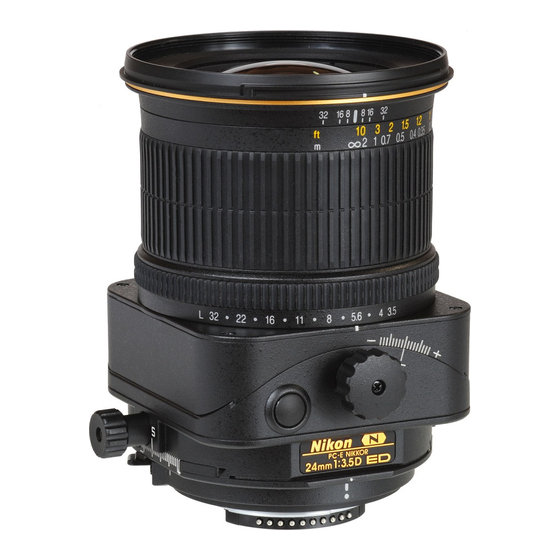
- Seite 4 このたびはニッコールレンズをお買い上げいただき、誠にありがとうご ざいます。 1. 各部の名称 ① フード ⑨ 絞りリング ⑰ CPU 信号接点 ② フード取り付け ⑩ 絞り目盛 ⑱ 絞り込みボタン 指標 ⑪ 絞り指標 ⑲ シフトノブ ③ フードセット指標 ⑫ ティルトノブ ⑳ シフト目盛 ④ フード着脱指標 ⑬ ティルト目盛 レボルビングレバー ⑤ 被写界深度目盛 ⑭ レボルビング指標 シフトロックノブ ⑥ 距離目盛基準線 ⑮...
- Seite 5 2. 主な特長 シフトやティルトのアオリ操作により、カメラアングルによる主要被写 体の歪みを補正したり、奥行きのある主要被写体の手前から奧まで全体 にピントを合わせられます。PC とは、Perspective Control の略で、 遠近感の補正や強調ができることを表します。 D3/D300 カメラでは、 “自動絞り”対応で、絞り込みボタンを操作 ● しないで撮影できます。 被写体までの距離情報をカメラ側に伝達する機能を備え、3D マルチ ● パターン測光機能を持ったカメラとの組み合わせでは、より的確な露 ※ 出制御を実現します。 (アオリなしで、開放絞りの場合のみ ) ※ D3/D300 カメラを除く。 ニコン独自の ED(特殊低分散)ガラスによる色収差の補正とともに、 ● 良好なボケ味が得られる円形絞りの採用で優れた光学性能、描写性能 を発揮します。 ナノクリスタルコート(Nano Crystal Coat)を一部のレンズに施し ● たことで、強い太陽光が当たるスポーツ撮影から、スポットライトの ある室内撮影まで、クリアーで抜けの良い画像を提供します。 最短撮影距離 0.21 m までの近接撮影ができます。 ●...
- Seite 6 3. 使用できる機能 カメラによって、使用できる機能には制限・制約がありますので、カメ ラの使用説明書でもご確認ください。 ※ 1 アオリ 露出モード カメラによる プリセット カメラへの カメラ 絞り値の設定 絞り 取り付け ※2 操作 ○ ○ ○ ○ ※3 ○ ※4 ※ 5 ※ 6 D300 ○ ○ △ △ D2 シリーズ、 D1 シリーズ、 D200、D100、D80、...
- Seite 7 ※ 9: 絞り込み状態で半押しタイマー OFF でシャッターボタンを全押し (深く押し込む)すると、適正露出が得られない場合がありますの で、シャッターボタン半押し後、絞りの開閉動作終了後にレリー ズしてください。 絞り込みボタン(プリセット絞り) 絞り込みボタンを押すと、セットした絞り値までの絞り込みが行 ● われます。再度押すと、 “開放絞りの状態”になります。ファイン ダーの画面または絞り羽根(被写体側から見たレンズ内部)で、 現在の状態は確認できます。 開放絞りの状態でも、カメラには、セットした絞り値が表示され ● ます。 D3/D300 カメラ : “開放絞りの状態”でも、 シャッターを切ると、 ● セットした絞り値までの絞り込みが自動的に行われ撮影できます。 “絞り込みボタンを ON した状態”で電源を OFF にしたり、半押 しタイマーが切れると、 “開放絞りの状態”になります。 ■ ご注意 D3 以外のカメラでは、アオリ操作(シフト、ティルト、レボルビング) ● の組み合わせにより、カメラボディーと干渉しますので、充分ご注意 ください。 このレンズは、マニュアルフォーカス専用です。オートフォーカスは、 ●...
- Seite 8 4. カメラへの取り付け a シフトノブとティルトノブを回して、シフト目盛とティルト目盛が図 2 の位置 (目盛の中心を T/S に合わせる) になるようにセットします。 ご注意: アオリ(P.10)状態だったり、ロックされていない状態、 またはレボルビング(P.12)している状態で取り付けたり、 取り外すと、指をはさんでケガをしたり、カメラボディーと レンズが接触してキズを付けることがあります。 図 2 b シフトロックノブとティルトロックノブを回して固定します(図 3) 。 ご注意: 故障の原因となりますので、各ノブやロックノブを無理に回 さないでください。 図 3 c カメラの電源スイッチを OFF にセットし、着脱指標を合わせて、矢印 方向にカチッと音がするまでレンズを回します(図 4) 。 カメラの電源が ON の時に、レンズを装着すると、カメラが正しく作 ● 動しません。 図 4...
- Seite 9 5. バヨネットフード HB-41 の装着 レンズ先端のフード着脱指標とフード取り付け 指標( 、2 ヵ所のいずれか)を合わせて、 時計回りにカチッと音がするまでフードを回転 させ、確実に取り付けます。 フード着脱指標とフードセット指標( ) ● が合っていることを確認してください。 フードが正しく取り付けられないと撮影画面 ● にケラレを生じますのでご注意ください。 図 5 フード先端を強くつかむと着脱が困難になりま ● す。着脱の際は、フードの根元(フード取り付 け指標部分) 付近を持って回転させてください。 収納時はフードを逆向きにしてレンズに取り付けられます。 ● 6. 露出の設定 ■ D3/D300 カメラ a シフトノブとティルトノブを回して、シフト 目盛とティルト目盛が図 2 の位置になるよう にセットします。 b カメラの露出モードをセットします。 c 露出モード A、M:絞りリングまたはカメラの コマンドダイヤルで絞り値を設定します(コマ...
- Seite 10 d 絞りリングで絞り値をセットし、変更した絞りの段数と同じ分、シャ ッタースピードもシフトさせます。 絞りリングを L" にセットすると、 最小絞り(F32)に固定されます。 ● 必ず、絞りリングでセットしてください。なお、カスタムセッティン ● グで「レンズの絞りリングによる絞りのセット」を設定する必要はあ りません。 ■ 単体露出計を使用する場合 a シフトノブとティルトノブを回して、シフト目盛とティルト目盛が 図 2 の位置になるようにセットします。 b カメラの露出モードを M(マニュアル)にセットします。 c 絞りリングまたはカメラのダイヤルで絞り値をセットし、カメラに表 示される F 値または絞りリングの絞り値を単体露出計にセットしてシ ャッタースピードを決めます。 D3/D300 以外のカメラは、必ず、絞りリングでセットしてください。 ● なお、カスタムセッティングで「レンズの絞りリングによる絞りのセ ット」を設定する必要はありません。 7. アオリ操作 ■ ご注意 正確な撮影のためには、三脚の使用をおすすめします。 ● 故障の原因となりますので、各ノブやロックノブは、強い力で無理に ●...
- Seite 11 ■ シフト 図 7 シフトノブを回すと、カメラに対して平行に、左右または上下(レボル ビング併用時)にレンズを移動(± 11.5 mm)できます。カメラの位 置を変えずに構図を変えることができ、被写体の歪みを補正したり、障 害物を避けて撮影できます(P.195) 。 シフトさせたら、必ず、シフトロックノブを回して固定します。 ● ご注意: シフト操作の時、レンズとカメラボディーの間に指をはさまな いようにご注意ください。 ■ ティルト 図 8 ティルトノブを回すと、左右または上下(レボルビングを併用)にレン ズの向きを変えられます(± 8.5° ) 。カメラに対して平行でない被写体 面の手前から奥までピントを合わせたり、逆に平行な被写体の一部にピ ントを合わせて撮影できます(P.195) 。 ティルトさせたら、必ず、ティルトロックノブを回して固定します。 ● ティルトすると、構図が若干変化します。 ● ティルトする場合は、レンズの被写界深度目盛や距離目盛は使用でき ● ません。...
- Seite 12 ■ レボルビング 図 9 レンズを回転して(± 90° ) 、上下のシフトを左右に変え、左右のティル トを上下に変えられます。 レボルビングする前には、必ず、シフト量とティルト量を“0” (目盛 ● の中心)にしてください。 ご注意: シフトまたはティルト状態だったり、ロックされていない状態 でレボルビングしたりすると、指をはさんでケガをしたり、カ メラボディーとレンズが接触してキズを付けることがあります。 レボルビングレバーをカメラ側に押しながら、レンズの四角い箱部を ● 持って、回してください。 左右とも 30 ゜毎にクリックストップがあります。30°と 60°の位 ● 置では、レボルビングレバーを押さないで、回転できます。 8. ピント合わせ 図 10...
- Seite 13 a 絞りを“開放状態”にして、ピントを合わせます。 b 絞り込みボタンを押して“絞り込み状態”にして、撮影します。 D3 / D300 カメラでは、通常この操作をする必要はありません。 ● 自動的に設定した絞り値まで絞り制御がされますので、そのまま撮影 が可能です。使用状況に合わせて使い分けてください。 アオリを行うと、フォーカスエイドは正常に作動しません。ファイン ● ダーで画面を確認しながら、ピントを合わせてください。 ピントを合わせた後にアオリ量を変えると、露出が変わり、ピントが ● ズレますので、ご注意ください。 9. 被写界深度 距離目盛基準線 被写体の前後のピントが合う範囲(被写 ● 被写界深度目盛 写界深度)は、距離目盛基準線の両側の 被写界深度目盛によって、おおよそ判り ます。 レンズの絞り込みボタン、またはカメラ ● (D3/D300 カメラのみ ) のプレビュー ボタンを押すと、おおよその被写界深度 をファインダーで確認できます。 詳 し い 被 写 界 深 度 は、 被 写 界 深 度 表 ●...
- Seite 14 カメラ ケラレなく撮影できる撮影距離 D300、D200、D100 1 m 以上 D80、D70 シリーズ、D50 2 m 以上 D60、D40 シリーズ 3 m 以上 その他 すべての撮影距離でケラレます。 11. ファインダースクリーンとの組み合わせ スクリーン EC-B G2 G3 J EC-E カメラ ◎ ◎ ― ◎ ― ― ― ― ― ◎ ― ◎ ― ○...
- Seite 15 上記以外のカメラで B、E スクリーンをお使いの場合は、それぞれ B、 ● E スクリーンの欄をご覧ください。 12. レンズのお手入れと取り扱い上のご注意 このレンズは可動部分が多く、ゴミやホコリまたは水滴の影響を受け ● やすいため、使わないときはシフト量とティルト量を“0”にセットし てください。 レンズ面の清掃は、ホコリを拭う程度にしてください。指紋がついた ● ときは、柔らかい清潔な木綿の布に無水アルコール(エタノール)ま たは市販のレンズクリーナーを少量湿らせ、レンズの中心から外周へ 渦巻状に、拭きムラ、拭き残りのないように注意して拭いてください。 シンナーやベンジンなどの有機溶剤は絶対に使用しないでください。 ● レンズ表面の汚れや傷を防ぐためには、NC フィルターをお使いいただ ● けます。また、レンズフードも役立ちます。 レンズをケースに入れるときは、必ず、レンズキャップを前後に取り ● 付けてください。 レンズを長期間使用しないときは、カビやサビを防ぐために、高温多 ● 湿のところを避けて風通しのよい場所に保管してください。また、直 射日光のあたるところ、ナフタリンや樟脳のあるところも避けてくだ さい。 レンズを水に濡らすと、部品がサビつくなどして故障の原因となりま ● すのでご注意ください。 ストーブの前など、高温になるところに置かないでください。極端に ● 温度が高くなると、外観の一部に使用している強化プラスチックが変 形することがあります。 13. 付属アクセサリー 77 mm スプリング式レンズキャップ...
- Seite 16 15. 仕 様 型式: ニコン F マウント CPU 内蔵 D タイプレンズ 焦点距離: 24mm 最大口径比: 1:3.5 レンズ構成: 10 群 13 枚(ED レンズ 3 枚、非球面レンズ 3 枚、 ナノクリスタルコート 1 面) 画角: 84°… 35mm 判一眼レフカメラ FX フォーマットのデジタル一眼レフカメラ 61°… DX フォーマットのデジタル一眼レフカメラ 71°… IX240 カメラ 最大撮影倍率: 1/2.7(倍)...
- Seite 18 Repairs should be performed only by qualified technicians. Should the camera or lens break open as the result of a fall or other accident, take the product to a Nikon authorized service representative for inspection after unplugging the product and/or removing the battery.
- Seite 19 Thank you for purchasing the PC-E NIKKOR 24mm f/3.5D ED lens. 1. Nomenclature 1 Lens hood 8 Focus ring & CPU contacts 2 Lens hood attachment 9 Aperture ring * Aperture stop-down 0 Aperture scale index button 3 Lens hood setting...
-
Seite 20: Major Features
• This lens features automatic aperture control. When it is mounted on a Nikon D3 or D300 camera, the user can use all exposure modes to take images without operating the aperture stop-down button. - Seite 21 F-401/N4004*, — — — — — — — — F-801s/N8008s*, F-801/N8008*, F-601M/N6000*, F3AF, F-601/N6006*, F-501/N2020**, Pronea S, Nikon MF cameras, (except F-601M/N6000*) : Possible —: Impossible * Sold exclusively in the USA ** Sold exclusively in the USA and Canada...
- Seite 22 *1 Exposure will be incorrect when the lens is shifted and/or tilted. *2 P includes AUTO (General-Purpose Program) and Vari-Program System *3 When the lens power or the camera is turned off using the auto meter off function while stopping down the lens aperture, the diaphragm blades fully open to the maximum aperture.
- Seite 23 • Use of tilt/shift function can cause some vignetting or slight color change. (Vignetting is the darkening of the corners around the image.) • When mounted on Nikon digital SLR (Nikon DX format) cameras, such as the D2-Series and D300, the lens’ picture angle becomes 61°...
- Seite 24 • To store the lens hood, attach it in the reverse position. 6. Determining exposure When using the Nikon D3 or D300 camera Set the shift and tilt amount to 0 by rotating the shift and tilt knobs. (Fig. 2) Set the camera’s exposure mode.
- Seite 25 When using other Nikon cameras Set the shift and tilt amount to 0 by rotating the shift and tilt knobs. (Fig. 2) Set the camera’s exposure mode to M. Press the aperture stop-down button to fully open the aperture, set the aperture ring to “3.5” (maximum aperture), and set the shutter speed for correct exposure.
- Seite 26 • Determining correct exposure with shift and/or tilt use requires experience. We recommend that you take a series of test shots until you feel comfortable with the operation. • When the lens is mounted to a camera other than the D3, shift and/or tilt the lens with care.
- Seite 27 By rotating the tilt knob, the lens is tilted up and down (or right and left, when the lens is revolved) ±8.5° to the camera body. By tilting, you can obtain clear focus of the entire subject plane when it is not parallel to the camera or can focus small areas of the subject which are parallel to the camera (p.
-
Seite 28: Depth Of Field
Before shooting, press the aperture stop-down button again to stop-down the aperture. • When using the Nikon D3 or D300 camera, you can take a picture without operating the aperture stop-down button (the aperture can be stopped down to a selected aperture automatically by pressing the shutter release button without pressing the aperture stop-down button). - Seite 29 Other cameras Vignetting occurs at all shooting distances 11. Recommended focusing screens Various interchangeable focusing screens are available for certain Nikon SLR cameras to suit any picture-taking situation. The ones recommended for use with this lens are: Screen EC-B G2 G3...
- Seite 30 − : Not available. ( ): Indicates degree of exposure compensation needed (Center- Weighted metering only). For F6 cameras, compensate by selecting “Other screen” in Custom Setting “b6: Screen comp.“ and setting the EV level to -2.0 to +2.0 in 0.5 EV steps. When using screens other than type B or E, “Other screen”...
-
Seite 31: Standard Accessories
13 elements in 10 groups (3 ED, 3 aspherical and 1 Nano Crystal Coat- deposited lens elements) Picture angle: 84° with 35 mm (135) format Nikon film- SLR cameras and Nikon FX format digital SLR cameras 61° with Nikon DX format digital SLR cameras 71°... - Seite 32 Shooting distance Graduated in meters and feet from 0.21 m scale: (0.75 ft) to infinity ( ) Closest focusing 0.21 m (0.75 ft) distance: No. of diaphragm 9 pcs. (rounded) blades: Diaphragm: Electrically automatic/One-touch preset aperture operation Aperture scale: f/3.5—f/32 Lens movement: Shift and tilt movement at right angles (the two operations can be modified for a...
-
Seite 34: Hinweise Für Sicheren Betrieb
Stoß (z.B. Fall auf den Boden) zu einem Bruch von Kamera oder Objektiv, so trennen Sie zunächst das Produkt vom Stromnetz bzw. entnehmen die Akkus/ Batterien, und geben es dann an eine autorisierte Nikon-Servicestelle zur Überprüfung ab. Schalten Sie die Kamera bei einer Fehlfunktion sofort aus Entnehmen Sie bei Entwicklung von Rauch oder ungewöhnlichem Geruch durch Kamera... - Seite 35 Wir danken Ihnen für das Vertrauen, das Sie uns mit dem Kauf des Nikon PC-E NIKKOR 24mm f/3.5D ED erwiesen haben. 1. Nomenklatur 1 Gegenlichtblende 8 Entfernungseinstellring & CPU-Kontakte 2 Montagemarkierung 9 Blendenring * Abblendtaste 0 Blendenskala ( Dezentrierknopf der Gegenlichtblende...
-
Seite 36: Wichtige Ausstattungsmerkmale
Beispiel die Ausschaltung perspektivischer Verzerrung und die Scharfabbildung diagonal durchs Bild laufender Strukturen. • Das Objektiv ist mit einer automatischen Blendensteuerung ausgestattet. Wird es an einem Kameramodell Nikon D3 oder D300 angebracht, können Sie sämtliche Belichtungssteuerungen ohne Betätigung der Abblenddtaste verwenden. -
Seite 37: Verwendbare Kameras Und Verfügbare Funktionen
— — — — — F-601M, F3AF, F-601, F-501, Pronea S, Nikon MF Kameras (außer F-601M) : Möglich —: Nicht möglich *1 Bei verschobenem und/oder verschwenktem Objektiv ist die Belichtung nicht korrekt. *2 P schließt die Automatik (AUTO) und Motivprogramme mit ein. - Seite 38 *5 Siehe »Funktion zum Dezentrieren bzw. Schwenken« (S. 42) *6 Siehe »Ansetzen des Objektivs« (S. 39) *7 Blendenlamellen öffnen und schließen automatisch nach jedem Drücken des Auslösers, und die Belichtung ist bei kontinuierlichem Aufnehmen falsch. *8 Werden Objektiv oder Kamera mittels der Abschaltfunktion für die Automessung abgeschaltet während die Objektivblende abgeblendet wird, bleibt diese in der Abblendeinstellung stehen.
-
Seite 39: Ansetzen Des Objektivs
Vignettierung oder leichte Farbveränderung auftreten. (Unter Vignettierung versteht man die Abdunkelung der Bildecken.) • Wird das Objektiv mit Nikon Digital-SLR-Kameras (Nikon DX-Format), wie etwa der Modelle der D2-Serie sowie Modell D300 verwendet, beträgt der Bildwinkel 61° und der Brennweitenbereich entspricht 36 mm bei einer Kleinbildformatkamera. -
Seite 40: Verwenden Der Bajonett-Gegenlichtblende Hb
Rand. • Die Gegenlichtblende kann zum Verstauen in umgekehrter Position an das Objektiv angesetzt werden. 6. Belichtungsmessung Bei Verwendung der Kamera Nikon D3 oder D300 Stellen Sie die Dezentrier- und Schwenkbewegungen durch Drehen der betreffenden Knöpfe auf Null. (Abb. 2) Stellen Sie den Belichtungsmodus der Kamera ein. - Seite 41 Bei Verwendung anderer Nikon-Kameras Stellen Sie die Dezentrier- und Schwenkbewegungen durch Drehen der betreffenden Knöpfe auf Null. (Abb. 2) Stellen Sie den Belichtungsmodus der Kamera auf »M« ein. Drücken Sie die Abblendtaste, um die Blende zu öffnen, stellen Sie den Blendenring auf »3,5« (maximale Öffnung), und legen Sie die für eine korrekte Belichtung erforderliche Verschlusszeit fest.
- Seite 42 vermeiden, schließen Sie die Blende (Auswahl einer größeren f-Nummer), oder korrigieren Sie die Belichtung vor der Aufnahme. • Die Ermittlung der richtigen Belichtung bei Dezentrierung bzw. Verschwenkung des Objektivs erfordert ein gewisses Maß an Erfahrung. Wir empfehlen, dass Sie sich durch einige Probeaufnahmen ein Gefühl für die erforderliche Korrektur verschaffen.
- Seite 43 Durch Drehen des Schwenkungsknopfes wird das Objektiv nach oben und unten (bzw. bei Drehung des Objektivs nach rechts oder links) geschwenkt, und zwar um ±8,5° zur Kamera. Hierdurch wird die Scharfabbildung von Objektebenen möglich, die sich nicht parallel zur Filmebene befinden oder von kleinen Bereichen des Objekts, die parallel zur Bildebene liegen (S.
-
Seite 44: Scharfeinstellung
Drücken Sie die Abblendtaste vor dem Fotografieren erneut, um die Öffnung abzublenden. • Wenn Sie die Kamera Nikon D3 oder D300 verwenden, können Sie eine Aufnahme machen, ohne die Abblendtaste zu betätigen. (Durch Betätigen des Auslösers kann die Blende automatisch auf eine gewünschte Öffnung eingestellt werden, ohne die Abblendtaste zu drücken.) Andernfalls können Sie auch die Abblendtaste verwenden. -
Seite 45: Empfohlene Einstellscheiben
3 m oder länger Andere Kameras Vignettierungen treten bei allen Distanzen auf 11. Empfohlene Einstellscheiben Es sind verschiedene austauschbare Einstellscheiben für Nikon- Spiegelreflexkameras für jede erdenkliche Aufnahmesituation erhältlich. Für die Verwendung mit diesem Objektiv empfehlen wir die folgenden: Screen EC-B... -
Seite 46: Pflege Des Objektivs
Einstellscheibe« und Einstellen des LW-Werts im Bereich zwischen –2,0 und +2,0 in 0,5-LWSchritten. Bei Gebrauch von anderen Scheiben als B oder E, ist »Andere« auch dann auszuwählen, wenn der erforderliche Korrekturwert »0« beträgt (keine Korrektur nötig). Zur Einstellung des Korrekturwerts am F5-Kameragehäuse dient die Individualfunktion Nr. -
Seite 47: Im Lieferumfang Enthaltenes Zubehör
• Aufsteckbarer 77-mm-Objektivfrontdeckel LC-77 • Objektivrückdeckel LF-1 • Bajonett-Gegenlichtblende HB-41 • Etui CL-1120 14. Optionales Zubehör • 77-mm-Schraubfilter 15. Technische Daten Objektivtyp: NIKKOR mit D-Charakteristik eingebauter CPU und Nikon-Bajonett Brennweite: 24 mm Maximale f/3,5 Blendenöffnung: Optischer Aufbau: 13 Elemente in 10 Linsengruppen (3 Linsenelemente aus ED-Glas, 3 asphärische Linsen und eine Linse mit... - Seite 48 Anzahl der 9 (abgerundet) Blendenlamellen: Blendenart: Elektrisch automatisch / Abblendung auf Tastendruck Blendenskala: f/3,5—f/32 Verstellbewegungen: Dezentrierung und Verschwenkung im rechten Winkel zueinander (gegen eine Gebühr ist Umstellung auf gleichsinnige [parallele] Bewegung möglich. Die Klemmschraube kann auch gegen eine größere ersetzt werden, allerdings kann sich dies auf das Ansetzen des Objektivs an der Kamera oder den Objektivbetrieb auswirken.)
-
Seite 50: Remarques Concernant La Sécurité
Si l’appareil ou l’objectif se casse suite à une chute ou un autre accident, débranchez le produit et/ou retirez les accumulateurs/piles, puis confiez-le pour inspection à un technicien de maintenance agréé Nikon. Éteignez immédiatement en cas de dysfonctionnement Si de la fumée ou une odeur inhabituelle se dégage de l’appareil photo ou de... - Seite 51 Nous vous remercions d’avoir porté votre choix sur cet objectif Nikon PC-E NIKKOR 24mm f/3.5D ED. 1. Nomenclature 1 Parasoleil 9 Bague d’ouverture ( Molette de 2 Repère de fixation du 0 Échelle des ouvertures décentrement ! Repère des ouvertures ) Échelle de décentrement...
-
Seite 52: Caractéristiques Principales
• Un contrôle d’exposition plus précis est possible quand cet objectif est monté sur un appareil Nikon à mesure matricielle 3D, car l’information de distance au sujet est transférée de l’objectif au boîtier (sans inclinaison et/ou décentrement) (avec une ouverture maximale lorsqu’il est monté... - Seite 53 — — — — F-801s, F-801, F-601M, F3AF, F-601, F-501, Pronea S, appareils MF Nikon (sauf F-601M) : Possible —: Impossible *1 L’exposition sera incorrecte si l’objectif est décentré et/ou incliné. *2 P inclut AUTO (programme à usage général) et le système à...
- Seite 54 *5 Reportez-vous à la section « Fonction d’inclinaison/décentrement » (P. 58) *6 Reportez-vous à la section « Montage de l’objectif » (P. 55) *7 Les lames du diaphragme s’ouvrent et se referment après chaque pression du déclencheur et l’exposition sera incorrecte pour une prise de vue continue.
-
Seite 55: Montage De L'objectif
(le vignetage est le phénomène décrit comme l’obscurcissement des angles autour de l’image). • Lorsqu’il est monté sur les reflex numériques Nikon (format Nikon DX), telles les séries D2 et D300, le champ angulaire de l’objectif devient 61° et la focale équivalente en 35 mm est d’environ 36 mm. - Seite 56 • Avant de ranger l’objectif, fixez le parasoleil à l’envers. 6. Détermination de l’ouverture Pour l’appareil Nikon D3 ou D300 Réglez le décentrement et l’inclinaison à 0 en tournant les molettes de décentrement et d’inclinaison (fig. 2).
- Seite 57 Pour les autres appareils Nikon Réglez le décentrement et l’inclinaison à 0 en tournant les molettes de décentrement et d’inclinaison (fig. 2). Réglez le mode d’exposition de l’appareil sur M. Appuyez sur le bouton de fermeture du diaphragme pour ouvrir complètement le diaphragme, réglez la bague d’ouverture sur...
- Seite 58 • La détermination de l’exposition appropriée avec le décentrement et l’inclinaison exige de la pratique. Nous vous conseillons de prendre une série de photos de test pour vous familiariser avec ce fonctionnement. • Lorsque l’objectif est fixé à un appareil autre que le modèle D3, décentrez et/ou inclinez-le soigneusement, sous peine de vous coincer les doigts entre l’objectif et le boîtier, ou de rayer le boîtier avec l’objectif.
- Seite 59 Dans cette opération, l’objectif est incliné vers le haut ou le bas (vers la droite ou la gauche, à la rotation de l’objectif) à ± 8,5° du plan film. Via l’inclinaison, vous pouvez obtenir un plan sujet entièrement net quand il n’est pas parallèle au plan film ou vous focaliser sur certaines parties du sujet parallèles au boîtier (p.
-
Seite 60: Mise Au Point
Avant une prise de vue, appuyez de nouveau sur le bouton de fermeture du diaphragme pour réduire l’ouverture. • Avec l’appareil photo Nikon D3 ou D300, il est possible de prendre une photo sans actionner le bouton de fermeture du diaphragme (l’ouverture peut être automatiquement réduite à... - Seite 61 11. Écrans de mise au point recommandés Différents verres de mise au point interchangeables sont disponibles pour certains appareils Nikon, afin de s’adapter au mieux à toutes les prises de vue. Nous vous recommandons l’usage des suivants en association avec cet objectif : Écran...
- Seite 62 − : Non disponible. ( ): Indique la compensation de l’exposition additionnelle requise (mesure pondérée centrale uniquement). Pour les appareils F6, corrigez en sélectionnant « Activ. : autre » dans le réglage personnalisé « b6 : Plage visée » et en réglant le niveau IL de -2,0 à +2,0 par pas de 0,5 IL.
-
Seite 63: Accessoires Fournis
: lentilles asphériques et 1 lentille à couche déposée de nano cristal) Angle de champ : 84° avec les reflex argentiques Nikon et reflex numériques Nikon au format FX 35 mm 61° avec les reflex numériques Nikon au format DX;... - Seite 64 Informations sur la Sur l’appareil distance : Mise au point : Manuelle via la bague de mise au point séparée. Échelle des Graduée en mètres et pieds de 0,21 m à distances de prise l’infini ( ) de vue : Distance focale la 0,21 m plus courte :...
- Seite 65 Dimensions : Env. 82,5 mm diam. x 108 mm extension à partir de la monture d’objectif située sur l’appareil Poids : Environ 730 g Les caractéristiques et les schémas sont susceptibles d’être modifiés sans préavis ni obligation de la part du constructeur.
- Seite 66 Tras retirarlo o desconectarlo de la fuente de alimentación, lleve el equipo a un servicio técnico autorizado Nikon para su revisión. No utilice la cámara o el objetivo en lugares donde haya gas inflamable Si utiliza el equipo electrónico en un lugar donde hay gas inflamable, puede...
- Seite 67 Gracias por adquirir el objetivo Nikon PC-E NIKKOR 24mm f/3.5D ED. 1. Nomenclatura 1 Visera del objetivo 7 Escala de distancias & Contactos CPU 2 Índice de acoplamiento 8 Anillo de enfoque * Botón de reducción 9 Anillo de aberturas...
- Seite 68 • Este objetivo presenta control automático de la abertura. Montado en una cámara Nikon D3 o D300, permite al usuario utilizar todos los modos de exposición o hacer fotografías sin utilizar el botón de reducción de la abertura.
- Seite 69 — — — — — — F-801s/N8008s*, F-801/N8008*, F-601M/N6000*, F3AF, F-601/N6006*, F-501/N2020**, Pronea S, cámaras Nikon MF (excepto F-601M/ N6000*) : Posible —: Imposible * De venta exclusiva en los EE.UU. ** De venta exclusiva en los EE.UU. y Canadá...
- Seite 70 *1 Un objetivo desplazado y/o inclinado causará una exposición incorrecta. *2 P incluye AUTO (Programa para propósitos generales) y sistema de programa variable *3 Cuando el objetivo o la cámara se desconectan usando la función automática de desconexión del medidor al tiempo que se reduce la abertura del objetivo, las hojas del diafragma se abren completamente hasta el máximo.
-
Seite 71: Montaje Del Objetivo
• En las cámaras SLR digitales Nikon (formato Nikon DX), como las de la serie D2 y D300, el ángulo de imagen del objetivo se vuelve de 61º y su distancia focal equivalente de 35 mm es de aproximadamente 36 mm. - Seite 72 • Para guardar la visera del objetivo, colóquela en la posición inversa. 6. Determinación de la exposición Con la cámara Nikon D3 o D300 Ajuste el desplazamiento y la inclinación a 0 girando las perillas de desplazamiento e inclinación (fig. 2).
- Seite 73 Con otras cámaras Nikon Ajuste el desplazamiento y la inclinación a 0 girando las perillas de desplazamiento e inclinación (fig. 2). Ajuste el modo de exposición de la cámara a M. Pulse el botón de reducción de la abertura hasta que la abertura alcance el máximo, ajuste el anillo de aberturas a “3,5”...
- Seite 74 • Para determinar la exposición correcta con desplazamiento y/o inclinación es necesario tener experiencia. Recomendamos que realice una serie de disparos de prueba para familiarizarse con esta función. • Si el objetivo está montado en una cámara que no sea la D3, desplace y/o incline el objetivo con cuidado.
- Seite 75 Al girar la perilla de inclinación, el objetivo se inclina hacia arriba y abajo (o derecha e izquierda, cuando el objetivo está girado) ±8,5° con respecto a la cámara. Con esta inclinación puede obtener un enfoque nítido de todo el plano del sujeto cuando no está paralelo a la cámara o puede enfocar zonas pequeñas del sujeto paralelas a la cámara (p.
- Seite 76 Antes de disparar, pulse el botón de reducción de la abertura otra vez para reducir la abertura. • Con la cámara Nikon D3 o D300, puede sacar una foto sin utilizar el botón de reducción de la abertura (la abertura puede reducirse automáticamente a un valor seleccionado pulsando el disparador...
- Seite 77 El viñetado ocurre en todas las distancias de disparo 11. Pantallas de enfoque recomendadas Existen varias pantallas de enfoque intercambiables disponibles para algunas cámaras SLR Nikon, permitiendo la adaptación a cualquier situación a la hora de tomar la fotografía. Las recomendadas para este objetivo son las siguientes:...
- Seite 78 ( ): Indica el grado de compensación de la exposición necesario (solamente medición ponderada central). Para las cámaras F6, compense seleccionando “Otra pantalla” en el ajuste personal del usuario “b6: Compens pantalla” y ajustando el nivel EV a -2,0 a +2,0 en intervalos de 0,5 EV.
-
Seite 79: Accesorios Estándar
1 de cristal con recubrimiento de nanocristal depositado) Ángulo de imagen: 84° con cámaras SLR de película con formato de 35 mm (135) de Nikon y cámaras digitales SLR con formato FX de Nikon 61° con cámaras digitales SLR con formato DX de Nikon;... - Seite 80 Enfoque: Manual con anillo de enfoque independiente. Escala de Calibradas en metros desde 0,21 m hasta distancias de la infinito ( ) toma: Distancia de 0,21 m enfoque más cercana: Nº de hojas del 9 (redondeadas) diafragma: Diafragma: Automático eléctrico/Funcionamiento con abertura preajustada de un toque Escala de f/3,5—f/32...
- Seite 81 Dimensiones: Aprox. 82,5 mm diá. x 108 mm desde la pestaña de montaje del objetivo de la cámara Peso: Aprox. 730 g Las especificaciones y los diseños están sujetos a cambios sin previo aviso ni obligación alguna por parte del fabricante.
- Seite 82 Reparationer bör endast utföras av kvalificerade tekniker. Skulle kameran eller objektivet brytas itu på grund av ett fall eller en annan olycka, ta produkten till en auktoriserad serviceverkstad för Nikon så att den kan undersökas efter att ha kopplats bort från elnätet och/eller batteriet tagits bort.
- Seite 83 Tack för att du valde ett Nikon PC-E NIKKOR 24mm f/3,5D ED-objektiv. 1. Terminologi 1 Motljusskydd för 8 Fokusring * Knapp för 9 Bländarring objektiv bländarstopp 2 Motljusskydd 0 Bländarskala ( Knapp för skiftning ! Bländarindex ) Skiftskala fästindex 3 Motljusskydd...
- Seite 84 är parallellt med kameran. • Objektivet har en funktion för automatisk bländarkontroll. När det är monterat på en Nikon D3 eller D300, kan användaren använda alla exponeringslägen för att fotografera utan att använda knappen för bländarstopp.
- Seite 85 — — — — — — — — F3AF, F-601, F-501, Pronea S, Nikon MF kameror (utom F-601M) : Möjligt —: Ej möjligt *1 Exponeringen kommer att bli felaktig när objektivet är skiftat och/eller tiltat. *2 P inkluderar AUTO (General-Purpose Program) och Vari- Programsystem *3 När objektivet eller kameran slås från via funktionen för...
- Seite 86 *4 Nedfällning av linsbländaren aktiverar AE-L (AE-låset). *5 Se “Skift-/tiltfunktionen” (P. 90) *6 Se “Montering av objektiv” (P. 87) *7 Bländarbladen öppnar och stänger efter varje tryck på avtryckaren, och exponeringen blir felaktig vid serietagning. *8 När objektivet eller kameran slås från via funktionen för automätaravstängning medan objektivbländaren stoppas, förblir objektivets bländare i den position den stoppades i.
- Seite 87 • Användande av tilt/shift-funktionen kan orsaka lätt vignettering eller en svag färgförändring. (Vignettering innebär att bildkanten blir mörkare.) • När den monteras på en Nikon digital SLR-kamera (Nikon DX- format), som D2-serien och D300 blir objektivvinkeln 61° och dess motsvarande fokallängd vid 35 mm är ungefär 36 mm.
- Seite 88 än i dess ytterkant. • Ta bort det tvärtom innan du lagrar det. 6. Att bestämma exponering När du använder Nikon D3 eller D300 Ställ skift och tilt till 0 genom att vrida skift- och tiltknapparna. (fig. 2) Ställ in kamerans exponeringsläge.
- Seite 89 När andra Nikonkameror används Ställ skift och tilt till 0 genom att vrida skift- och tiltknapparna. (fig. 2) Ställ in kamerans exponeringsläge på M. Tryck på knappen för bländarstopp för att helt öppna bländaren, ställ bländarringen på “3,5“ (maximal bländare), och ställ slutartiden så...
- Seite 90 • Att ange korrekt exponering med skift och/eller tilt kräver erfarenhet. Vi rekommenderar att du tar en serie testbilder till du är bekant med användningen. • När objektivet är monterat på en annan kamera än D3, bör du vara försiktig när du använder skift och/eller tilt på objektivet. I annat fall kan dina fingrar klämmas mellan linsen och kamerahuset, eller så...
- Seite 91 När tiltratten vrids flyttas objektivet upp och ned (eller till höger och vänster, när objektivet roterats) ±8,5° mot kamerahuset. Genom att tilta kan du få tydlig fokusering på hela planet när det inte är parallellt med kameran eller också kan du fokusera på små ytor på...
- Seite 92 Innan fotografering, tryck på knappen för bländarstopp igen för att stoppa bländaren. • När du använder Nikon D3 eller D300-kamera, kan du ta en bild utan att använda knappen för minskning av bländartid (bländartalet kan minskas till önskad bländartid automatiskt genom att trycka på...
- Seite 93 D60, D40-serien 3 m eller längre Övriga kameror Vinjettering uppträder vid alla fotograferingsavstånd 11. Rekommenderade mattskivor Olika utbytbara mattskivor finns för vissa Nikon SLR-kameror för att passa alla fotograferingssituationer. De som rekommenderas tillsammans med detta objektiv är: Skärm EC-B G2 G3...
- Seite 94 − : Inte tillgängligt. ( ): Anger hur mycket exponeringskompensation som behövs (endast centrumvägd mätning). För F6-kameror, kompensera genom att välja “Annan skärm“ i Anpassade inställningar, “b6: Screen comp.“ och ställ in EV-nivån från –2,0 till +2,0 i steg om 0,5 EV.
- Seite 95 Maximal bländare: f/3,5 Linskonstruktion: 13 element i 10 grupper (3 ED, 3 asfäriska och 1 nanokristallbelagt linselement) Bildvinkel: 84° med 35 mm-format (135) Nikon film SLR-kameror och Nikon FX-format digitala SLR-kameror 61° med Nikons digitala SLR-kameror i DX- format; 71° med IX240 systemkameror...
- Seite 96 Maximal 1/2,7 avbildningsskala: Avståndsinformation: Visas i kamerahuset Fokusering: Manuellt via separat fokusring. Avståndsskala för Graderad i meter och fot från 0,21 m till fotografering: oändlighet ( ) Minsta möjliga 0,21 m fokuseringsavstånd: Antal slutarblad: 9 st. (rundade) Bländare: Elektronisk automatisk/Inställning av bländare med ett tryck Bländarskala: f/3,5—f/32...
- Seite 98 немедленно извлеките батарею; соблюдайте меры предосторожности, чтобы не получить ожоги. Продолжение работы с устройством может привести к получению травм. После извлечения батареи или отключения источника питания доставьте изделие для проверки в ближайший авторизованный сервисный центр компании Nikon. Не используйте фотокамеру или объектив при наличии легковоспламеняющихся газов...
- Seite 99 Благодарим вас за покупку объектива Nikon PC-E NIKKOR 24mm f/3.5D ED. 1. Компоненты 1 Бленда ! Метка диафрагмы ( Кремальера 2 Метка крепления бленды @ Кремальера регулировки регулировки сдвига 3 Метка фиксации бленды угла наклона ) Шкала сдвига 4 Установочная метка бленды...
- Seite 100 наклона объектива, чтобы удержать в фокусе всю плоскость объекта, если он не параллелен камере. • Объектив оснащен системой автоматической регулировки диафрагмы. При установке на фотокамеры Nikon D3 или D300 данный объектив предоставляет возможность использовать все режимы экспозиции во время съемки, не прибегая к помощи кнопки диафрагмирования.
- Seite 101 — — — — — F-401, F-801s, F-601M, F3AF, F-601, F-501, Pronea S, камеры Nikon MF (кроме F-601M) : Возможно —: Невозможно *1 При сдвиге и/или наклоне объектива экспозиция будет неверной. *2 Режим P включает в себя режим AUTO (универсальная...
- Seite 102 *4 Закрытие диафрагмы объектива активирует функцию AE-L (блокировка автоматического выбора экспозиции). *5 См. “Функция сдвига/наклона” (стр. 106) *6 См. “Установка объектива” (стр. 103) *7 Лепестки диафрагмы открываются и закрываются после каждого нажатия кнопки затвора, экспозиция для непрерывной съемки будет неверной. *8 Когда...
- Seite 103 • Старайтесь не загрязнять и не повреждать контакты управления. • В случае повреждения резинового уплотнителя крепления объектива обратитесь к авторизованному дилеру компании Nikon или в сервисный центр для проведения ремонта. • При низких температурах следует использовать в фотокамере новые или полностью заряженные аккумуляторы.
- Seite 104 с меткой крепления, а не за наружную кромку. • Для хранения бленды присоединяйте ее в обратном положении. 6. Определение экспозиции При пользовании фотокамерой Nikon D3 или D300 При помощи кремальер регулировки угла наклона и сдвига установите значения сдвига и наклона, равные 0 (рис.
- Seite 105 При пользовании другими фотокамерами Nikon При помощи кремальер регулировки угла наклона и сдвига установите значения сдвига и наклона, равные 0 (рис. 2). Установите режим экспозиции фотокамеры на М. Нажмите кнопку диафрагмирования, чтобы полностью открыть диафрагму, установите кольцо диафрагмы в положение 3,5 (максимальная диафрагма) и...
- Seite 106 • Определение правильной экспозиции при использовании функции сдвига/наклона требует навыка. Мы рекомендуем сделать серию пробных снимков для формирования и закрепления навыка использования функции сдвига/наклона при съемке. • Если объектив установлен на фотокамеру другой модели, нежели D3, соблюдайте осторожность при сдвиге и/или изменении угла наклона объектива. Неосторожность...
- Seite 107 При вращении кремальеры регулировки угла наклона угол наклона объектива относительно корпуса камеры изменяется в пределах 8,5° в вертикальной плоскости (или горизонтальной, если объектив повернут). За счет изменения угла наклона можно обеспечить четкий фокус всей плоскости объекта, если она не параллельна камере или сфокусироваться...
- Seite 108 и наведите на резкость с помощью фокусировочного кольца. Перед фотографированием повторно нажмите кнопку диафрагмирования для затемнения линзы диафрагмой. • При использовании камеры Nikon D3 или D300 можно фотографировать, не используя кнопку диафрагмирования (диафрагму можно затемнить до выбранного значения автоматически, нажав...
- Seite 109 Другие фотокамеры Эффект виньетирования присутствует при съемке на любом расстоянии 11. Рекомендуемые фокусировочные экраны Сменные фокусировочные экраны, доступные для определенных зеркальных фотокамер Nikon, помогают осуществлять съемку практически в любых ситуациях. С этим объективом рекомендуется использовать следующие фокусировочные экраны: Экран EC-B G2 G3 Фотокамера...
- Seite 110 − : Недоступно ( ): Обозначает необходимую величину поправки экспозиции (только при использовании центрально-взвешенного замера). При использовании фотокамер F6 для задания величины поправки экспозиции для пользовательской настройки b6 Screen comp. (“Компенсация фокусировочного экрана”) выберите вариант Other screen (“Другой экран”) и задайте уровень EV в диапазоне от –2,0 до...
- Seite 111 • 77-мм передняя крышка объектива LC-77 • Задняя крышка объектива LF-1 • Байонетная бленда HB-41 • Мягкий чехол CL-1120 14. Дополнительные принадлежности • 77-мм ввинчиваемые фильтры 15. Технические характеристики Тип объектива: Объектив NIKKOR типа D со встроенным микропроцессором и байонетом Nikon Фокусное 24 мм расстояние: Максимальная f/3,5 диафрагма: Оптическая...
- Seite 112 Угол зрения: 84° при использовании с 35-мм (135) пленочными зеркальными фотокамерами Nikon и цифровыми зеркальными фотокамерами Nikon формата FX 61° при использовании с цифровыми зеркальными фотокамерами Nikon формата DX; 71° при использовании с фотокамерами со стандартом фотопленки IX240 МакМаксимальный 1/2,7 масштаб...
- Seite 113 Поворот объектива: 90° вправо и влево (с шагом, отмечаемым щелчком, в 30°) Замер экспозиции: Методом с полностью открытой диафрагмой Установочный 77 мм (Р = 0,75 мм) размер: Размеры: Прибл. 82,5 мм (диаметр) x 108 мм (длина от крепежного фланца объектива на фотокамере) Вес: Прибл.
-
Seite 114: Veiligheidsinstructies
Als de camera of het objectief onverhoopt openbreekt door een val of ander ongeluk, moet u het product voor onderzoek naar een door Nikon erkende servicedienst brengen nadat u het product heeft losgekoppeld van de stroomtoevoer en/of de accu heeft verwijderd. - Seite 115 Gefeliciteerd met de aanschaf van het Nikon PC-E NIKKOR 24mm f/3.5D ED objectief. 1. Terminologie 1 Zonnekap 7 Afstandsschaal ^ Rubberen pakking 2 Bevestigingsindex 8 Scherpstelring van objectiefvatting 9 Diafragmaring & CPU-contacten voor zonnekap 3 Instelindex voor 0 Diafragmaschaal * Diafragmeerknop...
-
Seite 116: Belangrijkste Functies
• Nog nauwkeurigere regeling van de belichting is mogelijk wanneer dit objectief gebruikt wordt op een Nikon camera met 3D-matrixmeting, omdat afstandsinformatie voor een onderwerp vanuit het objectief naar de camera gestuurd wordt (zonder tilten en/of shiften) (met het grootst mogelijke diafragma wanneer gemonteerd op camera’s*). - Seite 117 — — — — — — F3AF, F-601, F-501, Pronea S, Nikon MF camera’s (behalve F-601M) : Mogelijk —: Niet mogelijk *1 De belichting zal niet juist zijn wanneer het objectief geshift en/ of getilt is. *2 P inclusief AUTO (algemeen programma) en onderwerpstanden...
- Seite 118 *4 Het diafragmeren van het diafragma zal AE-L activeren (AE-vergrendeling). *5 Zie ‘De tiltshiftfunctie’ (P. 122) *6 Zie ‘Het objectief bevestigen’ (P. 119) *7 Diafragmalamellen openen en sluiten na elke druk op de ontspanknop en de belichting zal niet juist zijn voor continue opnamen. *8 Als de stroomtoevoer naar het objectief wordt afgesloten of de camera wordt uitgeschakeld door middel van de automatische meter-uit functie tijdens het diafragmeren, zal het diafragma in de...
- Seite 119 • Let erop dat de CPU-contacten niet vuil worden of beschadigd raken. • Als de rubberen pakking van de objectiefvatting is beschadigd, moet u het objectief voor reparatie naar de leverancier of servicedienst van Nikon brengen. • Bij lage temperaturen mogen geen nieuwe of volledig opgeladen batterijen voor de camera gebruikt worden.
-
Seite 120: Belichting Bepalen
• Om de zonnekap op te bergen, bevestigt u deze omgekeerd op het objectief. 6. Belichting bepalen Als u de Nikon D3-camera of D300-camera gebruikt Zet shift en tilt op 0 door aan de shift- en tiltknoppen te draaien.(Afb. 2) Selecteer de belichtingsstand van de camera. - Seite 121 Als u andere Nikon camera’s gebruikt Zet shift en tilt op 0 door aan de shift- en tiltknoppen te draaien. (Afb. 2) Zet de belichtingsstand van de camera op M. Druk op de diafragmeerknop om het diafragma helemaal te openen, stel de diafragmaring op ‘3,5’ (maximale opening), en stel de sluitertijd in voor de juiste belichting.
- Seite 122 • Het bepalen van de juiste belichting bij shift en/of tilt vereist enige ervaring. We raden u aan om eerst een aantal proeffoto’s te maken totdat u zich op uw gemak voelt met deze handeling. • Als het objectief op een andere camera dan de D3 gemonteerd wordt, moet u altijd voorzichtig zijn bij het shiften en/of tilten van het objectief.
- Seite 123 Door aan de tiltknop te draaien, zal het objectief omhoog of omlaag kantelen (of naar links of rechts als het objectief gedraaid is) op een hoek van ±8,5° ten opzichte van de camerabody. Door te tilten kunt u goed scherpstellen op het hele onderwerpvlak wanneer dit vlak niet parallel is met de camera of scherpstellen op kleine delen van het onderwerp die parallel liggen met de camera (p.
- Seite 124 Druk de diafragmeerknop weer in om te diafragmeren voordat u een foto maakt. • Met de Nikon D3 of D300 kunt u een foto nemen zonder de diafragmeerknop te gebruiken (het diafragma kan automatisch gediafragmeerd worden naar een geselecteerde opening door de ontspanknop in te drukken zonder de diafragmeerknop in te drukken).
- Seite 125 3 m of groter Andere camera’s Vignettering komt voor bij alle opnameafstanden 11. Aanbevolen matglazen Er zijn diverse uitwisselbare matglazen beschikbaar voor bepaalde Nikon SLR-camera's voor elke fotogelegenheid. De volgende worden voor dit objectief aangeraden: Matglas EC-B G2 G3 EC-E...
- Seite 126 − : Niet beschikbaar. ( ): Geeft aan hoeveel belichtingscorrectie is vereist (alleen centrumgerichte meting). Bij F6-camera’s kunt u de belichting compenseren door ‘Ander matglas’ te selecteren voor persoonlijke instelling ‘b6: Compensatie voor matglas’ en het LW-bereik in te stellen op -2,0 tot +2,0 in stappen van 0,5 LW. Wanneer u een ander type matglas gebruikt dan type B of E, selecteert u ‘Ander matglas’, zelfs als de gewenste correctie ‘0’...
-
Seite 127: Standaardaccessoires
Objectiefconstructie: 13 elementen in 10 groepen (3 ED- lenselementen, 3 asferische lenselementen en 1 lenselement met Nano Crystal Coat) Beeldhoek: 84° bij 35mm (135) formaat Nikon film-SLR camera’s en Nikon FX-formaat digitale SLR-camera’s; 61° bij Nikon DX-formaat digitale SLR-camera’s;... - Seite 128 Schaal In meters en feet van 0,21 m tot oneindig ( ) opnameafstand: Kortste 0,21 m scherpstelafstand: Aantal 9 stuks (afgerond) diafragmalamellen: Diafragma: Elektrisch automatisch/One-touch vooringestelde diafragmabediening Diafragmaschaal: f/3,5—f/32 Objectiefbeweging: tilt- en shiftbewegingen in rechte hoeken (deze twee handelingen kunnen gewijzigd worden tegen extra betaling, zodat ze in dezelfde [parallelle] richting bewegen.
- Seite 130 Le riparazioni devono essere eseguite solamente da tecnici qualificati. Qualora, in caso di caduta o di qualsiasi altro incidente, la fotocamera o l’obiettivo dovessero rompersi, portare il prodotto presso un punto assistenza Nikon autorizzato per l’ispezione, dopo averlo scollegato dalla presa e/o rimosso la batteria.
- Seite 131 Vi ringraziamo per l’acquisto dell’obiettivo Nikon PC-E NIKKOR 24mm f/3.5D ED. 1. Nomenclatura 1 Paraluce 8 Anello di messa a fuoco & Contatti CPU 2 Indice di collegamento 9 Anello di apertura * Tasto per la riduzione 0 Scala di apertura del paraluce dell’apertura dell’obiettivo...
-
Seite 132: Caratteristiche Principali
è parallelo alla fotocamera. • Questo obiettivo è caratterizzato dal controllo automatico dell’apertura. Una volta montato sulla macchina Nikon D3 o D300, l’utente può usare tutti i modi d’esposizione per fare delle fotografie senza dover utilizzare il tasto per la riduzione dell’apertura dell’obiettivo. - Seite 133 — — — — — — — F-601M, F3AF, F-601, F-501, Pronea S, fotocamere Nikon MF(tranne F-601M) : Possibile —: Impossibile * Venduto esclusivamente negli Stati Uniti d’America *1 L’esposizione non sarà corretta dopo aver orientato e/o inclinato l’obiettivo. *2 P include AUTO (Programma d’uso generico) e il sistema Vari-Program *3 Quando si spegne l’obiettivo o la fotocamera mediante la...
- Seite 134 *4 Riducendo l'apertura dell'obiettivo, si attiva l'AE-L (blocco AE). *5 Vedere “La funzione orientamento/inclinazione” (P. 138) *6 Vedere “Innesto dell’obiettivo” (P. 135) *7 Le lamelle del diaframma si aprono o si chiudono dopo ogni pressione del pulsante di scatto e l’esposizione non sarà adatta per lo scatto continuo.
- Seite 135 (La vignettatura indica l'oscuramento degli angoli dell'immagine.) • Se montato sulle fotocamere reflex digitali Nikon (formato Nikon DX), quali le serie D2 e D300, l’angolazione delle immagini sull’obiettivo diventa di 61° e la lunghezza focale pari a 35 mm di circa 36 mm.
- Seite 136 • Riporre il paraluce innestandolo in posizione invertita. 6. Determinazione dell’esposizione Usando la fotocamera Nikon D3 o D300 Mettere a zero il valore dell’orientamento e il valore dell’inclinazione ruotando le manopole d’orientamento e d’inclinazione.
- Seite 137 Usando fotocamere Nikon diverse Mettere a zero il valore dell’orientamento e il valore dell’inclinazione ruotando le manopole d’orientamento e d’inclinazione. (Fig. 2) Regolare il modo d’esposizione della fotocamera su M. Premere il tasto per la riduzione dell’apertura dell’obiettivo per regolare l’apertura sul valore massimo, ruotare l’anello di apertura su “3,5”...
- Seite 138 f maggiore), o compensare l’esposizione prima di scattare le foto. • La corretta determinazione dell’esposizione in condizioni d’orientamento e d’inclinazione richiede una buona esperienza. È consigliabile eseguire una serie di scatti di prova fino a quando non si è acquisita una buona pratica nell’esecuzione. •...
- Seite 139 Ruotando la manopola d’inclinazione, l’obiettivo viene inclinato verso l’alto e verso il basso (o verso destra e verso sinistra, quando l’obiettivo è ruotato) di ±8,5° rispetto al corpo della fotocamera. L’inclinazione permette di ottenere una messa a fuoco chiara di tutto il piano del soggetto quando esso non è...
- Seite 140 Prima di scattare le foto, premere nuovamente il tasto per la riduzione dell’apertura dell’obiettivo per regolare l’apertura su un valore ridotto. • Quando si usa la fotocamera Nikon D3 o D300, si possono scattare delle foto senza adoperare il tasto per la riduzione dell’apertura dell’obiettivo (è...
- Seite 141 11. Schermi di messa a fuoco consigliati Per alcune fotocamere Nikon SLR sono disponibili diverse schermate di messa a fuoco intercambiabili per potersi adeguare a qualsiasi situazione di ripresa. Quelle consigliate per l’utilizzo con...
- Seite 142 : Messa a fuoco accettabile L’immagine sullo schermo presenta una leggera riduzione di luminosità o tracce di fenomeno del moiré, senza però lasciare tracce sulla pellicola. − : Non disponibile. ( ): Indica il valore della compensazione di esposizione aggiuntiva richiesto (Solamente misurazione a preferenza centrale).
-
Seite 143: Accessori In Dotazione
1 lente con rivestimento di nanocristalli) Angolo di campo: 84° con fotocamere Reflex a pellicola Nikon formato 35 mm (135) e fotocamere Reflex digitali Nikon formato FX 61° con fotocamere Reflex digitali Nikon formato DX; 71° con fotocamere sistema IX240... - Seite 144 Dati distanze: Uscita verso il corpo fotocamera Messa a fuoco: Manuale mediante anello di messa a fuoco separato. Scala delle Graduata in metri e piedi da 0,21 m distanze di ripresa: all’infinito ( ) Distanza di messa 0,21 m a fuoco minima: N.
- Seite 145 Dimensioni: Circa 82,5 mm dia. x 108 mm di estensione dalla flangia Peso: Circa 730 g Le specifiche e i disegni sono soggetti a modifica senza preavviso o obblighi da parte del produttore.
- Seite 146 安全操作注意事项 警告 勿自行拆卸 触动相机或镜头的内部零件可能会导致受伤。修理只能由有资格的维 修技师进行。如果由于掉落或其它事故导致相机或镜头拆散,在切断 产品电源和(或)取出电池后,请将产品送至尼康授权的维修中心进 行检查。 发生故障时立刻关闭电源 如果您发现相机或镜头冒烟或发出异味时,请立刻取出电池,注意避 免燃烧。若继续使用可能导致受伤。请在取出电池或切断电源后,将 器材送到尼康授权的维修中心进行检查维修。 勿在易燃气体环境中使用相机或镜头 如果在易燃气体环境中使用电子设备,可能会导致爆炸或火灾。 勿通过镜头或取景器观看太阳 通过镜头或取景器观看太阳或其它强光,可能会导致永久性的视觉损 伤。 请勿在儿童伸手可及之处保管本产品 请特别注意避免婴幼儿将电池或其它小部件放入口中。 使用相机和镜头时应注意以下事项 • 保持相机或镜头干燥,否则可能导致火灾或引起电击。 • 请勿使用湿手处置或接触设备,否则可能引起电击。 • 当进行背光拍摄时,请不要把太阳包含在画面之内。 太阳光可能会通过透镜汇聚在镜头的镜身内,并引起火灾。当太阳 接近取景画面,也有可能引起火灾。 • 如果镜头要长期搁置不用,请盖上前镜头盖和后镜头盖,并在储存 镜头时要避免直接日照,否则可能导致火灾,因为镜头可能使日光 聚焦于某一物体。 • 当进行移轴(或倾斜)时,请小心操作镜头。 否则可能导致手指夹在镜头和相机机身之间,或者镜头擦伤相机机 身。...
- Seite 147 感谢您购买尼康PC-E尼克尔24mm f/3.5D ED镜头。 名称 1 镜头遮光罩 7 距离刻度 ^ 镜头安装橡皮 2 镜头遮光罩接头 8 对焦环 垫圈 9 光圈环 & CPU触点 标志 3 镜头遮光罩设定 0 光圈刻度 * 收缩光圈按钮 ! 光圈标志 ( 移轴旋钮 标志 4 镜头遮光罩安装 @ 倾斜旋钮 ) 移轴刻度 # 倾斜刻度 q 旋转杆 标志...
- Seite 148 主要特点 本镜头为反焦距型透视控制(PC)镜头,可让您突出或矫正远近 透视,或者控制景深。还可让您矫正由于相机角度造成的变形。 此外,当主体未与相机平行时,您可利用镜头的倾斜及移轴机械 装置获取整个主体平面的对焦。 • 本镜头具有自动光圈控制功能。当将其装在尼康D3或D300相机 上时,用户无需操作收缩光圈按钮即可使用所有曝光模式来拍 摄影像。 • 当本镜头装在有3D矩阵测光能力的尼康相机上时,由于此时镜 头会将主体距离信息传送到相机机身上,因而还可进行更精确 的曝光控制(不带倾斜及/或移轴)(装在相机 * 上时具有最大光 圈)。 * D3和D300除外 • 采用3片非球面镜和3片ED(超低色散)镜片可有效地消除色 差,从而确保图像清晰。同时,又利用9片光圈叶片形成一个近 乎圆形的光圈开孔,使主体前后焦点之外的景物形成舒心悦目 的模糊影像。 • 部分镜片上涂覆的纳米结晶涂层(Nano Cystal Coat),确保在 晴天的户外,或是灯光照明的室内等各种拍摄场景,均可再现 透彻、清晰的影像。 • 可能的最近对焦距离为0.21 m。 • 镜头前方共计可以安装2盏SB-R200无线遥控闪光灯。 * 安装SB-R200时,请旋紧移轴松锁旋钮。否则SB-R200的重量 可能导致镜头向下移位。不建议在装有SB-R200的情况下对镜 头进行倾斜及/或移轴。...
- Seite 149 — — — F6、F5、F4系列* 、 F100、F80系列、 F75系列、F65系列、 Pronea 600i F90X、F90系列、 F70系列、F60系列、 F55系列、F50系列、 F-401x、F-401s、 F-401、F-801s、 — — — — — — — — F-801、F-601M、 F3AF、F-601、 F-501、Pronea S、 Nikon MF相机 (F-601M除外) : 可能 — : 不可能 *1 当镜头移轴及/或倾斜时曝光不正确。 *2 P包括AUTO(通用程序)及可变程序系统 *3 收缩镜头光圈的情况下,当利用自动测光关闭功能关闭镜头电 源或相机时,光圈叶片会完全开启到最大光圈。此现象并非故 障。...
- Seite 150 *4 收缩镜头光圈会激活AE-L(AE 锁定)。 *5 参阅“移轴/倾斜功能”(P. 154) *6 参阅“安装镜头”(P. 151) *7 光圈叶片会随着快门按钮的按下而开启和关闭,连拍时的曝光 将会出错。 *8 当利用自动测光关闭功能关闭镜头电源或相机时,镜头光圈会 保持在收缩设定。当再次打开相机或轻轻按下相机快门时,光 圈叶片会随之再次开启而后关闭。此现象并非故障。 *9 收缩镜头光圈的情况下,当利用自动测光关闭功能关闭相机 时,拍摄之前轻轻按下快门按钮即可开启和关闭光圈。否则当 完全按下快门按钮时可能导致曝光错误。 收缩光圈按钮(一键式预设光圈操作) • 通过按下收缩光圈按钮,镜头光圈可从最大光圈收缩到选定的 光圈。再次按下该按钮可完全开启光圈。无论光圈是否收缩, 均请查看相机取景器或从镜头前方查看光圈。 • 取消光圈收缩之后,即使处于最大光圈,相机机身上仍然显示 预设的光圈值。 • 当使用D3或D300相机时,即使光圈完全开启(最大光圈),拍 摄之前通过按下快门按钮,光圈仍然会自动收缩到选定的光 圈。通过按下收缩光圈按钮收缩镜头光圈之后,当利用自动测 光关闭功能关闭镜头电源或相机时,光圈收缩会被取消且光圈 叶片完全开启到最大光圈。 注意事项! • 当镜头装在D3以外相机上时,请小心对镜头进行移轴、倾斜/旋 转。否则可能导致镜头擦伤相机机身。 • 本镜头为手动对焦镜头,即使相机对焦模式设为自动对焦模式 也无法进行自动对焦。...
- Seite 151 • 使用倾斜/移轴功能可能导致部分晕映或者轻微的色彩变化。 (晕映是指影像的周边出现的变暗的现象。) • 本镜头装在尼康数码单镜反光(尼康DX格式)相机,如D2系列 和D300上时,镜头画面的角度变成61°并且与其35 mm相当的 焦距约为36 mm。 • 注意不要弄脏或损坏CPU触点。 • 如果镜头安装橡皮垫圈损坏,请务必让附近的尼康授权的经销 商或服务中心修理。 • 在低温情况下,相机应该使用新的或充满电的电池。 安装镜头 转动移轴及倾斜旋钮将移轴值及倾斜量设为0。(图2) 注: 当使用倾斜、移轴及/或旋转且没有锁定各个旋钮时,应避免 将镜头安装到相机上或将镜头从相机上卸下。否则可能导致 手指夹在镜头和相机机身之间,或者镜头擦伤相机机身。 图2 设定倾斜及移轴旋钮。(图3) 注: 过度转动旋钮可能会损坏旋钮。 图3...
- Seite 152 关闭相机电源,将镜头及相机上的 安装标志对准,然后逆时针扭动镜 头,直至锁紧到位为止。(图4) • 当相机电源打开的情况下将镜头 安装到相机时,可能会导致相机 操作异常。 图4 使用卡口式镜头遮光罩 HB-41 将镜头遮光罩上的镜头遮光罩接头标志 ( )(两个标志都要)对准镜头上的镜 头遮光罩安装标志,然后顺时针转动镜头 遮光罩,直至听到咔嗒声转不动为止。 • 确认镜头遮光罩安装标志对准镜头遮光 罩设定标志( )。 • 若未正确安装镜头遮光罩,则会产生晕 图5 映。 • 为了便于装卸镜头遮光罩,应抓住其底座 (镜头遮光罩接头标志周围)而不是外缘。 • 存放镜头遮光罩时,应反方向装在相机上。 决定曝光 当使用尼康D3或D300相机时 转动移轴及倾斜旋钮将移轴值及倾斜量 设为0。(图2) 设定相机的曝光模式。 A或M曝光模式下,请使用光圈环或相机 的指令盘设定光圈。当使用相机的指令盘 时,请将光圈设为最小光圈锁定(L) 图6 (图6)。 P或S模式下,请使用相机的指令盘设定光圈。...
- Seite 153 当使用其他尼康相机时 转动移轴及倾斜旋钮将移轴值及倾斜量设为0。(图2) 将相机的曝光模式设为M。 按下收缩光圈按钮完全开启光圈,将光圈环设为“3.5” (最大 光圈),然后设定快门速度获取正确的曝光。 转动光圈环设定所需的光圈,并以与切换步骤相同的顺序改变 快门速度。 • 将光圈环设为最小光圈锁定(L)可使光圈固定在f/32(最小光 圈)。 • 即使使用可通过机身指令盘去设定光圈的相机,仍然要以镜头 的光圈环设定光圈。使用带有自选设定菜单“以镜头的光圈环 设定光圈” 的相机时,则无需此项设定。 决定曝光(利用外置测光表) 转动移轴及倾斜旋钮将移轴值及倾斜量设为0。(图2) 将相机的曝光模式设为M。 通过镜头的光圈环或相机的指令盘设定所需的光圈,并读出相 机LCD屏上显示的光圈值或选定的光圈环数值。然后将光圈值 输入到外置测光表决定曝光,并设定快门速度。 • 当使用D3或D300以外的相机时,即使使用可通过机身指令盘去 设定光圈的相机,仍然要以镜头的光圈环设定光圈。使用带有 自选设定菜单“以镜头的光圈环设定光圈”的相机时,则无需 此项设定。 移轴/倾斜功能 注意事项 • 建议使用三脚架进行正确拍摄。 • 过度转动各个旋钮会导致损坏。 • 使用倾斜/移轴功能可能导致部分晕映。(晕映是指影像的周边 出现的变暗的现象。)为了避免这种现象,请在拍摄之前关闭 光圈(选择较大的f指数)或进行曝光补偿。...
- Seite 154 • 若要在使用移轴及/或倾斜时获得正确的曝光需要经验。我们建 议您先作多次试拍,直到认为可以操作自如为止。 • 当镜头装在D3以外的相机上时,请小心对镜头进行移轴及/或倾 斜。否则可能导致手指夹在镜头和相机机身之间,或者镜头擦 伤相机机身。 移轴功能 图7 当转动移轴旋钮时,镜头会作水平(或垂直,当镜头进行旋转操 作时)的移轴,并与相机机身平行(±11.5mm)。 利用移轴功能,无需移动相机即可对拍摄的画面重新构图。 这种操作方式可让您矫正主体的透视变形,或消除不必要在主体 前出现的物体(p. 195)。 • 进行移轴之后,请旋紧移轴松锁旋钮固定镜头的移轴位置。 注: 当对镜头进行移轴时,请小心不要将手指夹在镜头和相机机身 之间。 倾斜功能 图8...
- Seite 155 当转动倾斜旋钮时,镜头会作向上及向下(或向左及向右,当镜头 作了旋转操作时)的倾斜(相机机身±8.5°)。利用倾斜功能, 可以在整个主体平面并未与相机平行的情况下获得完全清晰的对 焦,或者与相机平行的主体微小区域也可清晰的对焦(p. 195)。 • 进行倾斜之后,请旋紧倾斜松锁旋钮固定镜头的倾斜位置。 • 请注意镜头的倾斜会改变取景器中的影像。 • 当倾斜镜头时,镜头筒上的景深刻度及距离刻度均无法使用。 旋转 图9 本镜头可以作向左或向右高达90°的旋转。当旋转镜头时,移轴 功能可以由水平改为垂直的移动,而倾斜功能则由垂直改为水平 的摆动。 • 旋转镜头之前,请转动移轴及倾斜旋钮将移轴值及倾斜量设 为“0”。 注: 当利用倾斜及/或移轴功能旋转镜头时,请小心不要将手指夹 在镜头和相机机身之间,或者相机机身与镜头相互刮擦。无 法锁定各个旋钮也会造成相同的影响。 • 请在握持镜头方形部位的同时按下旋转杆并转动镜头。 • 左右两边均有每30°的定位。处于30°及60°位置时,无需按 下旋转杆即可转动镜头。...
- Seite 156 对焦 图10 按下收缩光圈按钮可将光圈设为最大,转动对焦环即可对焦。 拍摄之前再次按下收缩光圈按钮即可收缩光圈。 • 使用D3或D300相机时,不需操作收缩光圈按钮就可拍摄照 片。(不需按下缩小光圈按钮,只按下快门释放按钮,可以自 动将光圈缩小至一个选定的光圈值。)当然也可使用收缩光圈 按钮。 • 当使用倾斜及/或移轴时,无法使用相机的电子测距仪确认对焦 是否正确。应当通过查看相机取景器中的影像来确认对焦。 • 当在对焦之后改变倾斜及/或移轴的角度时,主体将会出现模糊。 景深 • 通过检查景深刻度可大约判断景深的 距离标志 景深刻度 大小。 • 假如使用镜头的收缩光圈按钮或相机 的景深预览(收缩)按钮(当使用 D3或D300相机时),则可通过相机 取景器观察到景深的效果。 • 有关更多的内容,请参阅p. 222。 注: 当倾斜镜头时,景深刻度及距离刻 度均无法使用。(仅当对镜头进行 图11 移轴时才可使用这两种刻度。)...
- Seite 157 使用带内置闪光灯的相机拍摄闪光照片 为了避免出现晕映,请勿使用镜头遮光罩,并参照以下拍摄距离 拍照。 注: 下列限制仅供不使用倾斜及/或移轴的情况下进行拍摄。当使用 相机的内置闪光灯进行倾斜/移轴拍摄时,晕映的程度比不使 用倾斜/移轴进行拍摄的情况更加严重。不建议使用相机的内 置闪光灯进行倾斜/移轴拍摄。 相机 可用的拍摄距离 D300、D200、D100 1 m 以上 D80、D70系列、D50 2 m 以上 D60、D40系列 3 m 以上 其他相机 所有拍摄距离下均会出现晕映 建议的聚焦屏 各种聚焦屏可通用于尼康单镜反光相机的任何相应的摄影场景。 下面所列可用于本镜头: 聚焦屏 EC-B G2 G3 EC-E 相机 F5+DP-30 (+1.0) F5+DA-30 (+1.0) (+0.5) (+0.5) (+1.0) F4+DP-20 (+1.0) (+1.0)
- Seite 158 且将曝光补偿标准设为+/- 2.0 EV,1/2 EV级。当使用了B型和 E型之外的屏幕时,即使所需补偿值为“0”(无需补偿),也 仍然必须选择“其他屏幕”。F5相机采用相机机身上的“自选 设定#18”进行补偿。F4系列相机采用聚焦屏的“曝光补偿刻 度”进行补偿。 详情请参阅相机机身说明书。 空白意为不宜使用。因为M型聚焦屏可同时使用1:1放大倍率进行 宏观摄影和微缩摄影,因此,不在此限。 注: • 使用F5相机时,在矩阵测光时仅可使用EC-B型、EC-E型、B型、 E型、J型、A型、L型聚焦屏。 • 使用B型和E型聚焦屏时,请参阅B型和E型聚焦屏栏。 镜头的维护保养 • 当不使用镜头时,请将移轴值及倾斜量设为“0”。由于镜头具 有许多可以移动的部件,因此容易受到灰尘、污垢或水滴的侵 入。 • 使用吹风刷清扫镜头表面。如想清除镜头上的污垢时,请用柔 软干净的棉布或镜头清洁纸沾点酒精或镜头清洁液擦拭。在擦 拭镜头时,请绕着圆圈自中心向周围擦拭,注意不要在镜片上 留下痕迹或碰撞镜头的其他部件。 • 切勿使用稀释剂或苯溶液清洁镜头,否则可能损伤镜头,造成 火灾,或损害健康。 • 为了保护前镜头镜片,建议随时使用NC滤光镜。镜头遮光罩也 有助于保护镜头的前镜片。 • 当将镜头保存在镜盒中时,请盖好前盖和后盖。 • 当镜头准备长时间不用时,请保存在凉爽干燥的地方以防生 霉。另勿放在阳光直接照射或放有樟脑或卫生丸等化学药品的 地方。 • 请勿溅水于镜头上或将其落入水中,否则将会生锈而发生故障。 •...
- Seite 159 标准配件 • 77 mm搭扣式前镜盖LC-77 • 后镜盖LF-1 • 卡口式镜头遮光罩HB-41 • 半软盒CL-1120 选购附件 • 77 mm旋入式滤色镜 规格 镜头类型: D型变焦尼克尔镜头,具有内置CPU(中央 处理器)和尼康卡口座 焦距: 24 mm 最大光圈: f/3.5 镜头构造: 10组13片(3片ED镜片、3片非球面镜片和 1个装有纳米晶体涂层的镜头元件) 画角: 使用35 mm (135)格式的尼康胶卷单镜 反光相机和尼康FX格式数码单镜反光相机 时为84°; 使用尼康DX格式数码单镜反光相机时为 61°; 使用IX240系统相机时为71° 最大摄影倍率: 1/2.7 距离信息: 输入相机机身 对焦: 通过独立对焦环进行手控...
- Seite 160 镜头移动: 以直角方向进行移轴或倾斜的移动 (此两个动作可以改装为同一[平行]方向 移动,须附加费用。移轴松锁旋钮可换为 更大的旋钮,但更换后的旋钮可能影响将 镜头装上相机或镜头操作。) 最大移轴值: ±11.5 mm 最大倾斜量: ±8.5° 镜头旋转: 左右90°(每30°有定位) 曝光测量: 采用全光圈方式 安装尺寸: 77 mm (P = 0.75 mm) 尺寸: 直径约82.5 mm,从相机镜头安装凸缘起 的长度约108 mm 重量: 约730 g 产品设计与规格如有更改,厂商恕不另行通知或承担任何责任。...
- Seite 161 相机及相关产品中有毒有害物质或元素的名称、 含量及环保使用期限说明 有毒有害物质或元素 环保使用 部件名称 铅 汞 镉 六价铬 多溴联苯 多溴二苯醚 期限 (Pb) (Hg) (Cd) (Cr(VI)) (PBB) (PBDE) 相机外壳和镜筒(金属制) 相机外壳和镜筒(塑料制) 机械元件 3 光学镜头、棱镜、滤镜玻璃 4 电子表面装配元件(包括电子元件) 5 机械元件,包括螺钉、包括螺母和垫圈等 注: 有毒有害物质或元素标识说明 表示该有毒有害物质或元素在该部件所有均质材料中的含量均在SJ/T11363-2006标准规定 的限量要求以下。 表示该有毒有害物质或元素至少在该部件的某一均质材料中的含量超出SJ/T11363-2006标 准规定的限量要求。但是,以现有的技术条件要使相机相关产品完全不含有上述有毒有害 物质极为困难,并且上述产品都包含在《关于电气电子设备中特定有害物质使用限制指令 2002/95/EC》的豁免范围之内。 环保使用期限 此标志的数字是基于中华人民共和国电子信息产品污染控制管理办法及相关标准,表示该产品 的环保使用期限的年数。请遵守产品的安全及使用注意事项,并在产品使用后根据各地的法律、 规定以适当的方法回收再利用或废弃处理本产品。...
- Seite 162 安全操作注意事項 警告 勿自行拆卸 觸動相機或鏡頭的內部零件可能會導致相機受損,相機僅能由專業維 修技師進行維修。若因摔落或其它事故導致相機或鏡頭分散,請先切 斷產品電源和(或)取出電池後,再將產品送至尼康授權的維修中心 進行檢查。 發生故障時立刻關閉電源 當您發現相機或鏡頭冒煙或發出異味時,請立刻取出電池,以免有燃 燒之虞,若繼續使用可能會導致受傷。請在取出電池或切斷電源後, 將器材送到尼康授權的維修中心進行檢查維修。 勿在具易燃氣體的環境中使用相機或鏡頭 如果在具有易燃氣體的環境中使用電子設備,可能會導致爆炸或火 災。 勿透過鏡頭或取景器觀看太陽 通過鏡頭或取景器觀看太陽或其它強光,可能會導致永久性的視覺損 傷。 請勿將本產品置於兒童伸手可及之處 請特別注意避免嬰幼兒將電池或其它小零件放入口中。 使用相機和鏡頭時應注意以下事項 • 保持相機或鏡頭乾燥,否則可能會導致火災或引起電擊。 • 請勿使用潮濕的手處置或接觸設備,以免引起電擊。 • 在進行背光拍攝時,請勿將太陽置於畫面之內。 太陽光若聚焦於鏡頭的鏡身內,可能會引起火災,當太陽直照射鏡 頭時,也可能會引起火災。 • 如果鏡頭將長期擱置不用,請蓋上前鏡頭蓋和後鏡頭蓋,並儲存在無 法直接接觸日照之處,以免導致火災,因為鏡頭可使日光聚焦於某一 物體上。 • 更換鏡頭或鏡頭傾斜時,請小心拿取。 若是拿取不小心,可能會發生將手指夾於鏡頭與相機機身之間,或 鏡頭刮傷相機機身等現象。...
- Seite 163 感謝您購買尼康 PC-E NIKKOR 24mm f/3.5D ED 鏡頭。 名稱 1 遮光罩 9 光圈環 & CPU接點 2 遮光罩裝置標記 0 光圈刻度尺 * 非全開光圈按鈕 3 遮光罩定位標記 ! 光圈標記 ( 移軸旋鈕 4 遮光罩接環標記 @ 俯仰旋鈕 ) 移軸刻度尺 5 景深刻度尺 # 俯仰刻度尺 q 旋轉推桿 6 距離標記...
- Seite 164 主要特色 此鏡頭具前負後正的透視控制(PC)功能,可讓您強調或修正遠 近透視或控制景深,也可因修正相機角度而造成的變形,此外, 您亦可利用鏡頭的俯仰與移軸機制,在主體與相機不平行時,達 到對焦於整個主體面的效果。 本鏡頭配置有自動光圈控制功能,因此當此鏡頭與尼康D3或 • D300相機搭配時,使用者即可使用所有的曝光模式,在不使用 非全開光圈按鍵的情況下進行拍攝。 當此鏡頭安裝於具3D矩陣測光能力的尼康相機身上時,即可進 • 行更精確的曝光控制,因為鏡頭會將主體距離的資訊傳送到相 機身上(無俯仰及 或移軸)(相機*上安裝最大光圈)。 * 非D3及D300 採用3片非球面鏡和3片ED(超低色散)鏡片可有效地消除色 • 差,確保圖像之清晰,同時,亦可利用9片光圈葉片形成一個近 乎圓形的光圈開孔,使主體前後焦點之外的景物形成賞心悅目 的模糊影像。 使用塗上納米結晶塗層(Nano Cystal Coat)的某些鏡頭後,無 • 論是由晴天的戶外,到閃光燈照明的戶內場景等多種拍攝環 境,均可確保獲得清晰的影像。 可能的最近對焦距離為0.21公尺。 • 鏡頭前方共計可以安裝兩盞SB-R200無線遙控閃光燈。 • * 安裝SB-R200時,務必鎖緊移軸開鎖旋鈕,否則將會造成 SB-R200的重量讓鏡頭向下移軸。不建議在安裝SB-R200時俯 仰及/或移軸鏡頭。...
- Seite 165 — — — F5、F4系列 、F100、 F80系列、F75系列、 F65系列、Pronea 600i F90X、F90系列、 F70系列、F60系列、 F55系列、F50系列、 F-401x、F-401s、 F-401、F-801s、 — — — — — — — — F-801、F-601M、 F3AF、F-601、 F-501、Pronea S、 Nikon MF 相機、 (除了F-601M) : 可能 —: 不可能 *1 當鏡頭移軸及 或俯仰,會造成曝光不正確。 *2 P包括AUTO(通用程序)及可變程序系統 *3 當使用自動測光關閉的功能關閉鏡頭電力或相機電源,且定格 鏡頭光圈時,光圈葉片會全開至最大光圈,這並非故障現象。...
- Seite 166 *4 定格鏡頭光圈會啟動AE-L (AE 鎖定)。 *5 請見「移軸 俯仰功能」(第170頁) *6 請見「安裝鏡頭」(第167頁) *7 在每次按下快門按鍵後光圈葉片就會開闔一次,會導致連續拍 攝的曝光不正確。 *8 當使用自動測光關閉功能關閉鏡頭電力或相機電源,且定格鏡 頭光圈時,鏡頭光圈會保持定格設定,當再次開啟相機電源或 輕按相機快門時,光圈葉片會開啟一次,然後關閉,這並非故 障現象。 *9 當使用自動測光關閉功能關閉鏡頭電力或相機電源,且定格鏡 頭光圈時,應先輕按快門釋放按鍵,在拍攝前開關光圈。若無 法進行此動作,可能會導致在完全按下快門釋放按鍵時得到不 正確的曝光。 非全開光圈按鍵(一鍵式預置光圈操作) 按下非全開光圈按鍵,就可以將鏡頭光圈從最大非全開光圈至 • 選定的光圈,若又再次按下此按鍵則會完全打開光圈。無論是 否定格光圈,皆請先檢查相機取景器或從鏡頭前檢查光圈。 即使在取消非全開光圈後使用最大光圈,預置光圈值仍會顯示 • 於相機機身上。 在使用D3或D300相機時按下快門釋放按鍵,光圈會在選定的光 • 圈上自動定格,即使在拍攝前光圈已呈現全開的狀態(最大光 圈)亦同。在按下非全開光圈按鍵定格鏡頭光圈後,再以自動 測光關閉功能關閉鏡頭電力或相機,即會取消非全開光圈,且 光圈葉片會全開至最大光圈。 注意事項 當鏡頭非安裝於D3相機上時,請特別小心移軸、俯仰及 或旋 • 轉鏡頭,以免造成鏡頭刮傷相機機身的情形。...
- Seite 167 當本鏡頭為使用手動對焦鏡頭時,即使當相機的對焦模式設定 • 為AF模式,也無法使用自動對焦功能。 使用俯仰 移軸功能會造成暈映或稍微變色的現象(暈映為圖 • 像的周邊出現的變黑現象)。 本鏡頭安裝於尼康數碼單鏡反光(尼康DX格式)相機,如D2系 • 列和D300上時,鏡頭畫面視角會變成61°,而與其35毫米相當 的焦距約為36毫米。 注意不要弄髒或損壞CPU接點。 • 如果鏡頭接環橡皮墊圈損壞時,請務必交由附近的尼康指定經 • 銷商或服務中心修理。 在低溫時,相機應使用新的或是充滿電的電池。 • 安裝鏡頭 旋轉移軸及俯仰旋鈕所設定的移軸量與俯仰量為0(圖 2)。 注意: 使用俯仰、移軸及 或旋轉,且未鎖定每個旋鈕時,請避免 安裝鏡頭至相機或從相機上拆除鏡頭,以免造成手指夾 在鏡頭與相機機身之間,或鏡頭刮傷相機機身。 圖 2 設定俯仰與移軸旋鈕。(圖 3) 注意: 旋鈕轉動過緊可能會損壞旋鈕。 圖 3...
- Seite 168 關閉相機電力,然後對準鏡頭與相 機上的接環標記,再以逆時針方向 轉動鏡頭,直到鎖進定位。(圖 4) 在相機電力為開啟的狀態下安裝鏡 • 頭,會造成相機無法正常運作。 圖 4 使用卡口式遮光罩 HB-41 將遮光罩上的遮光罩裝置標記( ) (兩個標記都要)對準鏡頭上的遮光 罩接環標記,然後以順時針的方向轉 動遮光罩,直至聽到咔嗒聲且無法轉 動為止。 確認遮光罩接環標記已對準遮光罩定 • 位標記( )。 若未正確安裝遮光罩,會產生暈映。 • 圖 5 為了便於裝卸鏡頭罩,應以手抓住底 • 座(遮光罩裝置標記部分)而不是外緣。 存放鏡頭罩時,應將其以反方向裝在相機上。 • 決定曝光 使用尼康D3或D300相機時 旋轉移軸與俯仰旋鈕所設定的移軸及俯仰 量為0。(圖 2) 設定相機的曝光模式。 在A或M曝光模式下,可使用光圈環或相 機的指令盤設定光圈,若是使用相機的指 令 盤 , 則 應 將 光 圈 設 定 為 最 小 光 圈 鎖 圖...
- Seite 169 使用其他尼康相機時 旋轉移軸與俯仰旋鈕所設定的移軸及傾斜量為0。(圖 2) 設定相機的曝光模式為M。 按下非全開光圈按鍵完全打開光圈,並設定光圈環為「3.5」 (最大光圈),再為正確曝光設定快門速度。 以相同變更級數,旋轉光圈環及變更快門速度,以設定所需的 光圈。 設定光圈環為最小光圈鎖(L),固定光圈為f/32 (最小光圈)。 • 即使是使用可利用機身的指令盤設定光圈的相機,亦應以鏡頭 • 的光圈環設定光圈,若是使用備有個人設定選項為「以鏡頭的 光圈環設定光圈」的相機時,即無需設定此選項。 決定曝光(利用外置曝光錶) 旋轉移軸與俯仰旋鈕所設定的移軸及俯仰量為0。(圖 2) 設定相機的曝光模式為M。 利用鏡頭的光圈環或相機的指令盤設定所需要的光圈,相機的 LCD螢幕上即會顯示出光圈值或所選擇的光圈環值,然後再將 光圈值輸入至外置曝光錶內決定曝光量,以及設定快門速度。 使用非D3或D300的相機時,即使是使用可以利用機身的指令盤 • 設定光圈的相機,亦應以鏡頭的光圈環設定光圈,若是使用備 有個人設定選項為「以鏡頭的光圈環設定光圈」的相機時,即 無需設定此選項。 移軸 俯仰功能 注意事項 建議使用三腳架,以拍攝正確的照片。 • 旋鈕若轉動過緊,會造成損壞。 • 使用俯仰 移軸功能會造成暈映的現象(暈映為圖像的周邊出 • 現的變黑現象),若欲抵消此現象,請關閉光圈(選擇大的 f值)或在拍攝前補償曝光。...
- Seite 170 若欲於使用移軸及 或俯仰時獲得正確曝光,必須先累積使用 • 經驗,因此我們建議您先進行多次試拍,直到認為可以操作自 如為止。 當鏡頭安裝在D3以外的相機上時,請特別注意移軸及 或俯仰 • 鏡頭,以免造成手指夾在鏡頭與相機機身之間,或鏡頭刮傷相 機機身。 移軸功能 圖 7 當旋轉移軸旋鈕時,鏡頭會呈現水平(或垂直,當鏡頭進行旋轉 操作時)的移軸,並與相機機身(±11.5 mm)平行。 若利用移軸功能,無需移動機身亦可為拍攝的畫面重新構圖。 此操作方式可以矯正主體畫面的透視變形,或消除一些無需在主 體畫面前出現的物體(請見第195頁)。 進行移軸後,應鎖緊移軸開鎖旋鈕,以固定鏡頭的移軸位置。 • 注意: 在操作鏡頭移軸時,應避免將手指夾在鏡頭與相機機身的握 把之間。 俯仰功能 圖 8...
- Seite 171 藉由旋轉俯仰旋鈕,鏡頭可以與相機機身呈現±8.5°的上下俯仰 (或左右,在操作鏡頭旋轉時)。使用俯仰鏡頭即可在拍攝的整個 主體畫面與相機不平行的情況下,取得清晰的對焦,亦可對焦在與 相機平行的小區域畫面上(請見第195頁)。 在俯仰鏡頭後,應鎖緊俯仰開鎖旋鈕以固定鏡頭的俯仰位置。 • 請注意鏡頭的俯仰會改變觀景窗內的影像。 • 當鏡頭進行俯仰設定時,鏡頭上的景深刻度尺及距離刻度尺均 • 無法使用。 旋轉 圖 9 本鏡頭可以進行左或右高達90°的旋轉。旋轉鏡頭,可以把鏡頭 的移軸功能由水平改為垂直移動,而俯仰功能則可由垂直改為水 平擺動。 在旋轉鏡頭前,請利用移軸及俯仰旋鈕,將鏡頭的移軸值及俯 • 仰值設定為「0」。 注意: 使用俯仰及 或移軸功能旋轉鏡頭時,應避免將手指夾在鏡 頭與相機機身之間,或鏡頭刮傷相機機身。無法鎖上每個旋 鈕,也可能會造成相同的效果。 推動旋轉推桿,並握住鏡頭的方形部分旋轉鏡頭。 • 左右兩邊均有每30°的定位,而在30°與60°之處,無需推動 • 旋轉推桿即可旋轉鏡頭。...
- Seite 172 對焦 圖 10 按下非全開光圈按鍵設定最大光圈,旋轉對焦環進行對焦。 在拍攝前再次按下非全開光圈按鍵,以調整光圈。 使用 D3 或 D300 相機時,不需操作非全開光圈按鍵即可拍攝 • 照片。(不需按下非全開光圈按鍵,只要按下快門釋放按鍵即可 將光圈自動收縮至所需的範圍。)或是使用非全開光圈按鍵。 使用俯仰及 或移軸功能時,無法使用相機的電子測距器確認 • 正確的對焦,應檢查相機取景器內的影像確認對焦。 在針對主體畫面對焦後,改變俯仰及或移軸的角度會造成失焦 • 的現象。 景深 距離標記 透過檢查景深尺,可大約判斷景深的遠近。 • 景深刻度尺 使用鏡頭的非全開光圈按鍵或相機的 • 景深預覽(收細光圈)按鍵(D3或 D300相機),便可以透過相機的觀景 窗觀察景深的效果。 更多相關內容,請參閱第222頁。 • 注意: 當鏡頭設定俯仰設定時,景深刻度尺 及距離刻度尺均無法使用(若鏡頭僅 設定移軸設定時,則兩個刻度尺均可 圖 11 使用)。...
- Seite 173 使用帶內置閃光燈的相機拍攝需增加曝光之照片 為了避免產生暈映,請勿使用遮光罩,並按照以下拍攝距離進行 拍攝。 注意: 以下限制僅適用於未使用俯仰及 或移軸功能的拍攝動作。 使用相機的內置閃光燈進行俯仰 移軸拍攝時,發生暈映的 現象較未使用俯仰 移軸進行拍攝時更為嚴重,因此不建議 使用相機的內置閃光燈進行俯仰 移軸拍攝。 相機 可用拍攝距離 D300、D200、D100 1 m 以上 D80、D70系列、D50 2 m 以上 D60、D40系列 3 m 以上 其他相機 在任何拍攝距離下都會產生背景暈映 請使用對焦板 多款尼康單鏡反光相機擁有多種可互換的對焦板,以配合您的拍 攝環境。建議搭配本鏡頭使用的對焦板為: 對焦板 EC-B G2 G3 EC-E 相機 F5+DP-30 (+1.0) F5+DA-30 (+1.0) (+0.5) (+0.5)
- Seite 174 將曝光補償標準設定在+/-2.0 EV、1/2 EV級,若所使用的是B型 和E型之外的屏幕,務必選擇「其他屏幕」,即使必須的補償 值 為 0 ( 沒 有 補 償 需 要 ) 。 F 5 相 機 請 用 機 身 上 的 「 自 選 設 定#18」提供補償,而F4系列相機則請使用對焦板的「曝光補 償刻度尺」進行補償。 詳情請參閱相機機身說明書。 空白代表不宜使用,不過,由於M型對焦板可同時以1:1放大倍 率進行宏觀攝影和微縮攝影,因此不在此限。 注意: 使用F5相機,在矩陣測光時僅可使用EC-B、EC-E、B、E、J、 • A、L對焦板。 使用B和E對焦板,請參閱B和E的對焦板一欄。 •...
- Seite 175 標準配件 77mm 按扣式前鏡蓋LC-77 後鏡蓋LF-1 • • 卡口式遮光罩HB-41 半軟套CL-1120 • • 選購附件 77 mm旋入式濾色鏡 • 規格 鏡頭類型: D型 NIKKOR鏡頭,具有內置CPU及尼康卡 口座 焦距: 24 mm 最大光圈: f/3.5 鏡頭構造: 10組13件(3片ED鏡片、3片非球面鏡片及 一片裝有納米晶體層的鏡頭原件) 圖像角度: 使用35 mm(135)格式的尼康菲林單鏡反 光相機及尼康FX格式數碼單鏡反光相機時 為84°; 使用尼康DX格式數碼單鏡反光相機時為 61°; 使用IX240系統相機時為71° 最大攝影倍率: 1/2.7 距離資料: 輸入機身 對焦: 手動使用獨立對焦環...
- Seite 176 鏡頭移動: 以直角方向進行移軸與俯仰的移動 (這兩項動作可以改裝為以同一平行方向 移動,移軸鬆鎖旋鈕也可以更換為較大尺 寸,但是更換旋鈕可能會影響安裝鏡頭至 相機或操作鏡頭。) 最大移軸量:±11.5 mm 最大俯仰量:±8.5° 鏡頭旋轉: 左右90°旋轉(每30°有定位) 曝光測量: 採用全光圈方式 配件尺寸: 77 mm (P = 0.75 mm) 尺寸: 直徑約82.5 mm,從相機鏡頭接環邊緣起 的長度約為108 mm 重量: 約730 g 產品設計與規格若有更改,恕不另行通知。...
- Seite 180 &...
- Seite 182 — — — — — — — — — — — — —...
- Seite 191 EC-B G2 G3 EC-E F5+DP-30 (+1.0) F5+DA-30 (+1.0) (+0.5) (+0.5) (+1.0) F4+DP-20 (+1.0) (+1.0) (+1.0) (+1.0) (+1.0) F4+DA-20 (+1.0) (+1.0) (+0.5) (+1.0) (+1.0) (+1.0)
- Seite 195 作 例 Sample images Beispielaufnahmen Exemples d’images Imágenes de muestra Provbilder Voorbeeldafbeeldingen Образцы изображений Immagini esemplificative 影像示例 範例影像 샘플 이미지...
- Seite 196 ■ シフト(P.11) ■ Shifting (P. 26) ■ Dezentrieren (S. 42) ■ Décentrement (P. 58) ■ Desplazamiento (p. 74) ■ Skiftning (S. 90) ■ Сдвиг (стр. 106) ■ Shiften (P. 122) ■ Orientamento (P. 138) ■ 移轴 (P. 154) ■ 移軸(第 170 頁 ) ■...
- Seite 197 被写体の歪みを修正する シフト無し (A) レンズからビルの上部と下部までの距離が異なるので、 ● 被写体が歪んで写ります。 シフト有り(B)カメラとビルを平行にして、上にシフトさせます。 ● Correct perspective distortion of subject • Without shifting (Photo A): When the lens-to-subject distance from the top and bottom of the subject differs, the subject appears with distorted perspective in the frame. •...
- Seite 198 Corregir la distorsión de perspectiva del sujeto • Sin desplazamiento (foto A): Cuando la distancia entre el objetivo y el sujeto no coincide entre la parte superior e inferior del sujeto, éste aparece con una perspectiva distorsionada en el encuadre. •...
- Seite 199 Correzione della distorsione prospettiva del soggetto • Senza orientamento (Foto A): Quando la distanza tra obiettivo e soggetto è differente a seconda della parte superiore o il fondo del soggetto, il soggetto apparirà nella foto con una prospettiva distorta. • Con orientamento (Foto B): Per correggere la distorsione, collocare la fotocamera parallelamente rispetto al soggetto e orientare l'obiettivo verso l'alto.
- Seite 200 ■ シフト(P.11) ■ Shifting (P. 26) ■ Dezentrieren (S. 42) ■ Décentrement (P. 58) ■ Desplazamiento (p. 74) ■ Skiftning (S. 90) ■ Сдвиг (стр. 106) ■ Shiften (P. 122) ■ Orientamento (P. 138) ■ 移轴 (P. 154) ■ 移軸(第 170 頁) ■...
- Seite 201 撮影者やカメラの写り込みを防ぐ シフト無し(C)鏡などを正面から撮影すると、撮影者やカメラが写り ● 込みます。 シフト有り(D)写り込まない位置に移動し、左にシフトさせます。 ● Excluding unwanted reflections • Without shifting (Photo C): When shooting a reflective surface such as a mirror, the photographer or the camera may be reflected in the frame. • With shifting (Photo D): To avoid such reflection, place the camera in a position where such reflection does not occur, then shift the lens left.
- Seite 202 Evitar reflejos no deseados • Sin desplazamiento (foto C): Cuando dispare a una superficie reflectante como un espejo, el fotógrafo o la cámara se pueden reflejar en el encuadre. • Con desplazamiento (foto D): Para evitar este reflejo, coloque la cámara en una posición en la que no se produzca este reflejo cuando desplace el objetivo hacia la izquierda.
- Seite 203 Esclusione di riflessi indesiderati • Senza orientamento (Foto C): Quando si fotografa una superficie riflettente come uno specchio, il riflesso del fotografo o della fotocamera può comparire sulla foto. • Con orientamento (Foto D): Per evitare questa situazione, collocare la fotocamera in una posizione in cui il riflesso non sia presente, quindi orientare l'obiettivo verso sinistra.
- Seite 204 ■ シフト(P.11) ■ Shifting (P. 26) ■ Dezentrieren (S. 42) ■ Décentrement (P. 58) ■ Desplazamiento (p. 74) ■ Skiftning (S. 90) ■ Сдвиг (стр. 106) ■ Shiften (P. 122) ■ Orientamento (P. 138) ■ 移轴 (P. 154) ■ 移軸(第 170 頁) ■...
- Seite 205 被写体の前にある不要物を避ける シフト無し(E)撮影したい構図内に不要物がある場合があります。 ● シフト有り(F)不要物が入らない位置に平行移動し、左にシフトさせ ● ます。 Excluding unwanted objects in the frame • Without shifting (Photo E): Sometimes unwanted objects appear in front of the main subject in a desired position for a specific composition. • With shifting (Photo F): To exclude such objects from disrupting the scene, move the camera horizontally at a position where the unwanted object will not be in the frame, then shift the lens left.
- Seite 206 Suprimir objetos no deseados del encuadre • Sin desplazamiento (foto E): En ocasiones aparecen objetos no deseados delante del sujeto principal en una posición deseada para una composición determinada. • Con desplazamiento (foto F): Para evitar que estos objetos perturben la escena, mueva la cámara en sentido horizontal hasta una posición en la que el objeto no esté...
- Seite 207 Esclusione degli oggetti indesiderati sulla foto • Senza orientamento (Foto E): Talvolta, dopo aver collocato la fotocamera nella posizione desiderata per una determinata composizione, davanti al soggetto principale compaiono degli oggetti indesiderati. • Con orientamento (Foto F): Per evitare che questi oggetti rovinino la scena, spostare la fotocamera orizzontalmente e collocarla in posizione tale che l'oggetto indesiderato non venga più...
- Seite 208 ■ ティルト(P.11) ■ Tilting (P. 26) ■ Schwenken (S. 42) ■ Inclinaison (P. 58) ■ Inclinación (p. 74) ■ Tiltning (S. 90) ■ Наклон (стр. 106) ■ Tilten (P. 122) ■ Inclinazione (P. 158) ■ 倾斜 (P. 154) ■ 俯仰(第 170 頁) ■...
- Seite 209 手前から奥までピントを合わせる ティルト無し(G)カメラと平行でない被写体は、手前から奥までピン ● トが合いません。 ティルト有り(H)下にティルトさせると、手前から奥までピントが合 ● います。 Achieve focus on the entire subject plane when it is not parallel to the camera • Without tilting (Photo G): When the subject plane is not parallel to the camera, focus cannot be achieved throughout the entire subject plane.
- Seite 210 Enfocar el plano entero del sujeto cuando no está paralelo a la cámara • Sin inclinación (foto G): Cuando el plano del sujeto no está paralelo a la cámara, no puede lograrse el enfoque de todo el plano del sujeto. •...
- Seite 211 Ottenere la messa a fuoco su tutto il piano del soggetto quando questo non è parallelo alla fotocamera • Senza inclinazione (Foto G): Quando il piano del soggetto non è parallelo alla fotocamera, non è possibile ottenere la messa a fuoco su tutto il piano del soggetto.
- Seite 212 ■ ティルト(P.11) ■ Tilting (P. 26) ■ Schwenken (S. 42) ■ Inclinaison (P. 58) ■ Inclinación (p. 74) ■ Tiltning (S. 90) ■ Наклон (стр. 106) ■ Tilten (P. 122) ■ Inclinazione (P. 138) ■ 倾斜 (P. 154) ■...
- Seite 213 被写体の一部分にピントを合わせる ティルト無し(I)全体にピントが合っています。 ● ティルト有り(J)右にティルトさせると、 一部分にピントが合います。 ● Achieve focus on a specific part of the subject • Without tilting (Photo I): Focus is achieved on all parts of the subject. • With tilting (Photo J): Tilt the lens right to focus on only a specific part of the subject.
- Seite 214 Фокусирование на отдельном элементе объекта • Без наклона (фото I): Все элементы объекта в фокусе. • С наклоном (фото J): Наклоните объектив вправо, чтобы сфокусироваться только на отельном элементе объекта. Scherpstellen op een specifiek deel van het onderwerp • Zonder tilten (Foto I): Er wordt scherpgesteld op alle delen van het onderwerp.
- Seite 215 피사체의 특정 부분에 초점 맞추기 피사체의 모든 부분에 초점이 맞습니다. 피사체의 특정 부분에만 초점을 맞추려면 렌즈를 오른쪽으로 틸트 합니다.
- Seite 216 ■ シフトとティルトの併用(P.11) ■ Shifting/Tilting (P. 26) ■ Dezentrieren /Schwenken (S. 42) ■ Décentrement/inclinaison (P. 58) ■ Desplazamiento/inclinación (p. 74) ■ Skiftning/tiltning (S. 90) ■ Сдвиг/наклон (стр. 106) ■ Tiltshift (P. 122) ■ Orientamento/inclinazione (P. 138) ■ 移轴 / 倾斜 (P. 154) ■...
- Seite 218 ノーマル(K)被写体が歪み、一部分にしかピントが合いません。 ● シフトのみ(L) ● ティルトのみ(M) ● シフトとティルト有り(N)併用によって、形が整い、全面にピントが ● 合います。 • Without shifting and tilting (Photo K): Without using shift and tilt, the subject appears distorted, and only a small area of the subject is in focus. • With shifting (Photo L) •...
- Seite 219 • Sin desplazamiento ni inclinación (foto K): Sin emplear el desplazamiento ni la inclinación, el sujeto aparece distorsionado, y sólo está enfocada una pequeña zona del sujeto. • Con desplazamiento (foto L) • Con inclinación (foto M) • Con desplazamiento e inclinación (foto N): Al emplear las funciones de desplazamiento e inclinación, el sujeto aparece con la perspectiva corregida y toda la zona del sujeto está...
- Seite 220 • Senza orientamento e inclinazione (Foto K): Senza usare le funzioni d'orientamento e d'inclinazione, i soggetti appaiono distorti, mentre solo una parte del soggetto è a fuoco. • Con orientamento (Foto L) • Con inclinazione (Foto M) • Con orientamento e inclinazione (Foto N): Quando si usano le funzioni d'orientamento e d'inclinazione, la distorsione prospettica della fotografia può...
- Seite 224 ニコンサービス機関にて新しい使用説明書をお求めください (有料) 。 No reproduction in any form of this manual, in whole or in part (except for brief quotation in critical articles or reviews), may be made without written authorization from NIKON CORPORATION. NIKON CORPORATION FUJI BLDG., 2-3, MARUNOUCHI 3-CHOME, CHIYODA-KU, TOKYO 100-8331, JAPAN Printed in Japan TT7L01 ( C2 ) 7MAA49C2-01 ▲...