Karibu CILJA Aufbauanleitung
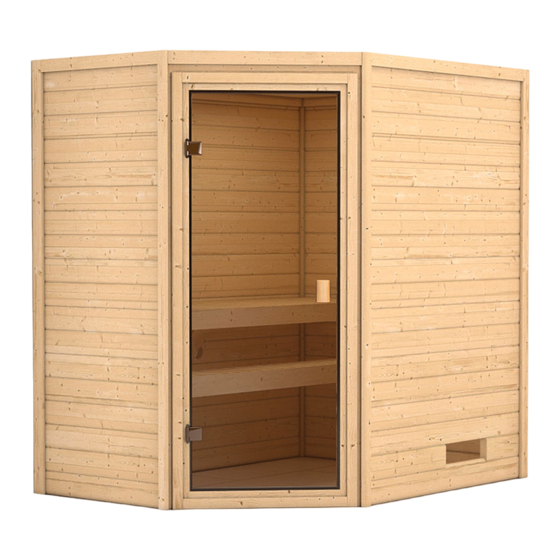
Basismodell

Verwandte Anleitungen für Karibu CILJA


Inhaltszusammenfassung für Karibu CILJA
- Seite 1 26225 85826-2008 montagehandleiding Aufbauanleitung Instrucciones de notice de montage construcción Building Instructions Istruzioni per il montaggio Service-Hotline:+49 421 38693 33...
- Seite 2 85826 Vergleichen Sie zu- Vergelijk eerst de Veuillez d’abord primer lugar, Firstly compare Confrontare la di- erst die Materialliste lijst van materialen comparer la liste compare la lista de the material list stinta dei materiali mit Ihrem Paketin- met de inhoud van du matériel avec le material with the contents...
- Seite 3 $ " % $ * % !" & " ! & ! & " '% ( '% ( " &&% & ! &* & ! /! % % * &%6 8 & ! %* < % & & & : < % &...
- Seite 4 Stärke Stück Art.Nr: Bezeichnung Bild Länge Breite Material Dikte Aantal Art.-nr. Benaming Afbeelding Lengte Breedte Materiaal Épaisseu Pièce Art. N°: N° Désignation Illustration Longueur Largeur Matériau Espesor Ctdad. N° Art. N° Denominación Dibujo Long. Ancho Material Thick- Num- Art. no. No..
- Seite 5 Stärke Stück Art.Nr: Bezeichnung Bild Länge Breite Material Dikte Aantal Art.-nr. Benaming Afbeelding Lengte Breedte Materiaal Épaisseu Pièce Art. N°: N° Désignation Illustration Longueur Largeur Matériau Espesor Ctdad. N° Art. N° Denominación Dibujo Long. Ancho Material Thick- Num- Art. no. No..
- Seite 6 TüV-Schild für Saunaofen 49870 inkl. 4 Schrauben Was mit welchem wordt Qu’est-ce qui est ¿Qué se une a qué What is joined to Cosa fissato Verbindungsmittel welk joint ensemble, et y con qué medio what with which con cosa? verbunden? verbindingsmiddel avec quels moyens de unión?
- Seite 7 Elemente Beschlag Stk. insgesamt ø Vorbohrung Elementen Beslag Aant. Totaal Voorge- Eléments Garniture Pièce Total boord Elementos Guarnición Ctda Total Percement Element Fixture Total pretaladro Elementi Ferramenta in tutto pre-drilling diameter Q.tà foro Brett über Tür mit aufrechten Rahmen schräg Spax 4,5 x 80 pro Seite (nur bei Eckeinstieg)
- Seite 8 Elemente Beschlag Stk. insgesamt ø Vorbohrung Elementen Beslag Aant. Totaal Voorge- Eléments Garniture Pièce Total boord Elementos Guarnición Ctda Total Percement Element Fixture Total pretaladro Elementi Ferramenta in tutto pre-drilling diameter Q.tà foro Brett aufrecht und Kranzleisten mit Spax Kopflochgebohrt mit pro Stk Saunakörper Abdeckkappen...
- Seite 10 Allgemein: Algemeen: Généralités : Generalidades: General: Generalità: No olvide que debe preperforar Please note that it is necessary Si raccomanda di preforare Bitte beachten Sie, das Sie Let op dat u alle schroefverbin- Veuillez observer que vous de- to pre-drill all screw connec- sempre prima di avvitare, in sämtliche Schraubverbindun-...
- Seite 11 ligbanken enz. etc. che ecc. Abb.: --> Abbildung Afb.: --> afbeelding Fig.: --> Figure Ilust.: Ilustración Fig.: --> Figure Imm. Immagine Abb.: 1 Afb.: 1 Fig.: 1 Ilust. : 1 Fig. 1 Imm. 1 Hier ist eine bemaßte Drauf- Hier is een overzichtstekening Aperçu général métré.
- Seite 12 hoog als een kant en klare wand. Schroef ter hoogte van de deur pos. J vast. Abb.: 4 Afb.: 4 Fig.: 4 Ilust.: 4 Fig. 4 Imm. 4 Ahora se coloca la puerta ya Then set in the already assem- Ora inserire la porta già...
- Seite 13 wordt bevestigd. métré (fig. 1). sauna e come. Abb.:L1 Afb.: L1 Fig.: L1 Ilust.: L1 Fig. L1 Imm. L1 Liegenhalterungen montieren Montage ligbankhouders. Monter les supports de bancs. Montar los soportes del banco. Assembling the supports for the Montare i supporti delle pan- benches che.
- Seite 14 der Kabelleiste diese Kabel ab- sleuven gefreesd zodat deze afin de pouvoir être utilisée horno hasta el aparato de that it can be used with differ- per i cavi. Il listello ha diverse decken. Die Leiste hat ver- voor elke kachelvariant kan pour chaque variante de poêle.
- Seite 15 85826 Stand 31.05.2005 Detail 1 Ofen 1342 Abb.:1 Detail 2...
- Seite 16 85442 / 85439 Stand 26.05.2005 6×90 6×90 4×40 4×40 6×90 6×90 Detail 6 Abb.:2 Detail 5 Detail 4 Detail 3...
- Seite 17 85442 / 85439 Stand 15.07.2004 Detail 7 Abb.:3 Detail 8 Detail 9...
- Seite 18 85442 / 85439 Stand 15.07.2004 Einbau Glastür Montage porte en verre Installation of glass door Montage van de glazen deur Montaje de la puerta de cristal Installazione portello di vetro – Detail 11 4×35 Detail 10 Abb.:4...
- Seite 19 85442 / 85439 Stand 26.05.2005 Abb.:5 Abb.6...
- Seite 20 38mm Stand 26.05.2004 6×60 6×60 Abb.:L1 L5/6 L7/8 L5/6 Abb.:L2 Abb.:L3...
- Seite 21 Ø3,5mm 4×35 Stand 07.07 2 0 0 m m Ø3,5mm Stand 07.07.2005 4x30 6 1 6 m m Abb. O 1/O 2 Einbau Glastür Abb.:O 2 4×35 Montage porte en verre Installation of glass door Montage van de glazen deur Abb.:O 2 Montaje de la puerta de cristal Abb.:O 2...
- Seite 22 Einbau Glastür Installation of glass door Montaje de la puerta de cristal Montage porte en verre Montage van de glazen deur Installazione portello di vetro Das Saunatürglas im Türrahmen ausrichten! Bien aligner le verre à vitre! 03.1 To start building up the door you need to center the glass in the wooden frame! 03.1 Plaats het glas van de sauna deur in het midden van het kozijn!
- Seite 23 Einbau Glastür Einbau Glastür Installation of glass door Installation of glass door Montaje de la puerta de cristal Montaje de la puerta de cristal Montage porte en verre Montage porte en verre Montage van de glazen deur Montage van de glazen deur Installazione portello di vetro Installazione portello di vetro 04.1...
- Seite 24 Einbau Glastür Installation of glass door Montaje de la puerta de cristal Montage porte en verre Montage van de glazen deur Installazione portello di vetro 07.1 07.2 07.1 07.1 07.2-1 07.2-2...
- Seite 25 Einbau Glastür Installation of glass door Montaje de la puerta de cristal Montage porte en verre Montage van de glazen deur Installazione portello di vetro Seitenverstellung + Höhenverstellung Achtung: Alle Verstell-Excenter müssen in der Glasscheibe die gleiche Grundstellung haben! Positionnement latéral + positionnement hauteur Attention: Tous les excentreurs de positionnement doivent avoir la même position de base dans la vitre! Lateral adjustment + height adjustment Attention: All adjustable eccentrics must have the same basic adjustment in the glass panel!
- Seite 26 Installation TÜV-Schild Entfernen Sie die Schutzfolie vom beiliegenden TÜV-Schild. Lassen Sie den Saunaofen von einem zugelassenen Elektrofachmann anschließen. Dieser markiert den installierten Ofen auf dem TÜV-Schild. Bringen Sie das TÜV-Schild an einer gut sichtbaren Stelle über dem Ofen an.