Herunterladen Inhalt Inhalt Diese Seite drucken
Icy Box IB-3664SU3 Benutzerhandbuch

Icy Box IB-3664SU3 Benutzerhandbuch

4fach externes jbod (single) gehäuse

Werbung

Verfügbare Sprachen

Verfügbare Sprachen

IB-3664SU3
User's Manual IB-3664SU3
4Bay External JBOD (SINGLE) Enclosure
Benutzerhandbuch IB-3664SU3
4fach Externes JBOD (SINGLE) Gehäuse

Werbung

Inhaltsverzeichnis
loading

Inhaltszusammenfassung für Icy Box IB-3664SU3

  • Seite 1 IB-3664SU3 User‘s Manual IB-3664SU3 4Bay External JBOD (SINGLE) Enclosure Benutzerhandbuch IB-3664SU3 4fach Externes JBOD (SINGLE) Gehäuse...
  • Seite 3: Inhaltsverzeichnis

    IB-3664SU3 Package content, Product View ..........4 HDD installation ..............5 HDD installation, Connecting the IB-3664SU3 to a PC ..... 6 HDD LED indicator, Sleep function, About partition format, Safely removing the HDDs ....7 Verpackungsinhalt, Produktansicht ......... 8 Festplatteninstallation ............9-10...
  • Seite 4: Hdd Installation

    IB-3664SU3 Package Content IB-3664SU3, 1x Power Supply, 1x AC Power Cord, 1x USB 3.0 Cable, 1x eSATA Cable, 1x Manual Product View Front Rear 1. HDD LED 1. Fan 2. Door ejection 2. eSATA connector 3. HDD handle 3. USB 3.0 connector 4.
  • Seite 5 IB-3664SU3 JBOD mode which is to be in use with this device: JBOD (Single) It is a configuration of a RAID-controller for several hard drives, which are being handled independently as separate logical volumes. • When connecting the hard drive, please consider the electrostatic! • Body‘s static electricity may cause malfunction of the machine. Please touch the metal objects to discharge or wear the antistatic gloves before the operation.
  • Seite 6 HDDs. Connecting the IB-3664SU3 to a PC Connect the IB-3664SU3 to your PC via USB 3.0 OR via eSATA. Connect the IB-3664SU3 to a power supply via the provided power cable. eSATA connection Note: Port multiplier at host needed, if connected via eSATA. If no Port multiplier is...
  • Seite 7 IB-3664SU3 HDD LED indicator HDD bay empty LED Off HDD installed Blue LED on HDD read / write Pink LED blinking Power off All LEDs off Cable disconnected All LEDs off Sleep function The status LEDs, HDDs and the fan will turn off when the PC is powered down. Note: Turn off the main power, if the IB-3664SU3 is not in use for a long time. About partition format MBR partition formatted capacity limit is 2 TB. We suggest using GPT format on 2 TB or above HDD, but GPT may not be recognized by Windows XP or lower.
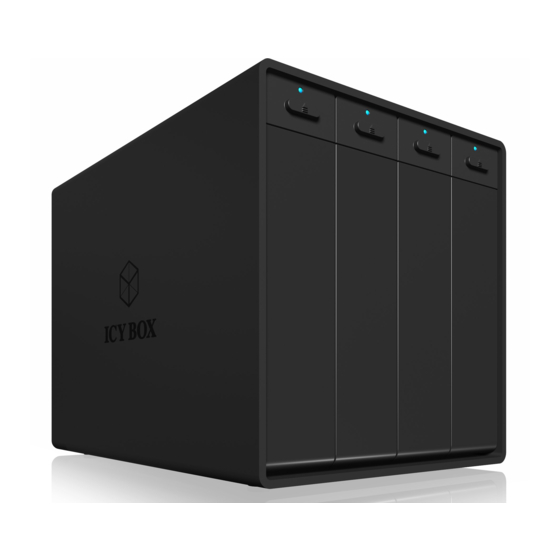
  • Seite 8: Verpackungsinhalt

    IB-3664SU3 Verpackungsinhalt IB-3664SU3, Externes Netzteil, Stromkabel, USB 3.0 Kabel, eSATA Kabel, Handbuch Produktansichten Frontansicht Rückansicht 1. HDD LED 1. Lüfter 2. Türentriegelung 2. eSATA Anschluss 3. Frontklappe 3. USB 3.0 Anschluss 4. Stromanschluss 5. AN/-AUS Schalter...
  • Seite 9: Festplatteninstallation

    IB-3664SU3 Festplatteninstallation In diesem Gerät verwendeter JBOD Modus: JBOD (Single) Konfiguration eines RAID-Controllers mit mehreren Festplatten, die keinen Verbund bilden. Damit werden die eingesetzten Festplatten dem Betriebssystem einzeln zur Verfügung gestellt. Warnung: Um Schäden oder Fehlfunktionen zu vermeiden trennen Sie die Strom zufuhr des Gerätes bevor Sie die Festplatten installieren.
  • Seite 10 IB-3664SU3 2. Setzen Sie die Festplatte(n) ein Schieben Sie die HDD vorsichtig in den Schacht 3. Schließen Sie die Frontklappe Durch das Schließen der Frontklappe wird diese automatisch verriegelt Festplattenentnahme Öffnen Sie die Frontklappe und drücken die Hebeltür um die Festplatte(n) "auszuwerfen" Hinweis: Zum Schutz der Festplatten und des Gerätes...
  • Seite 11: Verbindung Mit Dem Computer Herstellen

    IB-3664SU3 Verbindung mit dem Computer herstellen Verbinden Sie die IB-3664SU3 per USB 3.0 ODER eSATA mit Ihrem PC. Verbinden Sie die IB-3664SU3 mit dem mitgelieferten Netzteil. eSATA Verbindung Wichtig: Wenn die Verbindung über eSATA hergestellt wird, benötigt der Host PC einen Portmultiplier. Steht dieser nicht zur Verfügung, kann nur eine Festplatte erkannt werden. Festplatten LED Anzeige Keine Festplatte installiert LED AUS Festplatte installiert Blaue LED AN Festplatte lesen/schreiben Lila LED blinkt Ausschalten Alle LED‘s AUS Kabelverbindung getrennt Alle LED‘s AUS...
  • Seite 12 © Copyright 2015 by RaidSonic Technology GmbH. All Rights Reserved The information contained in this manual is believed to be accurate and reliable. RaidSonic Technology GmbH assumes no responsibility for any errors contained in this manual. RaidSonic Technology GmbH reserves the right to make changes in the specifications and/or design of the above mentioned product without prior notice. The diagrams contained in this manual may also not fully represent the product that you are using and are there for illustration purposes only. RaidSonic Technology GmbH assumes no responsibility for any differences between the product mentioned in this manual and the product you may have.

Inhaltsverzeichnis