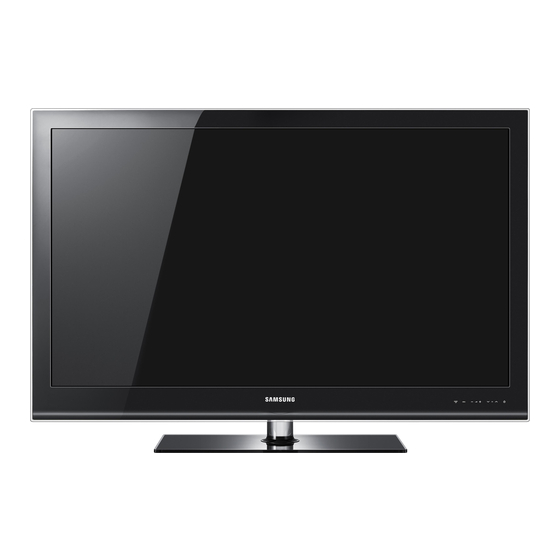
Samsung LE40B651 Bedienungsanleitung
Lcd tv series 6
Vorschau ausblenden
Andere Handbücher für LE40B651:
- Bedienungsanleitung (302 Seiten) ,
- Bedienungsanleitung (680 Seiten)
Inhaltsverzeichnis
Verfügbare Sprachen
Verfügbare Sprachen
Contact SAMSUNG WORLDWIDE
If you have any questions or comments relating to Samsung products, please contact the SAMSUNG customer care centre.
Country
Customer Care Centre
AUSTRIA
0810 - SAMSUNG (7267864, € 0.07/min)
02 201 2418
BELGIUM
800 - SAMSUNG (800-726786)
CZECH REPUBLIC
Distributor pro Českou republiku:
Samsung Zrt., česká organizační složka, Oasis Florenc, Sokolovská394/17, 180 00, Praha 8
DENMARK
8 - SAMSUNG (7267864)
EIRE
0818 717 100
FINLAND
30 - 6227 515
FRANCE
01 4863 0000
GERMANY
01805 - SAMSUNG (7267864, € 0.14/Min)
HUNGARY
06 - 80 - SAMSUNG (7267864)
ITALIA
800 - SAMSUNG (7267864)
LUXEMBURG
02 261 03 710
NETHERLANDS
0900-SAMSUNG (0900-7267864) (€ 0,10/Min)
NORWAY
3 - SAMSUNG (7267864)
0 801 1SAMSUNG(172678)
POLAND
022 - 607 - 93 - 33
PORTUGAL
808 20 - SAMSUNG (7267864)
SLOVAKIA
0800 - SAMSUNG (7267864)
SPAIN
902 - 1 - SAMSUNG (902 172 678)
SWEDEN
075 - SAMSUNG (726 78 64)
SWITZERLAND
0848 - SAMSUNG (7267864, CHF 0.08/min)
U.K
0845 SAMSUNG (7267864)
TURKEY
444 77 11
ESTONIA
800-7267
LATVIA
8000-7267
LITHUANIA
8-800-77777
KAZAHSTAN
8-10-800-500-55-500
KYRGYZSTAN
00-800-500-55-500
RUSSIA
8-800-555-55-55
TADJIKISTAN
8-10-800-500-55-500
UKRAINE
8-800-502-0000
UZBEKISTAN
8-10-800-500-55-500
Web Site
www.samsung.com/at
www.samsung.com/be
www.samsung.com/be_fr
www.samsung.com/cz
www.samsung.com/dk
www.samsung.com/ie
www.samsung.com/fi
www.samsung.com/fr
www.samsung.de
www.samsung.com/hu
www.samsung.com/it
www.samsung.com/lu
www.samsung.com/nl
www.samsung.com/no
www.samsung.com/pl
www.samsung.com/pt
www.samsung.com/sk
www.samsung.com/es
www.samsung.com/se
www.samsung.com/ch
www.samsung.com/uk
www.samsung.com/tr
www.samsung.com/ee
www.samsung.com/lv
www.samsung.com/lt
www.samsung.com/kz_ru
-
www.samsung.ru
-
www.samsung.ua
www.samsung.com/kz_ru
BN68-02325D-00
LCD TV
user manual
imagine the possibilities
Thank you for purchasing this Samsung product.
To receive more complete service, please register
your product at
www.samsung.com/register
Model
Serial No.
Kapitel
Inhaltsverzeichnis
Fehlerbehebung

Verwandte Anleitungen für Samsung LE40B651


Inhaltszusammenfassung für Samsung LE40B651
-
Seite 86: Vorsichtsmaßnahmen Beim Anzeigen Von Standbildern
5. Manche Digitalfernsehfunktionen sind in einigen Ländern oder Regionen möglicherweise nicht verfügbar, und bei DVB-C kann das Gerät möglicherweise bei manchen Kabelfernsehanbietern nicht störungsfrei zusammenarbeiten. 6. Für weitere Informationen setzen Sie sich bitte mit dem SAMSUNG-Kundendienstzentrum in Verbindung. Vorsichtsmaßnahmen beim Anzeigen von Standbildern ❑... - Seite 87 inHALT AnynET + EinricHTEn iHrES FErnSEHgEräTS Anschließen von Anynet + -Geräten ..........45 ■ ■ Zubehör ..................... 2 Einrichten von Anynet + ..............46 ■ ■ Bedienfeld ..................2 Wechseln zwischen von Anynet + -Geräten ........46 ■ ■ Anschlussfeld ..................3 ■...
-
Seite 88: Einrichten Ihres Fernsehgeräts
EinricHTEn iHrES FErnSEHgEräTS Die Abbildungen und Illustrationen in diesem Handbuch dienen nur zur Information und können vom tatsächlichen Aussehen des Geräts abweichen. Technische Änderungen und Änderungen am Design des Geräts, insbesondere zur Verbesserung der Leistungsfähigkeit des Geräts, sind jederzeit vorbehalten. Zubehör ¦... -
Seite 89: Anschlussfeld
5 MEnU: Drücken Sie diese Taste, um ein Bildschirmmenü zu den Funktionen Ihres Fernsehgeräts einzublenden. 6 SoUrcEE: Schaltet zwischen allen verfügbaren Signalquellen um. Im Bildschirmmenü können Sie diese Taste wie die EnTErE auf der Fernbedienung verwenden. 7 FErnBEDiEnUngSSEnSor: Richten Sie die Fernbedienung auf diesen Sensor am Fernsehgerät. 8 LAUTSPrEcHEr Anschlussfeld ¦... -
Seite 90: Common Interface-Steckplatz
Video- und Audioeingänge für externe Geräte wie z. B. Camcorder oder Videorecorder. # USB1(HDD) / USB2 Anschluss für Softwareaktualisierungen und Media Play, usw. Mit dem WLAN-Adapter von Samsung (gesondert erhältlich) können Sie eine Verbindung zum Netzwerk von Samsung herstellen. Verwenden Sie für eine USB-Festplatte den Anschluss USB1 (HDD). $ coMMon inTErFAcE-Steckplatz •... -
Seite 91: Fernbedienung
Arbeit mit Media Play und Anynet + . (∏: Mit dieser 7 5: Verborgenen Inhalt Fernbedienung können Sie einblenden die Aufnahmen von Samsung- 8 4: Videotextgröße auswählen. Rekordern mit der Anynet + - 0 Fastext-Thema auswählen Funktion fernsteuern. -
Seite 92: Batterien In Die Fernbedienung Einsetzen
Batterien in die Fernbedienung einsetzen ¦ 1. Heben Sie die Abdeckung auf der Rückseite der Fernbedienung an, wie in der Abbildung dargestellt. 2. Legen Sie zwei AAA-Batterien ein. Achten Sie darauf, dass die Pole der Batterien wie im Batteriefach angezeigt ausgerichtet sind. -
Seite 93: Fernsehgerät In Den Standby-Modus Schalten
Fernsehgerät in den Standby-Modus schalten ¦ Um den Stromverbrauchs zu senken, kann das Gerät in den Standby-Modus geschaltet werden. Der Standby-Modus ist nützlich, wenn Sie das Gerät vorübergehend ausschalten möchten (z. B. während einer Mahlzeit). 1. Drücken Sie die Taste PowErP auf der Fernbedienung drücken. Der Bildschirm wird ausgeschaltet, und auf der Vorderseite des Fernsehgeräts leuchtet die Standby-Anzeige auf. -
Seite 94: Anzeigen Des Bildschirmmenüs
Anzeigen des Bildschirmmenüs ¦ Auf dem Bildschirm werden der aktuelle Kanal und bestimmte Audio/Video-Einstellungen angezeigt. Drücken Sie die Taste inFo, um Informationen anzuzeigen. Drücken Sie die Taste inFo auf der Fernbedienung. Auf dem Bildschirm werden der abc1 18:11 Thu 6 Jan Life On Venus Avenue DTV Air Kanal, der Tonmodus sowie die Werte bestimmter Bild- und Toneinstellungen angezeigt. -
Seite 95: Sender Manuell Speichern
Sender manuell speichern ❑ Hiermit wird manuell ein Sender gesucht und dieser im Fernsehspeicher abgelegt. Wenn ein Kanal mit der Funktion Kindersicherung gesperrt wurde, wird das Eingabefenster für die PIN geöffnet. Digitaler Sender ■ Zum manuellen Speichern von digitalen Sendern. Digitaler Sender ist nur im DTV-Modus verfügbar. -
Seite 96: Senderliste
Standard → Ausführlich / Übersicht ❑ Mit der Taste gUiDE auf der Fernbedienung können Sie einstellen, ob der Ausführlich oder der Übersicht angezeigt werden soll. Senderliste ❑ Detaillierte Verfahrensbeschreibungen zur Verwendung der Senderliste entnehmen Sie den Beschreibungen unter Verwalten von Kanälen. Diese Optionen können Sie auch durch Drücken der Taste cH LiST (Kanalliste) auf der Fernbedienung aufrufen. -
Seite 97: Verwalten Von Kanälen
Verwalten von Kanälen ¦ Mit diesem Menübefehl können Sie Favoriten hinzufügen, löschen oder einstellen und den digitalen Programmführer für Digitalsendungen verwenden. 824 UKTV Gold Alle Sender 825 UKTV style ■ A 1 C -- Hiermit zeigen Sie alle verfügbaren Kanäle an. 2 C -- 3 C -- Hinzugefügte Sender ■ 4 C -- 5 C -- Hiermit zeigen Sie alle hinzugefügten Kanäle an. - Seite 98 Sperren / Freigabe ■ Sie können einen Kanal sperren, sodass er nicht ausgewählt und angezeigt werden kann. Diese Funktion ist nur verfügbar, wenn die Kindersicherung aktiviert ist (Ein). Der Eingabebildschirm für die PIN wird geöffnet. Geben Sie nun Ihre vierstellige PIN ein. Der Standard-PIN-Code eines neuen Fernsehgeräts lautet “0-0-0-0”.
-
Seite 99: Bild
Die im Betrieb verbrauchte Energiemenge geht deutlich zurück, wenn Sie die Helligkeit des Bildes reduzieren. Damit senken Sie die Betriebskosten. Erweiterte Einstellungen ❑ Bei den neuen Fernsehgeräten von Samsung können Sie die Bildeinstellungen noch genauer Erweiterte Einstellungen anpassen als mit den früheren Modellen. Schwarzton : Aus ▶... -
Seite 100: Weißabgleich
Farbraum ■ Der Farbraum ist eine Farbmatrix bestehend aus den Farben Rot, Grün und Blau. Wählen Sie Ihren bevorzugten Farbraum, um die Welt in den natürlichsten Farben zu erfahren. ● Auto: Bei automatischer Einstellung des Farbraums wird, je nach Programmquelle, der natürlichste Farbton eingestellt. ●... - Seite 101 größe ■ Gelegentlich möchten Sie vielleicht die Größe des auf Ihrem Monitor angezeigten Bilds ändern. Ihr Fernsehgerät bietet Ihnen unterschiedliche Bildformate, die jeweils für einen bestimmten Bildsignaltyp ideal geeignet sind. Möglicherweise verfügt auch Ihr Kabel- /Satellitenreceiver über eigene Bildschirmformate. Im Allgemeinen sollten Sie doch so viel wie möglich im 16:9-Format fernsehen. Drücken Sie die Taste TooLS, um das Menü...
-
Seite 102: Verwenden Der Bild-In-Bild-Funktion (Pip)
100Hz Motion Plus → Aus / Klar / Standard / Glätten / Benutzerd. / Demo ■ Beseitigt das Verschwimmen schneller Szenen mit viel Bewegung und sorgt für ein klareres Bild. Wenn Sie 100Hz Motion Plus aktivieren, kann es zu Bildrauschen auf dem Bildschirm kommen. In diesem Fall sollten Sie 100Hz Motion Plus deaktivieren (Aus). -
Seite 103: Verwenden Ihres Computers Als Computerbildschirm (Pc)
Version und verwendeter Grafikkarte möglicherweise nicht genau der Abbildung. Dennoch sind die hier nachfolgenden grundlegenden Konfigurationsinformationen in fast allen Fällen anwendbar. (Wenden Sie sich andernfalls an den Computerhersteller oder Samsung-Händler.) 1. Klicken Sie im Startmenü von Windows auf die Systemsteuerung. -
Seite 104: Fernsehgerät Mithilfe Des Pcs Einstellen
Fernsehgerät mithilfe des Pcs einstellen ¦ Voreinstellung: Drücken Sie die Taste SoUrcE, um den Modus „PC“einzustellen. Autom. Einstellung Helligkeit : 45 ❑ Schärfe : 50 Verwenden Sie die Funktion zum automatischen Einstellen, damit sich das Fernsehgerät Autom. Einstellung ▶ automatisch auf das empfangene Videosignal einstellt. PC-Bildschirm Bei dieser Funktion erfolgt auch automatisch eine Feineinstellung sowie die Anpassung der Erweiterte Einstellungen... -
Seite 105: Wiedergabesprache
wiedergabesprache ❑ Sie können die Standardsprache für Audio ändern. Zeigt die Sprachinformationen für den eingehenden Audiostream an. Während Sie ein digitales Programm anschauen, können Sie diese Funktion auswählen. Sie können nur Sprachen auswählen, die auch tatsächlich übertragen werden. Audioformat → MPEG / Dolby Digital ❑... -
Seite 106: Tonmodus Wählen
Tonmodus wählen ¦ Sie können den Tonwiedergabemodus im Menü Extras wählen. Wenn Sie Dual l ll einstellen, wird der aktuelle Tonwiedergabemodus auf dem Bildschirm abgebildet. Audiosystem Dual 1 / 2 Standard Mono Mono Automatischer Wechsel A2-Stereo STErEo ↔ Mono Stereo Dual DUAL 1 ↔... -
Seite 107: Common Interface
Teletextsprache ■ Sie können die Videotextsprache durch Auswählen des Sprachtyps einstellen. Englisch ist der Standardwert in Fällen, wo die ausgewählte Sprache für die Sendung nicht verfügbar ist. Benutzerdef. ■ ● Primäre wiedergabesprache / Sekundäre wiedergabesprache / Primäre Untertitelsprache / Sekundäre Untertitelsprache / Primäre Teletextsprache / Sekundäre Teletextsprache Mit dieser Funktion können Sie eine der verfügbaren Sprachen wählen. -
Seite 108: Allgemein
BD Wise → Aus / Ein ■ Ermöglicht optimale Bildqualität für SAMSUNG DVD, Blu-Ray und Heimkinoprodukte ein, die BD Wise unterstützen. Freuen Sie sich bei Anschluss dieser Geräte an das Fernsehgerät von Samsung auf ein detailreicheres Bild. Schließen Sie Geräte von Samsung, die über Bd Wise verfügen, mit Hilfe eines HDMI-Kabels an. -
Seite 109: Einstellen Der Uhrzeit
Einstellen der Uhrzeit ¦ ❑ Plug & Play Die Uhr muss eingestellt werden, damit Sie die verschiedenen Timerfunktionen des Sprache : Deutsch Fernsehgeräts verwenden können. Zeit ▶ Jedes Mal, wenn Sie die Taste inFo drücken, wird die aktuelle Zeit angezeigt. Sendungsoptionen Sicherheit Wenn Sie das Netzkabel ziehen, müssen Sie die Uhr erneut einstellen. Netzwerk Allgemein Uhr-Modus... -
Seite 110: Netzwerkverbindung
netzwerkverbindung ¦ Sie können das Internetprotokoll so konfigurieren, dass Sie mit verschiedenen angeschlossenen Netzwerken kommunizieren können. netzwerkverbindung - Kabel ❑ LAn-Verbindung für eine DHcP-Umgebung ■ Die Verfahren zum Einrichten des Netzwerks mithilfe von DHCP (Dynamic Host Configuration Protocol) werden nachfolgend beschrieben. -
Seite 111: Netzwerkverbindung - Drahtlos
Wenn der drahtlose IP-Sharer DHCP unterstützt, kann Ihr Fernsehgerät über DHCP oder über eine statische IP-Adresse mit dem Drahtlosnetzwerk verbunden werden. Der WLAN-Adapter von Samsung unterstützt IEEE 802.11A, IEEE 802.11B, IEEE 802.11G, IEEE 802.11N. Wenn Sie DLNA- Video über die IEEE 802.11B/G-Verbindung anzeigen, wird das Videobild möglicherweise nicht ohne Stockungen angezeigt. -
Seite 112: Konfigurieren Des Netzwerks
Die Internetverbindung kann auch aufgrund von Problemen mit der Firewall fehlschlagen. Setzen Sie sich in diesem Fall mit Ihrem Internetprovider in Verbindung. Wenn Sie selbst noch dann keine Internetverbindung aufbauen können, wenn Sie die Anweisungen Ihres Internet-Providers eingehalten haben, setzen Sie sich mit Samsung Electronics in Verbindung. Kabelnetzwerk einrichten-Auto Wenn Sie das Netzwerkkabel anschließen und DHCP wird unterstützt, werden die... -
Seite 113: Kabelnetzwerk Einrichten-Manuell
Fragen Sie in diesem Fall Ihren Internetprovider, auf welche Weise die Verbindung durch andere Geräte als Ihren PC (z. B. Ihr Fernsehgerät) hergestellt werden kann. Wenn Sie selbst noch dann keine Internetverbindung aufbauen können, wenn Sie die Anweisungen Ihres Internet-Providers eingehalten haben, setzen Sie sich mit Samsung Electronics in Verbindung. ●... -
Seite 114: So Stellen Sie Eine Verbindung Mit Einem Neuen Ad-Hoc
Wiederholen Sie den Versuch, wenn die Verbindung nicht hergestellt wird. • Ad-hoc: Mit dem WLAN-Adapter von Samsung können Sie die Verbindung zu einem Mobilgerät mit Hilfe eines Peer-to- Peer-Netzwerks auch ohne Zugriffspunkt herstellen. So stellen Sie eine Verbindung mit einem neuen Ad-hoc 1. -
Seite 115: Eingang / Unterstützung
Der Haftungsausschluss kann sich je nach Land unterscheiden. Eigendiagnose Software-Update HD-Anschlussplan Produktdemo Samsung kontaktieren ❑ Mit diesem Gerätehandbuch erhalten Sie Informationen zu den wichtigsten Funktionen dieses Fernsehgeräts. Die mit dieser Funktion zur Verfügung gestellten Beschreibungen liegen nur in englischer Sprache vor. - Seite 116 ● Ja: Wenn Sie den Ton beim Test nur durch einen Lautsprecher oder gar nicht hören, wählen Sie Ja. Möglicherweise liegt ein Problem mit dem Fernsehgerät vor. Hilfe erhalten Sie in diesem Fall beim beim Callcenter von Samsung. ● nein: Wenn Sie den Ton über die Lautsprecher hören können, wählen Sie nein. Möglicherweise liegt ein Problem mit Ihrer Haustechnik vor.
-
Seite 117: Software-Update
Möglicherweise wird Samsung in der Zukunft Upgrades der TV-Firmware anbieten. Diese Seitenverkleidung des Fernsehgeräts Upgrades können über das Fernsehen ausgeführt werden, sofern es an das Internet angeschlossen ist, oder durch Herunterladen der neuen Firmware von samsung.com auf ein USB-Speichergerät. Aktuelle Version, wenn die Software bereits im Fernsehgerät installiert ist. oder Alternative Software (Sicherung) zeigt die alte Version an, die ersetzt wird. -
Seite 118: Media Play (Usb & Dlna)
Ehe Sie Ihr Gerät an das Fernsehgerät anschließen, sichern Sie Ihre Dateien, Gerät R Zurück um eventuellem Datenverlust vorzubeugen. SAMSUNG haftet nicht für Verlust und Beschädigung von Daten. Schließen Sie eine USB-Festplatte an den dafür reservierten Anschluss an: USB1 (HDD). Wenn das angeschlossene Gerät allerdings eine hohe elektrische Leistung abfordert, kann USB1 (HDD) es möglicherweise nicht versorgen. -
Seite 119: Media Play Funktion
Media Play funktion ¦ Mit dieser Funktion können Sie auf einem USB-Speichermedium (MSC) gespeicherte Foto-, Musik und/oder Filmdateien anzeigen bzw. wiedergeben. Möglicherweise treten bei lizenzfreien Multimediadateien weniger Probleme auf. Starten des Modus Media Play (USB & DLnA). 851,86 MB/993,02 MB Frei 1. Drücken Sie die Taste MEnU. Wählen Sie durch Drücken der Tasten ▲ oder ▼ die Option Anwendung, und drücken Sie dann die Taste EnTErE. -
Seite 120: Sortieren Der Foto- / Musik- / Filmliste
5 Hilfe • Grüne Taste (Favoriten-Einst.): Ändert die Favoriteneinstellung für die gewählte Datei. Drücken Sie diese Taste so oft, bis der gewünschte Wert angezeigt wird. • Gelbe Taste (wählen): Hiermit wählen Sie eine Datei aus der Dateiliste aus. Die ausgewählten Dateien werden mit dem Symbolcgekennzeichnet. -
Seite 121: Optionsmenü Für Foto- / Musik- / Filmliste
optionsmenü für Foto- / Musik- / Filmliste ¦ 1. Drücken Sie die Taste MEDiA.P. Basisansicht Ordner Benutzerdef. 2. Wählen Sie durch Drücken der Tasten ◄ oder ► die Option Photo, Music oder Erstellung Farbe Movie, und drücken Sie dann die Taste EnTErE. 3. -
Seite 122: Optionsmenü Für Diashow / Musikwiedergabe / Filmwiedergabe
optionsmenü für Diashow / Musikwiedergabe / Filmwiedergabe ¦ 1. Während einer Diashow (oder beim Anzeigen eines Fotos) der bei der Wiedergabe von Musik oder eines Films drücken Sie die Taste TooLS, um die Option einzustellen. 2. Wählen Sie durch Drücken der Tasten ▲ oder ▼ die Option, und drücken Sie dann die Taste EnTErE. Bildeinstellungen / Toneinstellungen ❑... -
Seite 123: Anzeigen Eines Fotos Oder Einer Diashow
Anzeigen eines Fotos oder einer Diashow ¦ Anzeigen von Diashows Alle Dateien in der Dateiliste werden für die Diashow verwendet. Die Bilder werden nacheinander, beginnend mit der aktuell angezeigten Datei Farbe Benutzerdef. Erstellung Ordner Basisansicht angezeigt. Die Diashow wird entsprechend der Sortierreihenfolge in der Dateiliste ausgeführt. Diashow 5/15 Musikdateien können während der Diashow automatisch abgespielt werden, wenn... -
Seite 124: Wiedergeben Von Musik
wiedergeben von Musik ¦ wiedergeben einer Musikdatei 1. Drücken die Taste ▼, um den Dateilistenabschnitt zu wählen. ▶ 00:00:04 / 00:04:04 3/37 I Love You HaHaHa 2. Drücken Sie die Taste ◄ oder ►, um eine Musikdatei zu wählen, die abgespielt werden soll. 3. Drücken Sie die Taste ∂ (Wiedergabe)/EnTErE. Dieses Menü... -
Seite 125: Wiedergeben Einer Filmdatei
wiedergeben einer Filmdatei ¦ wiedergeben einer Filmdatei 1. Drücken die Taste ▼, um den Dateilistenabschnitt zu wählen. ▶ 00:00:01 / 00:05:30 3/37 ABC.avi 2. Wählen Sie mit den Tasten ◄ oder ► eine Filmdatei, die abgespielt werden soll. 3. Drücken Sie die Taste ∂ (Wiedergabe)/EnTErE. Die gewählte Datei wird wiedergegeben. -
Seite 126: Abspielen Einer Filmgruppe
regler für Videowiedergabe Taste Vorgang Wiedergeben / Anhalten der Filmdatei EnTErE Wiedergeben der Filmdatei ∂ Anhalten der Filmwiedergabe ∑ TooLS Hiermit führen Sie verschiedene Funktionen aus den Filmmenüs aus. Beenden des Wiedergabemodus und Rückkehr zur Filmliste. ∫ ◄ / ► Schneller Vor- oder Rücklauf durch den Film in Schritten. -
Seite 127: Verwenden Des Menüs Setup
Verwenden des Menüs Setup ¦ Mit dem Setup zeigen Sie die im Media Play-Menü vorgenommenen Benutzereinstellungen an. 851,86 MB/993,02 MB Frei 1. Drücken Sie die Taste MEDiA.P. SETUP 2. Wählen Sie durch Drücken der Tasten ◄ oder ► die Option Setup, und drücken Sie dann die Taste EnTErE. -
Seite 128: Media Play-Dlna
Teilnetzadresse des Fernsehgeräts und der IP-Adressen des PCs müssen übereinstimmen und nur der letzte Teil darf geändert werden. (z.B.: IP-Adresse: 123.456.789.**) 2. Schließen Sie den PC, auf dem das Programm Samsung Pc Share Manager installiert wird, über ein Netzwerkkabel an das externe Modem an. -
Seite 129: Verwenden Der Dlna-Anwendung
1. Starten Sie die Datei SETUP.EXE, die auf der zusammen mit dem Gerät gelieferten Programm-CD gespeichert ist. Sie können die Datei allerdings auch von www.samsung.com herunterladen. 2. Installieren Sie den SAMSUNG PC Share Manager (siehe nachfolgende Abbildungen). 3. Nach Abschluss der Installation wird auf dem Desktop das Symbol für den PC Share Manager angezeigt. -
Seite 130: Verwenden Der Dlna-Funktion
Bei manchen Containern wie ASF und MKV können Sie die Funktion zum Springen nicht verwenden. Divx DRM, Multi-Audio und eingebettete Beschriftung werden nicht unterstützt. Sie müssen Samsung PC Share Manager in der Firewall Ihres PCs freigeben. Die Funktionen zum Überspingen (Tasten ◄/►) oder die Pause-Funktion sind möglicherweise bei Verwendung der DLNA-Software anderer Hersteller nicht verfügbar. -
Seite 131: Anynet
Anynet + ? Bei Anynet + handelt es sich um eine Funktion, mit der Sie alle angeschlossenen Samsung-Geräte, die Anynet+ unterstützen, mit der Fernbedienung für Ihr Samsung-Fernsehgerät steuern können. Das Anynet + -System unterstützt nur Anynet + -fähige Samsung- Geräte. -
Seite 132: Einrichten Von Anynet
Einrichten von Anynet + ¦ Drücken Sie die Taste TooLS, um das Menü Extras anzuzeigen. Sie können das Anynet + -Menü auch durch Auswahl von Extras → Anynet + (HDMi-cEc) auswählen. Media Play (USB & DLNA) Anynet + (HDMI-CEC) Content Library Internet@TV Einstellungen ❑ Home Network Centre Anynet + (HDMI-CEC) →... -
Seite 133: Aufnahme
Die Anynet + -Funktionen sind für Geräte anderer Hersteller nicht verfügbar. Die Funktionen der Tasten π, μ können je nach Gerät unterschiedlich sein. Aufnahme ¦ Sie können Fernsehprogramme mit einem Samsung-Recorder aufnehmen. 1. Drücken Sie die Taste TooLS. Drücken Sie die Taste EnTErE, um Anynet + (HDMi- Fernsehen cEc) auszuwählen. -
Seite 134: Fehlerbehebung Für Anynet
Fehlerbehebung für Anynet + ¦ Problem Mögliche Lösung Anynet + funktioniert nicht. Überprüfen Sie, ob das Gerät Anynet + -tauglich ist. Das Anynet + -System unterstützt nur ● Anynet + -fähige Geräte. ● Schließen Sie nur einen Receiver (Heimkinosystem) an. Prüfen Sie, ob das Netzkabel des Anynet + -Geräts richtig angeschlossen ist. -
Seite 135: Content Library
Hiermit öffnen Sie verschiedene Rezepte, die Sie dann schrittweise befolgen können. Freuen Sie sich auf diese Inhalte, denn so erhalten Sie zahlreiche Anregungen für gutes Essen. Die Rezepte aus dem Abschnitt Kochen auf dem Samsung-Fernseher basieren auf den von Anness Publishing veröffentlichten Rezepten. -
Seite 136: Verwenden Des Management Der Inhalte
Entfernen Sie niemals den USB-Speicher, solange Daten gespeichert werden, da auf diese Weise Daten verloren gehen können. Herunterladen neuer Inhalte Neue bzw. andere als die eingebauten Inhalte können Sie kostenlos über die Website Samsung.com beziehen. Wenn Sie kostenpflichtige Inhalte herunterladen, benötigen Sie dafür die UDN-Nummer. Überprüfen Sie vor dem Herunterladen eines neuen Inhaltselements die UDN-Nummer. -
Seite 137: Erste Schritte Mit Internet@Tv
inTErnET@TV Bei Problemen mit einem Widget-Dienst wenden Sie sich an den Anbieter der Inhalte. Drücken Sie im Widget die grüne Taste, um Kontaktinformationen abzurufen, oder lesen Sie auf der Hilfe-Website, um Informationen über Dienstanbieter zu erhalten. Je nach Region wird möglicherweise nur Englisch als Sprache des Widget unterstützt. Diese Funktion wird, je nach Land, möglicherweise nicht unterstützt. - Seite 138 Bildschirmanzeige ❑ Verankerte Fenster ■ 1 Nun wird das Begrüßungsfenster mit Ihrem Profilnamen in der oberen Hallo John! rechten Ecke angezeigt. 5:15 AM Mo January 19th Viewport Snippet bearbeiten Warten Sie einen Augenblick, bis das Fenster geschlossen wird. 2 Im Begrüßungsbildschirm werden zwei Fernbedienungstasten hervorgehoben. Wenn Sie auf Ihrer Fernbedienung die blaue Taste (Viewport) drücken, wechelt die Anzeige zwischen Anzeigefenster und Overlay- Modus.
-
Seite 139: Bearbeiten Von Snippets Im Dock
Geräte zugänglich gemacht werden schließt Samsung daher insbesondere jede Verantwortung und Haftung aus, die durch eine Unterbrechung oder Aussetzung eines Inhalts oder eines Dienstes verursacht wird. Samsung ist für Kundendienst in Verbindung mit Inhalten oder Diensten weder verantwortlich noch haftbar. Alle Anfragen und Fragen zu den Inhalten oder Diensten sind unmittelbar gegenüber dem jeweiligen Service-Provider für diese Inhalte oder Dienste geltend zu... -
Seite 140: Verwenden Der Yahoo!®-Widget-Galerie
● Letzte widgets: Anzeigen der zuletzt hochgeladenen Widgets. NEWS HEADLINES ● yahoo!® widgets: Anzeigen der Widgets von Yahoo!®. ● Samsung widgets: Anzeigen der Widgets von Samsung. Weitere Kategorien: Anzeigen aller Widgets nach Kategorien. ● SEITE 1 VON 2 Top Stories Business Um ein Widget zu installieren, navigieren Sie zum Detailfenster und wählen Sie widget... -
Seite 141: Verwenden Des Wetter-Widget Von Yahoo
Verwenden des wetter-widget von yahoo!® ¦ Mit dem Wetter-Widget von Yahoo!® werden Sie über das Wetter bei Ihnen vor Ort und an WETTER einigen bevorzugten Standorten auf dem Laufenden gehalten. Der Inhalt wechselt je nach den 51° Sunnyvale Wetterbedingungen. Cloudy ●... -
Seite 142: Verwenden Des Flickr-Widget Von Yahoo
Verwenden des Flickr-widget von yahoo!® ¦ Mit dem Flickr-Widget erhalten Sie beim Fernsehen Zugriff auf die Fotos von Freunden und Verwandten. Genießen Sie Ihre Fotos gemeinsam mit Ihrer Familie in einer Diashow auf Ihrem Großbildschirm. ● Personalisieren Sie das Flickr-Widget durch Anmelden mit Ihrer Yahoo!-Kennung. anmelden. ●... -
Seite 143: Fehlerbehebung Für Internet@Tv
→ Produits → téléviseurs → medi@2.0 → Internet@TV Czech www.samsung.com → Produkty → televizory → medi@2.0 → Internet@TV Denmark www.samsung.com → Produkter → stue & soveværelse → medi@2.0 → Internet@TV Finland www.samsung.com → Tuotteet → kodinelektroniikka → medi@2.0 → Internet@TV France www.samsung.com →... -
Seite 144: Erste Schritte Mit Internet@Tv
Erste Schritte mit internet@TV ¦ internet@TV erhalten Sie über eine Netzwerkverbindung Zugriff auf die Widget-Dienste von SAMSUNG. Die Inhalte von Internet@TV richten sich nach dem Angebot der verschiedenen Anbieter. Sie erhalten mit dem internet@TV-Dienst Zugriff auf verschiedene Informationen wie beispielsweise von YouTube. -
Seite 145: Systemkonfiguration
Systemkonfiguration ❑ Ticker-Autostart, Tickeranzeigedauer werden je nach Land möglicherweise nicht unterstützt. Kennwort der Dienstsperre ändern. ■ Der Standard-PIN-Code eines neuen Fernsehgeräts lautet 0-0-0-0. Wenn Sie das Kennwort vergessen haben, drücken Sie die Fernbedienungstasten in der folgenden Reihenfolge, um das Kennwort auf 0-0-0-0 zurückzusetzen: PowEr (Aus) → MUTE → 8 → 2 → 4 → POWER (Ein). Dienstanzeigedauer ■... -
Seite 146: Fehlerbehebung Für Internet@Tv
→ Produits → téléviseurs → medi@2.0 → Internet@TV Czech www.samsung.com → Produkty → televizory → medi@2.0 → Internet@TV Denmark www.samsung.com → Produkter → stue & soveværelse → medi@2.0 → Internet@TV Finland www.samsung.com → Tuotteet → kodinelektroniikka → medi@2.0 → Internet@TV France www.samsung.com →... -
Seite 147: Home Network Centre
Sofern das Gerät die DLnA DMc (Digital Media controller)-Funktion unterstützt, ist die Home-Network-Center-Funktion verfügbar. Diese Funktion soll die Kompatibilität mit einem Samsung-Mobiltelefon sicherstellen, das zu einem späteren Zeitpunkt auf den Markt kommen soll. Weitere Informationen erhalten Sie unter www.samsung.com, oder wenden Sie sich an ein Samsung- Callcenter. -
Seite 148: Einrichten Des Home Network Centre
Einrichten des Home network centre ¦ Message / Medien ❑ Home Network Centre Hiermit zeigen Sie eine Liste der Mobiltelefone an, mit denen Sie die Nachrichten- oder Medienfunktion in Verbindung mit diesem Fernsehgerät verwenden können. Message 111-1234-5671 : Erlaubt Die Medienfunktion steht auch in anderen Mobilgeräten zur Verfügung, sofern Medien 111-1234-5672 : Erlaubt... -
Seite 149: Verwenden Der Medienfunktion
nachrichtenansicht Wenn eine neue Textnachricht (SMS) ankommt, während Sie fernsehen, wird das Alarmfenster geöffnet. Wenn Sie auf oK klicken, wird der Inhalt der Nachricht angezeigt. Sie können die Anzeigeeinstellungen für den Inhalt von Textnachrichten (SMS) auf dem Mobiltelefon konfigurieren. Anweisungen finden im Handbuch des Mobiltelefons. Manche Sonderzeichen werden möglicherweise als Leerzeichen oder unlesbar angezeigt. -
Seite 150: Empfehlungen
EMPFEHLUngEn Videotextfunktion ¦ Die meisten Fernsehsender bieten über Videotext Informationen an. Auf der Videotext-Indexseite finden Sie Verwendungshinweise zum Videotext. Darüber hinaus können Sie über die Tasten der Fernbedienung nach Bedarf verschiedene Optionen einstellen. Für die korrekte Anzeige von Videotextinformationen muss der Senderempfang einwandfrei sein. Andernfalls können Informationen unvollständig sein oder einige Seiten nicht angezeigt werden. -
Seite 151: Anbringen Des Standfußes
Die Videotextseiten sind in sechs Kategorien unterteilt: Sportergebnisse inhalt Gewählte Seitennummer Senderkennung Aktuelle Seitenzahl oder Suchhinweise Datum und Uhrzeit Text Statusinformation FASTEXT-Informationen Videotextinformationen sind oft auf mehrere, aufeinander folgende Seiten verteilt, die wie folgt aufgerufen werden können: • Eingabe der Seitennummer •... -
Seite 152: Lösen Des Standfußes
Lieferumfang der Wandhalterung enthalten sind. Lassen Sie sich beim Anbringen der Wandmontagehalterung von einem Techniker helfen. Samsung Electronics haftet nicht für Schäden an Gerät oder Personen, wenn die Montage vom Kunden selbst durchgeführt wird. Installieren Sie die Wandhalterung nicht bei angeschaltetem Fernsehgerät. Sie könnten dabei einen Stromschlag erhalten und sich verletzen. -
Seite 153: Absichern Des Einbaubereichs
Probleme mit dem Gerät auftreten. Stellen Sie das Gerät so auf, dass die in der Abbildung gezeigten Mindestabstände eingehalten werden. Verwenden Sie nur Teile von Samsung Electronics, wenn Sie einen Standfuß oder eine Wandhalterung einsetzen. • Wenn Sie Teile eines anderen Herstellers verwenden, kann es zu Problemen mit dem Gerät oder zu Verletzungen kommen, weil das Gerät herunterfällt. -
Seite 154: Fehlerbehebung: Vor Der Kontaktaufnahme Mit Dem Kundendienst
Fehlerbehebung: Vor der Kontaktaufnahme mit dem Kundendienst ¦ Kein Ton oder Bild Stellen Sie sicher, dass das Netzkabel an eine Steckdose angeschlossen ist. Stellen Sie sicher, dass Sie auf der Fernbedienung die Taste gedrückt haben. Überprüfen Sie die Einstellungen für Kontrast und Helligkeit. Überprüfen Sie die Lautstärke. -
Seite 155: Technische Daten
-20 °C bis 45 °C (-4 °F bis 113 °F) Luftfeuchtigkeit (Lagerung) 5 % bis 95 %, nicht kondensierend Drehbarer Fuß -20˚ ~ 20˚ (Links und rechts) Modellname LE40B650, LE40B651 LE46B650, LE46B651 LE40B652, LE40B653 LE46B652, LE46B653 Bildschirmgröße 40 Zoll 46 Zoll (Diagonal) Pc-Auflösung... -
Seite 296: Diagrammi A Blocch
Correct Disposal of This Product (Waste Electrical & Electronic Equipment) (Applicable in the European Union and other European countries with separate collection systems) This marking on the product, accessories or literature indicates that the product and its electronic accessories (e.g. charger, headset, USB cable) should not be disposed of with other household waste at the end of their working life. - Seite 300 Correct disposal of batteries in this product (Applicable in the European Union and other European countries with separate battery return systems.) This marking on the battery, manual or packaging indicates that the batteries in this product should not be disposed of with other household waste at the end of their working life.