Werbung
Quicklinks
QUICK START GUIDE | KURZANLEITUNG | GUIDE RAPIDE | GUIDA RAPIDA | GUÍA RÁPIDA
1
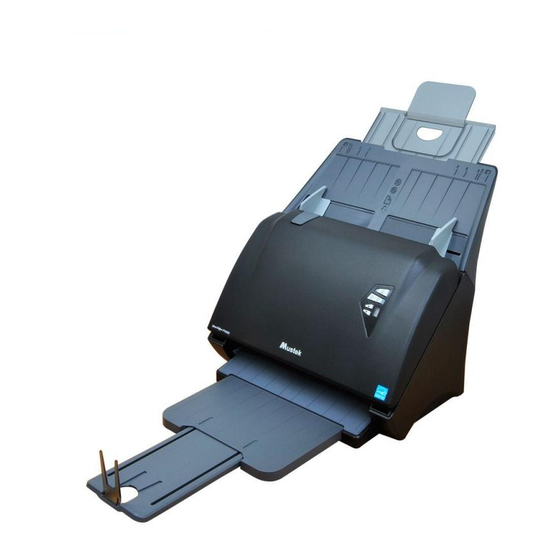
Unpack / Auspacken / Déballage / Disimballaggio / Contenido del paquete
2
1
7
6
5
NOTE: Remove all packaging and tapes from the the scanner before use.
HINWEIS: Entfernen Sie vor dem Einsatz des Scanners sämtliches
Verpackungsmaterial und sämtliche Klebebänder.
REMARQUE : Enlevez tous les emballages et adhésifs du scanner avant utilisation.
NOTA: rimuovere l'imballaggio e i nastri dallo scanner prima dell'uso.
NOTA: Quite todo el embalaje y las cintas del escáner antes de utilizar el producto.
3
Install the Software / Software installieren / Installation du programme / Installazione del software / Instalar el software
1
DO NOT connect computer yet.
NOCH NICHT an den Computer anschließen.
NE connectez PAS encore l'ordinateur.
NON collegare ancora il computer.
NO conecte su PC todavía.
Connect the Scanner / Scanner anschließen /
4
Connexion du scanneur / Collegamento dello
scanner / Conectar el escáner
Connect AC Adapter with Power Cord and the USB cable.
Schließen Sie Netzkabel und USB-Kabel an das Netzteil an.
Connectez d'adaptateur secteur avec le cordon d'alimentation et le câble USB.
Collegare l'adattatore CA con il cavo di alimentazione e il cavo USB.
Conecte el adaptador de CA al cable de alimentación y al cable USB.
System Requirements / Systemanforderungen
/ Configuration requise / Requisiti del sistema /
Requisitos del sistema
Computer with Intel Core Duo 2.4 GHz CPU or higher / SVGA color screen / 4GB
RAM or greater / USB 2.0 high-speed port / DVD-ROM drive / 5GB available hard disk
space for software installation / Supported operating systems: Windows XP, Vista, 7,
8, 8.1, and 10
Computer mit Intel Core Duo 2,4 GHz-Prozessor oder besser / SVGA-Farbbildschirm
/ 4 GB RAM oder mehr / USB 2.0, high-speed--Anschluss/ DVD-ROM-Laufwerk
/ 5 GB freier Festplattenspeicherplatz zur Softwareinstallation / Unterstützte
Betriebssysteme: Windows XP, Vista, 7, 8, 8.1 und 10
Un ordinateur avec processeur Intel Core Duo 2,4 GHz ou supérieur / Un écran SVGA
couleur / 4 Go de RAM ou plus / USB 2.0 haute vitesse le port / Un lecteur DVD-ROM /
5 Go d'espace libre sur votre disque dur pour l'installation du programme / Systèmes
d'exploitation pris en charge : Windows XP, Vista, 7, 8, 8.1 et 10
Computer con CPU Intel Core Duo 2,4 GHz o più potente / Schermo a colori SVGA
/ 4GB di RAM o superiore / Porta USB 2.0 ad alta velocità / Unità DVD-ROM / 5GB
di spazio libero su disco rigido per l'installazione del software / Sistemi operativi
supportati: Windows XP, Vista, 7, 8, 8.1 e 10
PC con CPU Intel Core Duo 2,4 GHz o superior / Pantalla a color SVGA / RAM de
4 GB o más grande / Puerto USB 2.0 de alta velocidad / Unidad de DVD-ROM / 5
GB de espacio disponible en disco duro para la instalación / Sistemas operativos
compatibles: Windows XP, Vista, 7, 8, 8.1 y 10
P1070 / P1060
1 Scanner / Scanner / Scanneur / Scanner / Escáner
3
2 Input Tray / Eingabefach / Bac à papier / Vassoio di ingresso
/ Bandeja de entrada
4
3 AC Adapter / Netzteil / Prise d'alimentation / Adattatore di
corrente / Adaptador de alimentación
4 Power Cord / Netzkabel / Cordon d'alimentation / Cavo di
alimentazione / Cable de alimentación
8
5 USB Cable / USB-Kabel / Câble USB / Cavo USB / Cable USB
6 Installation DVD / Installations-DVD / DVD d'installation /
DVD d'installazione / DVD de instalación
7 Calibration Sheet / Kalibrierungsblatt / Page de calibrage /
Foglio di calibratura / Hoja de calibración
8 Quick Start Guide / Kurzanleitung / Guide rapide / Guida
rapida / Guía rápida
2
Insert the Installation DVD into your DVD-ROM
drive.
Legen Sie die Installations-DVD in Ihr DVD-
Laufwerk ein.
Insérez le DVD d'installation dans votre lecteur
DVD-ROM.
Inserire il DVD d'installazione nell'unità DVD-
ROM.
Inserte el DVD de instalación en la unidad de
DVD-ROM.
5
1
Press the Power button to turn on the
scanner.
Drücken Sie zum Einschalten des
Scanners die Ein-/Aus Taste.
Appuyez sur la touche Alimentation pour
allumer le scanneur.
Premere il tasto Alimentazione per
accendere lo scanner.
Presione el botón Alimentación para
encender el escáner..
4
Click
change.
Drücken Sie
vordefinierten Scanauftrages.
Appuyez sur
numérisation prédéfinie.
Premere
scansione preimpostato.
Presione
digitalización predefinido.
ENGLISH • DEUTSCH • FRANÇAIS • ITALIANO • ESPAÑOL
Learn More
Mehr Zum Thema
En Apprendre Plus
Ulteriori Informazioni
Más Información
2
1
Align the Input Tray's tabs with slots and push down to snap into place.
Setzen Sie die Nasen am Eingabefach in die Schlitze ein, lassen Sie das Eingabefach
durch Hinabdrücken einrasten.
Alignez les ergots du bac à papier avec les fentes et encliquetez-le en position.
Allineare le linguette del vassoio di ingresso con le fessure e spingere per far scattare
in posizione.
Alinee las pestañas de la bandeja de entrada con las ranuras y empuje hacia abajo para
ajustarla en su lugar.
3
In the main menu, select "Scanner Driver".
Wählen Sie im Hauptmenü „Scannertreiber".
Dans le menu principal, sélectionnez « Pilote
du scanneur ».
Nel menu principale, selezionare "Driver
dello scanner".
En el menú principal, seleccione
"Controlador del escáner".
Scan Operation / Scanoperationen / Utilisation de la numérisation /
Operazioni di scansione / Operaciones de digitalización
2
Load the paper stack in the Inpt Tray.
Legen Sie den Papierstapel in das
Eingabefach ein.
Chargez la pile de papier dans le bac à
papier.
Caricare la pila di carta nel vassoio di
ingresso.
Cargue la pila de papel en la bandeja de
entrada.
5
Press
/
to open the Job Setting dialog to
Drücken Sie
zur Auswahl eines
vordefinierten Scanauftrages.
Appuyez sur
pour choisir une tâche de
de numérisation prédéfinie.
Premere
per selezionare un lavoro di
scansione preimpostato.
Presione
para seleccionar un trabajo de
de digitalización predefinido.
2
1
Assemble the Scanner / Scanner montieren
/ Assemblez le scanner / Montaggio rello
scanner / Ensamblar el escáner
2
4
Select "English", then follow on-screen instructions to complete
installation.
Wählen Sie "Deutsch", befolgen Sie dann zum Abschließen der Installation
die Bildschirmanweisungen.
Sélectionner "Français", puis suivez les instructions à l'écran pour
terminer l'installation.
Selezionare "Italiano", quindi seguire le istruzioni su schermo per
completare l'installazione.
Seleccione "Español", a continuación, siga las instrucciones de la pantalla
para completar la instalación.
3
Click
to open iDocScan Touch.
Sie zum Öffnen von iDocScan Touch auf
.
Cliquez sur
Touch.
Fare clic su
Touch.
Haga clic en
Touch.
6
to select a preset scan job.
Press
/
zur Auswahl eines
Klicken Sie zum Starten des Scans auf
die
-Schaltfläche.
/
pour choisir une tâche
Appuyez sur la touche
commencer à numériser.
/
per selezionare un lavoro di
Premere il tasto
scansione.
/
para seleccionar un trabajo
Presione
digitalización.
pour ouvrir iDocScan
per aprire iDocScan
para abrir iDocScan
to start scanning.
pour
per avviare la
para iniciar la
PN:82-371-00120
Werbung

Verwandte Anleitungen für Mustek iDocScan P1070

Inhaltszusammenfassung für Mustek iDocScan P1070
- Seite 1 ENGLISH • DEUTSCH • FRANÇAIS • ITALIANO • ESPAÑOL P1070 / P1060 Learn More Mehr Zum Thema En Apprendre Plus Ulteriori Informazioni QUICK START GUIDE | KURZANLEITUNG | GUIDE RAPIDE | GUIDA RAPIDA | GUÍA RÁPIDA Más Información Assemble the Scanner / Scanner montieren Unpack / Auspacken / Déballage / Disimballaggio / Contenido del paquete / Assemblez le scanner / Montaggio rello scanner / Ensamblar el escáner...
- Seite 2 РУССКИЙ • POLSKI • TÜRKÇE • 한국어 • 日本語 P1070 / P1060 Подробности Więcej Informacji Daha Fazla Bilgi Al КРАТКОЕ РУКОВОДСТВО | SKRÓCONA INSTRUKCJA OBSŁUGI | HIZLI BAŞLANGIÇ KILAVUZU | 퀵 스타트 가이드 | クイックガイド 자세히 보기 詳細 Сборка сканера / Złóż wszystkie elementy Распаковка...