Herunterladen Inhalt Inhalt Diese Seite drucken

Werbung

Verfügbare Sprachen
  • DE

Verfügbare Sprachen

  • DEUTSCH, seite 16

Werbung

Inhaltsverzeichnis
loading

Inhaltszusammenfassung für Zibro R 316 C

  • Seite 1: Inhaltsverzeichnis

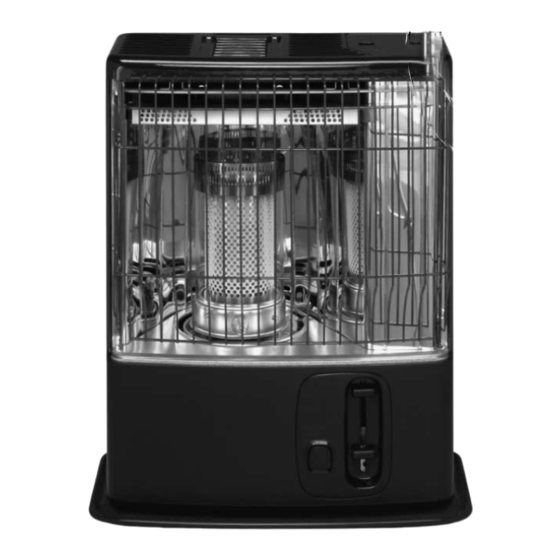
    ® R 316 C MANUEL D'UTILISATION GEBRAUCHSANWEISUNG INSTRUCCIONES DE USO OPERATING INSTRUCTIONS > ISTRUZIONI D’USO GEBRUIKSAANWIJZING...
  • Seite 2: Conseils D'utilisation Et D'entretien

    Si une difficulté subsistait, vous pouvez écrire au LNE LABORATOIRE NATIONAL D’ESSAIS LABORATOIRE NATIONAL D’ESSAIS Service Certification et Conformité Technique Service Certification et Conformité Technique 1, Rue Gaston Boisier - 75724 PARIS CEDEX 15 1, Rue Gaston Boisier - 75724 PARIS CEDEX 15 R 316 C...
  • Seite 3 Si une difficulté subsistait, vous pouvez écrire au LNE LABORATOIRE NATIONAL D’ESSAIS LABORATOIRE NATIONAL D’ESSAIS Service Certification et Conformité Technique Service Certification et Conformité Technique 1, Rue Gaston Boisier - 75724 PARIS CEDEX 15 1, Rue Gaston Boisier - 75724 PARIS CEDEX 15 R 316 C...
  • Seite 4 Chère Madame, Cher Monsieur, Nous vous remercions de la confiance que vous avez bien voulu témoigner à notre marque en choisissant un convecteur à pétrole Zibro Kamin. Vous venez d'acquérir un produit de qualité, qui vous donnera entière satisfaction durant de très nombreuses années.
  • Seite 5 Le combustible vieillit. Utilisez à chaque début saison chauffage nouveau combustible. • Si vous chauffez au Zibro Plus vous êtes assurés d'avoir un combustible de bonne qualité et conforme à l'arrêté du 8/1/1998 relatif aux caractéristiques du combustible liquide pour appareils mobiles de chauffage. •...
  • Seite 6: Ce Que Vous Devez Savoir Au Préalable

    LE COMBUSTIBLE APPROPRIÉ Votre convecteur a été conçu pour fonctionner avec du pétrole pur, de haute qualité et dénué d'eau, comme Zibro Plus Extra et Zibro Plus Kristal. Seuls ces combustibles vous assureront une combustion propre et optimale. Un combustible de moins bonne qualité...
  • Seite 7: Manuel D'utilisation

    Prenez la pompe à main et introduisez le tuyau rigide dans le bidon. Veillez à ce que ce dernier soit plus haut que le réservoir amovible (fig. H). Introduisez le tuyau flexible dans l'orifice du réservoir amovible. R 316 C...
  • Seite 8 Une flamme trop haute peut provoquer la formation de fumée et de suie alors qu'une flamme trop basse entraîne la formation d'odeur et d'usure de la mèche. Les hauteurs maximales et minimales autorisées pour votre flamme sont indiquées (fig. M). R 316 C...
  • Seite 9 Voir les instructions du chapitre D et consulter votre revendeur. Vous utilisez un combustible usagé. Commencez chaque saison froide avec un combustible neuf. Vous utilisez un combustible inadapté. Voir LE COMBUSTIBLE APPROPRIÉ. De la poussière s’est accumulée en dessous du convecteur. Consultez votre revendeur. R 316 C...
  • Seite 10 (fig. K). Ayez un chiffon à portée de main pour essuyer le combustible Le filtre restant. Retirez le filtre à combustible et nettoyez-le avec du pétrole ou à l'aide combustible d'une soufflette (ne nettoyez jamais à l'eau!) Remettez le filtre à combustible en place dans le convecteur. R 316 C...
  • Seite 11: Transport

    Conservez le filtre et le réservoir amovible indépendamment du convecteur. Mettez le bouchon de transport à la place du filtre à combustible (fig. L) et enfoncez-le bien. Transportez le convecteur toujours en position verticale. bouchon de transport R 316 C...
  • Seite 12: Conditions De Garantie

    Les pièces sujettes à l'usure normale, comme la mêche, l’allumeur et la pompe à main ne sont pas couverts par la garantie. La garantie s'applique uniquement si vous présentez le bon d'achat d'origine, daté et ne portant pas de modifications. R 316 C...
  • Seite 13 être présents. Le plateau supérieur et la grille devant deviennent chauds. Le poêle ne doit jamais être couvert (risque d’incendie). Il faut éviter tout contact avec le plateau supérieur et la grille. Aérez toujours suffisamment. R 316 C...
  • Seite 14 élevée. Tournez l’anneau-mèche (avec la mèche) le plus possible dans le sens inverse des aiguilles d'une montre jusqu'à ce qu'il se détache puis dégagez-le du convecteur. Retirez la mèche de l’anneau-mèche. R 316 C...
  • Seite 15 1 1 8 8 Placez les piles dans le logement de piles (faites attention aux pôles + et -). Après avoir placé le réservoir amovible et les piles, vous devez attendre 1 heure avant d'allumer le convecteur. R 316 C...
  • Seite 16 Sehr geehrte Kundin, sehr geehrter Kunde, herzlichen Glückwunsch! Sie sind jetzt der stolze Besitzer eines Zibro Kamins, der Top-Marke für transportable Kaminofen. Sie haben sich für ein absolutes Qualitätsprodukt entschieden, an dem Sie noch viele Jahre Ihre Freude haben werden, vorausgesetzt, Sie benutzen den Kaminofen verantwortungsvoll.
  • Seite 17: Benutzung Kurz Zusammengefasst

    Ort. • Brennstoff altert. Beginnen Sie jede Heizsaison mit neuem Brennstoff. • Wenn Sie Zibro Plus benutzen, können Sie sich auf die Qualität des Brennstoffs verlassen. • Wenn Sie zwischen den einzelnen Sorten wechseln, müssen Sie den Kaminofen erst voll- ständig leer brennen lassen.
  • Seite 18: Wichtig Zu Wissen

    Berühren Sie die Oberseite und das Gitter nicht. DER RICHTIGE BRENNSTOFF Ihr Kaminofen wurde für die Benutzung von wasserfreiem, sauberem Petroleum hoher Qualität, wie Zibro Plus, entwickelt. Nur dieser Brennstoff sorgt für eine saubere und optimale Verbrennung. Brennstoff geringerer Qualität kann zu folgenden Problemen führen: übermäßige Ablagerung auf dem Docht...
  • Seite 19: Gebrauchsanweisung

    Tankverschluß mit Hilfe des Tankdeckelöffners auf (Abb. G1). Den glatten, steifen Schlauch der Syphonpumpe in den Kanister stecken. Das Befüllen ist einfacher, wenn der Kanister höher als der Brennstofftank steht (Abb. H). Den geriffelten Schlauch stecken Sie dann in die Öffnung des Brennstofftanks. R 316 C...
  • Seite 20 Sie den Tankverschluß mit Hilfe des Tankdeckelöffners wieder sorgfältig auf den Tank. Nach Gebrauch können Sie den Tankdeckelöffner wieder an der Rückseite des Zibro Kamins befestigen. Wischen Sie eventuell verschütteten Brennstoff weg. Kontrollieren Sie, ob der Tankverschluß gerade sitzt und fest angezogen ist.
  • Seite 21 Mit dem Handgriff ¿ die Brennkammer richtig einsetzen, bis sie sich mühelos etwas nach links und rechts verschieben läßt. Die Flammenhöhe ist nicht richtig. Siehe Kapitel D und fragen Sie Ihren Vertragshändler. Sie benutzen veralteten Brennstoff. Fangen Sie jede neue Heizsaison mit neuem und richtigem Brennstoff an. R 316 C...
  • Seite 22 Zeit zu Zeit vollständig leer brennen lassen (bis er von selbst ausgeht). Tun Sie dies, sobald Sie merken, daß die Flamme etwas schwächer wird. Da dieser Vorgang etwas Geruch verursacht, empfehlen wir Ihnen, dies außerhalb des Wohnbereiches zu tun. R 316 C...
  • Seite 23: Die Elektrische Zündung

    Brennstoff gemäß den Vorschriften, die in Ihrer Gemeinde für chemische Kleinabfälle gelten. Beginnen Sie jede neue Heizsaison immer mit neuem Brennstoff. Beachten Sie wieder die Gebrauchsanweisung (wie beschrieben ab Kapitel A), wenn Sie den Kaminofen erneut in Betrieb nehmen. R 316 C...
  • Seite 24: Garantiebedingungen

    Teile, die normalem Verschleiß ausgesetzt sind, wie die elektrische Zündung, der Docht und die Syphonpumpe, fallen nicht unter die Garantie. Die Garantie gilt ausschließlich unter Vorlage der datierten Originalrechnung, auf der keine Veränderungen vorgenommen wurden. R 316 C...
  • Seite 25 Gase oder Dämpfe auftreten könnten (zum Beispiel Auspuffgase oder Farbdämpfe). Die Oberseite des Ofens wird heiß. Der Ofen darf nicht abgedeckt werden (Feuergefahr). Berühren Sie die Oberseite und das Gitter nicht. Achten Sie immer auf ausreichende Ventilation. R 316 C...
  • Seite 26: Das Wechseln Des Dochtes

    Den unteren Schieber nach unten drücken, so dass sich der Dochtmechanismus in seine höchste Position bewegt. Den Dochthalter (mit Docht) so weit nach links drehen, bis er sich löst und anschließend aus dem Ofen nehmen. Den Docht aus dem Dochthalter nehmen. R 316 C...
  • Seite 27 1 1 8 8 Die Batterien in das Batteriefach einlegen (achten Sie dabei auf die + und – Pole). Nach dem Einsetzen des Brennstofftanks und der Batterien müssen Sie 30 Minuten warten, bevor Sie den Ofen starten. R 316 C...
  • Seite 28: Instrucciones De Uso

    Estimado Cliente: Le felicitamos por la compra de su Zibro Kamin, la primera marca de estufas portátiles. Usted acaba de comprar un producto de calidad absoluta, que le dará plena satisfacción durante muchos años, a condición de que lo utilice debidamente.
  • Seite 29 Alojamiento de pilas • El combustible envejece. Comience cada otoño con nuevo combustible. • Si Usted utiliza Zibro Plus, tiene la seguridad de hacer combustible apropiado. aconsejamos Zibro Plus por su alta calidad constante en todas y cada una de sus garrafas.
  • Seite 30 EL COMBUSTIBLE APROPIADO Su estufa está diseñada para quemar parafina líquida (combustible especial para estufas), de alta calidad y sin agua, como lo es Zibro Plus. Solamente este combustible asegura una combustión limpia y completa: Un combustible de calidad inferior puede conducir a: El tapón ”manos...
  • Seite 31 Abra la tapa ¶ y extraiga el depósito extraíble º de la estufa (fig. G). Atención: el depósito puede gotear algo. Ponga el depósito extraíble en el suelo (tapón hacia arriba) y desenrosque con el tapón ”manos limpias” (fig. G1). R 316 C...
  • Seite 32 Baje las dos palancas de encendido · cuidadosamente (fig. J). Al mismo tiempo se accionará la seguridad. En cuanto vea una pequeña llama en el fondo de la cámara de combustión », suelte las palancas. La palanca superior saltará. R 316 C...
  • Seite 33 Después de colocar el depósito extraíble lleno, esperar 30 minutos para encender la estufa. Usted baja las palancas de encendido · con demasiada fuerza. Oprimir con menos fuerza (capítulo C). La resistencia de encendido ¾ está averiada. Resistencia con filamento partido Consulte a su distribuidor. R 316 C...
  • Seite 34 Su estufa requiere poco mantenimiento. Lo que sí es importante es que quite el polvo y las manchas a tiempo con un paño húmedo, ya que si no podrían formarse manchas permanentes. Normalmente, tan solo dos siguientes piezas están sometidas a desgaste: R 316 C...
  • Seite 35: Filtro Del Combustible

    Pequeños Residuos Químicos. En cualquier caso, comience el próximo invierno con combustible nuevo. Cuando vuelva a usar la estufa, siga de nuevo las instrucciones (a partir del capítulo A). R 316 C...
  • Seite 36: Condiciones De Garantia

    La reparación o el recambio de piezas efectuado dentro del período de garantía no da lugar a una prórroga de la misma. La garantía no se aplicará en los casos que: se hayan realizado modificaciones; se hayan montado piezas no originales; reparaciones efectuadas por terceros. R 316 C...
  • Seite 37 * Los materiales muy inflamables - no es el caso del Zibro Plus -, pueden conducir, por ejemplo, a una combustión incontrolable, resultando en un incendio. En tal caso, no intente transportar la estufa, apáguela inmediatamente (vea capítulo E).
  • Seite 38 Oprima la varilla inferior hacia abajo para que el mecanismo de la mecha vaya a su posición superior. Gire el portador (con la mecha) a la izquierdas hasta que quede suelto y extráigalo de la estufa. Saque la mecha de su alojamiento. R 316 C...
  • Seite 39 1 1 8 8 Coloque de nuevo el depósito extraíble lleno. Inserte las pilas en su alojamiento (Observe los polos + y -). Después de colocar el depósito extraíble y las pilas, espere 30 minutos para encender la estufa. R 316 C...
  • Seite 40 Dear Sir, Madam, Congratulations on your purchase of this Zibro Kamin heater, the number one brand amongst portable heaters. You have purchased a quality product, which will serve you for many years to come. This, of course, provided you use the heater correctly.
  • Seite 41: General Directions For Use

    • The right quality of fuel will be assured, when you use Zibro Plus for your heater. • If you change to another brand and/or type of paraffin oil, you must first finish up all the remaining fuel in the heater.
  • Seite 42: What You Need To Know In Advance

    Only use Class C1 paraffin fuel in accordance with BS2869 Part two, or equivalent. Your heater has been designed for use with high-quality water-free pure paraffin oil, such as Zibro Plus. Only fuels of this kind will ensure clean and proper burning. Lower quality fuel may result in:...
  • Seite 43: Installing The Heater

    Open the lid ¶ and lift the removable tank º out of the heater (Fig. G). Note: Some drops may leak from the tank. Put down the removable tank (cap pointing upwards) and screw off the fuel cap using the fuel cap cover (Fig. G1). R 316 C...
  • Seite 44 Push down both slide controls · at the same time (fig. J). This will also activate the safety device. As soon as you can see a small flame in the combustion chamber », you can let go of the controls. The upper slide control will return to the original position. R 316 C...
  • Seite 45 After having refilled and replaced the removable tank, wait for 30 minutes before igniting the heater. You are pushing down the slide controls · with too much force. Push them down less forcefully (Section C). The ignition coil ¾ is defective. Contact your dealer. broken ignition coil R 316 C...
  • Seite 46 Your heater needs hardly any maintenance. It is, however, important that you remove dust and stains in time with a damp cloth, because otherwise these may cause stains that are hard to remove. Under normal conditions, only two components are subject to wear: R 316 C...
  • Seite 47 Always start the new heating season with fresh fuel. When you start re-using the heater, follow the instructions again (starting from Section A and as specified). R 316 C...
  • Seite 48: Warranty Provisions

    Any repairs or replacements of components within the term of warranty will not result in an extension of the term of warranty. The warranty will no longer apply, when the heater has been modified, non-original parts have been used, or when it is repaired by third parties. R 316 C...
  • Seite 49 (e.g. exhaust gasses or paint fumes). The top plate of the heater becomes hot. Do not cover the heater (there is a risk of fire). Avoid any concact with the top plate and grille. Always make sure that there is sufficient ventilation. R 316 C...
  • Seite 50 Push the lowest slide down to adjust the wick mechanism to its highest setting. Turn the wick holder (with wick) to the left until it is released and then remove it from the heater. Remove the wick from the wick holder. R 316 C...
  • Seite 51 Put the batteries into the battery holder (ensure that the positive and negative poles match the + and – marks indicated on the battery housing). Wait 30 minutes after placing the removable tank and batteries before using the heater. R 316 C...
  • Seite 52 Egregio Signore, Gentile Signora, Ci congratuliamo con Lei per l'acquisto di una Zibro Kamin, il marchio principale fra le stufe portatili. Lei ha acquistato un prodotto di qualità, da cui trarrà grande soddisfazione per molti anni, naturalmente sempre a patto che Lei adoperi la stufa in modo corretto.
  • Seite 53: Componenti Principali

    Cominciare ogni stagione fredda con nuovo combustibile. • Quando si fa uso di Zibro Plus, si è sicuri di utilizzare combustibile di qualità. • Se si passa ad un’altra marca o tipo di petrolio, fare bruciare dapprima la stufa fino a che non vi è...
  • Seite 54: Osservazioni Generali

    IL COMBUSTIBILE GIUSTO La stufa portatile è stata progettata per l’uso di un petrolio di alta qualità, puro, senza acqua, come Zibro Plus, che assicura una combustione pulita ed ottimale. Un combustibile di qualità inferiore può causare i seguenti problemi:...
  • Seite 55: Istruzioni D'uso

    Aprire lo sportellino ¶ ed estrarre il serbatoio º dalla stufa (fig. G). Attenzione: il serbatoio può rilasciare qualche goccia. Appoggiare detto serbatoio (con il tappo in alto) e svitare il tappo con l’ausilio del relativo cappuccio (fig. G1). > R 316 C...
  • Seite 56: Accensione Della Stufa

    Premete leggermente i tasti di accensione · verso il basso. (fig. J) In tal modo si inserirà anche il sistema di sicurezza antiribaltamento. Non appena scaturirà la fiamma nella camera di combustione », rilasciate il tasto d’accensione. Dopo il tasto superiore ritornerà nella posizione originale. > R 316 C...
  • Seite 57: Spegnimento Della Stufa

    Dopo aver installato il serbatoio estraibile pieno, attendere 30 minuti prima di procedere all’accensione. I tasti di accensione · vengono premuti troppo energicamente verso il basso. Premere con meno forza (capitolo C). La resistenza ¾ è difettosa. resistenza interrotta Consultare il rivenditore. > R 316 C...
  • Seite 58 LA MANUTENZIONE La stufa richiede una manutenzione minima. Tuttavia, occorre eliminare periodicamente polvere e sporco con un panno umido, onde evitare la formazione di macchie difficili da rimuovere. Normalmente sono solo due le parti che si consumano. > R 316 C...
  • Seite 59 Lasciare raffreddare la stufa. Pulire la stufa con un panno umido ed asciugarla con un panno asciutto. Togliere le batterie dalla stufa µ e conservarle in un luogo asciutto. Pulire il filtro (cfr. capitolo G). > R 316 C...
  • Seite 60: Jspecifiche

    La PVG International rifiuta esplicitamente tutti gli accordi relativi a rimborso dei danni, compreso il rimborso di danni sorti in seguito a guasti. La riparazione o la sostituzione delle parti entro il termine di garanzia non implica un prolungamento della garanzia stessa. > R 316 C...
  • Seite 61 (ad esempio, gas di scarico o vapori di vernici). 9 La parte superiore della stufa diventa molto calda. La stufa non può essere coperto (pericolo d’incendio). Evitare ogni contatto con il tettuccio e la griglia. 10 Assicurarsi sempre che la ventilazione sia sufficiente. > R 316 C...
  • Seite 62 Premere verso il basso la levetta inferiore, in modo che il meccanismo dello stoppino si trovi nella posizione più alta. Ruotare verso sinistra l’anello porta-stoppino (con lo stoppino) fino a che i suoi perni non si sganciano dalla loro sede. Rimuovere lo stoppino dall’anello porta-stoppino. > R 316 C...
  • Seite 63 Rimettere al suo posto il serbatoio pieno. 1 1 7 7 1 1 8 8 Inserire le batterie nell’apposito vano (fare attenzione ai poli + e -), dopodiché aspettare 30 minuti prima di riaccendere la stufa. > R 316 C...
  • Seite 64 Geachte mevrouw, meneer, Van harte gefeliciteerd met de aankoop van uw Zibro Kamin, het A-merk onder verplaatsbare kachels. U hebt een kwaliteitsproduct aangeschaft, waar u nog vele, vele jaren plezier van zult hebben, mits u de kachel verantwoord gebruikt natuurlijk. Lees daarom eerst deze gebruiksaanwijzing, voor een optimale levensduur van uw kachel.
  • Seite 65: Het Gebruik In Hoofdlijnen

    • Brandstof veroudert. Begin elk stookseizoen met nieuwe brandstof. • Wanneer u stookt met Zibro Plus, bent u verzekerd van de juiste kwaliteit brandstof. • Indien u overgaat op een ander merk en/of soort kerosine, moet u de kachel eerst helemaal laten leegbranden.
  • Seite 66: De Juiste Brandstof

    DE JUISTE BRANDSTOF kachel. Uw kachel is ontworpen voor het gebruik van watervrije, zuivere kerosine van hoge kwaliteit, zoals Zibro Plus. Alleen deze zorgt voor een schone en optimale verbranding. Brandstof van mindere kwaliteit kan leiden tot: overmatige teeraanslag op de kous...
  • Seite 67: Gebruiksaanwijzing

    Open het deksel ¶ en til de wisseltank º uit de kachel (fig. G). Let op: de tank kan even nadruppelen. Zet de wisseltank neer (dop naar boven) en schroef de tankdop eraf met behulp van de tankdop-opener (fig. G1). R 316 C...
  • Seite 68 Duw de beide ontstekingsschuiven · tegelijk rustig naar beneden (fig. J). Zo zet u tevens de beveiliging in werking. Zodra u een vlammetje ziet onder in de verbrandingskamer », kunt u de schuiven weer loslaten. De bovenste zal hierna opveren. R 316 C...
  • Seite 69: Storingen, Oorzaken En Oplossingen

    Na het plaatsen van de gevulde wisseltank 30 minuten wachten met ontsteken. U duwt de ontstekingsschuiven · te krachtig naar beneden. Minder hard indrukken (hoofdstuk C). De ontstekingsspiraal ¾ is defect. ontstekingsspiraal met Raadpleeg uw dealer. gebroken gloeidraad R 316 C...
  • Seite 70 Uw kachel vergt weinig onderhoud. Wel dient u stof en vlekken bijtijds af te nemen met een vochtige doek, omdat er anders hardnekkige vlekken kunnen ont- staan. Normaal gesproken zijn er slechts twee onderdelen aan slijtage onderhevig: R 316 C...
  • Seite 71 Klein Chemisch Afval. Begin het nieuwe stookseizoen in elk geval met nieuwe brandstof. Als u de kachel opnieuw in gebruik neemt, volg dan weer de instructies (zoals aangegeven vanaf hoofdstuk A). R 316 C...
  • Seite 72 Reparatie of vervanging van onderdelen binnen de garantietermijn leidt niet tot verlenging van de garantie. De garantie geldt niet wanneer veranderingen zijn aangebracht, niet- originele onderdelen zijn gemonteerd of reparaties aan de kachel zijn verricht door derden. R 316 C...
  • Seite 73 (bv. uitlaatgassen of verfdampen). 9 De bovenzijde van de kachel wordt heet. De kachel mag niet afgedekt worden (brandgevaar). Vermijd elk contact met de bovenplaat en de grille. 10 Zorg altijd voor voldoende ventilatie. R 316 C...
  • Seite 74 Druk de onderste schuif omlaag zodat het kous- mechanisme in de hoogste stand komt. Draai de koushouder (met kous) zover naar links totdat deze loskomt en haal hem uit de kachel. Haal de kous uit de koushouder. R 316 C...
  • Seite 75 1 1 7 7 1 1 8 8 Plaats de batterijen in de batterijhouder (let op de plus en min). Na het plaatsen van de wisseltank en de batterijen, moet u 30 minuten wachten voordat u de kachel aanmaakt. R 316 C...
  • Seite 76 ✗ ✓ ✗ 1-3 cm.
  • Seite 77 º ¶ ´ ² » ¿ ¾ µ ³ ·...
  • Seite 78 Holloway Bank, Wednesbury tel: +43 7434 44867 West Midlands WS10 0AW fax: +43 7434 44868 Tel.: +44 121 506 1818 email: pvgaustria@zibro.com Fax: +44 121 505 1744 email: gases@lister.co.uk e BELGIË > ITALIA PVG Belgium NV/SA Industrielaan 55 PVG Italy SRL 2900 SCHOTEN Via Niccolò...

Inhaltsverzeichnis