Synology DS107+ Kurzinstallationsanleitung
Festplattenstation
Vorschau ausblenden
Andere Handbücher für DS107+:
- Benutzerhandbuch (65 Seiten) ,
- Installationsanleitung (80 Seiten)
Inhaltsverzeichnis

Verwandte Anleitungen für Synology DS107+


Inhaltszusammenfassung für Synology DS107+
- Seite 1 Disk Station DS107+, DS107, DS108j Kurz-Installationsanleitung...
-
Seite 2: Sicherheitsanweisungen
Bitte lesen Sie vor der ersten Anwendung des Systems diese Sicherheitshinweise und bewahren Sie diese Anleitung für spätere Bezugnahme auf. Schützen Sie das Stellen Sie das Platzieren Sie das Synology-Produkt vor Synology-Produkt Synology-Produkt nicht direkter aufrecht auf. Legen Sie in der Nähe von Sonneneinstrahlung und es nicht horizontal hin. -
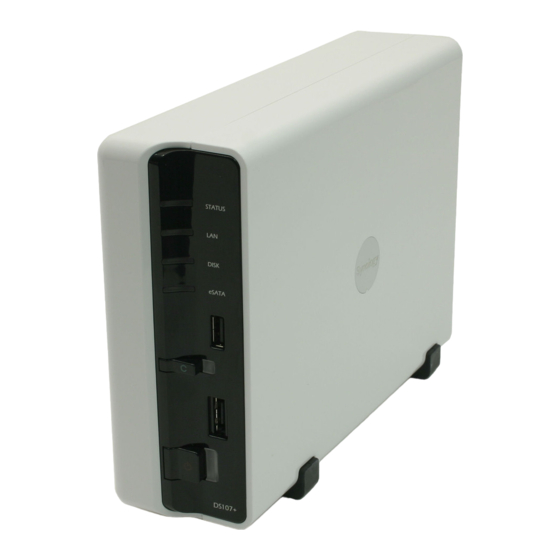
Seite 3: Inhalt Des Kartons
2M RJ-45 LAN-Kabel Stromkabel Montagekit Schrauben zur Schrauben zur SATA-Fest- Stromversor- Befestigung Befestigung plattenkabel* gungskabel für der Festplatte des Synology- Festplatte* x 6 (1 Ersatz- Gehäuses x 3 schraube) (1 Ersatz- schraube) * Ist bei kabellosen Modellen nicht im Lieferumfang mit inbegriffen. -
Seite 4: Einbau Der Festplatte
EINBAU DER FESTPLATTE Um den Server in Betrieb zu nehmen benötigen Sie eine 3,5” SATA-Festplatte. In mehreren, bebilderten Schritten wird der leichte Einbau gezeigt. Warnung! Wenn Sie zur Installation eine Festplatte verwenden, die bereits Daten enthält, werden diese gelöscht, da das System die Festplatte neu formatiert. - Seite 5 Heben Sie den oberen Gehäuseteil nach oben hin ab. Legen Sie die Festplatte auf die Festplattenhalterung.
- Seite 6 Befestigen Sie die Festplatte mit den 4 mitgelieferten Festplattenschrauben. Schließen Sie das SATA-Festplatten- und das Stromversorgungskabel an das Motherboard des Servers an. (Überspringen Sie diesen Schritt bitte, wenn Ihre Disk Station ein kabelloses Modell ist.) Setzen Sie das Gehäuseoberteil etwas versetzt auf das Gehäuseunterteil und schieben Sie beides zusammen.
-
Seite 7: Server Einschalten
SERVER EINSCHALTEN Schließen Sie das Netzteil an den Server an. Verbinden Sie nun das Stromkabel mit dem Netzteil und stecken Sie das andere Ende in die Steckdose. Verwenden Sie das mitgelieferte LAN-Kabel, um den Server an Ihren Switch/Router/Hub anzuschließen. Schalten Sie bitte nun den Server an der Gehäusefrontseite über den Hauptschalter ein. - Seite 9 Legen Sie die Installations-CD in das entsprechende Laufwerk ihres Rechners ein. Ein Fenster öffnet sich auf Ihrem Bildschirm. Klicken Sie nun bitte im Menü, auf den Punkt “Synology-Server einrichten”. Klicken Sie auf “Durchsuchen“, um die “.pat“-Installationsdatei auf der Installations-CD auszuwählen.
- Seite 10 Klicken sie nun doppelt auf das Symbol “MacOSX“. Als nächstes klicken Sie doppelt auf ”Synology Assistant-SYNOLOGY.dmg”. Auf dem Desktop erscheint das Symbol “Synology Assistent-SYNOLOGY” das Sie bitte ebenfalls doppelt anklicken. Es öffnet sich ein neues Fenster. Klicken Sie bitte doppelt auf das Symbol “Synology Assistent”, um den Einrichtungsassistenten zu starten.
- Seite 11 HERZLICHEN GLÜCKWUNSCH! Der Server ist jetzt eingerichtet. Informationen zu weiteren Einstellungen und dem richtigen Umgang mit dem System finden Sie im Benutzerhandbuch auf der Installations-CD. Weitere Informationen, Hilfe und Updates finden Sie auf unserer Homepage: http://www.synology.com...
- Seite 12 GPL Notice This Synology product uses software partially or completely licensed under the terms of the GNU GENERAL PUBLIC LICENSE. The author of the software does not provide any warranty. This does not affect the warranty for the product itself.
- Seite 13 0. This License applies to any program or other work which contains a notice placed by the copyright holder saying it may be distributed under the terms of this General Public License. The "Program", below, refers to any such program or work, and a "work based on the Program" means either the Program or any derivative work under copyright law: that is to say, a work containing the Program or a portion of it, either verbatim or with modifications and/or translated into another language.
- Seite 14 c) Accompany it with the information you received as to the offer to distribute corresponding source code. (This alternative is allowed only for noncommercial distribution and only if you received the program in object code or executable form with such an offer, in accord with Subsection b above.) The source code for a work means the preferred form of the work for making modifications to it.
- Seite 15 9. The Free Software Foundation may publish revised and/or new versions of the General Public License from time to time. Such new versions will be similar in spirit to the present version, but may differ in detail to address new problems or concerns. Each version is given a distinguishing version number.