Herunterladen Inhalt Inhalt Diese Seite drucken
Electrolux EOB 53003 Gebrauchsanleitung
Vorschau ausblenden Andere Handbücher für EOB 53003:
Inhaltsverzeichnis

Werbung

Verfügbare Sprachen

Verfügbare Sprachen

Gebrauchsanleitung
User manual
Návod na používanie
Einbau-Backofen
Built-in oven
Zabudovaná rúra
EOB 53003

Werbung

Inhaltsverzeichnis
loading

Inhaltszusammenfassung für Electrolux EOB 53003

  • Seite 1: Fig

    Gebrauchsanleitung User manual Návod na používanie Einbau-Backofen Built-in oven Zabudovaná rúra EOB 53003...
  • Seite 2 2 electrolux...
  • Seite 3 Willkommen bei Electrolux! Wir möchten uns bedanken, dass Sie sich für ein erstklassiges Produkt von Electrolux entschieden haben, welches Ihnen sicherlich viel Freude bereiten wird. Es ist unser Bestreben, eine breite Vielfalt von Qualitätsprodukten anzubieten, die helfen, Ihr Leben etwas komfortabler zu machen. Sie finden einige Beispiele auf der vorletzten Seite in diesem Heft.
  • Seite 4: Inhaltsverzeichnis

    Wass etwas falsch läuft Technische Daten Anweisungen für den Installateur Einbau-Anweisungen Kundendienst Europäische Garantie Anleitung zur Gebrauchsanweisung Sicherheitsanweisung Schritt-für-Schritt-Anweisung Ratschläge Umweltinformationen Dieses Gerät entspricht den folgenden EWG-Richtlinien: 2006/95 (Niederspannungsrichtlinie); 89/336 (EMC Richtlinie); 93/68 (algemeine Richtlinie); und weitere Änderungen. 4 electrolux...
  • Seite 5: Warnungen Und Wichtige Hinweise

    Sie nie auf den sich in der «0» Stellung befinden wenn der Fettfilter (falls vorhanden), die Heizstäbe Backofen nicht mehr benutzt wird. und den Thermostatfühler. Dieser Backofen wurde je nach Ausführung Es ist gefährlich Veränderungen jeglicher electrolux 5...
  • Seite 6: Personensicherheit

    Reparaturen vom Kundendienst des Herstellers oder von einem vom Hersteller autorisierten Kundendienst ausführen und verwenden Sie nur Original-Ersatzteile. Versuchen Sie nicht, das Gerät bei Funktionsstörungen oder Schäden selbst zu reparieren. Durch Reparaturen seitens ungeschulter Personen können Schäden oder Verletzungen hervorgerufen werden. 6 electrolux...
  • Seite 7: Erst-Installation

    Es wird empfohlen, das oben beschriebenen Verfahren durch Auswählen der Garfunktion Doppelgrill sowie die Funktion Heissluft etwa 5-10 Minuten lang zu wiederholen. Um die Backofentür zu öffnen, immer den Griff in der Mitte anpacken (Abb. 1). Abb. 1 electrolux 7...
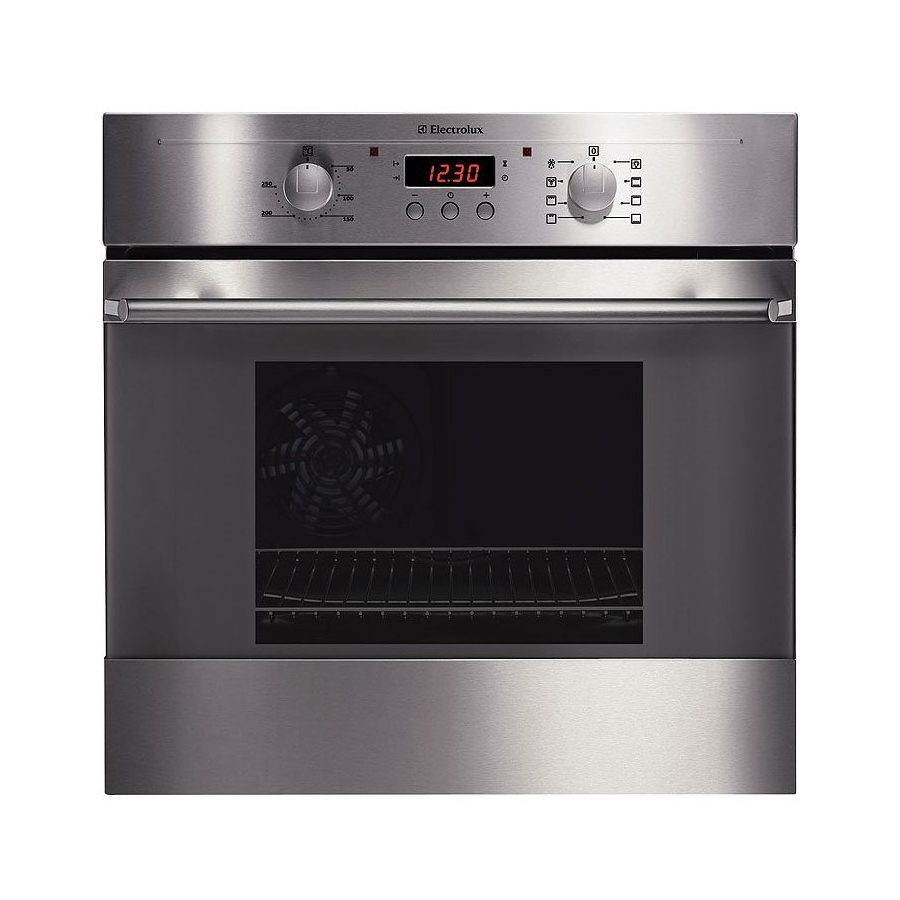
  • Seite 8: Gerätebeschreibung

    Gerätebeschreibung 1. Bedienungsblende 6. Knebel für Backofen-Funktionswähler 2. Knebel für Backofen-Temperaturregler 7. Grill 3. Thermostat-Kontrollampe 8. Backofen-Lampe 4. Elektronik-Uhr 9. Typenschild 5. Betriebskontrollampe 8 electrolux...
  • Seite 9: Elektro-Backofen

    — Wahlschalter-Knebel auf drehen, — dann Thermostat-Knebel auf die geeignete Temperatur einstellen. Unterhitze — Wahlschalter-Knebel auf drehen, — dann Thermostat-Knebel auf die geeignete Temperatur einstellen. Oberhitze — Wahlschalter-Knebel auf drehen, — dann Thermostat-Knebel auf die geeignete Temperatur einstellen. electrolux 9...
  • Seite 10 Temperatur normale Thermostat-Kontrollampe Werte erreicht hat. Sie erlischt, wenn die eingestellte Temperatur im Backofen erreicht ist, und leuchtet jeweils beim Aufheizen wieder auf. Betriebskontrollampe Sie zeigt an, daß ein oder mehrere Heizkörper des Backofens eingeschaltet sind. 10 electrolux...
  • Seite 11: Elektronik-Uhr

    Mit der Funktion "Kochdauer" können Sie einstellen, wie lange der Backofen in Betrieb sein soll. Stellen Sie die Speise in den Backofen, wählen Sie die gewünschten Betriesart und Temperatur. Drücken Sie die Taste Auswahl so oft, bis die Funktionsleuchte "Dauer" blinkt. Dann, verfahren Sie wie folgt: electrolux 11...
  • Seite 12 2. 5 Sekunden warten: die Funktionsleuchte "Ende" leuchtet und die gegenwärtige Uhrzeit wird wieder angezeit. 3. Wenn die Zeit abgelaufen ist, blinkt die Funktionsleuchte, es ertönt ein Signalton und der Ofen schaltet sich selbsttätig aus. Funktions- wahlschalter und Thermostat-Knebel auf "Aus" stellen. 12 electrolux...
  • Seite 13 Der Timer arbeitet wie ein normaler Küchenwecker, bei dem nach Ablauf einer Kurzzeit ein Signalton ertönt.BITTE BEACHTEN: Der Timer hat keinen Einfluß auf den Backofenbetrieb. Kurzzeit einstellen: 1. Taste Auswahl so oft drücken, bis die Funktionsleuchte "Timer" blinkt. electrolux 13...
  • Seite 14: Display Ausschalten

    Funktionsleuchten blinkt. Display ausschalten 1. Zwei Tasten 5 Sekunden gedrückt halten. Das Display schaltet sich aus. 2. Zum Einschalten des Displays eine beliebige Taste drücken. Das Display kann nur ausgeschaltet werden, wenn keine Automatikfunktion eingestellt ist. 14 electrolux...
  • Seite 15: Praktische Tipps

    Sie die oberen oder die unteren Einschiebeleisten. Heißluft- und Gebäckbetrieb Die Wärmeübertragung geschieht hierbei durch heisse Luft, die von dem Lüfterrad in der Backofenrückwand in Bewegung gesetzt Abb. 4 wird (Zwangs-Konvektion). Damit verteilt sich electrolux 15...
  • Seite 16 Garzeit gleich zu Beginn in die Gerichte. Bratenpfanne gegeben, andernfalls werden Aufgrund Ihrer eigenen Erfahrungen können sie in der letzten halben Stunde zugegeben. Sie die angegebenen Werte individuell Ob das Fleisch gar ist, können Sie mit einem verändern. 16 electrolux...
  • Seite 17: Back- Und Brattabelle

    1500 Hasenrücken 150-200 A-Stücke Fasan 90-120 komplett FISCH 1200 Bachforelle/Zahnbrassen 2(1u3)* 30-40 3-4 Fische 1500 Thunfisch/Lachs 2(1u3)* 25-535 4-6 Stücke Falls Sie gleichzeitig mehr als ein Gericht garen, empfehlen wir diese, auf den in Klammern angegebenen Ebenen abzustellen. electrolux 17...
  • Seite 18 10-15 8-10 Hähnchenbrürste 12-15 12-14 Hähnchen, (in 2 Hälften) 1000 30-35 25-30 Spieße 10-15 10-12 — Fischfilet (Seezunge) 12-14 10-12 Belegte Toastbrote — Weißbrotscheiben — Die angegebenen Temperaturen sind Richtwerte. Vielleicht müssen die Temperaturen persönlichen Ansprüchen angepaßt werden. 18 electrolux...
  • Seite 19: Pflege Und Wartung

    Flecken hinterlassen. Solche Flecken in der Hochglanzoberfläche der Emaille beeinträchtigen die Funktion des Backofens jedoch nicht. Reinigen Sie den Backofen grundsätzlich nach jedem Gebrauch. Verschmutzungen lassen sich so am leichtesten entfernen. Ein weiteres Einbrennen wird damit vermieden. electrolux 19...
  • Seite 20: Backofentür

    5. ziehen Sie die Tür nach vorne aus ihrem Sitz (Abb. 7); 6. legen Sie die Tür auf festem Boden ab (Abb. 8) und schützen Sie die Oberfläche des Griffs mit einem weichen Tuch; Abb. 7 Abb. 8 20 electrolux...
  • Seite 21 Nach der Reinigung die Innenscheiben wieder in die Tür einsetzen. Die Tür in den Ofen einbauen; gehen Sie dabei in der zum Ausbau umgekehrten Reihenfolge vor. Achten Sie 90° auf die richtige Ausrichtung der Scheiben. Abb. 10 Abb. 11 electrolux 21...
  • Seite 22 Zustand der Dichtung. Die Dichtung bei Bedarf reinigen, ohne dazu Gegenstände oder Scheuermittel zu verwenden. Wenn Beschädigungen der Dichtung feststellen, rufen Sie sofort den nächsten Kundendienst an. Benutzen Sie den Ofen nicht, solange die Dichtung nicht ersetzt worden ist. 22 electrolux...
  • Seite 23: Einhängegitter

    1. Vergewissern Sie sich, dass die Stromversorgung Ofens unterbrochen ist. 2. Drehen Sie Glasabdeckung nach links. Abb. 15 3. Entfernen Sie die durchgebrannte Lampe und setzen Sie eine neue ein. 4. Bringen Sie die Glasabdeckung wieder 5. Schalten Sie den Strom wieder ein. electrolux 23...
  • Seite 24: Wass Etwas Falsch Läuft

    Wenn etwas falsch läuft Wenn das Gerät nicht richtig arbeitet, bitte vor Anforderung des Electrolux Service-Centers folgendes überprüfen: PROBLEM LÖSUNG Der Backofen schaltet nicht ein. Prüfen, Gerät ordentlich angeschlossen ist und der Steckdosen- Schalter oder die Netzstrom-zufuhr zum Backofen auf EIN stehen.
  • Seite 25: Technische Daten

    1800 W Infrarot-Grill 1650 W Doppelgrill 2450 W Heißluft-Beheizung 2000 W Backofen-Lampe 25 W Motor des Heißluftgebläses 25 W Motor der Kühlungsbelüftung 25 W Gesamtanschlusswert 2500 W Backofen-Thermostat 50 °C - 250 °C Betriebsspannung (50 Hz) 230 V electrolux 25...
  • Seite 26: Anweisungen Für Den Installateur

    Wird der Anschluss ohne Stecker vorgenommen, oder ist dieser nicht zugänglich muss zwischen Gerät und Netzleitung ein mehrpoliger Ausschalter (z.B. Sicherungen, LS-Schalter) mit Mindestabstand zwischen den Kontakten von 3 mm angebracht werden. Der Schalter darf den Schutzleiter an keinem Punkt 26 electrolux...
  • Seite 27: Einbau-Anweisungen

    An die andere Seitenwand dürfen jedoch nur andere Geräte oder Möbel mit gleicher Höhe wie das Gerät angestellt werden. Abb. 18 Backofenmasse (Abb. 17) Einbau-Anweisungen Zur einwandfreien Funktion des eingebauten Gerätes muss das Einbaumöbel bzw. die Einbaunische passende Abmessungen haben (Abb. 18-19). Abb. 19 electrolux 27...
  • Seite 28: Befestigung Im Möbel

    Produktionsnummer (Prod. Nr.) sowie die Fabrikations-nummer (Ser. Nr.) an, welche Sie auf dem Typenschild des Ofens finden. Die Original-Ersatzteile des Herstellers, welche mit dem folgenden Markenzeichen gekennzeichnet sind, finden ausschließlich in den Zentralen unseres Kundendienstes sowie autorisierten Ersatzteil-Geschäften. 28 electrolux...
  • Seite 29: Europäische Garantie

    Für dieses Gerät besteht in den am Ende dieser Benutzerinformation aufgeführten Län- dern eine Garantie von Electrolux für den Zeitraum, der in der Gerätegarantie oder andern- falls gesetzlich festgelegt ist. Wenn Sie aus einem dieser Länder in ein anderes der auf- geführten Länder ziehen, wird die Gerätegarantie unter folgenden Voraussetzungen mit...
  • Seite 30 30 electrolux...
  • Seite 31 Thank you for choosing a first class product from Electrolux, which hopefully will provide you with lots of pleasure in the future. The Electrolux ambition is to offer a wide variety of quality products that make your life more comfortable. You find some examples on the cover in this manual.
  • Seite 32: For Your Safety

    Never use steam or steam machines to Be careful and keep children away from clean the appliance. the appliance while you are using it. When Do not use harsh abrasive cleaners or you connect other appliances to a plug near 32 electrolux...
  • Seite 33: Environmental Information

    Guide to Use the instructions Safety Instructions Step by step instructions for an operation Hints and Tips Environmental information This appliance complies with the following E.E.C. Directives: 2006/95 (Low Voltage Directive); 89/336 (Electromagnetical Compatibility Directive); 93/68 (General Directives) and subsequent modifications. electrolux 33...
  • Seite 34: When The Oven Is First Installed

    Repeat this operation for the full grill part (Fig. 1). fan cooking function for about 5-10 Before cooking for the first time, minutes. carefully wash the oven accessories. 34 electrolux...
  • Seite 35: Description Of The Appliance

    Description of the appliance 1. Control panel 6. Oven Function control knob 2. Oven Thermostat control knob 7. Grill 3. Oven thermostat control light 8. Oven lamp 4. Electronic programmer 9. Rating plate 5. Overall control light electrolux 35...
  • Seite 36: Electric Oven

    Full grill - The full grill element will be Fan cooking - This allows you to roast Fig. 3 or roast and bake simoultaneously using any shelf, without flavour transference. Defrost setting - This setting is intended to assist in thawing of frozen food. 36 electrolux...
  • Seite 37: Safety Thermostat

    Warm air is blown out through the aperture near the oven door handle. When the oven is switched off, the fan will remain on in order to to keep the controls cool, after which it switches off automatically. electrolux 37...
  • Seite 38: Electronic Programmer

    “Time of day” function. The relevant pilot lamp will start flashing. Then proceed as described above. The time of day may be reset only if no automatic function (cook duration or end of cooking ) has been set. 38 electrolux...
  • Seite 39 1. press button “ ” or “ ”. 2. After the setting is carried out, wait for 5 seconds: the “End of cooking” pilot lamp will come on and the display will revert to the time of day. electrolux 39...
  • Seite 40 The minute minder alarm will sound at the end of a timed period, but THE OVEN WILL REMAIN ON, if it is in use. To set the minute minder: 1. Press button repeatedly to select the “Minute minder” function. The relevant pilot lamp will start flashing. 40 electrolux...
  • Seite 41 1. Press two programmer push buttons simoultaneously and keep them pressed for about 5 seconds. The display will switch off. 2. To switch on the display, press any button. The display can be switched off only if no other functions have been set. electrolux 41...
  • Seite 42: Hints And Tips For Using The Oven

    If cooking requires more heat from the top or from the bottom use the top or the bottom runners. Fan cooking The food is cooked by means of preheated air Fig. 4 force blown evenly round the inside of the oven 42 electrolux...
  • Seite 43: Some Hints

    In Only experience will enable you to make the the case of roast beef and fillet steaks, the appropriate changes to values given on charts. inside of which should remain fairly pink in electrolux 43...
  • Seite 44: Cooking Tables

    1500 Tuna fish/Salmon 2 (1 and 3)* 25 ~ 35 4-6 fillets (*) If you need to cook more than one dish at the same time, we recommend you to place them on the levels quoted between brackets. 44 electrolux...
  • Seite 45 10 ~ 12 Sandwiches — 5 ~ 7 — Toast — 2 ~ 3 The oven temperatures are intended as a guide only. It may be necessary to increase or decrease the temperatures to suit individual preferences and requirements. electrolux 45...
  • Seite 46: Cleaning And Maintenance

    Clean the oven thoroughly after use; in this way it will be possible to remove cooking residuals more easily, thus avoiding these from burning the next time the oven is used. 46 electrolux...
  • Seite 47: The Oven Door

    5. pull the door forward, removing it from its seat (Fig. 7); 6. place the door on a stable surface protected by a soft cloth to prevent the handle surface from being damaged (Fig. Fig. 7 Fig. 8 electrolux 47...
  • Seite 48 After cleaning, reassemble the panes in the door and then the oven door, following the procedure described above in reverse. Make Fig. 9 sure you reposition the panes correctly. 90° Fig. 10 Fig. 11 48 electrolux...
  • Seite 49 If it has to be cleaned, do not use abrasive objects or substances. If you notice that the seal is damaged, contact your local service centre and do not use the oven until it has been repaired. electrolux 49...
  • Seite 50: Replacing The Oven Light

    1. Ensure the oven is disconnected from the electrical supply. 2. Turn the glass cover anticlockwise (Fig. 15). 3. Remove the faulty bulb and replace it with the new one. 4. Refit the glass cover. 5. Reconnect to the electrical supply. Fig. 15 50 electrolux...
  • Seite 51: What Happens If Something Goes Wrong

    Steam and condensation settle on Leave dishes inside the oven no longer than the food and the oven cavity. 15-20 minutes after the cooking is completed. The display shows "12.00". Set the time of day (see chapter "Setting the time of day"). electrolux 51...
  • Seite 52: Technical Data

    Grill heating elements inner 1650 W full 2450 W Fan Oven heating element 2000 W Oven lamp 25 W Convection fan 25 W Cooling fan 25 W Maximum power rating 2500 W Voltage tension (50 Hz) 230 V 52 electrolux...
  • Seite 53: Instructions For The Installer

    3 mm, suitable for the required load and in compliance with rules in force. The green & yellow ground wire must not be interrupted electrolux 53...
  • Seite 54: Building-In

    Overall oven dimensions (Fig. 17) Fig. 18 In-Column recess dimensions The recess must have the dimensions shown in Fig. 18. Undertop recess dimensions The recess must have the dimensions shown in Fig. 19. Fig. 19 54 electrolux...
  • Seite 55: Service And Spare Parts

    (Ser. No.) marked on the identification plate. This plate is placed on the front external edge of the oven cavity. Original spare parts, certified by the product manufacturer and carrying this symbol, are only available at our Service Centre authorized spare parts shops. electrolux 55...
  • Seite 56: European Guarantee

    European guarantee This appliance is guaranteed by Electrolux in each of the countries listed at the back of this user manual, for the period specified in the appliance guarantee or otherwise by law. If you move from one of these countries to another of the countries listed below the appliance guarantee will move with you subject to the following qualifications: •...
  • Seite 57 57...
  • Seite 58 Vitajte vo svete Electrolux Ďakujeme vám za výber prvotriedneho výrobku spoločnosti Electrolux, ktorý vám prinesie veľa radosti v budúcnosti. Cieľom našej spoločnosti je ponuka širokej palety kvalitných spotrebičov, ktoré zabezpečia väčšie pohodlie pre váš život. Niekoľko príkladov nájdete aj na obálke tohto návodu. Nájdite si pár minút a preštudujte si ho, aby ste mohli využiť...
  • Seite 59: Pre Vašu Bezpečnosť

    Na čistenie spotrebiča nikdy nepoužívajte používate. Ak do sieťovej zásuvky v blízkosti paru, ani zariadenia, ktoré na čistenie rúry zapojíte iné spotrebiče, dbajte na to, aby využívajú prúd pary. electrolux 59...
  • Seite 60: Technický Servis

    Vysvetlivky pre používanie návodu Bezpečnostné pokyny Pokyny krok po kroku pri jednotlivých úkonoch Rady a tipy Tento spotrebič vyhovuje požiadavkám nasledujúcich. smerníc ES: 2006/95 (Smernica pre nízke napätie); 89/336 (Smernica o elektromagnetickej kompatibilite); 93/68 (Všeobecná smernica) v znení následných úprav. 60 electrolux...
  • Seite 61: Pri Prvej Inštalácii Rúry

    časti spôsobujú to zvyšky z výroby. (Obr. 1). Túto operáciu zopakujte aj s funkciou celého Pred prvým použitím starostlivo grilu a s funkciou horúceho vzduchu umyte všetky časti príslušenstva počas približne 5-10 minút. rúry. electrolux 61...
  • Seite 62: Popis Spotrebiča

    Popis spotrebiča 1. Ovládací panel 6. Ovládací gombík funkcií rúry 2. Ovládací gombík termostatu rúry 7. Gril 3. Kontrolka termostatu rúry 8. Osvetlenie rúry 4. Elektronický programátor 9. Typový štítok 5. Všeobecná kontrolka rúry 62 electrolux...
  • Seite 63: Elektrická Rúra

    Celý gril - Zapne sa celý grilovací článok. Horúci vzduch - Umožňuje pečenie Obr. 3 mäsa alebo pečenie mäsa a koláčov súčasne na ľubovoľnom rošte bez miešania sa chutí. Rozmrazovanie - Táto funkcia je určená rozmrazovanie zmrazených potravín. electrolux 63...
  • Seite 64 Ventilátor sa zapína automaticky po niekoľkých minútach pečenia. Teplý vzduch sa vyfukuje otvorom nachádzajúcim sa v blízkosti rukoväte dvierok. Po vypnutí rúry ostane ventilátor v činnosti, aby udržiaval ovládacie gombíky chladné, potom sa automaticky vypne. 64 electrolux...
  • Seite 65: Elektronický Programátor

    1. Opakovane stláčajte tlačidlo aby ste zvolili funkciu „Presný čas. Príslušná kontrolka začne blikať. Potom postupujte podľa hore popísaného postupu. Nastavenie presného času môžete zmeniť, iba ak nie je nastavená žiadna automatická funkcia (doba varenia alebo koniec pečenia electrolux 65...
  • Seite 66 Potom postupujte nasledovne: Nastavenie času ukončenia pečenia: 1. Opakovane stláčajte tlačidlo “ ” alebo “ ”. 2. Po nastavení počkajte 5 sekúnd: kontrolka “Čas ukončenia pečenia sa rozsvieti a na displeji sa znovu zobrazí presný čas. 66 electrolux...
  • Seite 67 Rúra sa zapne a vypne podľa nastavených údajov. Funkcia “Časomiera” Alarm časomiery zaznie po ukončení nastavenej doby, ale RÚRA OSTANE ZAPNUTÁ, ak sa používa. Nastavenie kuchynského časovača: 1. Opakovane stláčajte tlačidlo aby ste zvolili funkciu “Časomiera. Príslušná kontrolka začne blikať. electrolux 67...
  • Seite 68 čas. Ako sa vypína displej 1. Súčasne stlačte tlačidlá programátora a pridržte ich stlačené pribl. 5 sekúnd. Displej sa vypne. 2. Displej znovu zapnete stlačením ktoréhokoľvek tlačidla. Displej môžete vypnúť, iba ak nie je nastavená žiadna iná funkcia. 68 electrolux...
  • Seite 69: Rady A Tipy Pri Používaní Rúry

    Ak sa pri pečení vyžaduje viac tepla zhora alebo zdola, použite vrchné alebo spodné polohy v rúre. Pečenie horúcim vzduchom Jedlo sa pripravuje horúcim vzduchom, ktorý Obr. 4 sa rovnomerne rozvádza ventilátorom electrolux 69...
  • Seite 70 Ináč ich treba pridať počas poslednej polhodiny. Pri jednoduchej kontrole, či je mäso upečené, ho stlačte lyžicou; ak sa mäso lyžicou nedá stlačiť, znamená to, že je hotové. V prípade pečenia roastbeefu a steakov, ktoré majú ostať vnútri ružové, 70 electrolux...
  • Seite 71 Doby prípravy jedla sa líšia podľa druhu surovín, ich konzistencie a objemu. Odporúčame vám, aby ste si poznamenali výsledky pečenia v rúre, pretože pečením rovnakých jedál za rovnakých podmienok dosiahnete približne rovnaké výsledky. Iba skúsenosť vám umožní urobiť vhodné zmeny hodnôt uvedených v tabuľkách. electrolux 71...
  • Seite 72: Tabuľky Pečenia

    2 (1 a 3)* 30 ~ 40 3-4 ryby 1500 Tuniak/Losos 2 (1 a 3)* 25 ~ 35 4-6 filé (*) Ak chcete piecť viac ako jedno jedlo naraz, odporúčame vám uložiť ich na úrovne uvedené v zátvorkách. 72 electrolux...
  • Seite 73 8 ~ 10 Ryby (filé) 12 ~ 14 10 ~ 12 Sendviče 5 ~ 7 Hrianky 2 ~ 4 2 ~ 3 Teploty rúry sú iba približné. Môže byť potrebné zvýšiť alebo znížiť teplotu podľa vašich potrieb a želania. electrolux 73...
  • Seite 74: Údržba A Cistenie

    šťava, šťava z varených sliviek a pod.) zanechávajú na smaltovaných povrchoch ťažko odstrániteľné škvrny; škvrny môžu poškodiť smalt, ale neovplyvnia činnosť rúry. po použití rúru starostlivo vyčistite; zvyšky jedál sa tak odstránia ľahšie a predídete tým ich pripečeniu pri nasledujúcom použití rúry. 74 electrolux...
  • Seite 75 4. dvierka uchopte na bokoch a pomaly Obr. 6 ich privrite, ale NEZATVÁRAJTE ich (Obr. 7); 5. potiahnite dvierka vpred, vyberte ich (Obr. 7); 6. položte dvierka na stabilný povrch chránený mäkkou handrou, aby ste predišli ich poškodeniu (Obr. 8); Obr. 7 Obr. 8 electrolux 75...
  • Seite 76 špeciálny povrch na vnútornej strane skla, ktorý odráža teplo. Po čistení panely znovu namontujte na dvierka a potom namontujte dvierka na rúru, vykonajte úkony v opačnom postupe. Skontrolujte správne umiestnenie panelov. Obr. 9 90° Obr. 10 Obr. 11 76 electrolux...
  • Seite 77 Gumové tesnenie po obvode otvoru rúry zaručuje jej správnu funkčnosť. Tesnenie pravidelne kontrolujte. Ak ho treba vyčistiť, nepoužívajte drsné predmety, ani abrazívne čistiace prostriedky. spozorujete, že je tesnenie poškodené, zavolajte servisné stredisko a rúru nepoužívajte, kým nebude opravená. electrolux 77...
  • Seite 78 1. Skontrolujte, či je rúra odpojená od elektrickej siete. 2. Otočte sklenený kryt smerom vľavo (Obr. 15). Obr. 15 3. Vyberte vypálenú žiarovku a nahraďte ju novou. 4. Namontujte späť sklenený kryt. 5. Zapojte rúru do elektrickej siete. 78 electrolux...
  • Seite 79: Čo Robiť, Keď Niečo Nefunguje

    Pozrite obsah tohto návodu, najmä kapitolu naopak, jedlá sú hotové príliš “Elektrická rúra”. rýchlo. jedle vnútri rúry Po ukončení pečenia nenechávajte jedlá skondenzovaná voda a para. vnútri rúry dlhšie ako 15-20 minút. Displej zobrazuje “12.00”. Nastavte presný čas (pozrite kapitolu “Nastavenie presného času”). electrolux 79...
  • Seite 80: Technické Údaje

    Ohrievacie články grilu stredný 1650 W plný 2450 W Ohrevací článok ventilátora rúry 2000 W Žiarovka rúry 25 W Ventilátor horúceho vzduchu 25 W Chladiaci ventilátor 25 W Maximálny príkon 2500 W Elektrické napätie (50 Hz) 230 V 80 electrolux...
  • Seite 81: Pokyny Pre Inštalatéra

    3 mm, ktorý musí vyhovovať platným normám. Zeleno-žltý uzemňovací vodič nesmie byť prerušený vypínačom a musí byť 2-3 cm. dlhší ako ostatné vodiče. electrolux 81...
  • Seite 82: Zabudovanie

    Celkové rozmery rúry (Obr. 17) Rozmery otvoru v hornej skrinke Obr. 18 Otvor musí mať rozmery uvedené na Obr. 18. Rozmery otvoru pod pracovnou plochou Otvor musí mať rozmery uvedené na Obr. 19. Obr. 19 82 electrolux...
  • Seite 83: Servis A Náhradné Diely

    štítku. Tento štítok sa nachádza na prednom okraji otvoru rúry. Originálne náhradné diely, certifikované výrobcom spotrebiča a s jeho označením, dostanete výhradne v našom servisnom stredisku a u t o r i z o v a n ý c h predajniach. electrolux 83...
  • Seite 84: Záruka/Servisná Služba

    • Spotrebic bol nainštalovaný apoužívaný vsúlade spokynmi vydanými spolocnost’ou Electrolux apoužíva sa iba vrámci domácnosti, t. j. nepoužíva sa na komercné úcely. • Spotrebic bol nainštalovaný vsúlade so všetkými príslušnými predpismi platnými vo vašej novej krajine pobytu.
  • Seite 85 85...
  • Seite 86 EOB 53003 0,79 kWh 0,78 kWh 53,0 43 min. 41 min. 1130 cm² 86 electrolux...
  • Seite 88 35694-2703 07/08 R.A...

Inhaltsverzeichnis