
Verwandte Anleitungen für Harvia CLASSIC 400 Top Duo

Inhaltszusammenfassung für Harvia CLASSIC 400 Top Duo
- Seite 1 HARVIA CLASSIC 400 Top Duo Instructions for Installation and Use of Woodburning Stove Anleitung für Montage und Gebrauch des holzbeheizten Saunaofens 20122012VTT...
-
Seite 2: Inhaltsverzeichnis
3.2.1. Verstellbare Füße des Ofens ......14 3.2.2. Connecting the Stove to a Masonry Flue ..14 3.2.2. Anschluss des Ofens an einen gemauerten 3.2.3. Connecting the Stove to a Harvia Steel Rauchfang ............14 Chimney ............. 15 3.2.3. Anschluss des Ofens an einen Harvia- 3.3. - Seite 3 Classic 400 Top Duo Harvia Oy, PL 12, 40951 Muurame, Finland WKC400LUX Sauna room volume (m³) 14–36 eN 15821:2010 Volumen der Saunakabine (m³) Classic 400 Required temperature class of chimney T600 Erforderliche Temperaturklasse des Top Duo Rauchfangs WKC400LUX Diameter of connection opening (mm)
-
Seite 4: General
1. GeNeRAL 1. ALLGeMeINeS Choose the stove model carefully. A stove with too Wählen Sie den Ofen sorgsam nach seiner Leistung low output must be heated longer and more intensely, aus. Wenn die Heizleistung zu gering ist, muss der which will shorten the stove’s life span. Ofen länger und intensiver beheizt werden, was Please note that non-insulated wall and ceiling seine Lebensdauer verkürzt. -
Seite 5: Stove's Operating Principle
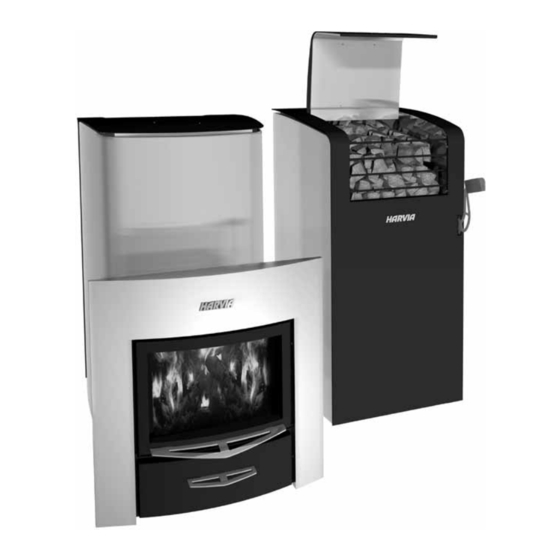
1.2. Stove’s Operating Principle 1.2. Die Funktionsweise des Ofen The purpose of the stove's cover is to control air Die Aufgabe des Ofendeckels ist die Steuerung der flow through the stove. While the cover is closed, Luftzufuhr innerhalb des Ofens. Ist der Decke ge- the stones heat up but the sauna remains reasonably schlossen, erwärmen sich die Steine sehr schnell warm. -
Seite 6: Instructions For Use
2. INSTRUCTIONS FOR USe 2. BeDIeNUNGSANLeITUNG Read the instructions carefully before using Lesen Sie die Anweisungen vor der Inbetrieb- the stove. nahme des Ofens aufmerksam durch. 2.1. Warnings 2.1. Warnungen Staying in the hot sauna for long periods of ein langer Aufenthalt in einer heißen Sauna •... -
Seite 7: Sauna Stones
15 % less beech than birch to obtain the same heat werten der verschiedenen Holzsorten. Um die Heiz- quantity. If you burn large amounts of wood, which kraft von Birkenholz zu erreichen, benötigt man bei- spielsweise ca. 15% weniger Buchenholz. Wenn zu has a high thermal value, the life span of the stove will shorten! viel Holz mit hohem Brennwert auf einmal im Ofen... - Seite 8 Figure 3. Heating the Stove Abbildung 3. Heizen des Ofens 1. empty the ash box. 1. Leeren Sie den Aschekasten. 2. Close the cover. 1.2. 2. Schließen Sie den Deckel. 1.2. 3. Place the firewood into the fire chamber, leaving 3.
-
Seite 9: Sauna Water
Prolonged, intense heating may cause risk Längeres, intensiveres Heizen kann zu einem of fire! Brandrisiko führen! Excessive heating (several full loads in a Exzessives Heizen (z. B. mit mehreren vollen • • row, for example) will make the sauna room, Holzladungen hintereinander) führt zu einer stove and the chimney overheat. -
Seite 10: Troubleshooting
4. After a sootfire, a chimney sweeper must 2. Kontaktieren Sie die örtliche Feuerwehr. check the stove and the flue before use. 3. Versuchen Sie nicht, den Rußbrand mit Wasser zu löschen. 4. Nach einem Rußbrand muss der Schornstein- feger sowohl die Feuerstelle als auch den Schornsteinabzug vor dem nächsten Anheizen kontrollieren. -
Seite 11: Instructions For Installation
3. INSTRUCTIONS FOR INSTALLATION 3. MONTAGeANLeITUNG 3.1. Before Installation 3.1. Vor der Montage Before installing the stove make sure that all Sorgen Sie vor der Montage des Ofens dafür, safety distance requirements are fulfilled. dass alle Anforderungen bezüglich der Sicher- There shall be no electrical devices, wires or heitsabstände eingehalten werden. -
Seite 12: Protecting The Floor
Protect the floor with the Harvia protective nicht standhalten. Schützen Sie den Boden mit bedding ( 3.5.) or similar heat radiation der Schutzplatte von Harvia ( 3.5.) oder einem protection. ähnlichen Hitzeschutz. C. Floor in front of the stove door made of C. -
Seite 13: Safety Distances
3.1.3. Safety Distances 3.1.3. Sicherheitsabstände See figure 7. Siehe Abbildung 7. A. Ceiling. The minimum safety distance between A. Dach. Der Mindest-Sicherheitsabstand zwi- the stove and the ceiling is 1250 mm. schen Ofen und Dach beträgt 1250 mm. B. Masonry walls. Leave 50 mm between the B. -
Seite 14: Adjustable Legs
Pull the stove back to make the flange press sich die Manschette und die Luke in der richti- • against the wall and door. gen Position befinden. Ziehen Sie den Saunaofen so weit zurück, dass • die Manschette gegen Wand und Luke drückt. m i n . -
Seite 15: Connecting The Stove To A Harvia Steel Chimney
Connecting the stove to a masonry flue (all dimensions in millimeters) Abbildung 9. Anschluss des Ofens an einen gemauerten Rauchfang (alle Abmessungen in Millimetern) 3.2.3. Connecting the Stove to a Harvia Steel 3.2.3. Anschluss des Ofens an einen Harvia-edel- Chimney... -
Seite 16: Installing The Handle
3.3. Installing the Handle 3.3. Montage der Griff See figure 10. Siehe Abbildung 10. Figure 10. Installing the handle Abbildung 10. Montage der Griff 3.4. Changing the Opening Direction of the 3.4. Änderung der Öffnungsrichtung der Ofentür Stove Door Die Ofentür kann so montiert werden, dass sie ent- The door to the firing chamber can be installed to weder nach links oder nach rechts zu öffnen ist. -
Seite 17: Accessories
3.5. Accessories 3.5. Zubehör A. Harvia steel chimney WHP1500. 3.2.3. A. Harvia-Stahlschornstein WHP1500. 3.2.3. B. Water heater VL22l. Installed on the top of the B. Warmwasserbehälter VL22l. Oben auf der upper connection opening. When a protective oberen Anschlussöffnung montiert. Wenn ein... - Seite 18 S/N: Copy the stove’s serial number from the carton and attach the manual to the house documentation. Notieren Sie hier die Seriennummer von der Verpackung des Saunaofens und fügen Sie die Anleitung zu den Hausunterlagen hinzu.