Herunterladen Inhalt Inhalt Diese Seite drucken

Werbung

Verfügbare Sprachen
  • DE

Verfügbare Sprachen

  • DEUTSCH, seite 25
Radio réveil projecteur Disney Princess
Disney Princess Projector Alarm Clock Radio
Mode d'emploi – Instruction manual
RP500DP
RP500DPIM1280_v01.indd 1
27/07/2010 5:52

Werbung

Inhaltsverzeichnis
loading

Inhaltszusammenfassung für LEXIBOOK RP500DP

  • Seite 1 Radio réveil projecteur Disney Princess Disney Princess Projector Alarm Clock Radio Mode d’emploi – Instruction manual RP500DP RP500DPIM1280_v01.indd 1 27/07/2010 5:52...
  • Seite 2 RP500DPIM1280_v01.indd 2 27/07/2010 5:52...
  • Seite 3 RP500DPIM1280_v01.indd 3 27/07/2010 5:52...
  • Seite 4: Description Du Produit

    Description du produit 1. MODE: Sélectionner le mode. 2. SCAN: Rechercher des stations radio. 3. RADIO OFF / ON / VOLUME: Allumer ou éteindre la radio ; monter ou baisser le volume. 4. RESET: Réinitialiser la fréquence radio pour lancer une nouvelle recherche de stations.
  • Seite 5: Installation

    ATTENTION : D’importantes interférences électromagnétiques ou des décharges électrostatiques peuvent provoquer un mauvais fonctionnement ou une perte de données. Si l’appareil ne fonctionne pas correctement, appuyez sur le bouton RESET ou enlevez puis remettez les piles. Installation Déballage Lors du déballage, vérifiez que l’emballage contient tous les éléments suivants: 1 x radio réveil projecteur Disney Princess 1 x mode d’emploi AVERTISSEMENT: Tous les matériaux d’emballage, comme le scotch, les...
  • Seite 6 BIP HORAIRE Pour activer ou désactiver le bip horaire, maintenez enfoncée la touche SET, puis appuyez sur MODE. Si le jour de la semaine est affiché en haut de l’écran, cela signifie que le bip horaire est activé. CHRONOMÈTRE 1. Appuyez une fois sur MODE. 2.
  • Seite 7: Garantie

    à des modifications des couleurs et de certains détails du produit montré sur l’emballage. REMARQUE: Conservez ce mode d’emploi car il contient des informations importantes. Référence : RP500DP Conçu et développé en Europe – Fabriqué en Chine © 2010 Lexibook® © Disney Lexibook S.A...
  • Seite 8: Product Description

    Your Disney Princess Radio Alarm Clock Projector works with 4 x 1.5V AA / LR6 type batteries (not included). 1.5V AA OR LR6 When you use the RP500DP for the first time: 1. Using a screwdriver, open the battery compartment 1.5V AA OR LR6 cover located at the bottom of the unit.
  • Seite 9 WARNING: Malfunction or loss of memory may be caused by strong frequency interference or electrostatic discharge. Should any abnormal function occur, press the RESET button or remove the batteries and insert them again. Installation Unpacking the device When unpacking, ensure that the following elements are included: 1 x Disney Princess Radio Alarm Clock Projector 1 x instruction manual WARNING: All packaging materials, such as tape, plastic sheets, wire ties and...
  • Seite 10: Specifications

    HOURLY CHIME To turn the hourly chime on or off, press and hold SET and then press MODE. When you see the days of the week at the top of the screen the hourly chime is STOPWATCH 1. Press MODE once. 2.
  • Seite 11: Maintenance

    In a bid to keep improving our services, we could implement modification on the colours and the details of the product shown on the packaging. NOTE: Please keep this instruction manual, it contains important information. Reference: RP500DP Designed and developed in Europe – Made in China © 2010 Lexibook®...
  • Seite 12: Descripción Del Producto

    AA/LR6 (no incluidas). 1.5V AA OR LR6 Antes de utilizar por primera vez su aparato modelo RP500DP, lleve a cabo los siguientes pasos preliminares: 1.5V AA OR LR6 1. Utilizando un destornillador, abra la tapa del compartimento de las pilas situado en la cara inferior del 1.5V AA OR LR6...
  • Seite 13: Instalación

    No se deben intentar cargar aquellas pilas que no sean recargables. Las pilas recargables deberán retirarse del producto antes de cargarlas. Las pilas recargables deberán recargarse únicamente bajo la supervisión de un adulto. No deberán mezclarse diferentes tipos de pilas ni tampoco pilas nuevas con otras usadas.
  • Seite 14 Configuración RELOJ 1. Para proceder a configurar el reloj, pulse 3 veces el botón MODE. 2. Pulse una vez el botón SET: las cifras correspondientes a los minutos comenzarán a parpadear. 3. Pulse el botón ADJUST para modificar el valor mostrado. A continuación, pulse el botón SET para pasar al siguiente parámetro.
  • Seite 15: Especificaciones

    RADIO 1. Gire el mando RADIO OFF/ON/VOLUME hacia la derecha para encender la radio y aumentar el volumen. 2. Pulse el botón SCAN para buscar emisoras de radio. 3. Pulse el botón RESET si desea volver a buscar emisoras de radio desde el principio de la banda de frecuencia.
  • Seite 16 NOTA: por favor conserve este manual de instrucciones, ya que contiene informaciones importantes. Referencia: RP500DP Diseñado y desarrollado en Europa - Fabricado en China © 2010 Lexibook® © Disney España...
  • Seite 17: Descrição Do Produto

    O seu Rádio Despertador Projector do Disney Princess funciona com 4 pilhas AA / LR6 de 1,5V (não incluídas). 1.5V AA OR LR6 Quando usar o RP500DP pela primeira vez: 1. Com uma chave de fendas, abra a tampa do 1.5V AA OR LR6 compartimento das pilhas, que se encontra na parte inferior da unidade.
  • Seite 18 Instalação Retirar o aparelho da caixa Quando retirar o aparelho da caixa, certifique-se de que os seguintes elementos estão incluídos: 1 Rádio Despertador Projector do Disney Princess 1 Manual de instruções AVISO: Todos os materiais de empacotamento, como fita, películas de plástico, arames e etiquetas não fazem parte deste brinquedo e deverão ser deitados fora.
  • Seite 19 TOQUE HORÁRIO Para ligar e desligar o toque horário, prima e mantenha premido SET e depois prima MODE. Quando vir os dias da semana no topo do ecrã, o toque horário está ligado. CRONÓMETRO 1. Prima MODE. 2. Prima ADJUST para iniciar ou parar o cronómetro. 3.
  • Seite 20 Num esforço constante para melhorar os nossos serviços, podemos implementar modificações nas cores e detalhes do produto apresentado na caixa. NOTA: Por favor, guarde este manual de instruções, pois contém informações importantes. Referência: RP500DP Desenhado e desenvolvido na Europa – Fabricado na China © 2010 Lexibook® © Disney...
  • Seite 21: Descrizione Del Prodotto

    L’orologio radio sveglia con proiettore Disney Princess funziona con 4 batterie 1,5 AA / LR6 (non fornite). 1.5V AA OR LR6 Quando si utilizza il RP500DP per la prima volta: 1. Con un cacciavite, aprire il coperchio del vano batterie 1.5V AA OR LR6 collocato sotto l’unità.
  • Seite 22: Installazione

    AVVERTENZA: Il cattivo funzionamento o la perdita di memoria può essere causato da una forte interferenza di frequenza o scariche elettrostatiche. In caso di qualsiasi funzionamento anormale, premere il pulsante RESET o rimuovere le batterie e inserirle di nuovo. Installazione Aprire la confezione Quando si apre la confezione, controllare che contenga i seguenti elementi: 1 x Orologio radio sveglia con proiettore Disney Princess...
  • Seite 23 SEGNALE ORARIO Per attivare o disattivare il segnale orario, premere e tenere premuto SET quindi premere MODE. Quando si vedono i giorni della settimana alla parte superiore dello schermo il segnale orario è in funzione. CRONOMETRO 1. Premere MODE una volta. 2.
  • Seite 24: Manutenzione

    NOTA: Si prega di conservare il presente manuale di istruzioni, che contiene importanti informazioni. Riferimento: RP500DP Progettato e sviluppato in Europa – Fabbricato in Cina © 2010 Lexibook® © Disney www.lexibook.com...
  • Seite 25: Produktbeschreibung

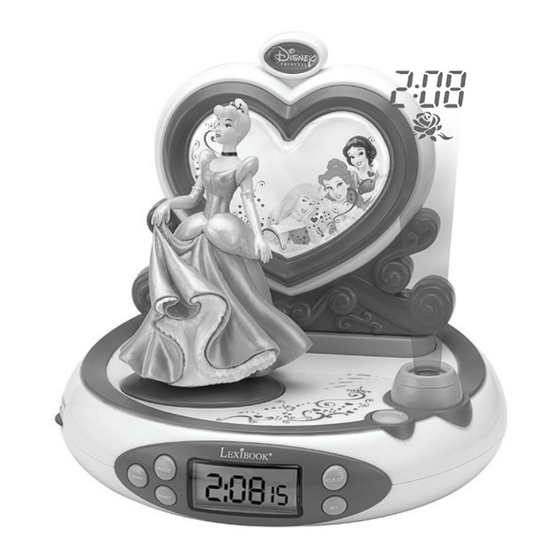
    Batterieinformationen Ihr Disney Princess Projektor-Radiowecker benötigt zum Betrieb 4 x 1,5V LR6/AA Batterien (nicht mitgeliefert). Wenn Sie den RP500DP zum ersten Mal benutzen: 1.5V AA OR LR6 1. Öffnen Sie mithilfe eines Schraubendrehers die Bat- teriefachabdeckung im Boden des Gerätes.
  • Seite 26 Aufstellen Auspacken des Gerätes Achten Sie beim Auspacken darauf, dass die folgenden Elemente enthalten sind: 1 x Disney Princess Projektor-Radiowecker 1 x Bedienungsanleitung WARNUNG: Das gesamte Verpackungsmaterial wie Klebeband, Plastikfolie, Drähte und Etiketten ist nicht Teil dieses Spielzeuges und sollte entsorgt werden. Einstellungen 1.
  • Seite 27 STUNDENLÄUTEN Um das Stundenläuten ein- oder auszuschalten, halten Sie SET gedrückt und drücken Sie anschließend MODE. Wenn Sie die Wochentage oben auf dem Display sehen, ist das Stundenläuten aktiviert. STOPPUHR 1. Drücken Sie einmal MODE. 2. Drücken Sie ADJUST, um die Stoppuhr zu starten oder anzuhalten. 3.
  • Seite 28: Wartung

    Farben und der Ausführung des Produktes, wie es auf der Verpackung abgebildet ist, Änderungen vornehmen. HINWEIS: Bitte bewahren Sie diese Bedienungsanleitung auf, sie enthält wich- tige Informationen. Referenz: RP500DP Entworfen und entwickelt in Europa – hergestellt in China ©2010 Lexibook® ©2010 Disney Deutschland &...
  • Seite 29: Productbeschrijving

    1,5V AA / LR6 type batterijen (niet meegeleverd). 1.5V AA OR LR6 Als u de RP500DP voor de eerste maal gebruikt: 1. Open het batterijvak, dat zich achteraan het apparaat 1.5V AA OR LR6 bevindt, met behulp van een schroevendraaier.
  • Seite 30 Installatie Het apparaat uitpakken Controleer tijdens het uitpakken of de volgende onderdelen aanwezig zijn: 1 x Disney Princess radio-alarmklok met projector 1 x gebruiksaanwijzing WAARSCHUWING: Alle verpakkingsmateriaal, zoals kleefband, plastic vellen, koorden en labels vormen geen onderdeel van dit speelgoed en dienen verwi- jderd te worden.
  • Seite 31 UURALARM Druk op SET en houd deze ingedrukt en druk dan op MODE om het uuralarm aan of uit te zetten. Het uuralarm is ingeschakeld als de dagen van de week aan de bovenzijde van het scherm worden weergegeven. STOPWATCH 1.
  • Seite 32 Om onze diensten te verbeteren, is het mogelijk dat de kleuren en de details van het product zoals weergegeven op de verpakking wijzigen. OPMERKING: Bewaar deze gebruiksaanwijzing, het bevat belangrijke informatie. Referentie: RP500DP Ontworpen en ontwikkeld in Europa – Vervaardigd in China © 2010 Lexibook®...
  • Seite 33 RP500DPIM1280_v01.indd 33 27/07/2010 5:52...
  • Seite 34 RP500DPIM1280_v01.indd 34 27/07/2010 5:52...

Inhaltsverzeichnis