Werbung
Quicklinks
User's Manual
Version 1.1
March 2006
SPECIFICATIONS
Connector type
Clip terminal
Wire diameter
< 4 mm
Power capacity (prg.) 100 W (IEC 268-5)
Ω
Impedance
4
Frequency range
60 Hz to 23 kHz (-10 dB)
Nominal sound
pressure level (SPL)
86 dB*W/m (program,
bandwidth 100-5000 Hz
on axis, full space)
Max. short term
acoustic output
112 dB @ 1m (on axis,
half space)
Tweeter
½ "
Woofer
5 ½"
Crossover frequency 5000 Hz
Dimensions (H x W x D) 8.9" x 5.9" x 5.6"
(225 x 150 x 142 mm)
Weight
approx. 4 lbs each
(1.8 kg each)
BEHRINGER is constantly striving to maintain the highest professional
standards. As a result of these efforts, modifications may be made from
time to time to existing products without prior notice. Specifications and
appearance may differ from those listed or illustrated.
ENGLISH
WIRING
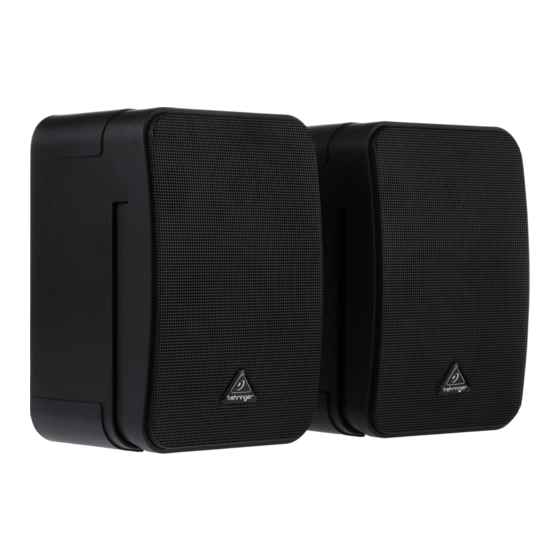
The MONITOR 1C is capable of producing extreme
volumes. Please note that high sound pressures may
cause temporary or even permanent hearing damage. Be
careful to select a suitable volume.
Always mute your amp before connecting the speakers. Use
loudspeaker cables with a diameter of up to 4 mm (AWG 6).
Connect your MONITOR 1C to the amplifier as shown in the
illustration: Press the connector clamps on the back of the speaker
and insert the bare end of the loudspeaker cable, paying attention
to correct polarity. Let go of the connector to secure the cable.
Connect the second loudspeaker the same way.
Make sure that bare wire ends never touch the open end
of another speaker cable, speaker connectors or metal
parts of your amp.
If you let your MONITOR 1C loudspeakers run at or
near their power limit, the integrated protective
circuitry may temporarily disconnect the tweeters.
L o w e r t h e v o l u m e t o a l l o w t h e t w e e t e r t o
automatically come online again. In this case, there
is no danger of causing permanent damage. If you
turn up treble on your amplifier, the protective
circuitry may intervene even at lower overall volume
levels.
IMPORTANT SAFETY INSTRUCTIONS
1) Read these instructions.
2) Keep these instructions.
3) Heed all warnings.
4) Follow all instructions.
5) Do not use this apparatus near water.
6) Clean only with dry cloth.
7) Be sure to mount your speakers on a solid, stable and level base or
stand. Vibrating floors do not provide reliable support for speaker
enclosures or stacks.
8) Do not install near any heat sources such as radiators, heat registers,
stoves, or other apparatus (including amplifiers) that produce heat.
9) Only use attachments/accessories specified by the manufacturer.
10) Use only with the cart, stand, tripod, bracket, or table specified by
the manufacturer, or sold with the apparatus. When a cart is used, use
caution when moving the cart/device combination to avoid injury from
stumbling.
11) Refer all service to qualified service personnel. Service is required
when the unit has been damaged in any way, liquid has been spilled or
objects have fallen into the apparatus, the unit has been exposed to rain
or moisture, does not operate normally, or has been dropped.
12) Do not block any ventilation openings. Install in accordance with the
manufacturer's instructions.
Werbung

Verwandte Anleitungen für Behringer Monitor 1C


Inhaltszusammenfassung für Behringer Monitor 1C
- Seite 1 Always mute your amp before connecting the speakers. Use loudspeaker cables with a diameter of up to 4 mm (AWG 6). Connect your MONITOR 1C to the amplifier as shown in the illustration: Press the connector clamps on the back of the speaker and insert the bare end of the loudspeaker cable, paying attention to correct polarity.
- Seite 2 Use cables de altavoz con un diámetro de hasta 4 mm. Cablate il MONITOR 1C con l’amplificatore come mostrato nella Verkabeln Sie die MONITOR 1C wie in der Abbildung gezeigt mit dem Raccordez les MONITOR 1C à l’amplificateur comme indiqué sur figura.
- Seite 3 Используйте соединительный кабель с диаметром до 4 мм. Należy używać kabli głośnikowych o przekroju do 4 mm. Sluit met kabels de MONITOR 1C op de versterker aan, zoals dit in de Yhdistäkää MONITOR 1C vahvistimeen oheisen kuvan mukaan. Подключите MONITOR SPEAKERS 1C к усилителю как...
- Seite 4 ändarna på högtalarkabeln i de fria öppningarna. Släpp afisolerede ender af højtalerkablet unipolar ind i de frie åbninger. Ligue os cabos do MONITOR 1C com os do amplificador como åíéó÷õôÞ, üðùò ðáñïõóéÜæåôáé óôçí åéêüíá. Áíïßîôå ôá êëéð klämmorna igen så att kabeländarna tas upp. Anslut den andra Slip klemmerne igen, så...
-
Seite 5: Warranty
In the case that other parts are used which constitute an improvement, BEHRINGER may, at its discretion, charge 6. If an inspection of the product by BEHRINGER shows that the defect the customer for the additional cost of these parts.