Werbung
Quicklinks
Werbung

Verwandte Anleitungen für Ganz ZC-NH255P


Inhaltszusammenfassung für Ganz ZC-NH255P
- Seite 1 Page 1 04.2.24, 11:10 AM ZC_NH255_P.p65 Adobe PageMaker 6.5J/PPC...
- Seite 2 WARNING CAUTION This symbol indicates that there is a possibility of This symbol indicates that there is a possibility of slight serious injury or even death if the product is not used or greater injury or damage to equipment. correctly. VORSICHT WARNUNG Dieses Symbol weist auf die Gefahr von Unfällen mit...
- Seite 3 Cautions: Power supply (1) • Use only with a 24V AC power supply marked class 2 or +12VDC power supply. (2) Be sure to connect each lead to the appropriate terminal. Wrong connection may cause malfunction and/or damage to the video camera. Operating and storage locations (1) Do not attempt to aim the camera at the sun or other extremely bright objects that cause smear to appear irrespective of whether the camera is operating or not.
- Seite 4 Précautions: Alimentation (1) • Utilisez uniquement le courant alternatif de 24 V mentionné classe 2 ou le courant continu de +12 V comme source d‘alimentation. (2) Veillez à raccorder chaque fils à la borne appropriée. Une mauvaise connexion peut être à l’origine d’un mauvais fonctionnement et/ou endommager la caméra vidéo.
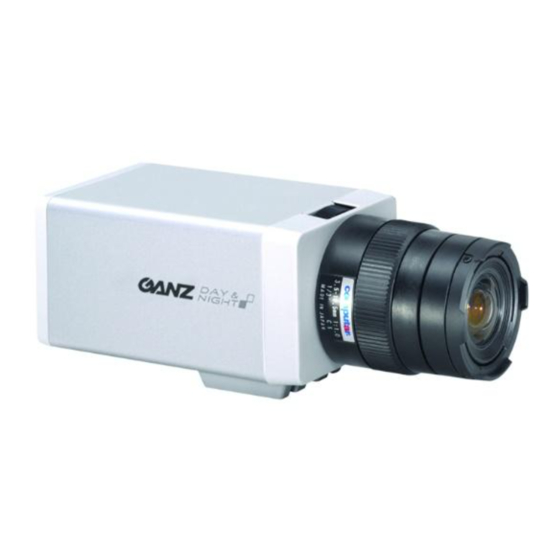
- Seite 5 FEATURES ■ 1/3" interline transfer High Resolution CCD (480 TV lines or ■ Automatically switchable 12VDC/24VAC ■ Electric iris function more horizontal) ■ Incorporation of digital signal processing IC. ■ Bullt in Auto iris Ampllfier ■ Back light compensation* ■ Impressive Color Reproduction ■...
- Seite 6 EXTERNAL DIMENSIONS AUSSENABMESSUNGEN DIMENSIONS EXTERNES DIMENSIONI ESTERNE DIMENSIONES EXTERNAS WYMIARY ZEWNĘTRZNE DIMENSÕES EXTERNAS 外部尺寸 CS Mount standard flange surface Standardflansch für CS-Fassung Monture CS bride de surface standard Attacco obiettivi passo CS Montura CS superficie de reborde normalizada Mocowanie obiektywu-CS Montagem CS com superfície de flange normal CS 接口标准法兰面...
- Seite 7 AC24V CLASS ONLY B/W-FIX +12VDC VIDEO 15.3 29.3 103.3 1/4" -20 UNC (tripod thread) 1/4" -zoll, 20 UNC (stativgewinde) 1/4" -20 UNC (trépied fileté) 1/4" -20 UNC (filettature per treppiede) 1/4" -20 UNC (rosca del trípode) 1/4"-20 UNC gwint mocowania 1/4"...
-
Seite 8: Technische Daten Des Produkts
TECHNISCHE DATEN DES PRODUKTS ZC-NH255P Videosignalsystem Video-Ausgang 1,0 Vs-s/75 Ohm Abtastsystem 2:1 Zeilensprung Auflösung (horizontale TV-Zeilen) Minimale F1,2 50IRE 0,08lx (Nachtmodus, Schwarzweiß) Objektbeleuchtung F1,2 30IRE 0,04lx (Nachtmodus, Schwarzweiß) Mit Infrarotbeleuchtung 0,00lx (Nachtmodus, Schwarzweiß) Signal-Rauschspannungsabstand 50 dB oder mahr Gamma-Eigenschaft 0,45 Bildsensor 1/3-zoll CCD-Zwischenzeilenmodul, Farbkomplementär-... -
Seite 9: Caracteristiques Techniques
CARACTERISTIQUES TECHNIQUES ZC-NH255P Système de signal vidéo 1,0 Vc-c/75 Ω Sortie vidéo Système de balayage 2:1 entrelacé Résolution (lignes de télévision horizontales) Eclairage minimum F1,2 50IRE 0,08lx (Mode Nuit, B/N) du sujet F1,2 30IRE 0,04lx (Mode Nuit, B/N) Avec un éclairage... -
Seite 10: Beschreibung Der Funktionen
BESCHREIBUNG DER FUNKTIONEN 1 Rückfokus Einstellrad Falls der Fokus nach der Montage des Objektives einer Einstellung bedarf, die Sicherungsschraube (7) lösen und mit dem Einstellrad die Schärfe einstellen. 2 Potentiometer Einstellung des DC-Blendenpegels Den DC-Blendenpegel manuell einstellen. 3 BLC-Modus-Schalter (Gegenlichtkompensation) Bei starkem Gegenlicht (Sonne, Himmel, Beleuchtung usw.) erscheint das Objekt dunkel. -
Seite 11: Description Des Fonctions
DESCRIPTION DES FONCTIONS 1 Molette de réglage de bride arrière Si la mise au point doit être réglée après qu’un objectif ait été monté sur la caméra vidéo, desserrer la vis de verrouillage de foyer arrière (7) et tourner la molette de réglage pour faire la mise au point. 2 Potentiomètre de réglage du niveau du diaphragme CC Ajuster manuellement le niveau de diaphragme CC. - Seite 12 Camera Mounting Anbringen der Kamera Fixation de la caméra Installazione della telecamera Montaje de la cámara Mocowanie kamery Montagem da câmera 摄像机安装 Moving the tripod set base plate Ändern der Position der Stativbefestigungsplatte Déplacement du plateau de base de l’ensemble du trépied Spostamento della piastra di montaggio per treppiede Moviendo la placa de base de fijación del trípode montaż...
- Seite 13 Français La caméra peut être fixée sur un trépied, un dispositif de fixation ou tout autre dispositif de montage, adaptable en haut ou en bas, en utilisant les trous de vis de montage (1/4 de pouce, filet à pas gros UNC) du plateau de base de l’ensemble de trépied.