Herunterladen Inhalt Inhalt Diese Seite drucken
DF-models RACE-X Bedienungsanleitung

DF-models RACE-X Bedienungsanleitung

2,4 ghz 2kanal fernsteueranlage mit / ohne servo rs 90 mgbb
Vorschau ausblenden Andere Handbücher für RACE-X:
Inhaltsverzeichnis

Werbung

Verfügbare Sprachen
  • DE

Verfügbare Sprachen

  • DEUTSCH, seite 1
Bedienungsanleitung / Operating Instructions / Notice d´Utilisation / Manual de instrucciones / Istruzioni per l´uso
RACE-X
2,4 GHz 2Kanal Fernsteueranlage
mit / ohne Servo RS 90 MGBB
2.4-GHz 2-channel remote-control
transmitter
with / without Servo RS 90 MGBB
Radiocommande 2,4 GHz à 2 voies
avec / sans Servo RS 90 MGBB
Emisora 2,4 GHz 2 canales
de control remoto
con / sin Servo RS 90 MGBB
Trasmettitore a 2 canali 2,4 GHz
con / senza Servo RS 90 MGBB
No. 2002 / 2000

Werbung

Inhaltsverzeichnis
loading

Inhaltszusammenfassung für DF-models RACE-X

  • Seite 1: Nhaltsverzeichnis

    Bedienungsanleitung / Operating Instructions / Notice d´Utilisation / Manual de instrucciones / Istruzioni per l´uso RACE-X 2,4 GHz 2Kanal Fernsteueranlage mit / ohne Servo RS 90 MGBB 2.4-GHz 2-channel remote-control transmitter with / without Servo RS 90 MGBB Radiocommande 2,4 GHz à 2 voies...
  • Seite 2: Inhaltsverzeichnis

    2,4 GH AnAl ERnstEuERAnlAGE No. 2002 mit Servo RS 90 MGBB No. 2000 ohne Servo RS 90 MGBB nhaltsverzeIchnIs 1. v orwort 2. s IcherheItsanweIsungen Vorbereitungen Funkfernsteuerung: Betrieb eines Modells Batterie- und Akkuhinweise: 3. P roduktbeschreIbung Bestimmungsgemäße Verwendung Lieferumfang Technische Daten 4. l aden kkus...
  • Seite 3 oRwoRt Sehr geehrter Kunde, sehr geehrte Kundin, wir beglückwünschen Sie zum Kauf eines Produktes aus dem Hause df-models. Das Produkt ist EMV-geprüft und erfüllt die Anforderungen der geltenden europäischen und nationalen Richtlinien. Auf Grund ständiger Weiterentwicklung und Verbesserung unserer Produkte behalten wir uns technische Änderungen sowie Änderungen in Ausstattung und Design ohne Ankündigung vor.
  • Seite 4: Icherheitsanweisungen

    iCHERHEitsAnwEisunGEn Gehen Sie verantwortungsbewusst mit dem Produkt um. Als Hersteller und Vertreiber des Produktes haben wir keinen unmittelbaren Einfluss auf den kor- rekten Umgang und die korrekte Bedienung des Produktes. Die nachfolgenden Sicherheitsanweisungen sollen Sie und Ihr Umfeld vor Schäden bewahren, die bei unsachgemäßem Gebrauch entstehen können.
  • Seite 5: Betrieb Eines Modells

    2.3 Betrieb eines Modells Fahren Sie nicht, wenn Ihre Reaktionsfähigkeit eingeschränkt ist (z. B. bei Müdigkeit, Medikamenten- oder Alkoholeinfluss). Fehlreaktionen können schwerwiegende Personen- und Sachschäden verursachen. Fahren Sie auch nicht, wenn Sie nur den geringsten Zweifel am einwandfreien, technischen Zustand Ihres Modells / Ihrer Fernsteueranlage haben. >...
  • Seite 6 > Mischen Sie niemals Batterien und Akkus gleichzeitig in einem Gerät! Verwenden Sie entweder nur Batterien oder nur Akkus. > Werden zur Stromversorgung des Senders keine fabrikneuen Batterien genutzt, achten Sie auf eine ausreichende Restkapazität (Batterieprüfer). > Bei Verwendung von Akkus müssen Sie auf Grund der geringeren Spannung (Batterien=1.5V, Akkus=1.2V) und der geringeren Kapazität von Akkus mit einer Verringerung der Betriebsdauer und u.U.
  • Seite 7: P Roduktbeschreibung

    6� USB-Kabel (PC-Link) 7� Bedienungsanleitung Bedienungsanleitung / Operating Instructions / Notice d´Utilisation / Manual de Instrucciones / Istruzioni per l´uso RACE-X 2,4 GHz 2Kanal Fernsteueranlage mit / ohne Servo RS 90 MGBB 2.4-GHz 2-channel remote-cont- rol transmitter with / without Servo RS 90 MGBB Radiocommande 2,4 GHz à...
  • Seite 8: Technische Daten

    3.3 Technische Daten Sender Kanalzahl 2 Kanäle Frequenz 2,4GHz Modulation GFSK Signale digital (1024 Schritte) Verwendung Auto, Schiff Unterspannungsanzeige (LED) ja (unter 9V) PC-Link (DSC Port) Klinkenstecker (3.5mm) Interne Ladebuchse Betriebsspannung 12V DC (8xAA) Gewicht 328g Abmessungen 159 x 99 x 315mm Empfänger Kanalzahl 3 Kanäle...
  • Seite 9 Laden der Senderakkus im Sender > Setzen Sie die Akkus in den Sender ein. Achten Sie auf die korrekte Polung! > Schalten Sie den Sender aus. > Schliessen Sie das Ladegerät an die entsprechende Spannungsquelle an > Verbinden Sie das Ladegerät mit der Ladebuchse. >...
  • Seite 10: Edienelemente Des Enders

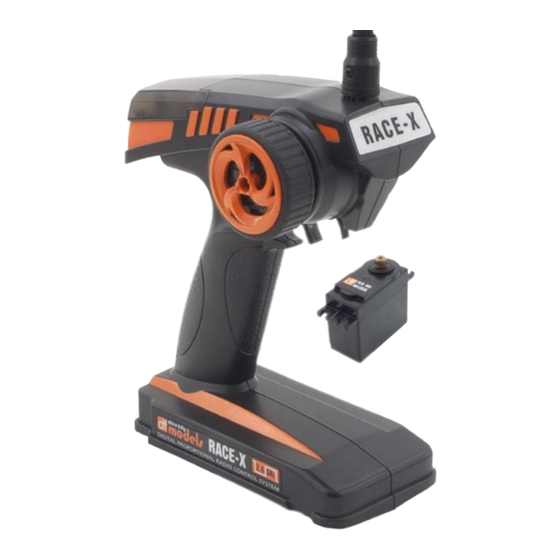
    EdiEnElEmEntE dEs EndERs Pistolensender mit Steuerrad für die Lenkung und Zughebel für die Geschwindigkeit 1� Antenne 2� Steuerrad für Lenkfunktion 3� Steuerhebel für Fahrfunktion 4� Batterie/Akkufach (Unterseite) 5� Steuereinheit 6� PC-Link (DSC-Port, Rückseite) 7� Ladebuchse (Rückseite) Steuereinheit (5) a� Reverse-Schalter Lenkung b�...
  • Seite 11: I Nbetriebnahme Des S Enders Und Des E Mpfängers

    Kontroll-LED (b) Die Kontroll-LED zeigt den Einschaltzustand des Senders an. Funktionsschalter (d) Mit dem Funktionsschalter wird der Sender ein- bzw. ausgeschaltet. Unterspannungsanzeige (f) Die LED zeigt den Ladezustand der Senderakkus an. So lange die LED grün leuchtet, ist die Akkuspannung ausreichend (>9V). Bindungstaster (g) Zur (Wieder-)Herstellung der Verbindung zwischen Sender und Empfänger nach einem Empfänger- bzw.
  • Seite 12: Überprüfen Der Steuerfunktionen

    Montage des Empfängers Die Montage des Empfängers ist grundsätzlich vom Modell abhängig. Halten Sie sich diesbezüglich an die Empfehlungen des Modellherstellers. Unabhängig davon sollte der Empfänger vor Staub, Schmutz, Feuchtigkeit und Vibrationen optimal geschützt montiert werden. Zur Befestigung eignen sich doppelseitiges Klebeband (Servo-Tape) oder auch Gummiringe, die den in Schaumstoff eingewi- ckelten Empfänger sicher an seinem Platz halten.
  • Seite 13: Verwendung Dera

    ERwEndunG dER nlAGE Als imulAtoR Mit dem beiliegenden USB-Kabel können Sie den Sender an Ihrem PC wie einen herkömmlichen Joystick zur Steuerung von Fahrsimulationsprogrammen verwenden. Mit einem solchen Fahrsimulationsprogramm können Sie auf materialschonende Weise sowohl erste Erfahrungen sammeln als auch Ihren Fahrstil optimieren. >...
  • Seite 14: Fehlerbehebung

    11. F EHlERbEHEbunG Problem Abhilfe Sender reagiert nicht Prüfen, ob die Anlage eingeschaltet ist. Ladezustand der Batterien / Akkus des Senders prüfen. Polung der Batterien / Akkus überprüfen. Die Servos / der Fahrtregler Prüfen, ob die Anlage eingeschaltet ist. reagieren nicht Ladezustand der Batterien / Akkus des Empfängers prüfen.
  • Seite 15 2.4-GH CHAnnEl REmotE ContRol tRAnsmittER No. 2002 with Servo RS 90 MGBB No. 2000 without Servo RS 90 MGBB able contents 1. P reface 2. s afety InstructIons Preparation Radio remote control: Operation of a model Information about batteries and rechargeable batteries: 3. P roduct descrIPtIon...
  • Seite 16: Preface

    REFACE Dear customer, We congratulate you on purchasing a product from the house of DF models. The product is EMC tested and meets the requirements of the existing European and national gui- delines. Due to ongoing development and enhancement of our products, we reserve the right to make technical changes and changes in the equipment and design without prior notice.
  • Seite 17: S Afety Instructions

    AFEty instRuCtions Deal with the product responsibly. As a manufacturer and distributor of the product, we have no direct influence on the proper hand- ling and correct use of the product. The following safety instructions are to keep you and your environment from damage that can result from improper use.
  • Seite 18: Operation Of A Model

    2.3 Operation of a model Do not drive if your ability to respond is restricted (e.g. due to fatigue, drug or alcohol in- fluence). Improper operation can cause serious injury to persons and damage to property. Do not drive if you have the slightest doubt about the proper functioning and technical condition of your model / your remote control set.
  • Seite 19 > The range of the transmitter decreases if the remote control or the receiver has weak batteries (or rechargeable batteries) and errors may occur in transmitting signals to the receiver. Therefore, the model may no longer respond properly to the remote control. Stop operating immediately and replace the batteries with new ones or charge the rechargeable batteries again.
  • Seite 20: P Roduct Description

    Communication plug USB cable (PC link) Bedienungsanleitung / Operating Instructions / Notice d´Utilisation / Manual de Instrucciones / Istruzioni per l´uso Operating instructions RACE-X 2,4 GHz 2Kanal Fernsteueranlage mit / ohne Servo RS 90 MGBB 2.4-GHz 2-channel remote-cont- rol transmitter with / without Servo RS 90 MGBB Radiocommande 2,4 GHz à...
  • Seite 21: Technical Specifications

    3.3 Technical specifications Transmitter Channel number 2 channels Frequency 2,4 GHz Modulation GFSK Signals Digital signals (in 1024 steps) Car, ship Undervoltage indicator (LED) yes (under 9V) PC Link (DSC Port) Jack plug (3.5mm) Internal charging socket Operating voltage 12V DC (8xAA) Weight 328g Dimensions...
  • Seite 22 Charging the transmitter batteries in the transmitter > Insert the rechargeable batteries in the transmitter. Ensure correct polarity! > Switch off the transmitter. > Connect the charger to the appropriate voltage source > Connect the charger to the charging socket. >...
  • Seite 23: Ransmitter Controls

    RAnsmittER ContRols Pistol transmitter with a steering wheel for steering and pull lever for speed 1� Antenna 2� Steering wheel for steering func- tion 3� Joystick for driving function 4� Battery / rechargeable battery compartment (lower side) 5� Control unit 6�...
  • Seite 24: C Ommissioning The Transmitter And The Receiver

    Control LED (b) The control LED indicates the switched-on state of the transmitter. Function switch (d) The transmitter can be switched on or off using the function switch. Undervoltage indicator (f) The LED indicates the state of charge of the transmitter batteries. The battery voltage is sufficient (> 9V) as long as the LED is green.
  • Seite 25: Installing The Receiver

    Installing the receiver The installation of the receiver basically depends on the model. For this reason, you should always follow the recommendations of the model manufacturer regarding receiver assembly. Regardless of the model, you should always try to install the receiver so that it is protected from dust, dirt, moisture and vibration in the best possible way.
  • Seite 26: U Sing The System As A Simulator

    sinG tHE systEm As A simulAtoR With the enclosed USB cable, you can use the transmitter on your PC like a standard joystick to con- trol driving simulation programs. With such a driving simulation program, you can gain initial experience while going easy on the equipment as well as optimise your driving style.
  • Seite 27: T Roubleshooting

    11. t RoublEsHootinG Problem Remedial measures transmitter does Check whether the system is switched on. respond Check the state of charge of the batteries / rechargeable batteries of the transmitter. Check the polarity of the batteries / rechargeable batteries. The servos / speed Check whether the system is switched on.
  • Seite 28 2,4 GH AdioCommAndE z à VoiEs No. 2002 avec Servo RS 90 MGBB No. 2000 sans Servo RS 90 MGBB able atIères 1. P réface 2. c onsIgnes ecurIte Préparations 2.2 Télécommande radio Fonctionnement d’un modèle Indications sur les piles et accumulateurs 3. d escrIPtIon roduIt...
  • Seite 29: P Réface

    RéFACE Cher client, chère cliente, Nous vous félicitons pour l’achat d’un produit de la maison df-models. Le produit est contrôlé selon CEM et remplit les exigences des directives européennes et nationales en vigueur. En raison du développement continuel et de l’amélioration de nos produits, nous nous réservons le droit de modifications techniques et de changements d’équipement et de conception, sans préavis.
  • Seite 30: C Ononsignesigneonsignes De Onsignes Ecurite

    onsiGnEs dE ECuRitE Prenez consciemment votre responsabilité envers le produit. En tant que fabricant et distributeur du produit, nous n’avons aucune influence immédiate sur les gestion et manipulation correctes du produit. Les consignes de sécurité suivantes doivent vous prévenir, ainsi que votre entourage, des dommages possibles en cas d’usage inapproprié.
  • Seite 31: Fonctionnement D'un Modèle

    2.3 Fonctionnement d’un modèle Ne conduisez pas lorsque votre capacité de réaction est réduite (par ex. en cas de fatigue, influence de médicament ou d’alcool). Des réactions fautives peuvent provoquer des dom- mages corporels et matériels graves. De même, ne conduisez pas lorsque vous avez le moindre doute quant à l’irréprochabilité de l’état technique de votre modèle/ radiocommande.
  • Seite 32 > N’exposez jamais les piles/ accumulateurs, le chargeur et le modèle face à un environnement défavorable (par ex. humidité, température environnante trop élevée, source de flammes, feu, poussière, vapeur, dissolvant) ! > Evitez également les fortes salissures et le chargement mécanique excessif de l’accumulateur. Ne jamais tirer sur les câbles de connexion ! >...
  • Seite 33: D Escription Du P Roduit

    6� Câble USB (lien PC) 7� Notice d’utilisation Bedienungsanleitung / Operating Instructions / Notice d´Utilisation / Manual de Instrucciones / Istruzioni per l´uso RACE-X 2,4 GHz 2Kanal Fernsteueranlage mit / ohne Servo RS 90 MGBB 2.4-GHz 2-channel remote-cont- rol transmitter with / without Servo RS 90 MGBB Radiocommande 2,4 GHz à...
  • Seite 34: Données Techniques

    3.3 Données techniques Emetteur Nombre de voies 2 voies Fréquence 2,4 GHz Modulation GFSK Signaux numériques (1024 paliers) Utilisation Auto, bateau Afficheur sous-tension (LED) oui (inférieur à 9V) Lien PC (port DSC) fiche jack (3.5mm) Douille de chargement interne Tension de fonctionnement 12V DC (8xAA) Poids 328g...
  • Seite 35 Chargement des accumulateurs de l’émetteur dans l’émetteur > Introduisez les accumulateurs dans l’émetteur. Veillez à la bonne polarité ! > Eteignez l’émetteur. > Raccordez le chargeur à la source de tension correspondante. > Reliez le chargeur à la douille de chargement. >...
  • Seite 36: E Lements De M Anipulation De L 'E Metteur

    ’E lEmEnts dE AniPulAtion dE l mEttEuR Emetteur pistolet avec volant de commande et levier de traction pour la vitesse Antenne Volant de commande pour direction Levier de commande pour conduite Comp. à piles/ accumulateurs (côté inf.) Unité de commande Lien PC (Port DSC, derrière) Douille de chargement (derrière)
  • Seite 37: Ise En M Arche De L 'E Metteur Et Du R Ecepteur

    Contrôle LED (b) Le contrôle LED indique l’état de commutation de l’émetteur. Interrupteur de fonctions (d) Avec l’interrupteur de fonctions, l’émetteur est allumé ou éteint. Afficheur de sous-tension (f) La diode LED indique le niveau de chargement de l’accumulateur de l’émetteur. Tant que la diode LED est verte, la tension d’accumulateur est suffisante (>9V) Bouton de liaison (g) Pour la (re)production de la liaison entre l’émetteur et le récepteur après un changement respective-...
  • Seite 38: P Roduction De L Iaison E Ntre L 'E Metteur Et Le Recepteur

    Montage du récepteur Le montage du récepteur dépend fondamentalement du modèle. A ce sujet, suivez les recommanda- tions du fabricant du modèle. Indépendamment de cela, le récepteur doit être monté en étant pro- tégé de manière optimale contre la poussière, les salissures, l’humidité et les vibrations. La fixation est parfaite avec une bande adhésive à...
  • Seite 39: U Tilisation De L 'I Nstallation En T Ant Que S Imulateur

    ’i tilisAtion dE l nstAllAtion En Ant quE imulAtEuR Avec le câble USB joint, vous pouvez utiliser l’émetteur sur votre PC comme un joystick traditionnel pour le pilotage de programmes de simulation de conduite. Avec un tel programme de simulation de conduite, vous pouvez gagner une première expérience tout en ménageant le matériel, ou optimiser votre style de conduite.
  • Seite 40: Escription Des Rreurs

    11. d EsCRiPtion dEs RREuRs Problème Solution L’émetteur ne réagit pas Vérifiez si l’installation est allumée. Vérifiez le niveau de chargement des piles/ accumulateurs de l’émetteur. Vérifiez la polarité des piles/ accumulateurs. Les servos/ le régulateur de con- Vérifiez si l’installation est allumée. duite Vérifiez le niveau de chargement des piles/ accumulateurs du ne réagissent pas...
  • Seite 41 2,4 GH misoRA CAnAlEs dE ContRol REmoto No. 2002 con Servo RS 90 MGBB No. 2000 sin Servo RS 90 MGBB Í ndIce contenIdos 1. P rólogo 2. I nstruccIones segurIdad Precauciones Control remoto: Funcionamiento de un modelo Instrucciones para batería y acumuladores: 3. d escrIPcIón Producto...
  • Seite 42: P Rólogo

    RóloGo Estimados clientes: Les damos la enhorabuena por haber comprado un producto de nuestra casa. Este producto ha superado los controles de CEM y cumple todos los requisitos de las directivas euro- peas y nacionales vigentes. Estamos comprometidos con mejorar nuestros productos permanentemente y dada la constante evolución de los mismos nos reservamos el derecho para realizar cualquier modificación técnica, así...
  • Seite 43: I Nstrucciones De Seguridad

    nstRuCCionEs dE sEGuRidAd Es importante manipular el producto con cuidado. En nuestra calidad de fabricante y distribuidor del presente producto no tenemos influencia sobre la manipulación y manejo correctos del mismo. Las siguientes instrucciones de seguridad deben protegerle a usted y a su entorno de los daños que se pueden causar en caso de someterlo a un uso indebido.
  • Seite 44: Funcionamiento De Un Modelo

    2.3 Funcionamiento de un modelo No maneje el aparato si su capacidad de reacción está mermada (p.ej. en caso de cansancio, medicamentos, hallarse bajo los efectos del alcohol). Cualquier reacción errónea puede provocar graves daños personales y materiales. Tampoco lo maneje cuando tenga la menor duda sobre el perfecto estado técnico de su modelo / de su control remoto.
  • Seite 45 > Si a la emisora se le proporciona corriente procedente de baterías no nuevas de fábrica, hay que tener en cuenta una capacidad residual suficiente (comprobador de baterías). > Si se usan acumuladores, hay que tener presente que la tensión se reduce (baterías=1.5V, acumuladores=1.2V), y una capacidad reducida de los acumuladores conlleva una merma en la vida útil así...
  • Seite 46: D Escripción Del Producto

    Cable USB (link PC) 7� Manual de instrucciones Bedienungsanleitung / Operating Instructions / Notice d´Utilisation / Manual de Instrucciones / Istruzioni per l´uso RACE-X 2,4 GHz 2Kanal Fernsteueranlage mit / ohne Servo RS 90 MGBB 2.4-GHz 2-channel remote-cont- rol transmitter with / without Servo RS 90 MGBB Radiocommande 2,4 GHz à...
  • Seite 47: Datos Técnicos

    3.3 Datos técnicos Emisora Nº de canales 2 canales Frecuencia 2,4 GHz Modulación GFSK Señales digitales (1024 pasos) Utilización Coche, barco Visualización de subtensión (LED) sí (con 9V) Link PC (puerto DSC) Clavija (3.5mm) Hembrilla interna de carga sí Tensión operativa 12V DC (8xAA) Peso 328g...
  • Seite 48 Recarga de los acumuladores de la emisora dentro de la emisora. > Coloque los acumuladores en la emisora. Tenga en cuenta los polos. > Desconecte la emisora. > Conecte el cargador a la fuente de tensión correspondiente. > Conecte la hembrilla del cargador con el cargador. >...
  • Seite 49: E Lementos De Manejo De La Emisora

    lEmEntos dE mAnEjo dE lA EmisoRA Emisora de pistola con volante para direccionado y palanca de tracción para velocidad Antena Volante para función de direccionado Palanca de control para función de marcha Batería/compartimiento de acumulador (cara inferior) Unidad de control Link PC (puerto DSC, reverso) Hembrilla de carga (reverso) Unidad de control (5)
  • Seite 50: P Uesta En Servicio De Emisora Y Receptor

    LED de control (b) Las LED de control indican el estado de conexión de la emisora. Interruptor de funcionamiento (d) El interruptor de funcionamiento sirve para encender o apagar la emisora. Visualización subtensión (f) Las LED reflejan el estado de la carga de los acumuladores de la emisora. Mientras las LED se iluminen en verde la tensión presente en los acumuladores será...
  • Seite 51: Montaje Del Receptor

    Montaje del receptor El montaje del receptor depende fundamentalmente del modelo. Manténgase por ello estrictamente a las recomendaciones del fabricante del modelo. Independientemente de ello debería montarse el receptor a salvo de polvo, suciedad, humedad y vibración. Para sujetarlo sirve la cinta adhesiva de dos caras (Servo-Tape) o los anillos de goma, que se encargarán de mantener en su sitio al receptor dentro de la espuma que le protege.
  • Seite 52: U Tilizar El Equipo Como Simulador

    tilizAR El EquiPo Como simulAdoR El cable USB adjunto permite utilizar la emisora en su PC como un joystick convencional para simu- lación de programas de marcha. Con este programa de simulación de marcha podrá experimentar sin poner en marcha el material y optimizar su estilo.
  • Seite 53: S Ubsanado De Errores

    11. s ubsAnAdo dE ERRoREs Problema Ayuda La emisora no responde Comprobar si el equipo está conectado. Comprobar el nivel de carga de baterías y acumuladores de la emisora. Revisar los polos de baterías / acumuladores. Servos / regulador de marcha Comprobar si el equipo está...
  • Seite 54 2,4 GH RAsmEttitoRE A CAnAli No. 2002 con Servo RS 90 MGBB No. 2000 senza Servo RS 90 MGBB ndIce 1. P refazIone 2. I struzIonI sIcurezza Preparazione Radiocomando: Funzionamento di un modello Indicazioni pile e batteria: 3. d escrIzIone Prodotto Utilizzo secondo le disposizioni Volume di fornitura...
  • Seite 55: Prefazione

    REFAzionE Gentili clienti, ci congratuliamo con Voi per aver acquistato un prodotto della ditta df-models. Il prodotto è stato sottoposto al test della compatibilità elettromagnetica e soddisfa tutti i requisiti delle Direttive Europee e Nazionali vigenti. Dato i nostri continui sviluppi e migliorie dei nostri prodotti, ci riserviamo il diritto di modifiche tec- niche nonché...
  • Seite 56: I Struzioni Di Sicurezza

    stRuzioni di siCuREzzA Utilizzate il prodotto con responsabilità. In quanto produttori e distributori di questo prodotto, non abbiamo alcun influsso diretto sull'utilizzo appropriato e comando corretto del prodotto. Le seguenti istruzioni di sicurezza devono preservare lei e l'ambiente circostante da eventuali danni che possono verificarsi per un uso inappropriato.
  • Seite 57: Funzionamento Di Un Modello

    2.3 Funzionamento di un modello Non utilizzate l'apparecchio in caso di capacità reattive limitate (ad es. sonnolenza o stato di ubriachezza). Le azioni errate possono causare gravi infortuni alle persone o cose. Non utilizzate l'apparecchio anche se avete soltanto il minimo dubbio sul corretto stato tecnico del vostro modello / del vostro trasmettitore.
  • Seite 58 > Non utilizzate mai contemporaneamente pile e batterie nello stesso apparecchio! Utilizzate sol- tanto pile o soltanto batterie. > Se per l'alimentazione elettrica del trasmettitore non vengono usate pile nuove di fabbrica, con- trollate che abbiano una capacità residua sufficiente (tester batterie). >...
  • Seite 59: Escrizione Del Prodotto

    Cavo USB (collegamento PC) 7� Istruzioni per l'uso Bedienungsanleitung / Operating Instructions / Notice d´Utilisation / Manual de Instrucciones / Istruzioni per l´uso RACE-X 2,4 GHz 2Kanal Fernsteueranlage mit / ohne Servo RS 90 MGBB 2.4-GHz 2-channel remote-cont- rol transmitter with / without Servo RS 90 MGBB Radiocommande 2,4 GHz à...
  • Seite 60: Dati Tecnici

    3.3 Dati tecnici Trasmettitore Numero canali 2 canali Frequenza 2,4 GHz Modulazione GFSK Segnale digitale (passi 1024) Utilizzo auto, nave Visualizzazione bassa tensione (LED) sì (minore di 9V) Collegamento PC (porta DSC) spina clinker (3.5mm) Connettore di carica interno sì Tensione d'esercizio 12V DC (8xAA) Peso...
  • Seite 61 Carica delle batterie del trasmettitore nel trasmettitore stesso > Inserite le batterie nel trasmettitore. Prestate attenzione alla corretta polarità! > Spegnete il trasmettitore. > Collegate il caricabatteria al relativo alimentatore > Collegate il caricabatteria al connettore di carica > Non utilizzate dispositivi di carica rapida per evitare danneggiamenti delle piste di circuito di stampa e dei collegamenti a causa delle alte correnti di carica.
  • Seite 62: E Lementi Di Comando Del Trasmettitore

    lEmEnti di ComAndo dEl tRAsmEttitoRE Trasmettitore a forma di pistola con volantino per lo sterzo e levetta per la regolazione della velocità 1� Antenna 2� Volantino per le funzioni dello sterzo 3� Levetta di comando per la funzi- one di guida 4�...
  • Seite 63: M Essa In Funzione Del Trasmettitore E Del

    Regolatore trim per i canali 1 e 2 (c, h) Il trim consente la microregolazione della posizione neutrale del servosterzo e/o del regolatore di velocità / del servo di accelerazione e del servofreno. A tale proposito i valori del Dual Rate dovreb- bero essere impostati al 100%.
  • Seite 64: Montaggio Del Ricevitore

    Montaggio del ricevitore Il montaggio del ricevitore dipende dal tipo di modello. Per questo motivo osservate le indicazioni del produttore del modello. Indipendentemente da ciò, il ricevitore dovrebbe essere montato pre- stando particolare attenzione ad eventuale presenza di polvere, sporco, umidità e vibrazioni. Per il fissaggio potete utilizzare nastri biadesivi (nastro servo) oppure anelli di gomma che immobilizzano adeguatamente il ricevitore avvolto nel materiale espanso.
  • Seite 65: U Tilizzo Dell ' Impianto Come Simulatore

    tilizzo dEll imPiAnto ComE simulAtoRE Mediante il cavo USB fornito potete collegare il trasmettitore al vostro PC e utilizzarlo come un comunissimo joystick per il comando di programmi di simulazioni di guida. Con un tale programma di simulazione di guida potete accumulare le vostre prime esperienze e ottimizzare il vostro stile di guida.
  • Seite 66: E Liminazione Degli Errori

    11. E liminAzionE dEGli ERRoRi Problema Rimedi Il trasmettitore non reagisce Controllare se l'impianto è acceso. Controllare lo stato di carica delle pile / batterie del trasmetti- tore. Controllare la polarità delle pile / batterie. I servo / il regolatore di velo- Controllare se l'impianto è...
  • Seite 68: Legal Notice

    © Copyright 2009 by df models Information légales Ce mode d‘emploi est une publication de la société df models, Drahthammer Strasse 22, D-92224 Amberg. Tous droits réservés, y compris de traduction. Toute reproduction, quelle qu‘elle soit (p. ex. photocopie, microfilm, saisie dans des installations de traitement de données) nécessite une autorisation écrite de l‘éditeur.

Diese Anleitung auch für:

20022000

Inhaltsverzeichnis