Herunterladen Inhalt Inhalt Diese Seite drucken
Whirlpool AWZ9CD/PRO Sicherheitshinweise, Gebrauchs- Und Installationsanleitung

Whirlpool AWZ9CD/PRO Sicherheitshinweise, Gebrauchs- Und Installationsanleitung

Kondensationstrockner
Vorschau ausblenden Andere Handbücher für AWZ9CD/PRO:
Inhaltsverzeichnis

Werbung

Verfügbare Sprachen
  • DE

Verfügbare Sprachen

  • DEUTSCH, seite 29
Consignes d'installation, d'utilisation et de sécurité
Sécheuse à condensation AWZ9CD/PRO
Sicherheitshinweise, Gebrauchs- und Installationsanleitung
Kondensationstrockner AWZ9CD/PRO
Istruzioni per l'uso
Asciugatrice a condensazione AWZ9CD/PRO
Guía de salud y seguridad, uso y cuidado y de instalación
de la secadora de condensación AWZ9CD/PRO
Health & Safety, Use & Care and Installation guide
Condenser Dryer AWZ9CD/PRO
www.whirlpool.eu/register

Werbung

Inhaltsverzeichnis
loading

Inhaltszusammenfassung für Whirlpool AWZ9CD/PRO

  • Seite 1 Sicherheitshinweise, Gebrauchs- und Installationsanleitung Kondensationstrockner AWZ9CD/PRO Istruzioni per l’uso Asciugatrice a condensazione AWZ9CD/PRO Guía de salud y seguridad, uso y cuidado y de instalación de la secadora de condensación AWZ9CD/PRO Health & Safety, Use & Care and Installation guide Condenser Dryer AWZ9CD/PRO www.whirlpool.eu/register...
  • Seite 2 Mode d’emploi traduit de l’anglais Bedienungsanleitung aus dem Englischen übersetzt Istruzioni per l’uso tradotte dall’inglese Manual de instrucciones traducido del inglés Instruction manual translated from the English language FRANÇAIS . . . . . . . . . . . . . . . . . . . . . . . . . . . . . . . . . . . . . . 3 DEUTSCH .
  • Seite 3: Inhaltsverzeichnis

    FRANÇAIS CONSIGNES D'INSTALLATION, UTILISATION ET SÉCURITÉ MERCI D'AVOIR CHOISI UN PRODUIT WHIRLPOOL. Afin de profiter d'une assistance complète, veuillez enregistrer votre appareil sur www.whirlpool.eu/register Index Consignes de sécurité . . . . . . . . . . . . . . . . . . . . . . . . . . . . . . . . . . . . . . . . . . . . . . . . . . . . . . . . . . . . . . . . . . . . . . . . . . . . . . . 4 Consignes d'utilisation .
  • Seite 4: Consignes De Sécurité

    Consignes de sécurité CONSIGNES DE SÉCURITÉ IMPORTANT DE LIRE ET DE RESPECTER Avant d'utiliser le sèche-linge, il Tous les messages relatifs à la la cire, et le décapant pour convient de lire attentivement sécurité spécifient le danger cire, doivent être lavés à l'eau les Consignes d'utilisation et potentiel présenté...
  • Seite 5 La dernière phase du cycle conformément aux l'acclimater aux conditions de séchage est sans chaleur directives du fabricant et à la environnementales de la pièce . (phase de refroidissement) réglementation de sécurité N'installez pas votre sécheur pour s'assurer que le linge locale .
  • Seite 6: Alimentation Électrique

    N'installez pas le sèche-linge sur Le câble électrique doit être Utilisez les assouplissants un tapis épais bouclé . suffisamment long pour et autres produits similaires brancher le sèche-linge, une en vous conformant aux Si, à cause du manque fois installé, à l'alimentation instructions figurant sur d'espace, le sèche-linge doit principale .
  • Seite 7: Protection De L'environnement

    PROTECTION DE L'ENVIRONNEMENT ÉLIMINATION DES CONSEILS POUR Pour plus d'informations sur MATÉRIAUX D'EMBALLAGE ÉCONOMISER L’ÉNERGIE le traitement, la récupération et le recyclage des appareils Les matériaux d'emballage électriques ménagers, Séchez toujours une pleine sont entièrement recyclables contactez vos autorités locales charge, en fonction du type comme l'indique le symbole de compétentes, le service de...
  • Seite 8: Consignes D'utilisation

    Consignes d'utilisation DESCRIPTION DU PRODUIT APPAREIL 1. Plan de travail 2. Panneau de commande 3. Réservoir d'eau 4. Porte 5. Poignée de porte 6. Filtre de porte (derrière la porte) 7. Filtre inférieur (derrière le volet) 8. Supports réglables (4) PANNEAU DE COMMANDE 1.
  • Seite 9: Inverser La Porte

    Au besoin, la butée de porte de la sécheuse peut être inversée . Télécharger à partir du Site web Whirlpool http://docs . w hirlpool . e u LUMIÈRE DU TAMBOUR (selon le modèle) • Pendant la sélection du programme : la lumière •...
  • Seite 10: Comment Utiliser L'appareil

    COMMENT UTILISER L'APPAREIL PREMIÈRE UTILISATION VÉRIFIER LE RÉSERVOIR D'EAU Assurez-vous que le réservoir d'eau est correctement inséré VÉRIFIEZ LE TUYAU DE VIDANGE Assurez-vous que le tuyau de vidange à l'arrière du sèche-linge est fixé, soit au réservoir d'eau du sèche-linge ou à votre système d'égout domestique (voir CONSIGNES D'INSTALLATION) .
  • Seite 11: Utilisation Quotidienne

    UTILISATION QUOTIDIENNE Assurez-vous qu'il ne reste Assurez-vous que le linge AVERTISSEMENT aucun briquet, ni allumette n'est pas imbibé de liquides dans le linge. inflammables. / temps de séchage (UNIQUEMENT si le CHARGEZ LE LINGE programme Temps séchage ou Air Froid est Respectez les étiquettes de soin de vos choisi) / niveau de séchage (uniquement s'il articles ;...
  • Seite 12 Régler le niveau de séchage, si nécessaire MODIFIER AU BESOIN LES RÉGLAGES Si vous souhaitez changer le niveau de D'UN PROGRAMME EN COURS séchage, assurez-vous que le bouton de Vous pouvez toujours changer certains paramètres niveau de séchage s'allume . une fois que le programme a démarré...
  • Seite 13 VIDER LE RÉSERVOIR D'EAU / LAVER Le sèche-linge s'éteint automatiquement FILTRE PORTE / LAVER FILTRE INFÉRIEUR en environ un quart d'heure après la fin du programme pour économiser de l'énergie . Vider • le réservoir d'eau après chaque programme S'il n'est pas arrêté tout de suite après la fin •...
  • Seite 14 PROGRAMME Type de séchage Étiquettes Réglementations et recommandations d'entretien SYNTHÉTIQUES ): 3,5 Pour sécher le linge en fibres charge maximale synthétiques . durée du programme par ) : 0:55 défaut options sélectionnables Option vapeur, Niveau de séchage, Fraîcheur tambour, Délicat DÉLICAT ): 2,5 Pour sécher le linge délicate qui a...
  • Seite 15 PROGRAMME Type de séchage Étiquettes Réglementations et recommandations d'entretien RAFRAÎCHIR ): 1,5 Pour rafraîchir le linge avec de la charge maximale vapeur . durée du programme par ) : 0:30 Spécifiquement conçue pour rafraîchir défaut et éliminer les odeurs des vêtements options sélectionnables propres et secs comme les chemises, les chemisiers, les pantalons en coton,...
  • Seite 16 OPTIONS OPTIONS DIRECTEMENT SÉLECTIONNABLES EN APPUYANT SUR LA TOUCHE RELATIVE OPTION VAPEUR Minimise le froissement des vêtements en du sèche-linge immédiatement après la coton, synthétique, et leurs mélanges en fin du programme et mettez-les sur des ajoutant une phase d'humidification à la cintres .
  • Seite 17 FONCTIONS MARCHE/ARRÊT Pour allumer le sèche-linge : Pour annuler un programme en cours : appuyez sur la touche « Départ/Pause » jusqu'à ce que la touche s'illumine . appuyez sur le bouton et maintenez- le enfoncé jusqu'à ce que l'inscription Pour éteindre le sèche-linge après « rES »...
  • Seite 18: Départ Différé

    DÉPART DIFFÉRÉ Permet d'avoir le linge prêt à un Le programme démarre moment particulier en différant automatiquement à la fin de le démarrage du programme la période différée . Lorsque le ultérieurement . programme démarre, le délai, visible sur l'afficheur, est remplacé par le Sélectionnez le programme et les temps qui reste au programme .
  • Seite 19: Économies D'énergie

    VOYANTS RÉSERVOIR EAU PLEIN => vider le réservoir d'eau FILTRE INFÉRIEUR OBSTRUÉ => nettoyer le filtre inférieur FILTRE DE PORTE OBSTRUÉ => nettoyer le filtre de porte PANNE Pour toute indication de panne à l'écran, consultez la section DÉPANNAGE pour plus d'informations .
  • Seite 20: Nettoyage Et Entretien

    NETTOYAGE & ENTRETIEN N'utilisez pas de fluides AVERTISSEMENT inflammables pour nettoyer le sèche-linge. Pour toute opération de nettoyage et de maintenance, éteignez le sèche-linge . VIDANGE DU RÉSERVOIR D'EAU Videz le réservoir d'eau après chaque programme, à condition que le tuyau de vidange ne soit pas connecté...
  • Seite 21 NETTOYAGE DU FILTRE DE PORTE Nettoyez le filtre de porte après chaque programme . Assurez-vous que le linge est déchargé . Ouvrez la porte . Enlevez le filtre de porte en le tirant vers le Nettoyez le compartiment du filtre avec haut .
  • Seite 22 NETTOYAGE DU FILTRE INFÉRIEUR Nettoyez le filtre inférieur environ une fois par mois . Lavez le filtre inférieur à l'eau courante ; éliminez la poussière et les peluches . Pressez la courroie doucement vers le bas pour ouvrir le volet inférieur . Soigneusement essuyez le filtre inférieur pour enlever toute trace d'humidité...
  • Seite 23 Replacez le filtre inférieur à l'intérieur du Refermez le volet inférieur . compartiment du filtre ; assurez-vous qu'il soit complètement inséré . Tournez les deux barres de verrouillage (droit et gauche) à la position verticale pour verrouiller le filtre inférieur . 2°...
  • Seite 24: Guide De Dépannage & Service Après-Vente

    GUIDE DE DÉPANNAGE & SERVICE APRÈS-VENTE Votre sèche-linge est équipé de différentes fonctions de sécurité automatiques . Elles permettent de détecter des pannes rapidement et au système de sécurité de réagir adéquatement . Ces pannes sont généralement peu importantes et peuvent être résolues en quelques minutes . Problème Cause possible Solution...
  • Seite 25 DES GOUTTELETTES D'EAU Le filtre inférieur n'est pas bien • Vérifiez la position du filtre SONT SOUS LE SÈCHE-LINGE inséré inférieur et assurez-vous qu'il est totalement intégré dans le compartiment de filtre . Des peluches restent sur le filtre • Enlevez les résidus de peluches inférieur ou le joint de porte .
  • Seite 26 INDICATEUR DE PANNE ET MESSAGES Assurez-vous de • Vider le réservoir d'eau après chaque programme • Nettoyer le filtre de porte après chaque programme • Nettoyez le filtre inférieur après cinq cycles Voyant de panne Cause possible Solution Le réservoir d'eau peut être •...
  • Seite 27: Transport Et Manutention

    Vous trouverez ci-dessous un résumé des causes de panne possibles ainsi que les solutions . Si le problème persiste après avoir suivi les instructions indiquées ci-dessous, appuyez sur le bouton On/Off et maintenez-le enfoncé pendant au moins trois secondes . Si, après coup, l'indication de panne apparaît toujours, éteignez et débranchez le sèche-linge et contactez notre Service après-vente .
  • Seite 28: Avant D'appeler Le Service Après-Vente

    • votre adresse complète ; • votre numéro de téléphone . Fabricant : Whirlpool Europe s.r.l. Socio Unico Viale Guido Borghi 27 En cas de réparation, utilisez notre Service après- 21025 Comerio (VA) vente agréé, pour garantir une réparation correcte Italie et l'utilisation de pièces de rechange originales .
  • Seite 29 DEUTSCH SICHERHEITSHINWEISE, GEBRAUCHS- und INSTALLATIONSANLEITUNG DANKE, DASS SIE SICH FÜR EIN WHIRLPOOL PRODUKT ENTSCHIEDEN HABEN. Für eine umfassendere Unterstützung melden Sie Ihr Gerät bitte unter www.whirlpool.eu/register an Index Sicherheitshinweise . . . . . . . . . . . . . . . . . . . . . . . . . . . . . . . . . . . . . . . . . . . . . . . . . . . . . . . . . . . . . . . . . . . . . . . . . . . . . . . . 30 Nutzungs- und Pflegehandbuch .
  • Seite 30: Sicherheitshinweise

    Sicherheitshinweise SICHERHEITS- HINWEISE DIESE MÜSSEN DURCHGELESEN UND BEACHTET WERDEN Lesen Sie vor Inbetriebnahme Alle Gefahrenhinweise Aceton, Alkohol, Benzin, Kerosin, des Trockners sorgfältig die bezeichnen das potenzielle Fleckentfernern, Terpentin und Sicherheitshinweise und Risiko, auf das sie sich Wachsentfernern behandelt Gebrauchsanleitung . beziehen und geben an, wie worden sind, sollten vor dem Bewahren Sie diese Verletzungsgefahren, Schäden...
  • Seite 31 benutzen Sie kein Benzin Achten Sie beim Aufstellen WARNUNG oder andere brennbare darauf, das Netzkabel nicht Materialien im oder in der mit dem Trockner selbst zu Wenn Sie den Trockner vor Nähe des Trockners: Es besteht beschädigen . Programmende anhalten, sofort Brandgefahr, falls der Trockner Starten Sie den Trockner erst, die gesamte Wäsche entnehmen...
  • Seite 32: Elektrische Warnungen

    passen Sie diese bei Bedarf erfüllen, muss installationsseitig benutzen Sie ihn nicht, wenn Sie an und überprüfen Sie ein allpoliger Trennschalter barfuß sind . durch die Verwendung einer mit einer Kontaktöffnung von Wasserwaage, dass der mindestens 3 mm vorgesehen RICHTIGER GEBRAUCH Trockner vollkommen eben und werden .
  • Seite 33: Entsorgung Von Verpa- Ckungsmaterialien

    HINWEISE ZUM UMWELTSCHUTZ ENTSORGUNG VON VERPA- Recycling von elektrischen Möglichst immer die maximal CKUNGSMATERIALIEN Haushaltsgeräten erhalten Sie zulässige Schleuderdrehzahl bei Ihrer zuständigen örtlichen der Waschmaschine nutzen, Das Verpackungsmaterial ist zu Behörde, der Müllabfuhr oder da eine mechanische 100 % wiederverwertbar und dem Händler, bei dem Sie den Entwässerung weniger Energie trägt das Recycling-Symbol:...
  • Seite 34: Nutzungs- Und Pflegehandbuch

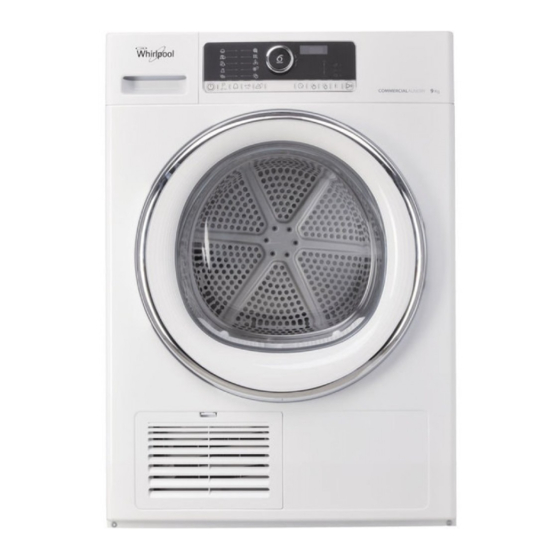
    Nutzungs- und Pflegehandbuch PRODUKT- BESCHREIBUNG GERÄT 1. Arbeitsplatte 2. Bedientafel 3. Wasserbehälter 4. Tür 5. Türgriff 6. Türfilter (hinter der Tür) 7. Bodenfilter (hinter der Klappe) 8. Stellfüße (4) BEDIENTAFEL 1. An/Aus-Taste (bei langem Tastendruck Rücksetzung) 2. Programmtaste (Einstellungstaste wenn lang gedrückt) 3.
  • Seite 35: Umkehren Der Tür

    Minute nicht wieder geschlossen wird . UMKEHREN DER TÜR Bei Bedarf kann der Türanschlag des Trockners umgekehrt werden . Download von der Whirlpool- Internetseite http://docs . w hirlpool . e u TROMMELBELEUCHTUNG (falls vorhanden) • Während der Programmwahl: Beim Beladen der •...
  • Seite 36: Bedienung Des Gerätes

    BEDIENUNG DES GERÄTES ERSTINBETRIEBNAHME WASSERBEHÄLTER PRÜFEN Stellen Sie sicher, dass der Wasserbehälter richtig eingesetzt ist ABLAUFSCHLAUCH PRÜFEN Stellen Sie sicher, dass der Abflussschlauch auf der Rückseite des Trockners befestigt ist, entweder an dem Wasserbehälter des Trockners oder an ihr häusliches Abwassersystem (siehe INSTALLATIONSANLEITUNG) .
  • Seite 37: Täglicher Gebrauch

    TÄGLICHER GEBRAUCH Stellen Sie sicher, dass sich Stellen Sie sicher, dass WARNUNG keine Feuerzeuge oder die Wäsche nicht mit Streichhölzer in der Wäsche brennbaren Flüssigkeiten befinden. getränkt ist. folgenden Reihenfolge: Programmauswahl WÄSCHE EINFÜLLEN / Trockenzeit (NUR wenn Zeitprogramme Die Pflegeetiketten beachten; sicherstellen, oder Lüften ausgewählt wird) / Trockengrad dass die Textilien für das Maschinentrocknen (nur wenn wählbar / einstellbar) / Optionen .
  • Seite 38 Trockengrad einstellen, falls erforderlich Sie können noch einige Einstellungen ändern Stellen Sie sicher, dass die Trockengrad-Taste« nachdem das Programm gestartet wurde: aufleuchtet, wenn Sie den Trockengrad ändern • Trockenzeit einstellen (nur wenn das möchten . Programm Zeitprogramme oder Lüften ausgewählt wird) Drehen Sie den Knopf, um den gewünschten •...
  • Seite 39 WASSERBEHÄLTER LEEREN / TÜRFILTER Nach ca . einer viertel Stunde schaltet der REINIGEN / BODENFILTER REINIGEN Trockner automatisch ab, um Energie zu sparen . Leeren Wenn der Trockner nicht direkt nach • den Wassertank nach jedem Programm Programmende abgeschaltet wird, bewegt •...
  • Seite 40: Pflegeleicht

    PROGRAMM Art des Trocknens Pflege- Vorschriften und Empfehlungen etiketten PFLEGELEICHT ): 3,5 Zum Trocknen von Wäsche aus eladung synthetischen Fasern . tandardprogrammdauer ): 0:55 usatZfunktionen Dampfoption, Trockenstufe, Knitterschutz, Schonen FEINWÄSCHE ): 2,5 Zum Trocknen von empfindlicher eladung Wäsche, die eine schonende tandardprogrammdauer ): 0:50 Behandlung braucht .
  • Seite 41: Zeitprogramme

    PROGRAMM Art des Trocknens Pflege- Vorschriften und Empfehlungen etiketten DAMPF AUFFR ): 1,5 Zum Auffrischen der Wäsche mit eladung Dampf . tandardprogrammdauer ): 0:30 Speziell zum Auffrischen und zur Beseitigung von Gerüchen aus usatZfunktionen Freizeitkleidung wie Hemden, Blusen, Hosen aus Baumwolle, pflegeleichten Geweben und ihren Mischungen .
  • Seite 42 OPTIONEN OPTIONEN, DIE DIREKT DURCH DRÜCKEN DER ENTSPRECHENDEN TASTE WÄHLBAR SIND Minimiert ein Knittern von Kleidung Kleidung nach Programmende sofort DAMPFOPTION aus Baumwolle, pflegeleichten aus dem Trockner und hängen Sie Geweben und ihrer Mischungen durch diese auf Kleiderbügel . die Zugabe einer Befeuchtungsphase Die Feuchtigkeitsstufe stellt sich am Ende des Trockenzyklus .
  • Seite 43: Funktionen

    FUNKTIONEN AN/AUS Um den Trockner einzuschalten: Um ein laufendes Programm abzubrechen: Drücken Sie die Taste bis die Start/ Pause-Taste leuchtet . Drücken und halten Sie die Taste gedrückt, bis „rES” an der Anzeige Um nach Programmende den erscheint . Trockner auszuschalten: drücken Sie die Taste, bis sich die Lichter ausschalten .
  • Seite 44 Ermöglicht es, die Wäsche zu einem Nach Ablauf der Verzögerung startet STARTVORWAHL bestimmten Zeitpunkt, durch das Programm automatisch . Beim Verschieben eines Programms auf einen Programmstart wird die Startvorwahl späteren Zeitpunkt, fertig zu haben . auf der Anzeige durch die verbleibende Programmdauer ersetzt .
  • Seite 45: Energie Sparen

    ANZEIGEN WASSERBEHÄLTER VOLL => den Wasserbehälter leeren BODENFILTER VERSTOPFT => Den Bodenfilter reinigen TÜRFILTER VERSTOPFT => den Türfilter reinigen STÖRUNG Bei Angabe einer Störung auf der Anzeige, für weitere Informationen siehe Abschnitt FEHLERBEHEBUNG . Weitere Informationen finden Sie in dem Abschnitt PFLEGE UND WARTUNG, und ANLEITUNG ZUR FEHLERBEHEBUNG .
  • Seite 46: Wartung & Pflege

    WARTUNG & PFLEGE Benutzen Sie keine WARNUNG brennbaren Flüssigkeiten, um den Trockner zu reinigen. Für Reinigungs- und Wartungsarbeiten, den Trockner ausschalten . LEEREN DES WASSERBEHÄLTERS Den Wasserbehälter nach jedem Programm leeren, vorausgesetzt der Abflussschlauch ist nicht an Abwassersystem angeschlossen (siehe INSTALLATIONSANLEITUNG) . Halten Sie den Griff und ziehen Sie den Den Wasserbehälter wieder in seinen Sitz Wasserbehälter vorsichtig heraus .
  • Seite 47: Reinigung Des Türfilters

    REINIGUNG DES TÜRFILTERS Den Türfilter nach jedem Programm reinigen . Achten Sie darauf, dass die Wäsche entnommen ist . Öffnen Sie die Tür . Entfernen Sie den Türfilter, indem Sie ihn nach Das Filterfach mit einem weichen Tuch oder oben ziehen . vorsichtig mit einem Staubsauger reinigen .
  • Seite 48: Reinigung Des Bodenfilters

    REINIGUNG DES BODENFILTERS Den Bodenfilter jeden Monat reinigen . Den Bodenfilter unter fließendem Wasser reinigen Staub und Flusen weg wischen . Die Lasche vorsichtig hinunterdrücken, um die Bodenklappe zu öffnen . Den Bodenfilter trocken wischen, so dass es nicht mehr tropfnass ist . Die Riegel rechts und links an dem Bodenfilter nach unten in eine waagrechte Position drehen .
  • Seite 49: Die Aussenseite Des Trockners Reinigen

    Den Bodenfilter wieder in das Filterfach Anschließend die Bodenklappe wieder hineindrücken; stellen Sie sicher, dass es vollständig schließen . eingesetzt ist . Die beiden Riegel (rechts und links) wieder in senkrechte Position stellen, um den Bodenfilter zu verriegeln . 2° 1°...
  • Seite 50: Anleitung Zur Fehlerbehebung & Kundendienst

    ANLEITUNG ZUR FEHLERBEHEBUNG & KUNDENDIENST Ihr Trockner ist mit verschiedenen automatischen Sicherheitsfunktionen ausgestattet . Somit werden Störungen frühzeitig erkannt und das Sicherheitssystem kann angemessen reagieren . Häufig sind diese Störungen so geringfügig, dass sie sich innerhalb von wenigen Minuten beheben lassen .
  • Seite 51: Wassertropfen Unter Dem Trockner

    WASSERTROPFEN UNTER DEM Bodenfilter ist nicht richtig • Die Position des Bodenfilters TROCKNER eingesetzt prüfen und sicherstellen, dass es komplett in das Filterfach integriert ist . Verbleibende Fusel an dem • Entfernen Sie die Bodenfilter oder der Türdichtung restlichen Fuseln an den Gummidichtungen des Bodenfilters und der Türdichtung .
  • Seite 52: Fehleranzeigen Und Meldungen

    FEHLERANZEIGEN UND MELDUNGEN Stellen Sie sicher, dass: • der Wassertank nach jedem Programm geleert wird • der Türfilter nach jedem Programm gereinigt wird • Den Bodenfilter nach fünf Zyklen reinigen; Fehleranzeige Mögliche Ursache Abhilfe Wasserbehälter kann • mit Wasser gefüllt sein •...
  • Seite 53 Nachstehend folgt eine Zusammenfassung der möglichen Störungsursachen und Abhilfen . Besteht das Problem nachdem die Anweisungen wie unten angegeben befolgt wurden, halten Sie die An/ Aus-Taste mindestens für drei Sekunden gedrückt . Wenn danach die Störung immer noch erscheint, den Trockner ausschalten und den Netzstecker ziehen und den Kundendienst kontaktieren .
  • Seite 54: Bevor Sie Den Kundendienst Rufen

    Die Servicenummer finden Sie auch auf dem Garantieheft, • Ihre vollständige Anschrift, • Ihre Telefonnummer . Hersteller: Whirlpool Europe s.r.l. Socio Unico Viale Guido Borghi 27 Wenden Sie sich für alle Reparaturen an 21025 Comerio (VA) unseren autorisierten Kundendienst, um eine Italien ordnungsgemäße Reparatur und die Verwendung...
  • Seite 55 ITALIANO ISTRUZIONI PER L'USO GRAZIE PER AVERE ACQUISTATO UN PRODOTTO WHIRLPOOL. Per ricevere un'assistenza più completa, registrare l'apparecchio su www.whirlpool.eu/register Indice Istruzioni per la sicurezza . . . . . . . . . . . . . . . . . . . . . . . . . . . . . . . . . . . . . . . . . . . . . . . . . . . . . . . . . . . . . . . . . . . . . . . . . . . 56 Istruzioni per l'uso .
  • Seite 56: Istruzioni Per La Sicurezza

    Istruzioni per la sicurezza NORME DI SICUREZZA IMPORTANTE: DA LEGGERE E OSSERVARE Prima di utilizzare Tutti i messaggi relativi cherosene, smacchiatori, l'asciugatrice, leggere alla sicurezza specificano il trementina, cere e deceranti attentamente le Istruzioni per potenziale pericolo esistente devono essere lavati ad alta l'uso .
  • Seite 57 fosse necessario, estrarre essere messa in funzione non danneggi il cavo di velocemente tutti i capi inavvertitamente, potrebbe alimentazione . e stenderli per favorire la incendiarsi . Attivare l'asciugatrice soltanto dispersione del calore . una volta ultimata la procedura d'installazione . INSTALLAZIONE L'ultima fase del ciclo di asciugatura viene effettuata...
  • Seite 58: Avvertenze Elettriche

    dell'asciugatrice sia Affinché l'installazione sia Non toccare l'asciugatrice con perfettamente in piano usando conforme alle norme di parti del corpo bagnate e non una livella a bolla d'aria . sicurezza vigenti, occorre un utilizzarlo a piedi scalzi . interruttore onnipolare avente USO CORRETTO Se possibile, usare un tubo una distanza minima di 3 mm...
  • Seite 59: Consigli Per La Salvaguardia Dell'ambiente

    CONSIGLI PER LA SALVAGUARDIA DELL’AMBIENTE SMALTIMENTO e il riciclaggio degli asciugatura . Per ulteriori DEL MATERIALE DA elettrodomestici, contattare informazioni, fare riferimento IMBALLAGGIO l'ufficio locale competente, il alla tabella dei programmi . servizio di raccolta dei rifiuti Il materiale di imballaggio è domestici o il negozio presso È...
  • Seite 60: Istruzioni Per L'uso

    Istruzioni per l'uso DESCRIZIONE DEL PRODOTTO APPARECCHIO 1. Piano superiore 2. Pannello comandi 3. Vaschetta di raccolta dell'acqua 4. Sportello 5. Maniglia 6. Filtro sportello (dietro sportello) 7. Filtro inferiore (dietro aletta) 8. Piedini regolabili (4) PANNELLO COMANDI 1. Tasto On/Off (se premuto a lungo: Reset) 2.
  • Seite 61: Accessori Disponibili

    Se necessario, il lato di chiusura dello sportello può essere invertito . Scaricare la guida dal sito web di Whirlpool http://docs . w hirlpool . e u LUCE DEL CESTELLO (se presente) • Durante la selezione del programma: la luce si •...
  • Seite 62: Utilizzo Dell'apparecchio

    UTILIZZO DELL'APPARECCHIO PRIMO UTILIZZO CONTROLLARE LA VASCHETTA DI RACCOLTA DELL'ACQUA Assicurarsi che la vaschetta di raccolta dell'acqua sia inserita correttamente CONTROLLARE IL TUBO DI SCARICO Assicurarsi che il tubo di scarico sul retro dell'asciugatrice sia fissato alla vaschetta di raccolta dell'acqua o all'impianto di scarico domestico (vedere le ISTRUZIONI PER L'INSTALLAZIONE) .
  • Seite 63: Uso Quotidiano

    USO QUOTIDIANO Assicurarsi che nella Assicurarsi che la biancheria AVVERTENZA biancheria non rimangano non sia impregnata di accendini o fiammiferi. liquidi infiammabili. programma nell'ordine seguente: selezione del INTRODURRE LA BIANCHERIA programma / tempo di asciugatura (SOLO se è Osservare i simboli riportati sulle etichette dei selezionato il programma Ciclo a tempo o Ciclo capi, verificando che questi siano idonei per aria / livello di asciugatura (solo se selezionabile...
  • Seite 64 Se necessario, impostare il livello di • regolare il tempo di asciugatura (solo se asciugatura è selezionato il programma Ciclo a tempo o Se si desidera modificare il livello di Ciclo Aria) asciugatura, controllare che la luce del tasto • regolare o annullare l'opzione Avvio Livello di asciugatura «...
  • Seite 65 SVUOTARE LA VASCHETTA DI RACCOLTA Dopo circa un quarto d'ora dal termine del DELL'ACQUA / PULIRE IL FILTRO DELLO ciclo di asciugatura, l'apparecchio si spegne SPORTELLO / PULIRE IL FILTRO INFERIORE automaticamente per risparmiare energia . Vuotare Se l'asciugatrice non viene spenta subito •...
  • Seite 66 PROGRAMMA Tipo di asciugatura Simboli di Regolazioni e raccomandazioni asciugatura SINTETICI ): 3,5 Per asciugare biancheria in fibre arico max sintetiche . urata del programma ): 0:55 pZioni seleZionabili Vapore, Livello di asciugatura, Antipiega, Delicato DELICATI Per asciugare biancheria delicata che ): 2,5 arico max richiede un trattamento delicato .
  • Seite 67 PROGRAMMA Tipo di asciugatura Simboli di Regolazioni e raccomandazioni asciugatura CICLO VAPORE ): 1,5 Per rinfrescare il bucato con il vapore . arico max Concepito in modo specifico per urata del programma ): 0:30 rinfrescare e rimuovere gli odori da indumenti sportivi asciutti e puliti pZioni seleZionabili come maglie, camicie, pantaloni di...
  • Seite 68 OPZIONI OPZIONI DIRETTAMENTE SELEZIONABILI PREMENDO IL TASTO CORRISPONDENTE OPZIONE VAPORE Riduce al minimo le pieghe degli dall'asciugatrice subito dopo la fine indumenti in cotone, sintetici e del programma e appenderli sulle misti aggiungendo una fase di grucce . umidificazione alla fine del ciclo di Il livello di umidità...
  • Seite 69 FUNZIONI ACCESO/SPENTO Per accendere l'asciugatrice: Per annullare un programma in corso: premere il tasto fino all'accensione del tasto Avvio/Pausa . Premere a lungo il tasto fino a quando sul display compare “rES” . Per spegnere l'asciugatrice al termine del programma: premere il tasto finché...
  • Seite 70: Avvio Ritardato

    AVVIO RITARDATO Consente di avere la biancheria pronta Al termine del ritardo impostato, a una determinata ora rinviando il programma si avvierà l'inizio del programma . automaticamente All'avvio del programma, il ritardo sul display viene Selezionare il programma, sostituito dalla durata residua del la temperatura e le opzioni .
  • Seite 71: Risparmio Energetico

    INDICATORI VASCHETTA ACQUA PIENA => vuotare la vaschetta FILTRO INFERIORE INTASATO => pulire il filtro inferiore FILTRO SPORTELLO INTASATO => pulire il filtro dello sportello ERRORE Per ulteriori informazioni sulle indicazioni di errore che compaiono sul display, consultare la sezione GUIDA ALLA RICERCA GUASTI .
  • Seite 72: Manutenzionee Pulizia

    MANUTENZIONE E PULIZIA Non utilizzare liquidi AVVERTENZA infiammabili per pulire l'asciugatrice. Prima di eseguire qualsiasi operazione di pulizia e manutenzione, spegnere l'asciugatrice . SVUOTAMENTO DELLA VASCHETTA DI RACCOLTA DELL'ACQUA Se il tubo di scarico non è collegato all'impianto di scarico domestico (vedere le ISTRUZIONI PER L'INSTALLAZIONE), vuotare la vaschetta di raccolta dell'acqua dopo ogni ciclo di asciugatura .
  • Seite 73 PULIZIA DEL FILTRO DELLO SPORTELLO Pulire il filtro dello sportello dopo ogni ciclo di asciugatura . Scaricare l'apparecchio estraendo tutta la biancheria . Aprire lo sportello . Rimuovere il filtro dello sportello tirandolo Pulire la sede del filtro con un panno morbido verso l'alto .
  • Seite 74 PULIZIA DEL FILTRO INFERIORE Pulire il filtro inferiore una volta al mese circa Pulire il filtro inferiore sotto l'acqua corrente, togliendo la polvere e i pelucchi . Premere la linguetta per aprire lo sportellino inferiore . Asciugare il filtro inferiore in modo che l'acqua non goccioli .
  • Seite 75 Reinserire il filtro inferiore nel comparto, Infine, chiudere nuovamente lo sportellino assicurandosi che sia inserito correttamente . inferiore . Bloccare il filtro inferiore riportando i fermi a destra e a sinistra in posizione verticale . 2° 1° PULIZIA ESTERNA DELL'ASCIUGATRICE Pulire le parti esterne dell'asciugatrice usando un panno morbido inumidito .
  • Seite 76: Guida Alla Ricerca Guasti E Servizio Assistenza

    GUIDA ALLA RICERCA GUASTI E SERVIZIO ASSISTENZA L'asciugatrice è dotata di varie funzioni automatiche di sicurezza . Queste funzioni permettono di rilevare i guasti in tempo utile, in modo che il sistema di sicurezza possa reagire adeguatamente . Le anomalie sono spesso di lieve entità e possono essere risolte entro pochi minuti .
  • Seite 77 GOCCE D'ACQUA SOTTO Il filtro inferiore non è inserito • Controllare la posizione del L'ASCIUGATRICE correttamente filtro inferiore, verificando che sia perfettamente integrato nella sede . Residui di pelucchi sulla • Rimuovere i residui di pelucchi guarnizione del filtro inferiore o dalle guarnizioni in gomma del dello sportello filtro inferiore e dello sportello .
  • Seite 78 INDICATORI E MESSAGGI DI ERRORE Eseguire sempre le seguenti operazioni: • Vuotare la vaschetta di raccolta dell'acqua dopo ogni ciclo di asciugatura • Pulire il filtro dello sportello dopo ogni ciclo di asciugatura • Pulire il filtro inferiore ogni cinque cicli di asciugatura Indicatore di Possibile causa Soluzione...
  • Seite 79: Trasporto E Movimentazione

    La tabella seguente contiene le possibili cause di errore e le relative soluzioni . Se una volta eseguite le operazioni qui descritte il problema persiste, premere il tasto Acceso/Spento per almeno tre secondi . Se anche in questo caso il problema persiste, spegnere l'asciugatrice, staccarla dalla rete elettrica e rivolgersi al Servizio Assistenza .
  • Seite 80: Prima Di Contattare Il Servizio Assistenza

    Per ricevere assistenza, chiamare il numero riportato PROBLEMA PERSISTE, CONTATTARE IL SERVIZIO sul libretto di garanzia, oppure seguire le istruzioni ASSISTENZA PIÙ VICINO. disponibili sul sito web www.whirlpool.eu Prepararsi a fornire: • una breve descrizione del problema; • il tipo e il modello esatto dell’apparecchio;...
  • Seite 81 ESPAÑOL GUÍAS DE SALUD Y SEGURIDAD, USO Y CUIDADO y DE INSTALACIÓN GRACIAS POR COMPRAR UN PRODUCTO WHIRLPOOL. Para recibir un asistencia más completa, registre su electrodoméstico en www.whirlpool.eu/register Índice Guía de Salud y Seguridad e Instalación . . . . . . . . . . . . . . . . . . . . . . . . . . . . . . . . . . . . . . . . . . . . . . . . . . . . . . . . . . . . 82 Guía de uso y cuidado .
  • Seite 82: Guía De Salud Y Seguridad E Instalación

    Guía de Salud y Seguridad e Instalación INSTRUCCIONES DE SEGURIDAD ES IMPORTANTE QUE LEA Y SIGA LAS SIGUIENTES RECOMENDACIONES Antes de utilizar por Todos los mensajes de aguarrás, cera y limpiaceras primera vez la secadora lea seguridad especifican el deben lavarse con agua caliente detenidamente la guía de peligro potencial existente e añadiendo una cantidad extra...
  • Seite 83 La última fase del ciclo de realizadas por un técnico Una vez finalizada la secado se realiza sin calor (fase cualificado, siguiendo las instalación del aparato espere de enfriamiento) para garantizar instrucciones del fabricante unas cuantas horas antes de que la colada se mantenga a un y de conformidad con la ponerlo en marcha, para que nivel de temperatura que no...
  • Seite 84: Uso Correcto

    desagüe de la casa . Así se es adecuado a su toma de No seque prendas sin lavar en evitará tener que vaciar el corriente, póngase en contacto la secadora . contenedor de agua al final de con un técnico cualificado . cada ciclo de secado, ya que el No use alargaderas, regletas No seque en exceso la ropa .
  • Seite 85: Protección Del Medio Ambiente

    PROTECCIÓN DEL MEDIO AMBIENTE ELIMINACIÓN DEL póngase en contacto con y del programa/tiempo de MATERIAL DE EMBALAJE las autoridades locales, con secado . Para una información el servicio de recogida de más detallada, consulte la tabla El material de embalaje es residuos domésticos, o con la de programas .
  • Seite 86: Guía De Uso Y Cuidado

    Guía de uso y cuidado DESCRIPCIÓN DEL PRODUCTO APARATO 1. Encimera 2. Panel de control 3. Depósito de agua 4. Puerta 5. Tirador de la puerta 6. Filtro de la puerta (detrás de la puerta) 7. Filtro inferior (detrás de la tapa) 8.
  • Seite 87: Invertir La Puerta

    Si es necesario, el tope de la puerta de la secadora se puede invertir . Descargándola del sitio web de Whirlpool http://docs . w hirlpool . e u LUZ DEL TAMBOR (si tiene) • Durante la selección del programa: la luz se •...
  • Seite 88: Cómo Usar El Electrodoméstico

    CÓMO USAR EL ELECTRODOMÉSTICO PRIMER USO COMPRUEBE EL DEPÓSITO DE AGUA Asegúrese de que el depósito de agua esté introducido correctamente COMPRUEBE EL TUBO DE DESAGÜE Asegúrese de que el tubo de desagüe situado en la parte trasera de la secadora esté fijado correctamente al depósito de agua de la secadora o al sistema de desagüe de la casa (consulte la GUÍA DE INSTALACIÓN ) .
  • Seite 89: Uso Diario

    USO DIARIO Compruebe que dentro Asegúrese de que la ropa no ADVERTENCIA de la colada no haya esté impregnada en líquidos encendedores ni cerillas. inflamables. de secado (SOLAMENTE si está seleccionado CARGUE LA ROPA Tiempo secado o Airear) / nivel de secado Respete las etiquetas de cuidados de las (sólo si se puede seleccionar / configurar) / prendas;...
  • Seite 90 Seleccione el nivel de secado, si fuera • Ajuste del tiempo de secado (solo si está necesario seleccionado el programa Tiempo de secado o Si desea cambiar el nivel de secado, asegúrese Aireado) que esté encendido el botón Nivel de secado « . •...
  • Seite 91 Para ahorrar energía, la secadora se apaga VACIADO DEL DEPÓSITO DE AGUA / automáticamente unos 15 minutos después LIMPIEZA DEL FILTRO DE LA PUERTA / de que haya terminado el programa . LIMPIEZA DEL FILTRO INFERIOR Vacíe Si no apaga la secadora inmediatamente •...
  • Seite 92 PROGRAMA Tipo de secado Etiquetas Normativa y recomendaciones de cuidados SINTÉTICOS ): 3,5 Para secar ropa con tejidos sintéticos . carga máx duración del programa ): 0:55 por defecto opciones que puede seleccionar Opción vapor, Nivel de secado, Ropa fresca, Suave PRENDAS ): 2,5 Para secar ropa delicada que requiere...
  • Seite 93 PROGRAMA Tipo de secado Etiquetas Normativa y recomendaciones de cuidados REFRESCAR ): 1,5 Para refrescar la ropa con vapor . carga máx Especialmente concebido para duración del programa ): 0:30 refrescar la ropa y eliminar los olores por defecto de las prendas secas y limpias como opciones que puede camisas, blusas, pantalones de seleccionar...
  • Seite 94 OPCIONES OPCIONES QUE SE PUEDEN SELECCIONAR DIRECTA- MENTE PULSANDO EL BOTÓN CORRESPONDIENTE Reduce al mínimo las arrugas de inmediatamente de la secadora cuando OPCIÓN VAPOR las prendas de algodón, sintéticas y finalice el programa y cuélguela en sus mezclas añadiendo una fase de perchas .
  • Seite 95: Bloqueo De Teclas

    FUNCIONES ENCENDIDO/APAGADO Para encender la secadora: pulse Para cancelar un programa en marcha: el botón Inicio/Pausa hasta que se encienda el botón . mantenga pulsado el botón hasta que aparezca «rES» en la pantalla . Para apagar la secadora cuando finaliza el programa: pulse el botón hasta que se apaguen las luces .
  • Seite 96: Inicio Diferido

    INICIO DIFERIDO Con esta función la ropa estará Después del periodo de aplazamiento, seca a una determinada hora, que el programa se inicia automáticamente . se establece configurando el inicio Cuando el programa inicia, el inicio diferido del programa . diferido visualizado en la pantalla es reemplazado por el tiempo restante de Seleccione el programa y las opciones .
  • Seite 97: Ahorro De Energía

    INDICADORES DEPÓSITO AGUA LLENO => vacíe el depósito de agua FILTRO INFERIOR OBSTRUIDO => limpie el filtro inferior FILTRO DE LA PUERTA => limpie el filtro de la puerta OBSTRUIDO ERROR Para cualquier indicación de error en la pantalla, consulte el apartado SOLUCIÓN DE PROBLEMAS para más información .
  • Seite 98: Limpieza Ymantenimiento

    LIMPIEZA Y MANTENIMIENTO No utilice líquidos ADVERTENCIA inflamables para limpiar la secadora. La secadora debe apagarse antes de efectuar cualquier tarea de limpieza o mantenimiento . VACIAR EL DEPÓSITO DE AGUA Vacíe el depósito de agua después de cada programa si el tubo de desagüe no está...
  • Seite 99 LIMPIAR EL FILTRO DE LA PUERTA Limpiar el filtro de la puerta después de cada programa . Compruebe que no quede ropa dentro . Abra la puerta . Extraiga el filtro de la puerta tirando hacia arriba . Limpie la cámara del filtro con un paño suave, o con cuidado con una aspiradora .
  • Seite 100 LIMPIAR EL FILTRO INFERIOR Limpie el filtro inferior cada mes aproximadamente . Limpie el filtro inferior bajo el grifo; limpie el polvo y la pelusa . Con cuidado, presione hacia abajo la brida para abrir la tapa inferior . Seque el filtro inferior con un paño para que no gotee .
  • Seite 101 Vuelva a colocar el filtro inferior en la cámara Por último, vuelva a cerrar la tapa inferior . del filtro; y asegúrese de que quede completamente introducido . Vuelva a girar las dos barras de cierre (derecha e izquierda) a la posición vertical para bloquear el filtro inferior .
  • Seite 102: Guía De Solución De Problemas Yservicio Postventa

    GUÍA DE SOLUCIÓN DE PROBLEMAS Y SERVICIO POSTVENTA Su secadora tiene diversas funciones de seguridad automáticas . Estas funciones permiten detectar errores de forma oportuna y que el sistema de seguridad pueda reaccionar de la forma adecuada . Estos errores suelen ser tan fáciles de solucionar que se pueden resolver en unos minutos .
  • Seite 103 AGUA GOTEANDO DEBAJO DE El filtro inferior no se ha • Compruebe la posición del LA SECADORA introducido correctamente filtro inferior y asegúrese de que quede totalmente encajado la cámara del filtro . Queda pelusa en el filtro inferior o •...
  • Seite 104 INDICADOR DE ERROR Y MENSAJES Acuérdese de: • Vaciar el depósito de agua después de cada programa • Limpiar el filtro de la puerta después de cada programa • Limpie el filtro inferior después de cinco ciclos Indicador de error Posible causa Solución El depósito de agua puede estar...
  • Seite 105: Transporte Y Manipulación

    A continuación tiene un resumen de los posibles errores, causas y soluciones . Si el problema persiste después de haber seguido las instrucciones que se indican debajo, mantenga pulsado Encendido/Apagado durante al menos 3 segundos . Si la indicación de error sigue sin desaparecer, apague y desenchufe la secadora y póngase en contacto con nuestro Servicio Postventa .
  • Seite 106: Servicio Postventa

    También aparece en el folleto de la garantía; • su dirección completa; • su número de teléfono . Fabricante: Whirlpool Europe s.r.l. Socio Unico Si fuera necesaria alguna reparación, póngase en contacto con un Servicio Postventa autorizado (que Viale Guido Borghi 27...
  • Seite 107 ENGLISH HEALTH & SAFETY, USE & CARE and INSTALLATION GUIDES THANK YOU FOR BUYING A WHIRLPOOL PRODUCT. In order to receive a more complete assistance, please register your appliance on www.whirlpool.eu/register Index Health and Safety guide . . . . . . . . . . . . . . . . . . . . . . . . . . . . . . . . . . . . . . . . . . . . . . . . . . . . . . . . . . . . . . . . . . . . . . . . . . .108 Use and Care guide .
  • Seite 108: Health And Safety Guide

    Health and Safety guide SAFETY INSTRUCTIONS IMPORTANT TO BE READ AND OBSERVED Before using the dryer carefully following instructions . pads should not be dried in the read, Health and Safety and Failure to observe these tumble dryer . Use and Care guides . instructions may lead to risks .
  • Seite 109: Intended Use Of The Product

    fixed on the washing machine children, during and after the the back towards a wall, to by using an appropriate installation of the dryer . avoid injuries by touching the stacking kit, which can be rear panel, which can become provided through our After- Use protective gloves to hot during the drying process .
  • Seite 110: Electrical Warnings

    a ventilation grid (minimum damaged or dropped . Do not he has access that the plug 45 cm x 8 cm), in the rear part immerse the mains cord or remains removed . of the worktop under which plug in water . Keep the cord the dryer is installed .
  • Seite 111: Safeguarding The Environment

    SAFEGUARDING THE ENVIRONMENT DISPOSAL OF PACKAGING store where you purchase the requires less energy . You will MATERIALS dryer . save time and energy when running your drying cycle . The packaging material is This dryer is marked in 100% recyclable and is marked compliance with European Always select the correct with the recycle symbol:...
  • Seite 112: Use And Care Guide

    Use and Care guide PRODUCT DESCRIPTION APPLIANCE 1. Worktop 2. Control panel 3. Water tank 4. Door 5. Door handle 6. Door filter (behind door) 7. Bottom filter (behind flap) 8. Adjustable feet (4) CONTROL PANEL 1. On/Off button (Reset if long pressed) 2.
  • Seite 113: Reversing The Door

    REVERSING THE DOOR If you needed the door stop of the dryers can be reversed . Download from the Whirlpool website http://docs . w hirlpool . e u DRUM LIGHT (if available) • During programme selection: the light goes on for •...
  • Seite 114: How To Use The Appliance

    HOW TO USE THE APPLIANCE FIRST TIME USE CHECK WATER TANK Make sure that the water tank is correctly inserted CHECK DRAIN HOSE Make sure that the drain hose on the back of the dryer is fixed, either to the dryer’s water tank or to your domestic sewage system (see INSTALLATION GUIDE) .
  • Seite 115: Daily Use

    DAILY USE Make sure that no lighters Make sure that the WARNING or matches are left in laundry is not soaked with clothing. flammable liquids. LOAD THE LAUNDRY you through setting your programme in the Respect your items’ care labels; make sure following order: selection of programme / that the items to be dried are suitable for drying time (ONLY if Drying time or Airing...
  • Seite 116 Set dryness level, if needed • Adjust drying time (only if programme If you want to change the dryness level, make Drying time or Airing is selected) sure that the Dryness level button « lights up . • Adjust or cancel Start delay, if a delay option is already in progress .
  • Seite 117 EMPTY WATER TANK / CLEAN DOOR If not switched off right after programme FILTER / CLEAN BOTTOM FILTER end, the dryer will tumble the laundry for about 10 minutes, to prevent creasing . The Empty display shows an animation . •...
  • Seite 118 PROGRAMME Type of Drying Care Regulations and Recommendations Labels SYNTHETICS ): 3.5 For drying laundry made of synthetic load fibres . default programme ): 0:55 duration selectable options Steam option, Dryness level, Fresh care, Gentle DELICATES For drying delicate laundry which ): 2.5 load needs gentle treatment .
  • Seite 119 PROGRAMME Type of Drying Care Regulations and Recommendations Labels STEAM REFRESH ): 1.5 For refreshing laundry with steam . load Specifically designed to refresh default programme ): 0:30 and remove odours from dry and duration clean casual garments like shirts, selectable options blouses, trousers made out of cotton, synthetics and their blends .
  • Seite 120 OPTIONS OPTIONS WHICH ARE DIRECTLY SELECTABLE BY PRESSING THE RESPECTIVE BUTTON STEAM OPTION Minimises creasing of garments made immediately after programme end of cotton, synthetics and their blends and put them on clothes hangers . by adding a humidifying phase at the end of the drying cycle .
  • Seite 121 FUNCTIONS ON/OFF To switch the dryer on: press the To cancel a running programme: button until the Start/Pause button press and hold the button until “rES” lights up . appears on the display . To switch the dryer off after programme end: press the button until the lights go off .
  • Seite 122: Start Delay

    START DELAY Enables to have the laundry ready at a The programme starts automatically particular time by moving the start of at the end of the delay period . On the programme to a later time . programme start, the delay on the display is replaced by the remaining Select programme and options .
  • Seite 123: Energy Saving

    INDICATORS WATER TANK FULL => empty water tank BOTTOM FILTER CLOGGED => clean bottom filter DOOR FILTER CLOGGED => clean door filter FAILURE For any failure indication on the display, refer to section TROUBLESHOOTING for more information . Find more information in section CARE AND MAINTENANCE, and TROUBLESHOOTING GUIDE . ENERGY SAVING AUTOMATIC SWITCH-OFF FUNCTION The dryer is designed to save energy .
  • Seite 124: Cleaning & Maintenance

    CLEANING & MAINTENANCE Do not use flammable fluids WARNING to clean the dryer. For any cleaning and maintenance, switch off the dryer . EMPTYING THE WATER TANK Empty the water tank after each programme, provided the drain hose is not connected to your sewage system (refer to INSTALLATION GUIDE) .
  • Seite 125 CLEANING THE DOOR FILTER Clean the door filter after each programme . Make sure that the laundry is unloaded . Open the door . Remove the door filter by pulling it upwards . Clean the filter compartment with a soft cloth, or carefully with a vacuum cleaner .
  • Seite 126 CLEANING THE BOTTOM FILTER Clean the bottom filter about every month . Clean the bottom filter under running water; wipe away dust and lint . Carefully press down the strap to open the bottom flap . Wipe the bottom filter dry, so that it is not dripping wet anymore .
  • Seite 127 Push the bottom filter back into the filter Finally close the bottom flap again . compartment; make sure that it is completely integrated . Turn both locking bars (right and left) back into vertical position, to lock the bottom filter . 2°...
  • Seite 128: Troubleshooting Guide & After-Sales Service

    TROUBLESHOOTING GUIDE & AFTER-SALES SERVICE Your dryer is equipped with various automatic safety functions . These enable failures to be detected in good time and the safety system can react appropriately . These failures are frequently so minor that they can be removed within a few minutes .
  • Seite 129 WATER DROPLETS ARE Bottom filter not inserted • Check position of the bottom BENEATH THE DRYER correctly filter and make sure it is completely integrated in the filter compartment . Lint remaining on bottom filter or • Remove lint residues on the door seal rubber seals of bottom filter and door seal .
  • Seite 130 FAILURE INDICATOR AND MESSAGES Make sure to • Empty the water tank after each programme • Clean the door filter after each programme • Clean the bottom filter after five cycles Failure Indicator Possible Cause Solution Water tank may be •...
  • Seite 131: Transport And Handling

    Below is a summary of possible failure causes and solutions . If the problem persists after having followed the instructions as indicated below, press and hold On/Off for at least three seconds . If afterwards the failure indication still appears, switch off and unplug the dryer and contact our After-Sales Service .
  • Seite 132: After-Sales Service

    The service number is also indicated on the guarantee booklet; • your full address; • your telephone number . Manufacturer: Whirlpool Europe s.r.l. Socio Unico Viale Guido Borghi 27 For any repairs, use our authorized After-Sales 21025 Comerio (VA) Service, to ensure proper repairing and use of Italy original spare parts .
  • Seite 134 max 2 cm max 0.79 inch...
  • Seite 135 max 100 cm 39 inch...
  • Seite 136 ....xxxx xxxx xxxx xxx V ~ xx Hz IPX4 xx A 400010850927 Whirlpool is a registered trademark of Whirlpool, USA...

Inhaltsverzeichnis