Inhaltsverzeichnis
Werbung
Verfügbare Sprachen
Verfügbare Sprachen
Werbung
Kapitel
Inhaltsverzeichnis

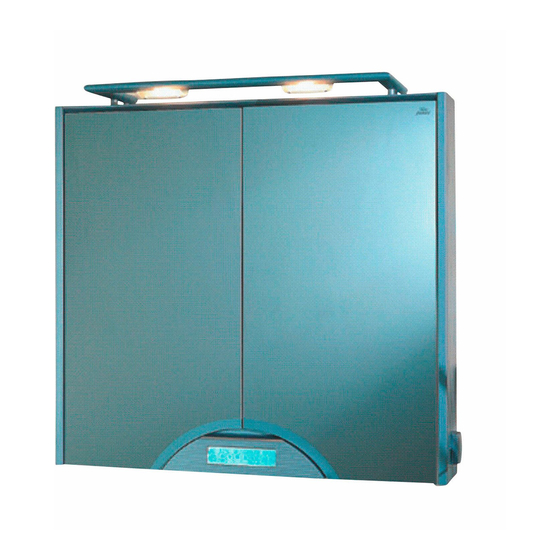
Inhaltszusammenfassung für jokey AVANO Prelude 80
- Seite 1 AVANO Prelude 80 DEUTSCH ENGLISH ČESKY...
- Seite 2 Gebrauchshinweise Instructions Návod k použití...
-
Seite 3: Inhaltsverzeichnis
Inhalt Seite DEUTSCH ENGLISH ČESKY INHALT DEUTSCH Teil I 1. Montage / Sicherheit - Bitte unbedingt lesen! 2. Pflege / Reinigung 3. Garantie 4. Bedienung Radio / CD/MP3-Player 5. Einstellung von Datum und Zeit 6. Funk-Thermometer 7. Optionale Einstellungen 8. Technische Daten Teil II Notizen 9. -
Seite 4: Montage / Sicherheit - Bitte Unbedingt Lesen
1. Montage / Sicherheit dieses Erzeugnisses bitte nur von einem autorisierten Elektrofachmann Die Montage unter Beachtung der geltenden Vorschriften vornehmen lassen. Bei Nichtbeachtung erlöschen unsere Garantie- und Haftungsverpflichtungen, es kann Lebensgefahr bestehen. Schutzbereich um Badewanne und Dusche beachten ! Beim Bohren Strom, Gas- und Wasserleitungen beachten. Vor Beginn Strom abschalten. Das beigelegte Befestigungsmaterial ist Standardmaterial und nicht für jeden Untergrund geeignet. -
Seite 5: Bedienung Radio/Cd-Spieler
4. Bedienung Radio/CD-Spieler Temperatur innen außen Uhrzeit Datum Beleuchtung innen / außen FM-Radio Speicher- platz (nicht Balance* Tiefen / Höhen: je 0-15* Frequenz/Name (RDS) bei RDS) links / rechts (1 / 4) (2 / 5) (3 / 6) Radio Sender- Speicherung: leiser*/ lauter* *= Anzeige links oben... -
Seite 6: Abspielen Von Cds Und Mp3-Cds
Abspielen von CDs und MP3-CDs: Abspielen von Audio-CDs: Standardfunktionalität. CD/MP3 ungefähr bis zur Hälfte einschieben, dann erfolgt Selbsteinzug. Abspielen von MP3-CDs: MP3-Erstellung entsprechend den Vorgaben Ihres Brennprogramms. Ordner können verwendet werden. Die Bezeichnungen der Ordner werden im Avano- MP3-Player angezeigt (die ersten 8 Stellen). Bitte hierfür keine Umlaute, keine Sonderzeichen und kein „ß“... -
Seite 7: Datum Und Uhrzeit Einstellen
5. Datum und Uhrzeit einstellen Datum einstellen Reihenfolge der “Tasten”-Betätigungen 2 sec. 2 sec. auf /ab Monat 2 sec. auf / ab Jahr Bestätigung / Enter auf / ab Uhrzeit einstellen Reihenfolge der “Tasten”-Betätigungen 2 sec. Stunde 2 sec. auf / ab Minuten Bestätigung auf / ab... -
Seite 8: Funk-Außenthermometer
6. Funk-Außenthermometer Installation / Gebrauch des Funk-Außen-Thermometers Zuerst bitte zwischen 2 Installationsmöglichkeiten entscheiden: 1. Gerät wird außen (regengeschützt) angebracht ohne zusätzliches Sensorkabel. Anschlussbuchse mit Kunststoffstopfen verschließen ! 2. Gerät bleibt in der Wohnung, Sensorkabel wird angeschlossen und Sensorleitung + Sensor (Temperaturfühler) werden nach außen geführt = empfohlene Variante. - Seite 9 Außen-Thermometer / Funkthermometer Model No.: 0668 Sende- Celsius /Fahrenheit- taste Umschalter (F-Anzeige nur im Display dieser Einheit) Temperaturfühler Anschlussstecker 2 x LR03 (Micro) R E M O T E S E N S O R zum Aufstellen für Wandbefestigung...
-
Seite 10: Optionale Einstellungen
7. Optionale Einstellungen * * Für Standardfunktionalität nicht von Bedeutung. Menü aufrufen: Schrank vom Netz trennen. Anschließend rechte Beleuchtungstaste gedrückt halten und Netzspannung gleichzeitig wieder zuschalten. Änderungen mit: “auf / ab” Wechsel der Kategorie mit dem “cd-stop” (Quadrat) 1. Maximale Lautstärke einstellen 2. -
Seite 11: Technische Daten
8. Technische Daten Allgemein 230V, 50 Hz Netzanschluss ........Nennaufnahme max. 35W (incl. CD-Laufwerk) 2.1 Netzteil ..........1 x 16 W Leuchtstofflampe: T8 / 26, 720mm 2.2 Innenleuchte ........Original-Lichtfarbe: 035/535/835 Alternativ: 830 warmton, warm white Elektronisches Vorschaltgerät Gesamt: 13 W Vebrauch LS ........ -
Seite 12: English
Contents CONTENTS ENGLISH page Part I 1. Mounting, wiring / Safety - very important ! 2. Care / cleaning 3. Guarantee 4. Radio, CD-player instructions for use 5. Setting date and time 6. Remote temperature sensor Optional Settings . Data sheet Part II Notes 9. -
Seite 13: Mounting, Wiring / Safety - Very Important
1. Mounting / Safety This unit may only be installed by an authorised and qualified electrician in Mounting: conformance to the established regulations. Any violation of this requirement will invalidate our warranty and liability obligations and may endanger life. Leave a safety area around the bath and shower! When drilling, be careful to avoid electricity cables and gas and water pipes. -
Seite 14: Radio, Cd-Player Instructions For Use
4. Radio / CD-Player Instructions for use temperature inside outside date time lighting inside / outside FM-Radio program frequency / balance* bass / treble: 0-15* service RDS-name left / right number (1 / 4) (2 / 5) (3 / 6) volume *= shown in the Radio... - Seite 15 Playing Audio CDs / MP3 CDs Playing audio CDs: Standard functions. Playing MP3 CDs: Please use the burning program function “Create data medium specially for MP3 player“ (or an analog menu). Folders can be used. The folder names (the first 8 digits/characters) are displayed in the Avano MP3 player. Please do not use any mutated vowels or special characters.
-
Seite 16: Setting Date And Time
5. Setting date and time Setting date 2 sec. up / down 2 sec. month 2 sec. up / down year enter up / down Setting time 2 sec. hour up / down 2 sec. minutes up / down enter... -
Seite 17: Remote Temperature Sensor
6. RF Remote Temperature Sensor Installation / Use of the RF remote outdoor temperature sensor Please decide first on one of the two 2 installation options: 1.You can mount the device outside (provided it is sheltered from the rain) without any additional sensor cable. Seal the connector socket with plastic plugs. 2.You can keep the device indoors, connect the sensor cable and lead the sensor cable + temperature sensor outside. - Seite 18 RF Remote Temperature Sensor Model No.: 0668 trans- mitter C / F - switch, button (F° only in this unit) temperature sensor plug 2 x LR03 (Micro) R E M O T E S E N S O R put up for wall mounting...
-
Seite 19: Optional Settings
Optional Settings * Not relevant to standard functions. Call up the menu: Disconnect the cabinet from the mains. Then, keeping the illuminated key on the right pressed down, switch the mains voltage on again. Alter by pressing the up/down keys. Change the category by pressing the “CD Stop“... -
Seite 20: Data Sheet
8. Data sheet General 1. Power, mains connection ...... 230V, 50Hz 2. Power input 2.1 Power supply unit ......... max. 35W (including CD-player) 2.2 Lighting inside ........1 x 16 W fluorescent lamp: T8, 720 mm, original colour: 035/535/835 alternative: 830 warm white Elecronic ballast Power .......... -
Seite 21: Česky
Obsah OBSAH ČESKY Strana Část I 1. Montáž / bezpečnost rosím bezpodmínečně přečíst! 2. Údržba / čistění 3. Záruka 4. Ovládání rádia / přehrávače CD 5 Nastavení data / hodin . Rádiový venkovní teploměr Voliteln nastaven á í 8. Technické údaje Část II Poznámky 9. -
Seite 22: Montáž / Bezpečnost P Rosím Bezpodmínečně Přečíst
1. Montáž / Bezpe čn Montáž tohoto výrobku nechte, prosím, provést pouze autorizovaným elektroinstalatérem se zřetelem na platné předpisy. Při nerespektování zanikají naše záruční povinnosti, může dojít k ohrožení života. Dodržte oblast ochrany kolem vany a sprchy! Při vrtání dejte pozor na elektrická, plynová a vodovodní 3. -
Seite 23: Ovládání Rádia / Přehrávače Cd
4. Ovládání rádia / p řehr ávače CD Teplota uvnitř venku Hodiny Datum Osvětlení uvnitř / venku Rádio FM (VKV) Frekvence nebo Hloubky / výšky: 0-15* Paměťové Reproduktory* název stanice(RDS) mí nalevo/napravo (1 / 4) (2 / 5) (3 / 6) Rádio Vyhledávání... - Seite 24 Přehrát audio CD/CD s MP3 Přehrávání audio CD: Standardní funkce. CD zasunout přibližně do poloviny, pak bude provedeno automatické zasunutí. Přehrávání CD s MP3: Ve svém vypalo vacím programu použijte funkci „Vytvořit nosič dat pro přehrávač MP3“ (nebo podobné menu). Je možno použít adresáře. Označení adresářů se zobrazí v přehrávači MP3 Avano (prvních 8 míst).
-
Seite 25: Nastavení Data / Hodin
5. Nastavení data / hodin Nastavení data Pořadí tisknutí tlačítek 2 sec. 2 sec. auf /ab Monat 2 sec. auf / ab Jahr Bestätigung / Enter auf / ab Nastavení hodin Pořadí tisknutí tlačítek 2 sec. Hodiny 2 sec. nahoru/dolů minuty Potvrzení... -
Seite 26: Rádiový Venkovní Teploměr
6. Rádiový venkovní teploměr Instalace / Použití rádiového venkovního teploměru Nejprve se prosím rozhodněte pro jednu ze dvou možností instalace: 1. Zařízení je umístěno venku (chráněné před deštěm) bez přídavného kabelu pro čidlo.Připojovací zdířku uzavřete zátkou z plastické hmoty! 2. Zařízení zůstane v bytě, je připojen kabel pro čidlo a vedení čidla + čidlo (snímač... - Seite 27 Přepínač mezi stupni Vnější teploměr/radiový teploměr Celsia / Fahrenheita Model No.: 0668 (zobrazení ve stupních Tlačítko Fahrenheita je možné pouze na displeji s vysílání těmito jednotkami) Teplotní čidlo Konektor 2 x LR03 (Micro) R E M O T E S E N S O R (Nožička) pro postavení...
-
Seite 28: Voliteln Nastaven Á
7. Voliteln nastaven * á í * Pro standardní funkčnost bez významu. Vyvolání menu: Skříň odpojte od sítě. Potom držte stisknuté tlačítko pro osvětlení a zároveň opět připojte napětí ze sítě. Změny pomocí: „nahoru / dolů” Změna kategorie pomocí „CD-stop” (čtverec) 1. -
Seite 29: Technické Údaje
8. Technické údaje Obecně Připojení do sítě ......230 V, 50 Hz Jmenovitý příkon 2.1 Síťový zdroj ........max. 35 W, 12 8V (včetně mechaniky CD) 2 Vnitřní světla ........ 1 x 16 W zářivka: T8/26 , 720 mm, původní barva: 035/535/835 í... -
Seite 30: Notizen
Notizen Notes Poznámky... -
Seite 31: Übersicht Montage
9. Montage / Mounting Lieferung: montiert assembled 20 x 80 cm 4/4 x Halogenleuchte halogen lighting 4/8 x Leuchten-Gläser Schutzbereich lighting glasses Safety area 2/2 x Funk-Thermometer RF remote sensor Minimum: 60 cm Batterie LR03 O/P/Q 1/1/1 x CH: Minimum 70 cm Aushebesicherung safety measure... - Seite 32 72,7 cm 66,3 cm 3,2 cm Ø 8 mm max. 40mm Bohrung für Aushebesicherung Borehole for retaining screw Ø 6 mm...
- Seite 33 Glas 2 x K 2 x D...
-
Seite 34: Lampenwechsel / Batteriewechsel
ca. 1x ca. 1x 10. Lampen / lamps Batterien / batteries 2 x G4 , 12V max. Nur Lampen mit diesem Symbol verwenden: 350°C ! Only use lamps with this sign: 1 x LS T8/26, 16 W L=720 mm, Color: original: white 3500K (035/535/835) alternativ:... -
Seite 35: Ersatzteile / Service-Informationen
AVANO prelude 80 / 13 131 / Z / (Spiegeltür links) Bei Reklamationen den Kontroll-Abschnitt (auf der Rückseite) zusammen mit dem Kaufbeleg an Jokey schicken. If there is a problem send the quality-control-coupon (on the back) together with the receipt back to Jokey. Jokey Plastik Sohland GmbH Service Industriestr. - Seite 36 QS-Kontroll-Nr.: Quality control : 13 131 / AVANO Prelude 80 / 430713596 / 2005 / 11 / 6. Auflage Jokey Plastik Sohland GmbH, Industriestr. 4, D-02689 Sohland a.d.Spree...